If you’ve been reading my blog for awhile you have probably worked out that when I come across a fun little sewing project I justcan’tstopatone.
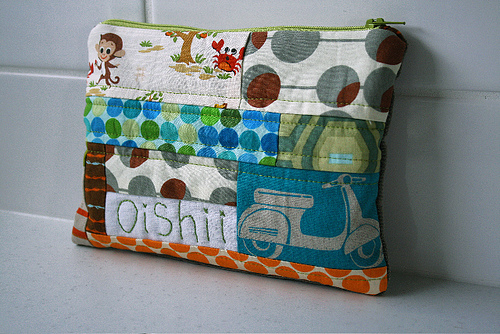
When I made Oishii I knew I was hooked on a good thing! At the same time I was putting together gift packs for my pattern testers and decided a zippered pouch each would be a great addition to their packs.
I have to admit that this is just round 1 of the zippered pouch sewing escapade! There are another 10 that I have recently finished but not photographed yet!! Nothing like digging through the scrap box and coming up with some cool combinations 🙂
Oh, and I haven’t forgotten about the tutorial for these…Oscar and Lil want one each so I’m going to make a couple more soon and will take photos along the way. Stay tuned!
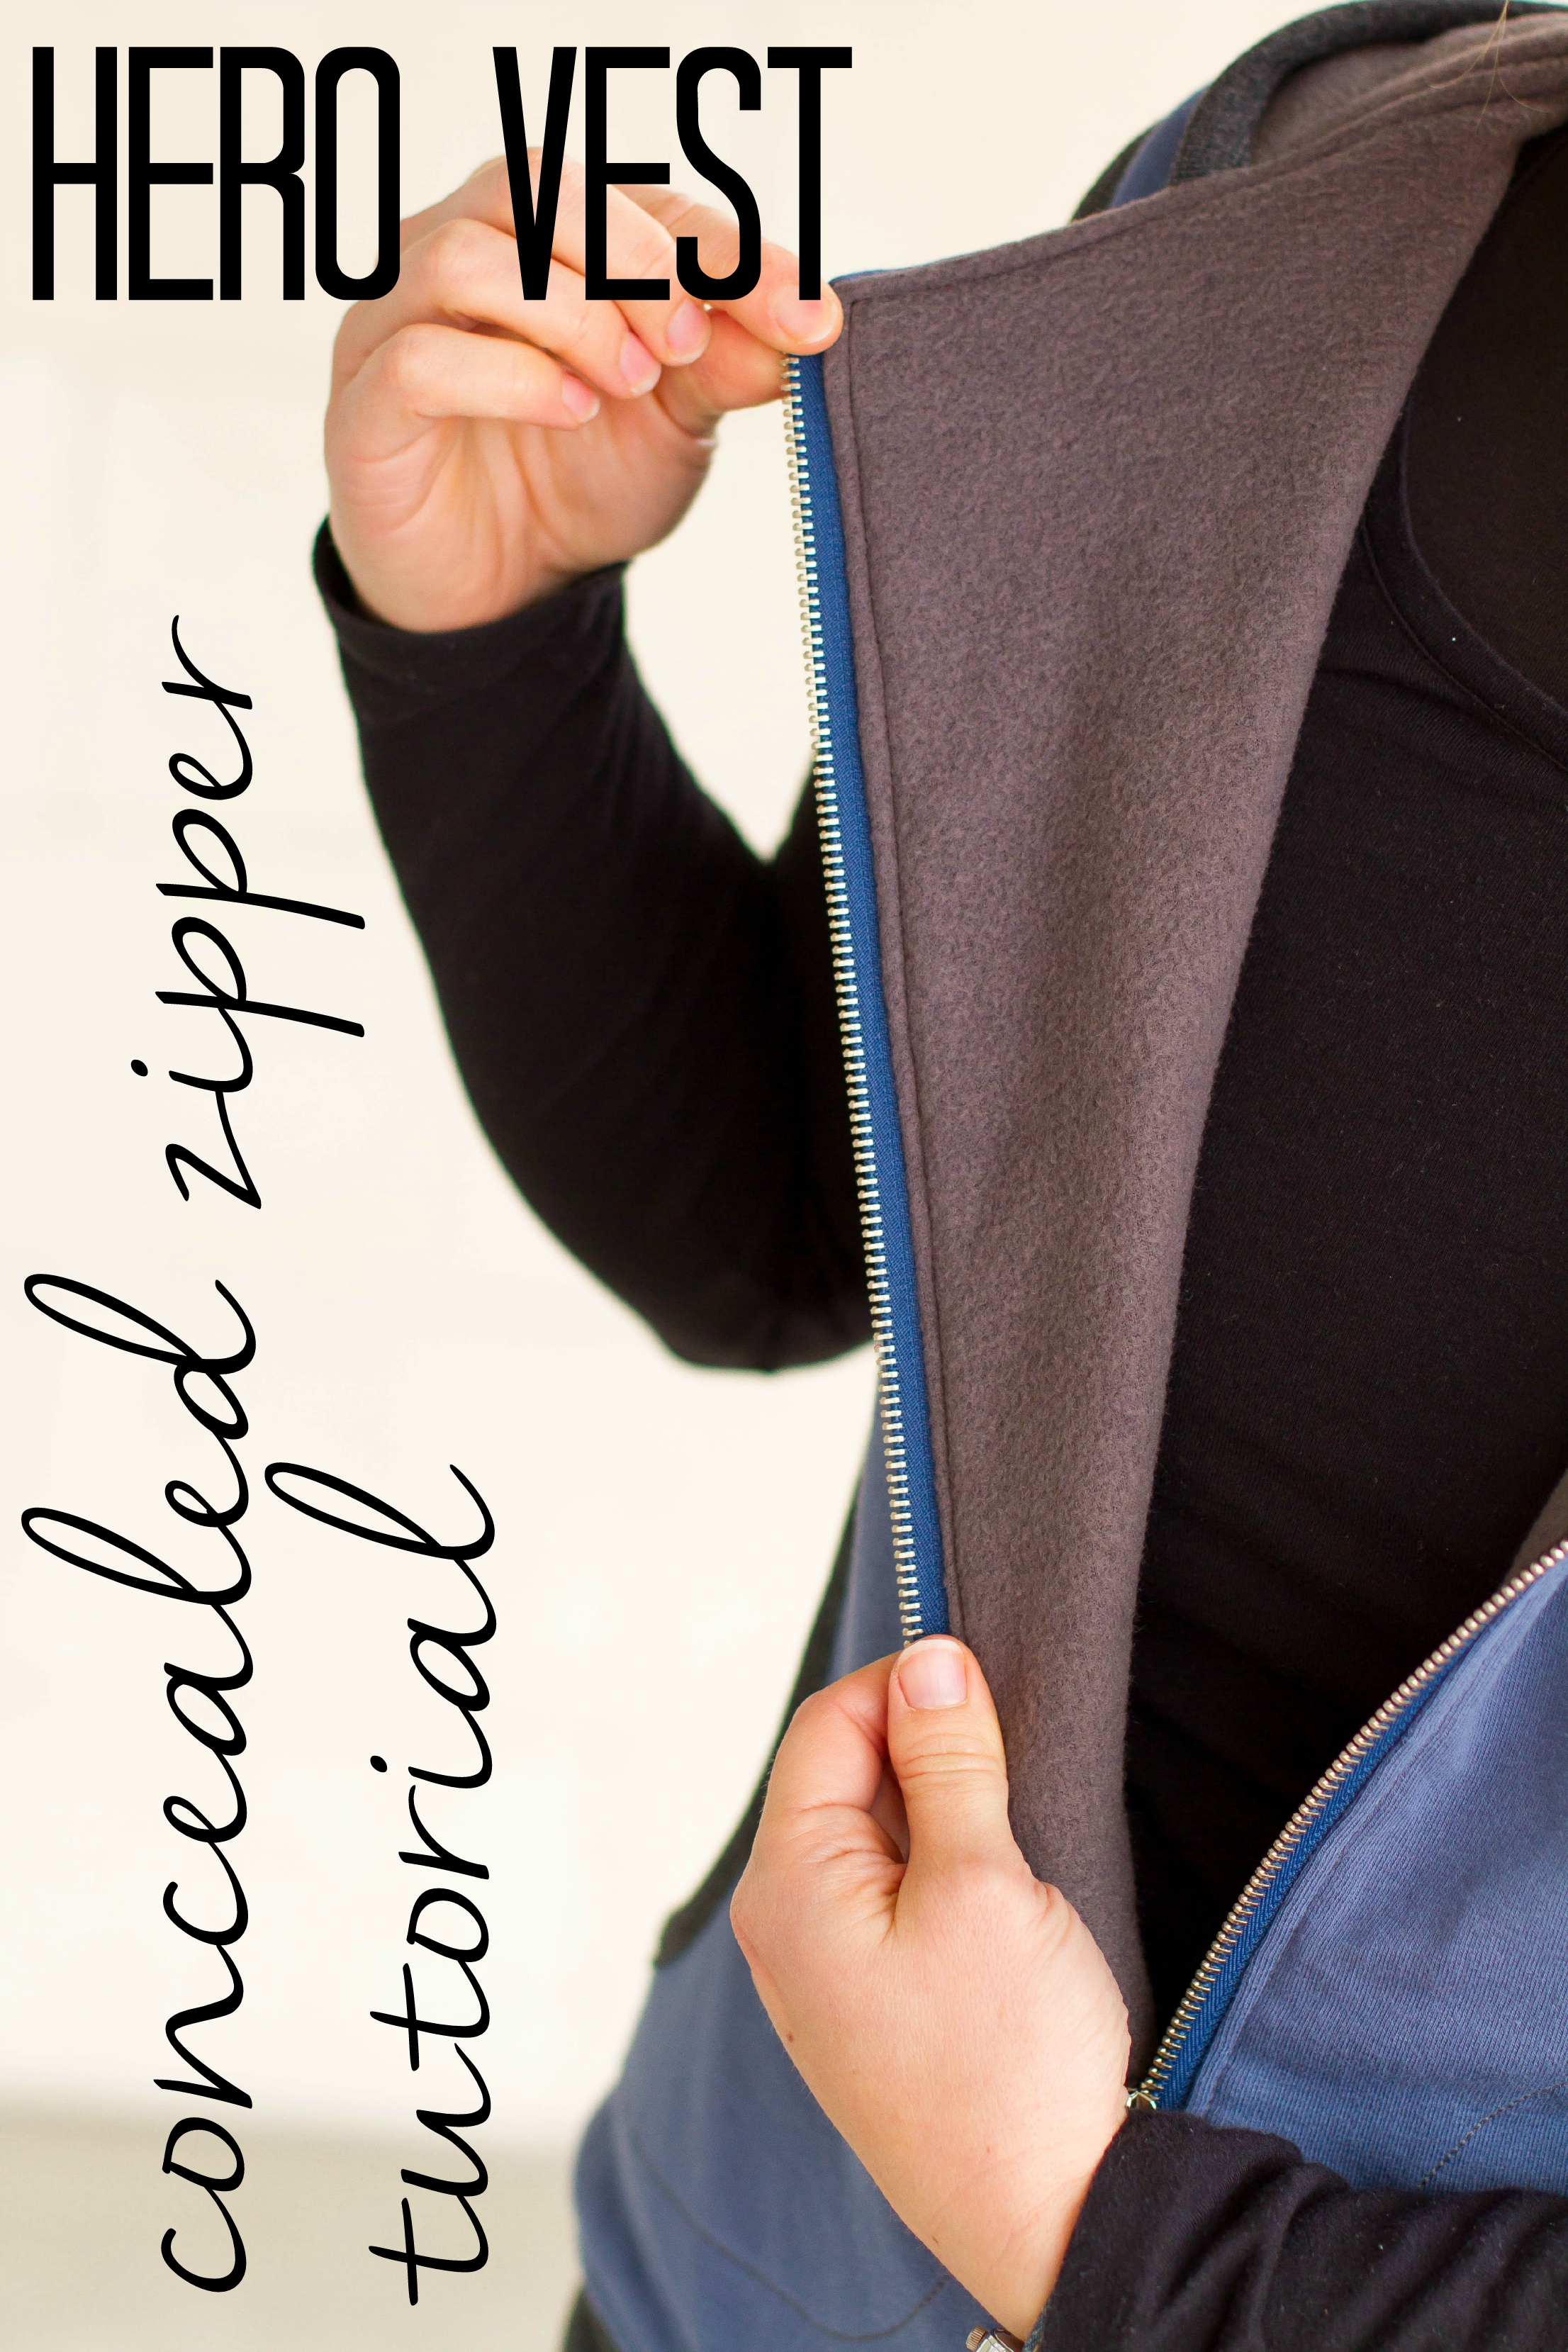
A few weeks ago over on the Make It Perfect Sharing Facebook Group there was a bit of discussion about how to make the Hero Vest (kids & women’s) with a completely concealed zipper from the inside of the vest. The way the pattern is written now, the zipper is sewn onto the vest as one of the very last steps, and from the inside of the vest you end up seeing the exposed edge of the zipper tape. While this method is completely fine (hundreds of kid’s Hero Vests have been constructed this way with no complaints!) I knew it would be a much cleaner finish if I could work out a way to conceal the zipper, especially for the Women’s Hero Vest where you might want to wear the zipper partially or fully opened from time to time.
A few group members shared suggestions and I tried out a few ideas of my own, but nothing was hitting the spot. Then one of our lovely group members emailed me and shared her method (which she learned from constructing another jacket) for concealing the zipper, I tried it out and it was awesome! I chose not to include instructions for this method in the pattern because it is a little tricky to get your head around and I felt like it really needed a bit of extra hand-holding and lots of accompanying photographs to help you get the correct finish. But trust me, after you’ve done it once it won’t seem tricky at all and you will be speeding through it in no time! So thankyou Helen, and may there be many more concealed zippers in your Hero Vest sewing!Before following this tutorial, begin making your vest following Steps 1 & 2 in the Hero Vest pattern. You will also need to follow Step 3, d & e to sandwich the hood between the exterior and lining vests – but don’t worry about attaching the waistband at this point.
To conceal your zipper, you will need to attach the waistband to your vest in a different way than the pattern instructs.
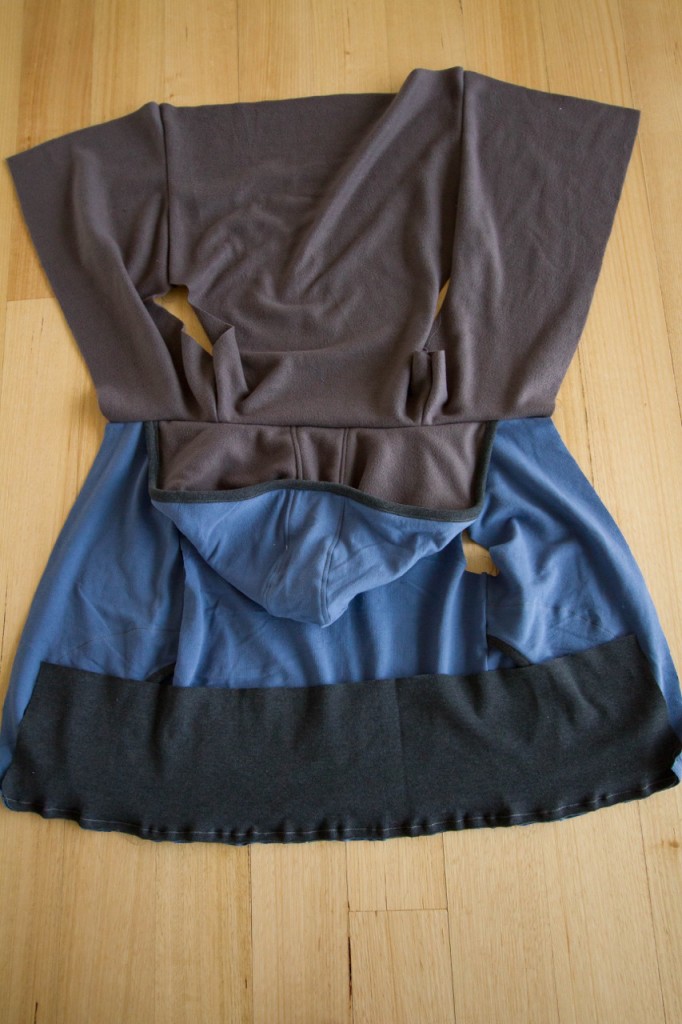
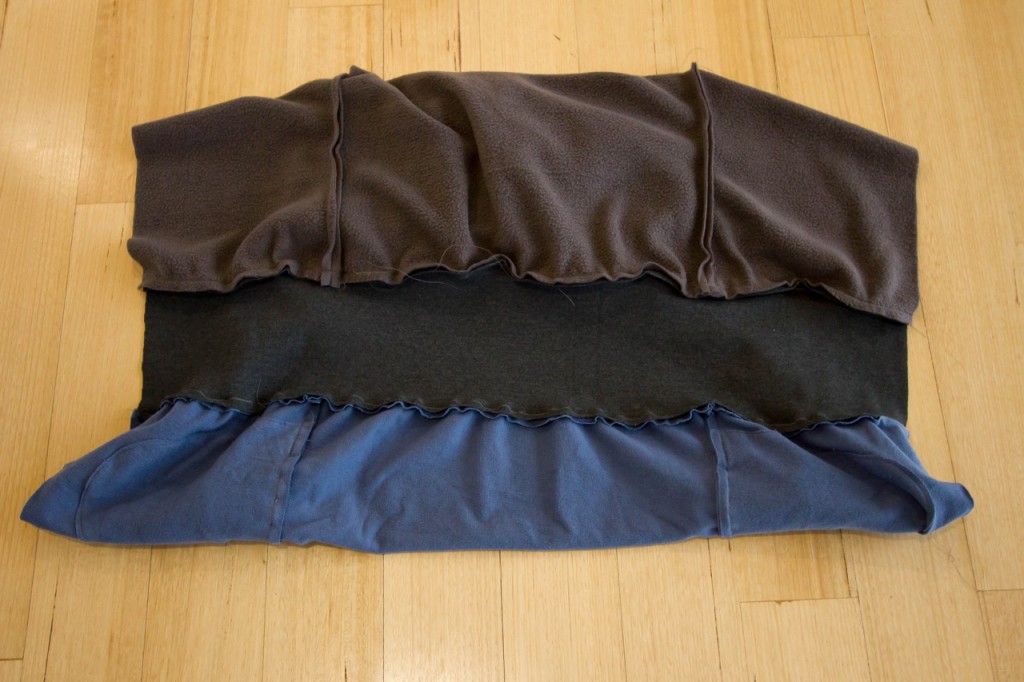
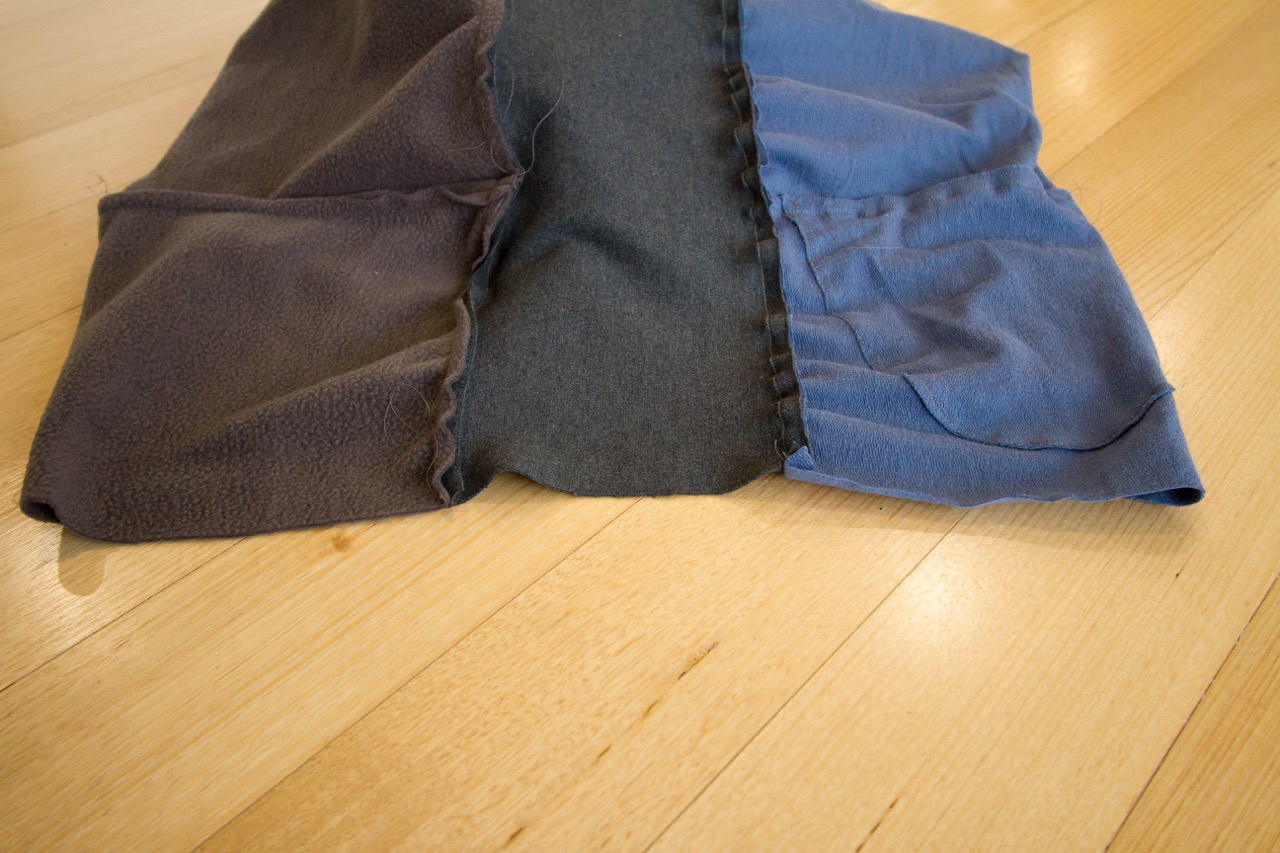
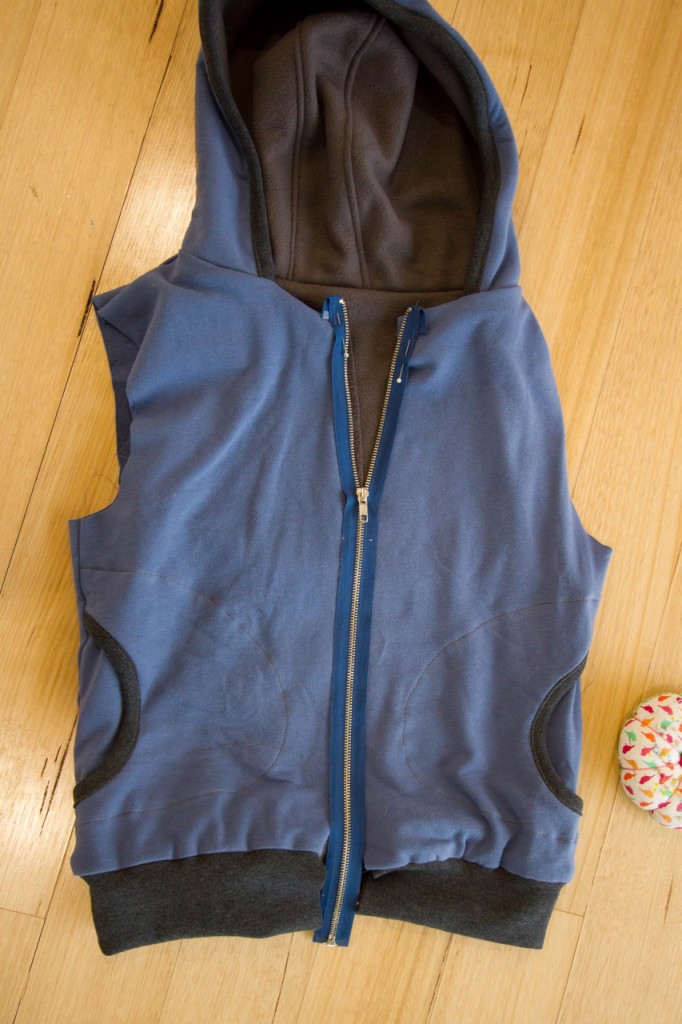
Take your vest and lay it flat on the floor with right side facing up. As you can see from the following photograph, the exterior and lining vests are joined together here at the neckline, with the finished hood sandwiched between them. For your reference, my exterior fabric is the blue (a french terry knit), lining is the grey (looks more brown in these photos – polar fleece) and ribbing is charcoal.
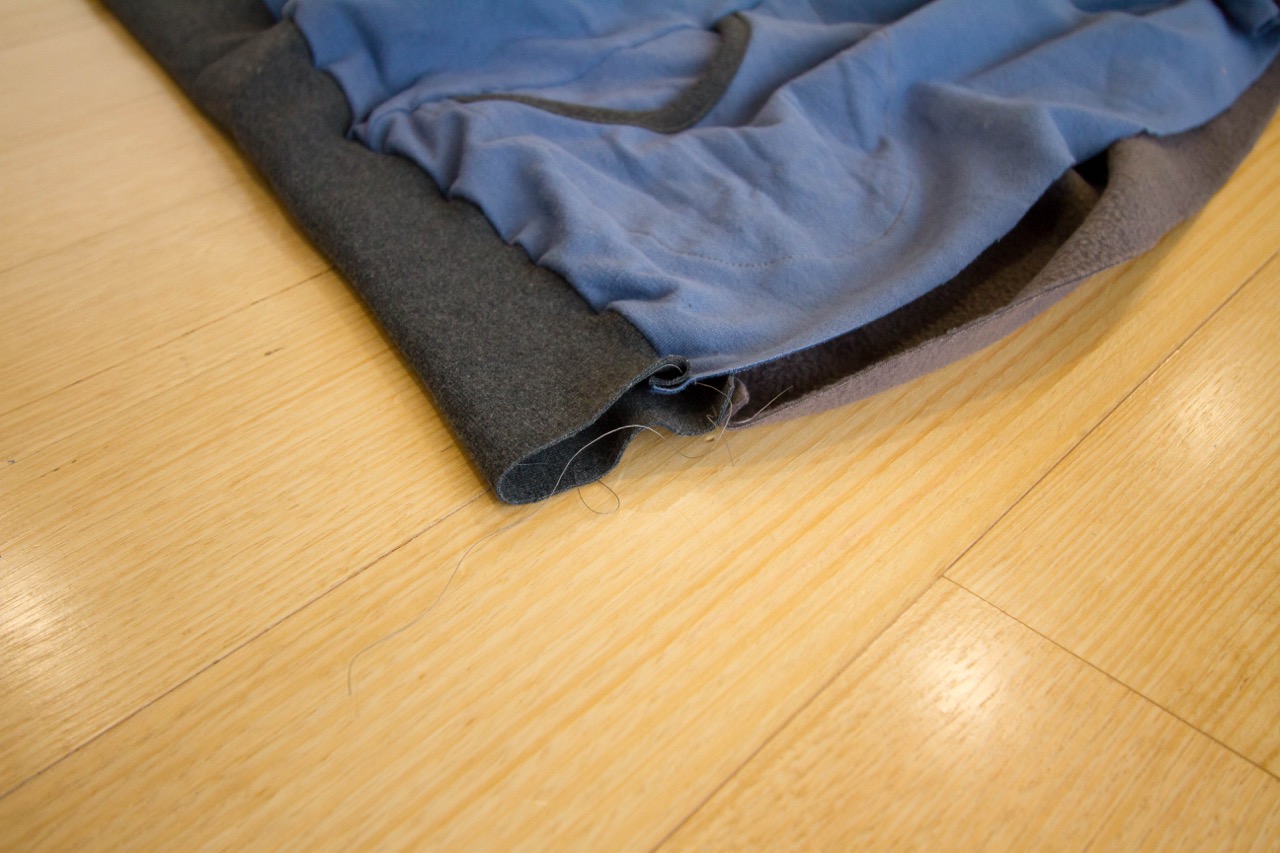
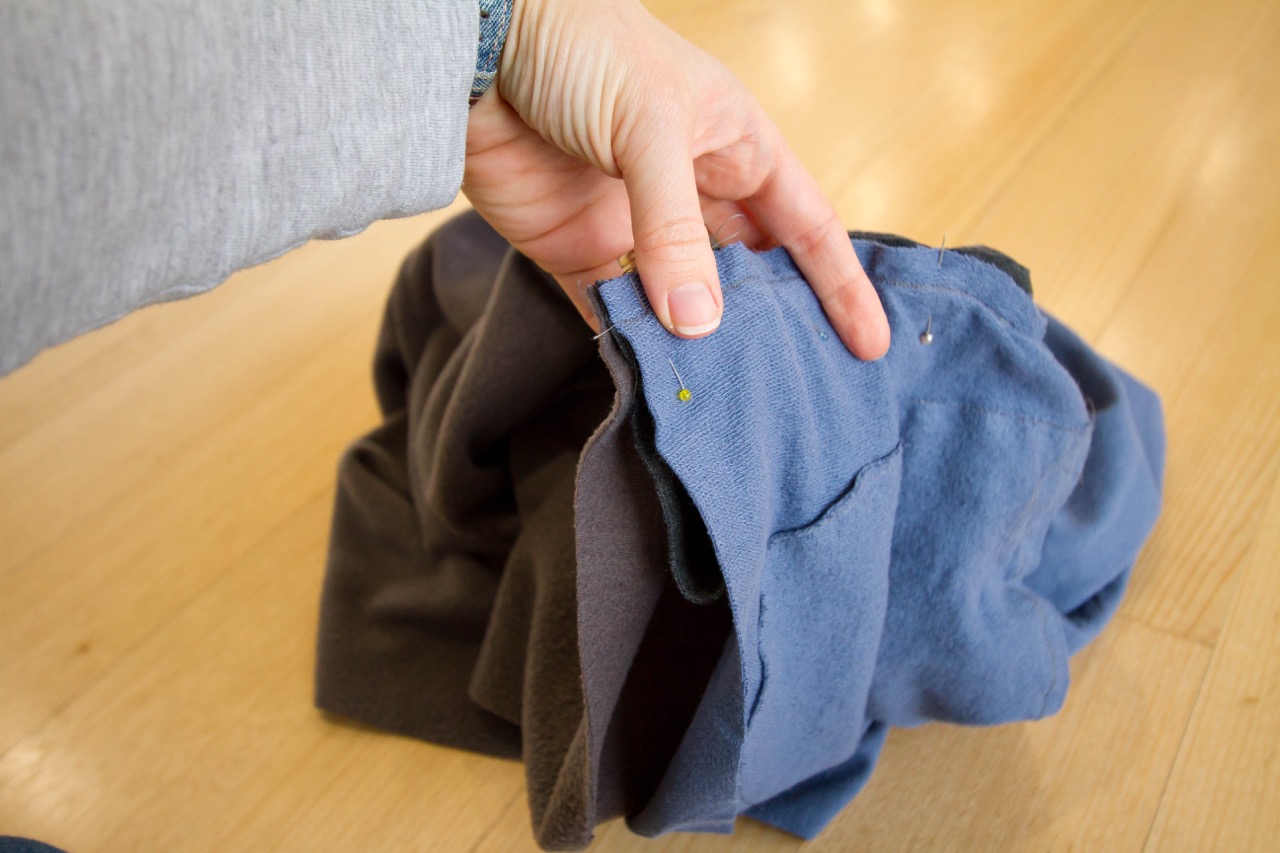
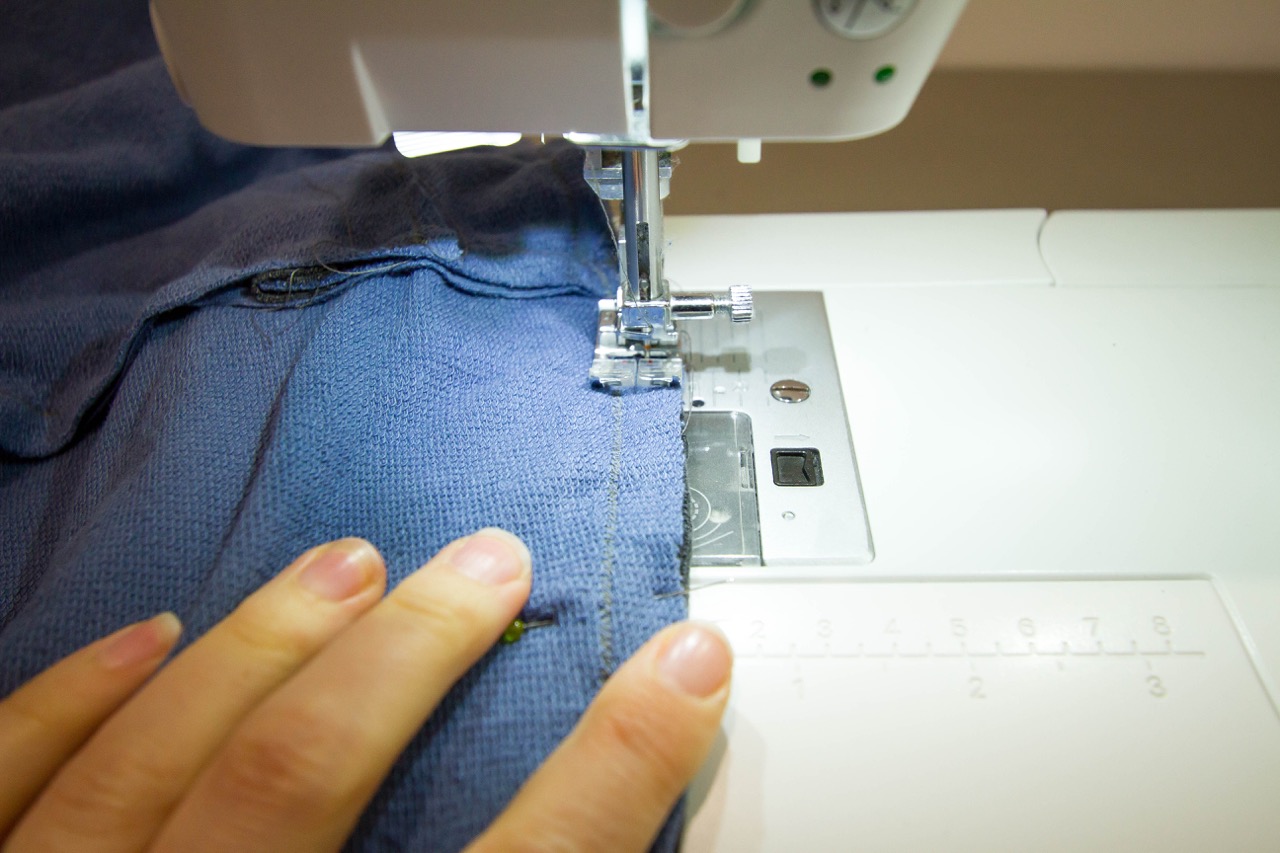
Take your waistband ribbing piece and, with right side of waistband facing right side of vest, pin waistband to the bottom edge of the exterior vest. You will need to stretch the waistband evenly to fit along the bottom edge of the vest. Sew waistband to the vest along pinned edge using a 1/2″ seam allowance. I have chosen to use a stretch tricot stitch here to make sure that none of my stitches pop when the waistband is stretched in the future. Here is a close-up shot of the waistband attached to the bottom edge of the exterior vest.Take the other long side of your waistband ribbing piece and, with right side of waistband facing right side of vest, pin waistband to the bottom edge of the lining vest. Once again, you will need to stretch the waistband evenly to fit along the bottom edge of the lining vest. Sew waistband to the vest along pinned edge using a 1/2″ seam allowance. Again, I used a stretch tricot stitch.
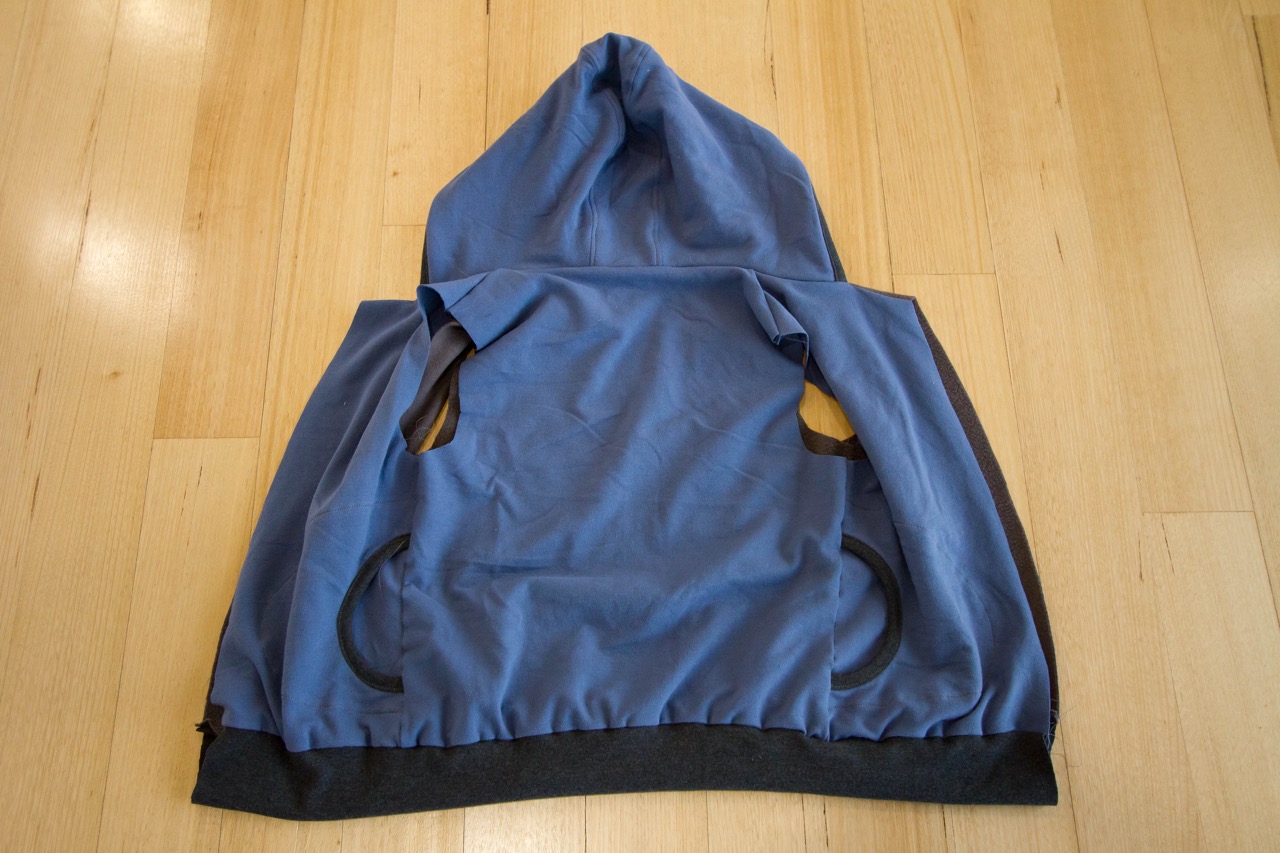
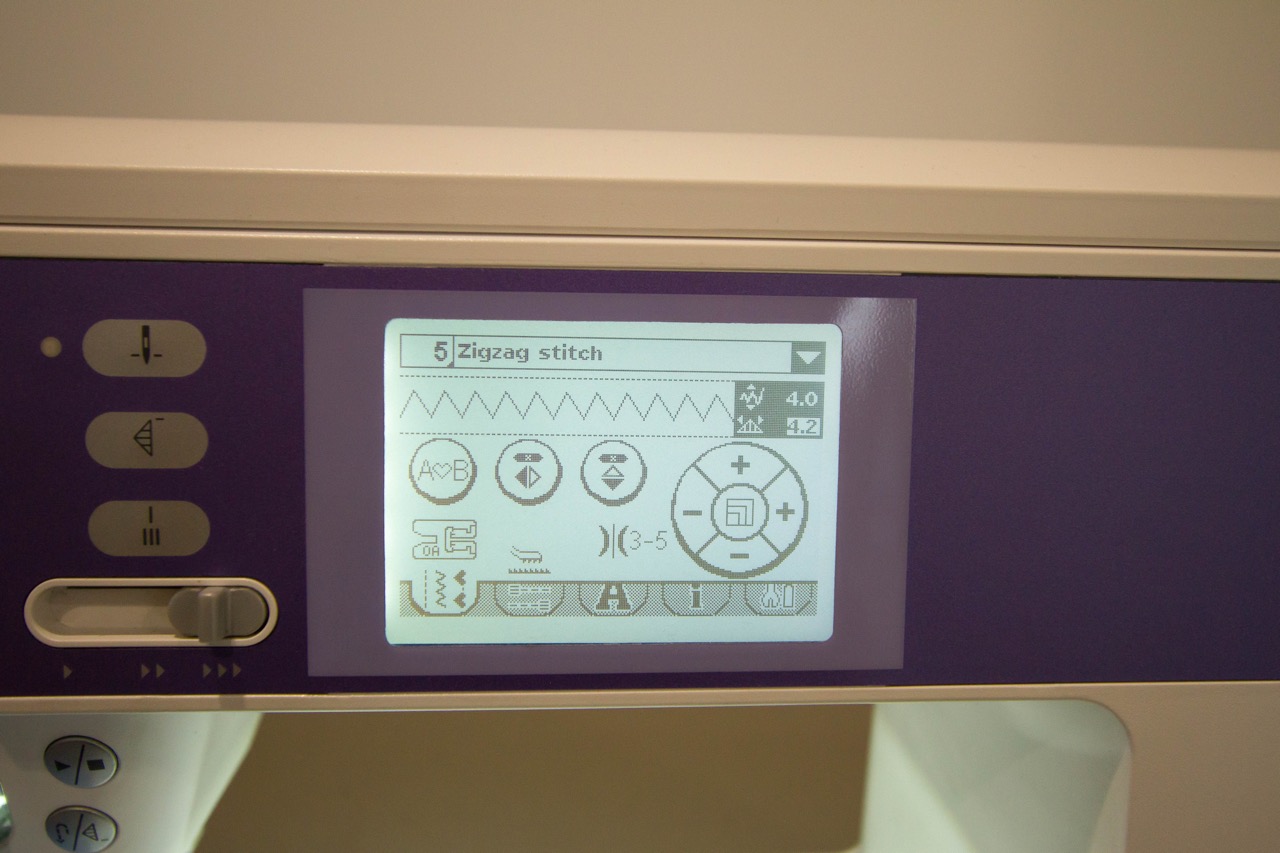
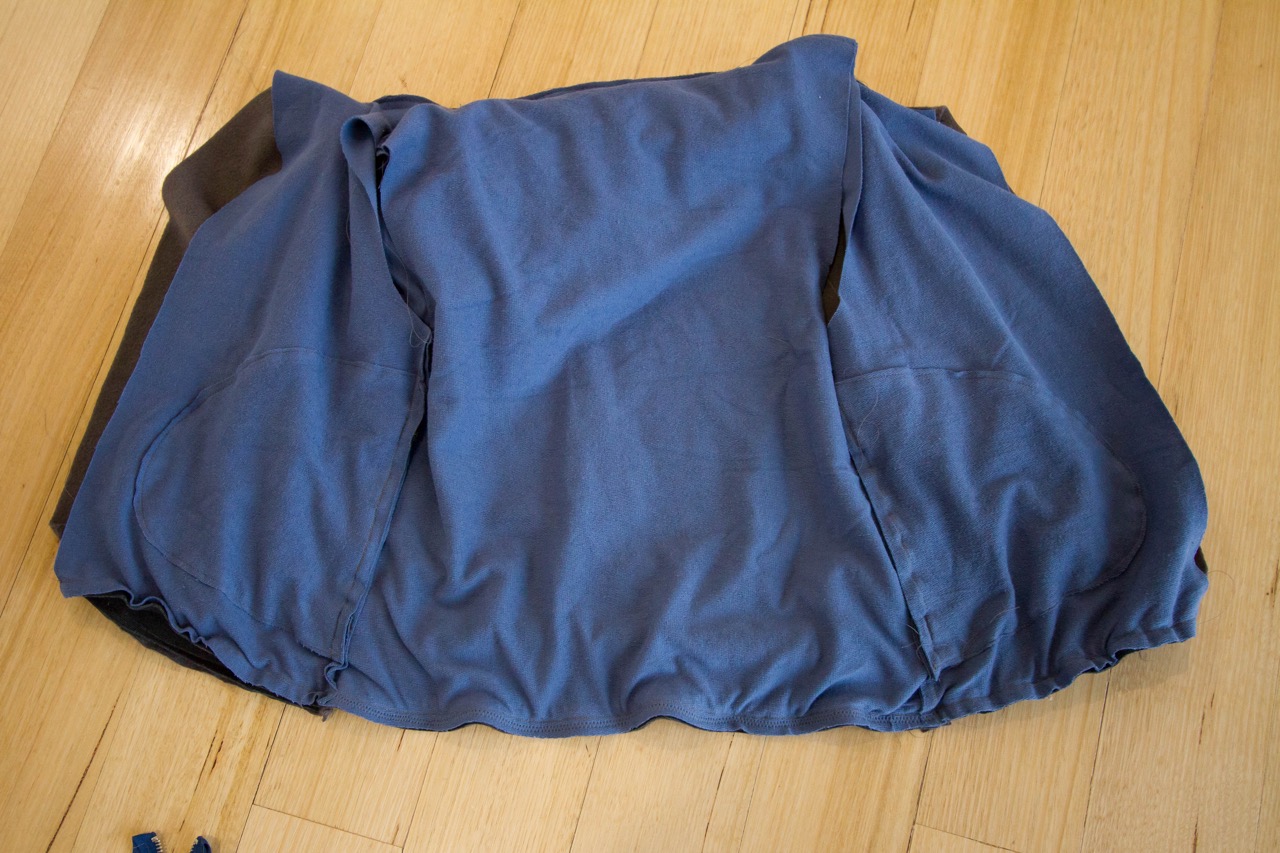
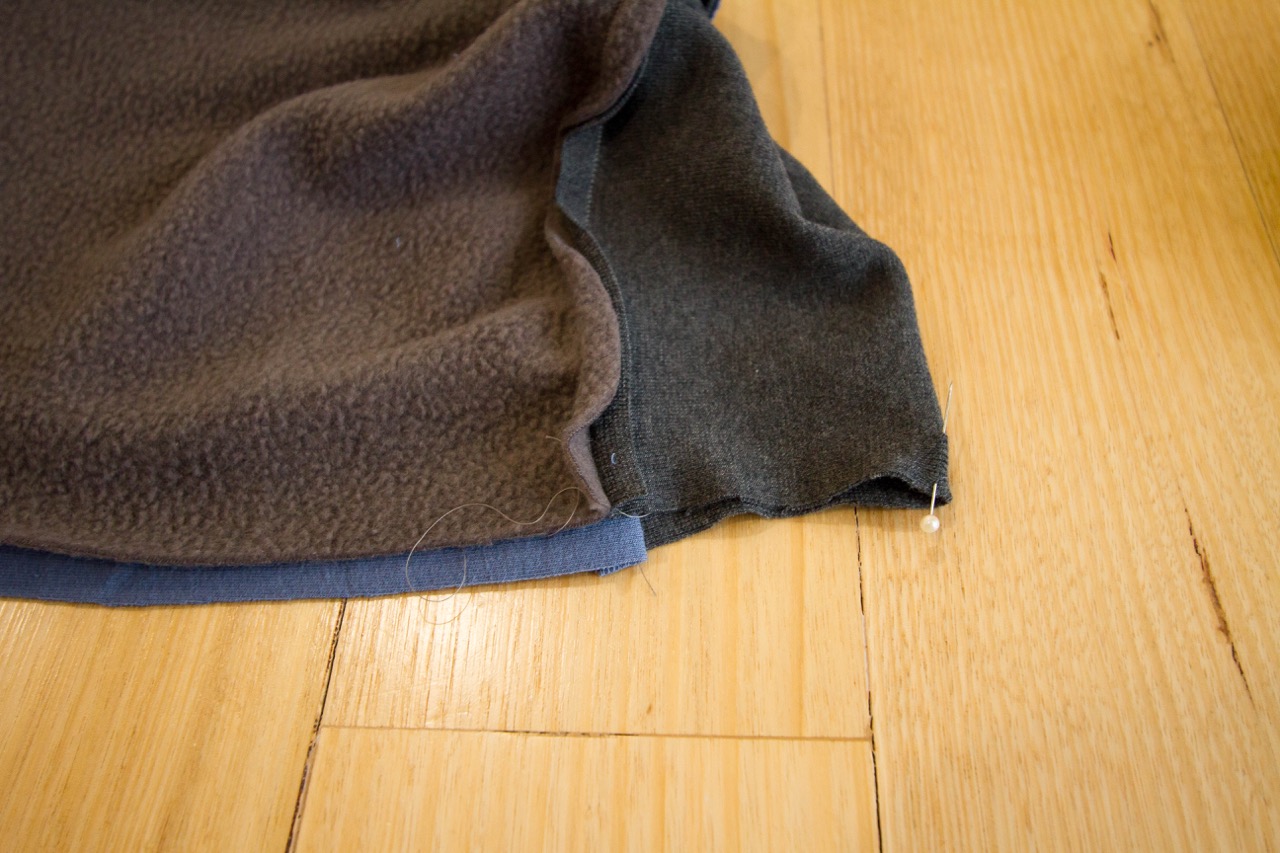
Now your exterior and lining vests will be joined at the top (neckline with hood sandwiched between) and the bottom (joined to waistband), making a big loop. Turn your vest right sides out and this is what it looks like from the lining side:This is what it looks like from the exterior:And this is what the front edge of the vest looks like – the waistband is folded in half, making the bottom edge of the vest.Turn your vest inside out again, with wrong side of lining, waistband and exterior facing out.Keeping the vest inside out, You will need to re-create the fold in the bottom edge of the vest as shown below. The waistband is folded in half, with wrong sides together and the raw edge of the bottom of the lining vest needs to line up with the raw edge of the bottom of the exterior vest.So the vest is still inside out, but the wasitband has been folded in half (length-ways) and tucked in between the lining and exterior vests. Make sure that the seam lines on the exterior and lining vests match up and pin into place along the bottom edge of the vest.Before you insert the zipper, you need to baste the bottom edge of the exterior and lining vests together to make things easier as you move onto the next steps. Starting at one side seam (not the front edge of the vest) sew the bottom edge of the vests together using a long, wide zig-zag stitch. It is important that this stitching isn’t seen from the right side of the vest, so keep the zig-zag within the seam allowance (between the stitching line and raw edge shown below).This is the setting I used for my zig-zag stitch:You can see in the photo below the row of zig-zag stitch sewn only from one side seam to the other (i.e. only along the back panel of the vest.)Here is a close-up of the zig-zag stitch sitting within the seam allowance:Now that the waistband is attached, it is time to insert the zipper.
Turn your vest right-way out again – this is a good time to check that you can’t see any of your zig-zag stitching on the back panel of the vest. I forgot to take a photo of this part, but open your open-ended zipper part way and fold the extra tape at the top of the zipper down and away from the zipper teeth to the back of the zipper. Baste into place.
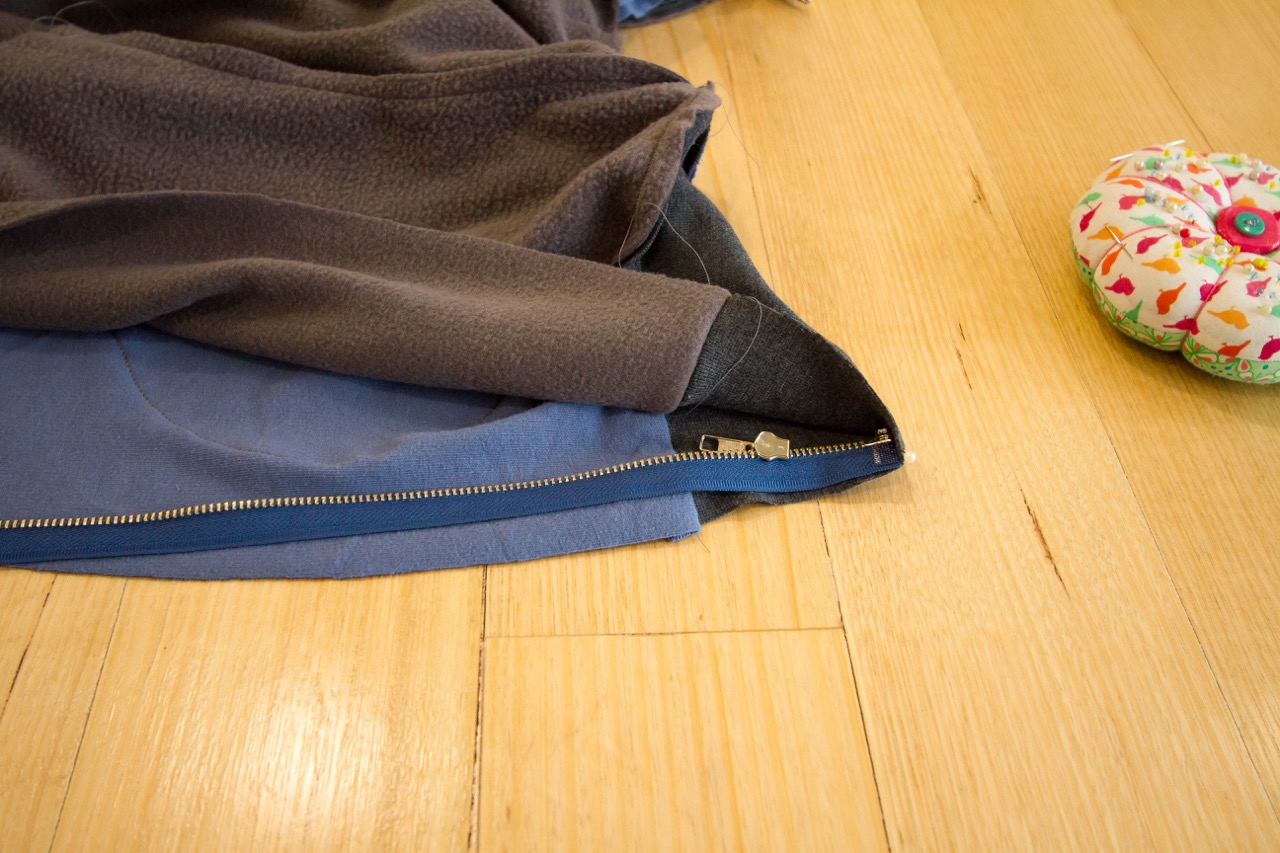
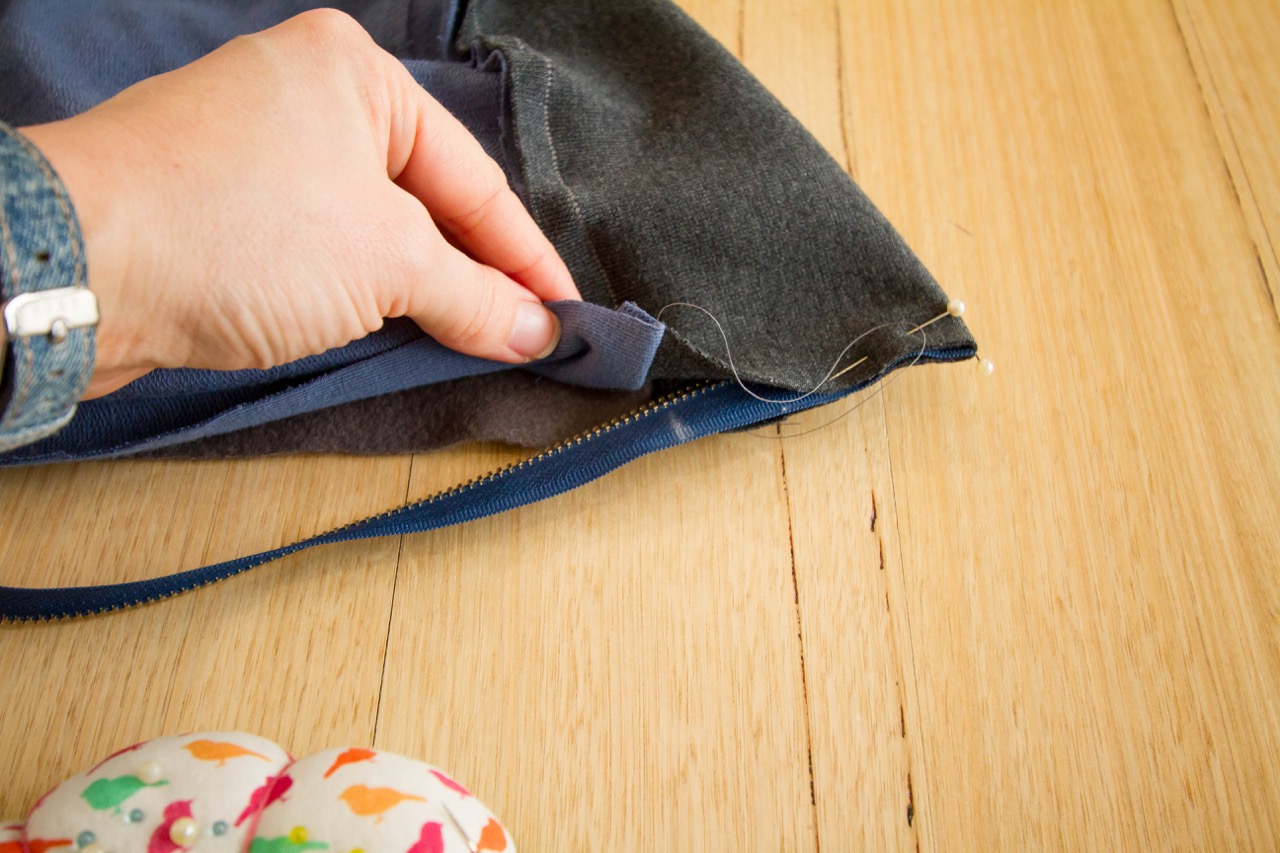
Place your zipper on top of your vest so that it is sitting exactly how it will be when you are wearing the vest. Pin the top of your zipper to the top of the front edges of the vest. This helps you to know which side of the zipper is attached to which side of the vest when you go to insert it. (You can see how the top edge of the zipper tape is folded back and sewn down in the photo below.) Open up your zipper completely, leaving the two sides pinned to the vest, and turn your vest inside out again. This next part is really important, it will make sure that the bottom edge of your zipper sits flush with the bottom folded hem of your vest. Take your waistband (it should be loosely folded in half from the zig-zag stitching you did earlier) and line up the seams joining the waistband to the lining and exterior vests so that they sit directly on top of each other. Then, take a pin and place it in the fold at the bottom of the waistband. This marks the very bottom edge of your vest.Take the zipper piece that is pinned to that same side of the vest and with the right side of the zipper facing the right side of the exterior vest, lay the zipper along the front edge of the vest. It is really important to make sure that the bottom of the zipper (with the zipper stop) butts up firmly with the pinned fold mark on the waistband. (Sorry for flipping the photo around here…hope it doesn’t confuse you!)
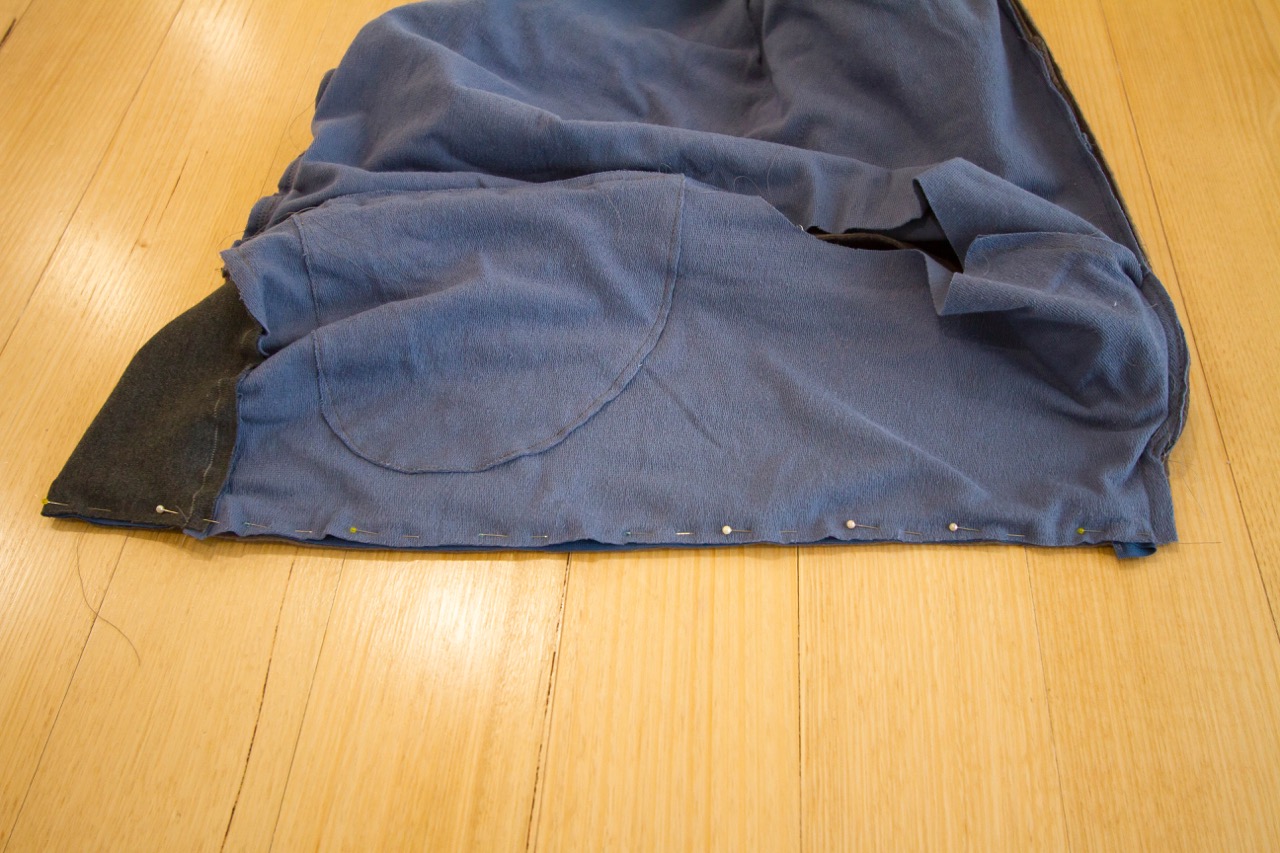
Line up the long edge of the zipper tape with the front edge of the vest, sandwiching the zipper between the exterior and lining pieces, and pin into place. I find I get a more accurate finish if I pin the bottom of the zipper into place first, then match up the seams at the top of the waistband and pin the zipper into place there next.Then I go to the top (neckline) of the vest and push the top edge of the zipper right up into the join between the exterior and lining pieces and pin into place so that I can be sure that there is no gap between the top of the zipper and the top of the vest.Then I pin the rest of the front edges of the vest to the zipper. Remembering the zipper is sandwiched between the exterior and lining vests. And the right side of the zipper faces the exterior, wrong side of the zipper faces the lining. I like to place a pin in the middle of the front edge first, then fill in the gaps in between. If you are working with a knit fabric for your exterior you might find that your fabric has stretched out a bit during all of the handling and will be a little too long for the zipper. If you pin evenly along the front edge it will eliminate big puckers later on when you are sewing your zipper into place.
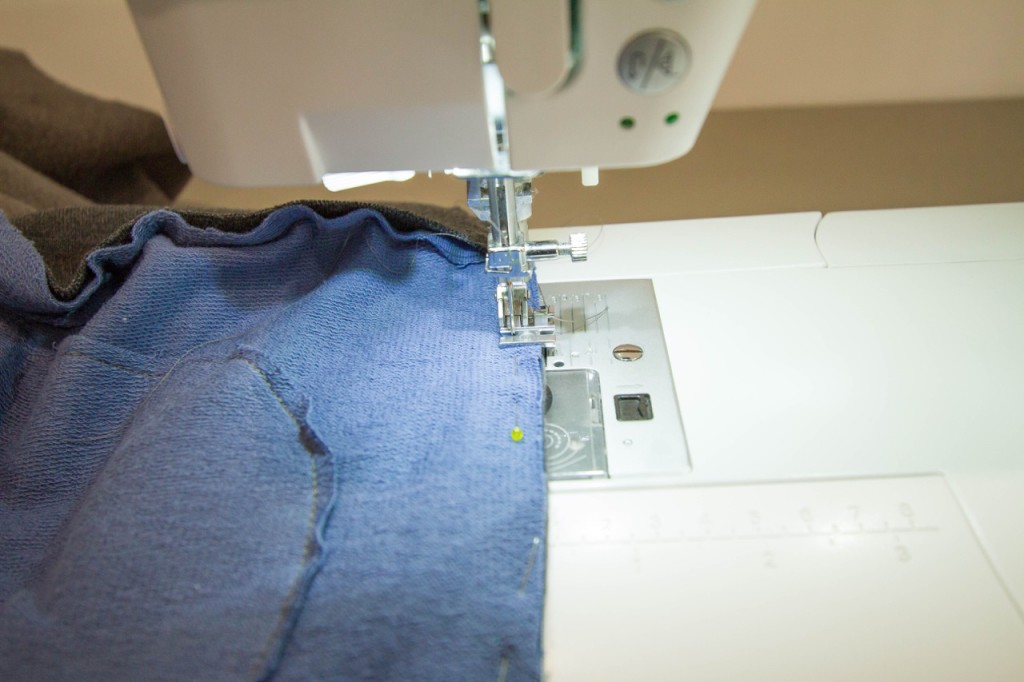
Just a note here…if your neckline and waistband seam allowances are more or less than 1/2″ you might have trouble fitting your zipper into the front of your vest without any gaps at the top or bottom. If your zipper is just a little too short, you can either slide it up so that you have a bit of a gap between the bottom of the zipper and bottom of the waistband or re-sew along the neckline and bring the stitching at the front edge of the vest down a little to meet the top edge of the zipper. (Bear in mind that this will mean the finished neckline will be a little lower at the front of your vest.)Using a zipper foot on your sewing machine, sew along the pinned front edge of the vest using a 3/8″-1/2″ seam. When you reach the zipper pull, stop sewing and put your needle down. Lift the presser foot, slide the zipper pull past the foot and continue sewing to make sure that you seam line is nice and straight. My knit fabric was trying to pucker as I sewed so I made sure that I sewed slowly and smoothed out the fabric with my fingers as I went. I ended up with a few tiny puckers but they were easy to smooth and push out with my fingers once I was done.Turn your vest right sides out (again!) and you will see one side of your zipper is sewn in! This next step is also really important, I didn’t do it on my first vest and ended up with the seam between my waistband and vest sitting higher on one side than the other. And you don’t want it all wonky-looking!
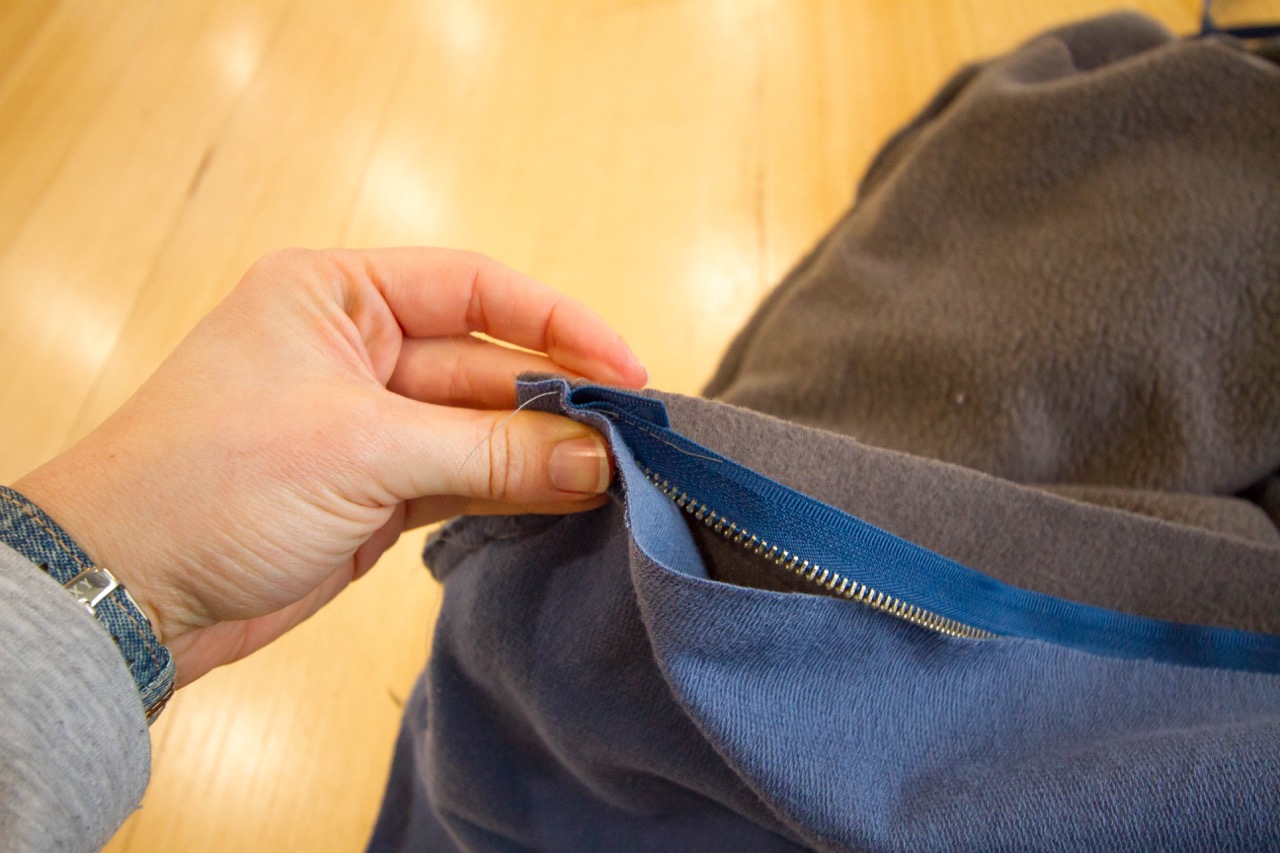
Rejoin your zipper sides and close your zipper to it sits just a few inches above the seam joining the waistband to the vest. With a chalk pen, pin or some other method of marking draw a line across the zipper tape that sits in line with the seam joining the waistband to the vest. Open up and separate your zipper and turn your vest inside out again.Follow the same instructions as above to find the fold in the bottom of your waistband and mark with a pin. Place the wrong side of your zipper on the right side of your lining with the teeth of the zipper facing into the vest and butt up the bottom of the zipper stop with the pin marked at the bottom fold of the waistband. Pin into place.
Next you will need to match up the seam joining the exterior and waistband to the line marked on the zipper tape. Make sure that the seam line sits directly on top of the marked line and pin into place. Continue pinning the zipper to the front edge of the vest and sew into place as you did with the other side.Turn your vest right side out for the final time and do up your zipper again to make sure everything matches up nicely – the bottom folded edge of the waistband, the seam joining the waistband to exterior and the top of the zipper at the neckline.Look at the inside of your vest and, ta-da! A completely concealed zipper!
To finish your vest, follow Step 4, e-j in your Hero Vest instructions.
I’ve got some big stuff going down on the blog in the next few days…I FINALLY got around to making another zippered pouch and taking photos along the way to put together a tutorial for you…I’ll be releasing a new pattern on the weekend (yay!) and I’m participating in the Sew Mama Sew May Giveaway Day on Monday with some lovely goodies up my sleeve to give away!! So stay tuned…lots of fun stuff to make and see and WIN 🙂
Lets get this tutorial started then! After making Oishii and then the abundance of zippered pouches that followed I had so many people write to me saying that they are scared of zips! Well, fear zips no more…they are actually quite simple. This is a great beginner zipper project, so gather yourself some materials and lets get sewing 🙂
EASY PEASY ZIPPERED POUCH TUTORIAL
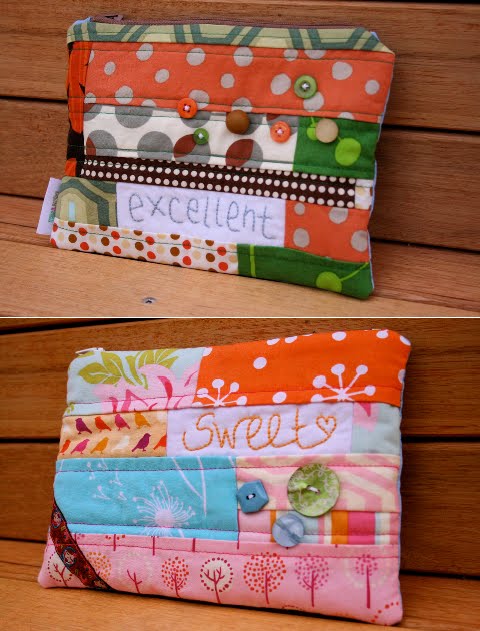
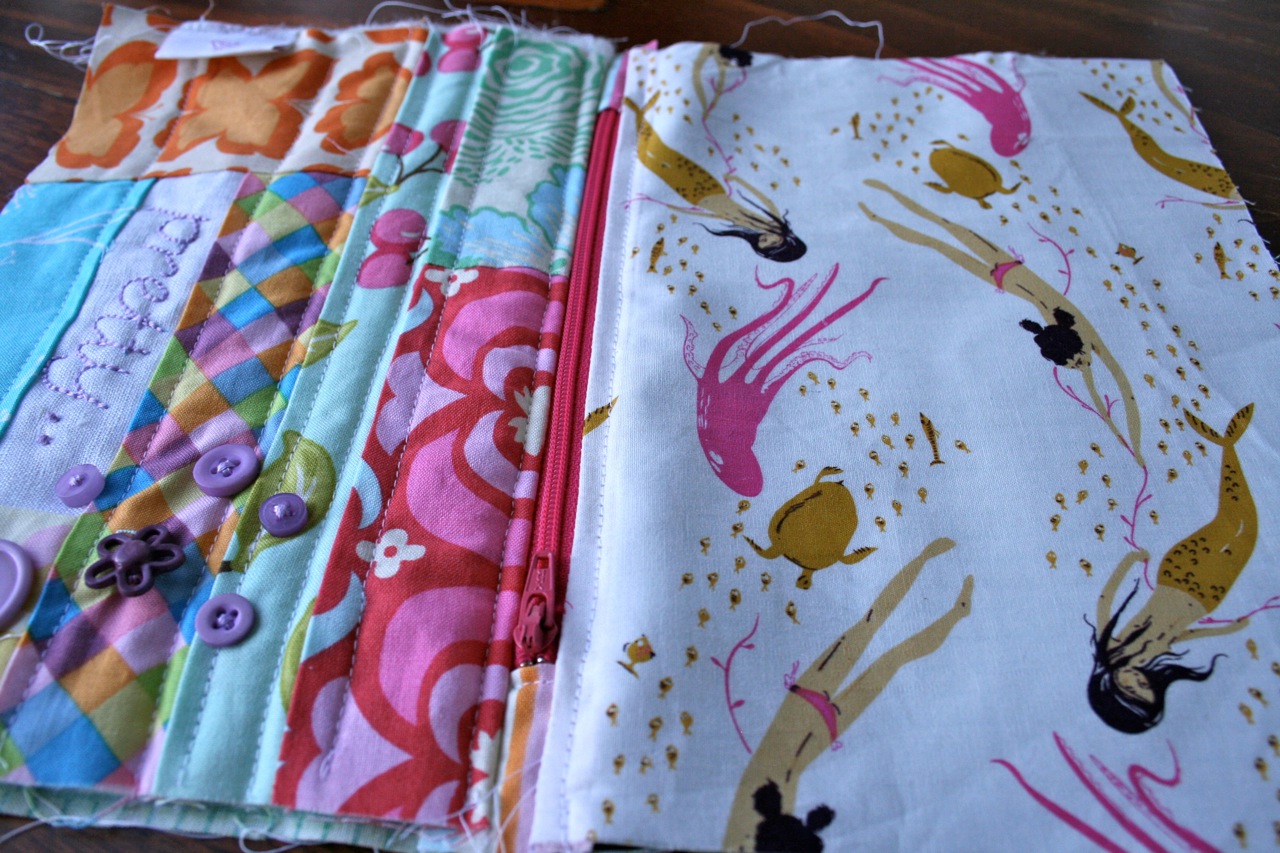
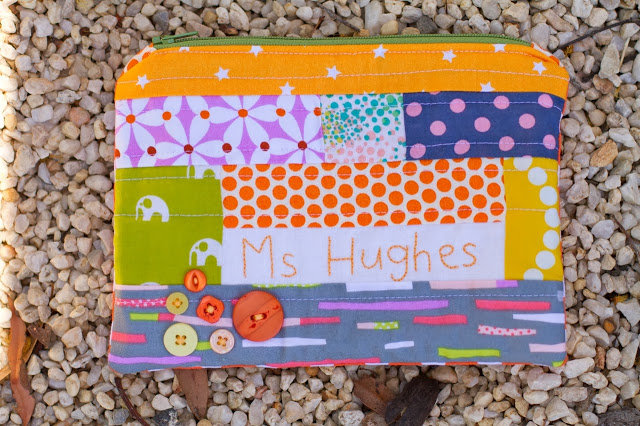
I’m not going to give instruction on how to make the patchwork panel that I use for my pouches…the instructions will vary depending on the size of your scraps and the way you lay them out. A quick run-down though in case anyone wants to get nitty-gritty…I cut and join my little scrap pieces until I get a rectangle which measures 9″ x 6 1/2″ making sure I get a piece of plain white fabric in there somewhere. Then I cut a piece of pellon or quilt wadding to the same size and adhere to the wrong side of the fabric by ironing on if using pellon or pinning around the edges if using wadding. Sew a few rows of stitching above and below seams joining fabric strips (I don’t sew on the white fabric). Using an erasable fabric marking pen, write a word on the white piece of fabric then embroider using 4 strands of cross-stitch thread. Sew on a little collection of buttons.
Okay, so that is a speedy how-to make the patchy panel! Of course you can also just use a single piece of fabric (WAY faster if you do that!) It is up to you if you want to use any wadding on the front or back of the pouch. I used wadding on the front but not on the back…depends on the look/feel you are going for. You could also use a piece of stiffener fabric (e.g. Shapewell) if you want a bit of extra strength or stability.
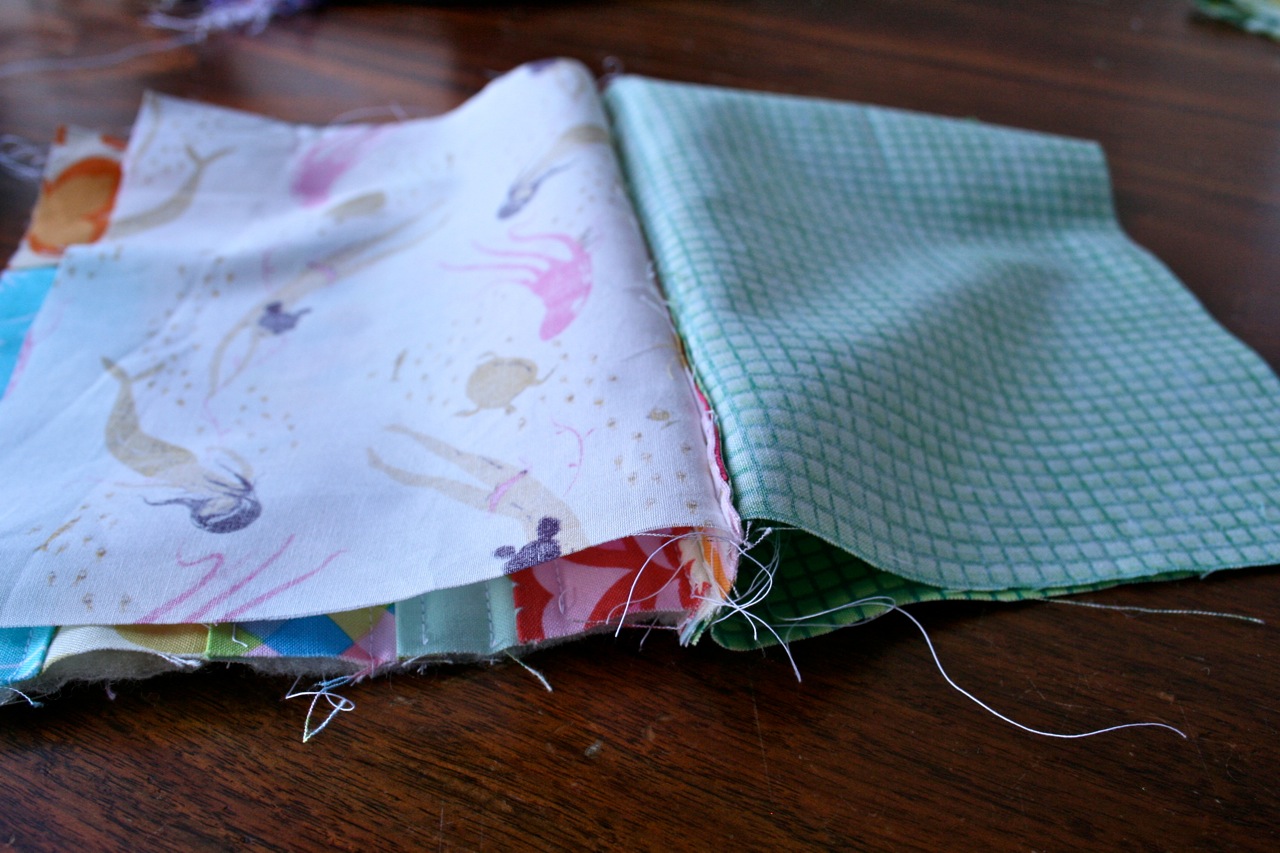
To make a Zippered Pouch, you will need: One 9″ x 6 1/2″ rectangle of fabric for front exterior (patchwork pieced) One 9″ x 6 1/2″ rectangle of fabric for back exterior (mermaids) Two 9″ x 6 1/2″ rectangles of fabric for lining (green check) Two 4″ x 2″ (approx) rectangles of fabric for zipper ends (pink/blue stripe) One 7″ dress zipper
Step 1. Take the two small rectangles of fabric for zipper ends and fold in half so that short ends meet. Press. Place the folded edge of the fabric just over the metal stopper on the end of the zipper and pin into place. Sew about 1/8″ from the folded edge of the fabric (be careful not to sew on top of the metal stopper here…your sewing machine will not like it!!).
Do the same with the second piece of fabric on the opposite end of the zipper (it is easier if you open your zipper a bit before sewing so that the zipper pull doesn’t get in the way).
Step 2. (Don’t think too hard about the next couple of steps because they kinda don’t make sense until you actually follow them!) Take your front exterior piece and lay on the table with right side of fabric facing up. Take your zipper and, with right side of zipper facing right side of fabric, place edge of zipper tape along the TOP edge of your front exterior piece. Pin a few times to hold in place.
Now take one of your lining pieces and lay it on top of the front exterior piece with right sides facing. The zipper should be sandwiched between the two pieces of fabric. Match up top edges of fabric and edge of zipper tape and pin together. (You can remove the pins that were put in earlier to hold the zipper to the front exterior piece now).
Pop a zipper foot on your sewing machine and sew along the pinned edge, about 1/8″ away from the zipper teeth. It can sometimes be tricky to sew close to the edge of the zipper when you reach the zipper pull…make sure your needle is in the down position, lift up your presser foot and slide the zipper towards the back of the sewing machine so that it is away from your needle, then keep sewing.
Step 3. Fold the exterior front and lining pieces back away from the zipper so that right sides of both pieces are facing out. The zipper should be sitting with one side of the zipper tape sewn between both of these pieces and the other side of the zipper tape left free.
Now take your remaining lining piece and place it on the table with right side facing up. Place the free side of the zipper tape along the top edge of the lining piece. Pin into place if you need to (I usually don’t bother). Take your exterior back piece and lay it on top of the edge of the zipper/lining with the wrong side of the exterior back piece facing down. The zipper and exterior front/lining pieces should be sandwiched between the exterior back and lining pieces.
Match up top edges of fabric and edge of zipper tape and pin together like you did in step 2 and sew along the edge.
Trim the overhanging raw edges of the zipper end fabric.
Step 4. Fold exterior and lining fabrics out so that wrong side of one lining piece is touching wrong side of exterior front piece and wrong side of second lining piece is touching wrong side of exterior back piece. The zipper should be sitting nicely in between the front and back fabrics. Press and pin. With the zipper foot still on your sewing machine, topstitch about 1/8″ away from the folded edge of the fabric down both sides of the zipper.
Step 5. Open the zipper and leave opened for the following step. Now open out the fabric pieces and position so that the right sides of the exterior front and back pieces are touching and the right sides of the lining pieces are touching.
Match up raw edges and pin around the entire pieces. When you get to the seam in the middle where the zipper is sewn in, it will be a little bulky. Fold the short end of the zipper and attached fabric so that the fold is facing the lining.
Sew a 1/2″ seam around the pinned edge, leaving a 2″ gap along the bottom edge of the lining pieces for turning. Clip corners and cut a curve into the seam where the zipper is to reduce bulk. Make sure you don’t cut your stitching!
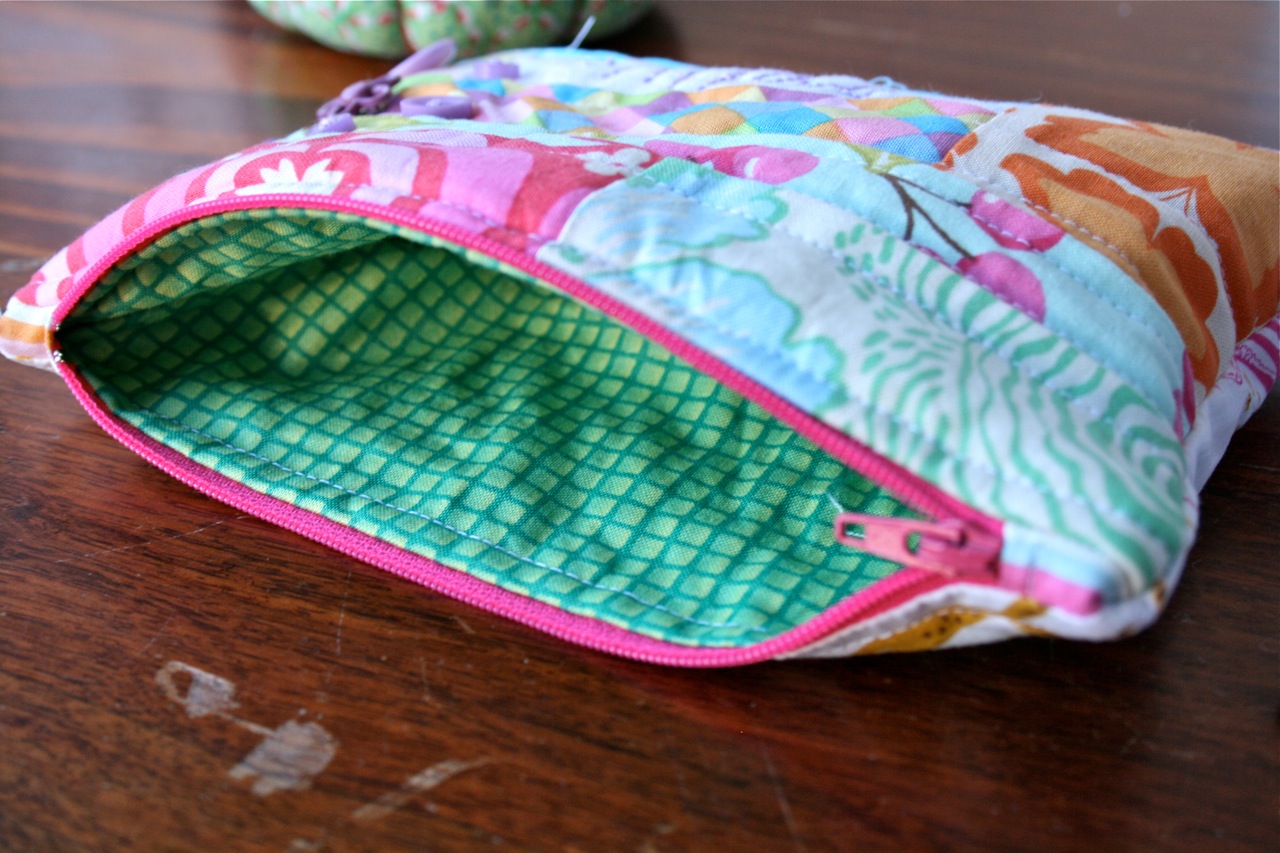
Pull fabric through the opening in the lining until pouch is right sides out. Push the lining into the exterior pouch. Use the pointed end of a closed pair of scissors to push the four corners of the pouch out. Slip stitch the opening in the lining closed, snip all stray thread and you are DONE!
I’d LOVE to see any zippered pouches you create using this tutorial! Make sure you leave a comment with a link or email me some pics so I can check it out 🙂
If you find any mistakes or don’t understand anything, let me know and I’ll fix it up!
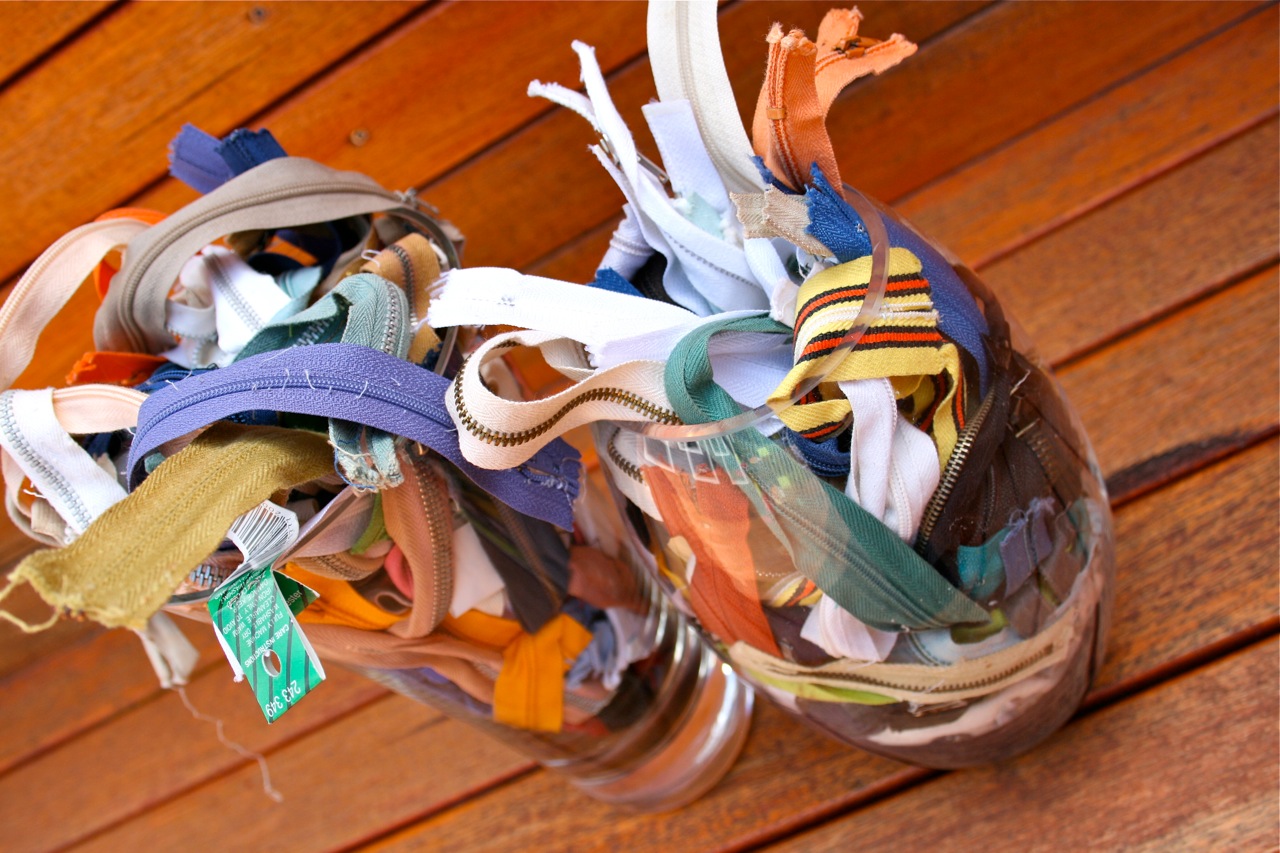
Awhile ago my sister gave me a massive zip-lock bag full of zippers. She had been to a deceased estate sale and the lady of the house must have been into thrifty sewing because she had a whole hoard of zippers stashed in one of her draws – most of them had been unpicked from old items of clothing.
I’m just about to start making some new cushion covers for our couch cushions but have been pushing the project back as it means making a trip to the shops to pick up some zippers – then I remembered the big bag of old lady zippers in the cupboard and problem solved!!
I didn’t think I would ever use them, still overcoming my issues with second-hand stuff, but if it means saving me a trip to the shops and a bit of money I think I’m going to face my issues and get on with it!
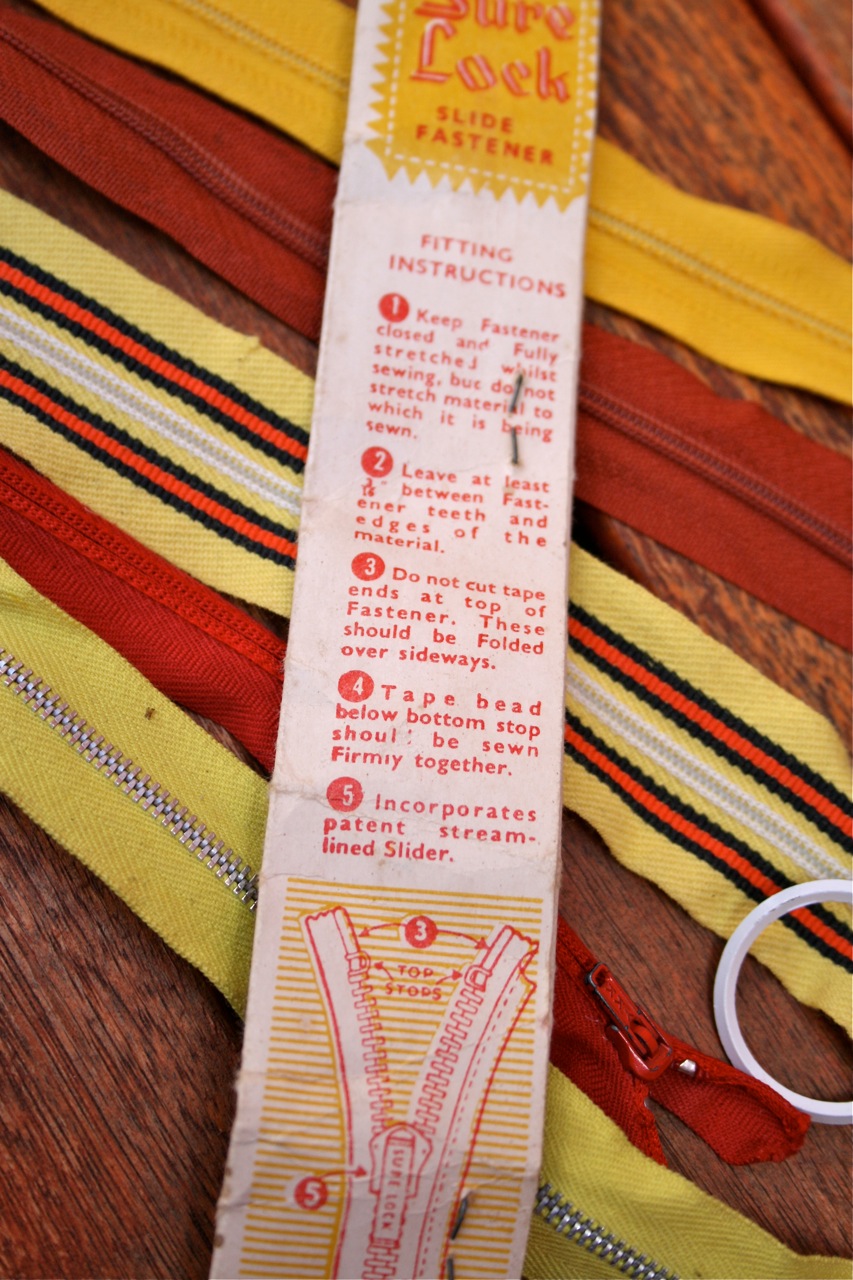
There are actually some really cool zippers in the stash…lots of retro looking ones and funky shaped pulls. Even some brand new ones still in their vintage packaging.
I’ll definitley be remembering to dive into my zipper collection next time I need to sew something with zippers, who knows what treasures I will find?! Perhaps I’ll make one of these funky no-fabric zippered pouches just to use some of them up!
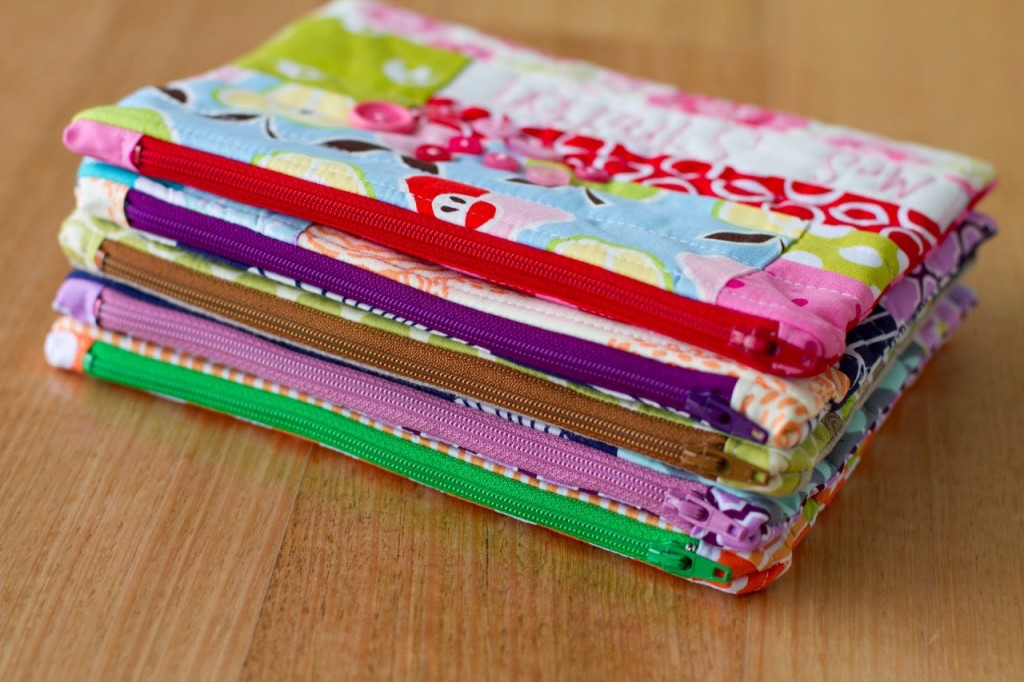
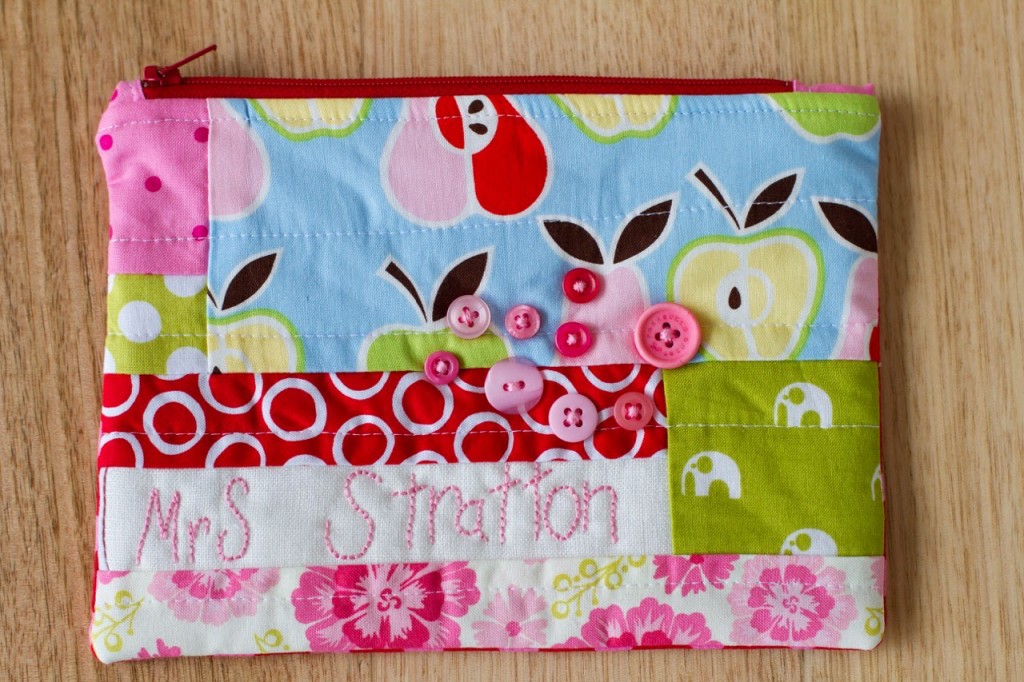
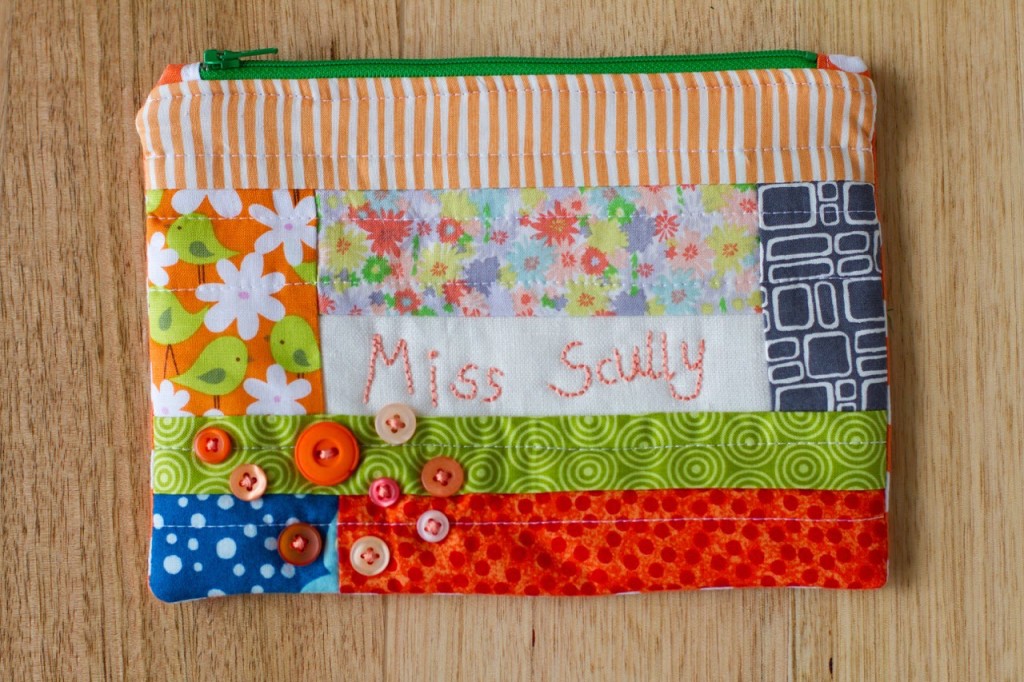
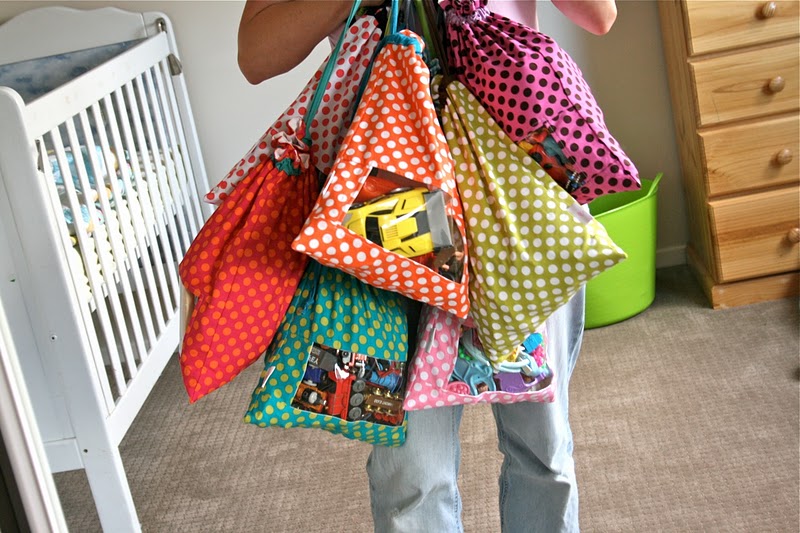
The end of the school year was signified with the annual school teacher zippered pouch marathon!
It’s kind of good having a “go to” teacher pattern – something that suits them all, is personal, not edible and something that I can be sure will actually be used in the future. Plus, it gives me a chance to lessen the load in the scrap fabric bin!
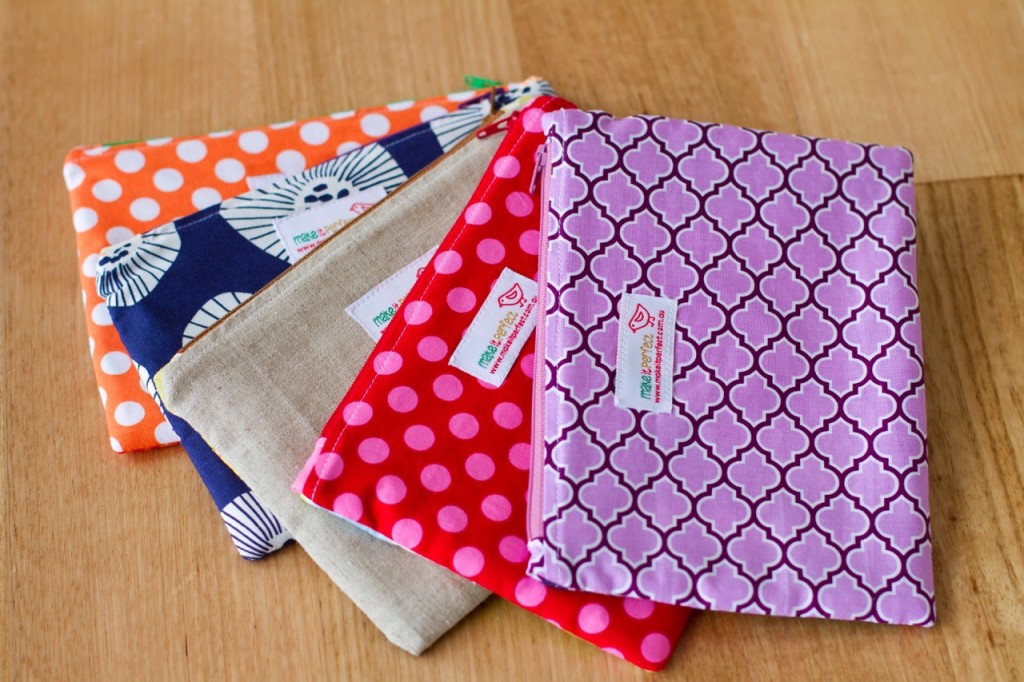
This year there were two teacher’s aides in Tommy’s class which meant I had to make 5 pouches. I managed to get them finished with a week or so to spare though which was nice considering it happened in amongst the craziness of moving and unpacking house.
You can see previous teacher zippered pouches here, here and here – this is the fourth year I have made them. Funny that some of those same scraps are still going strong!
I’m a mega list-maker…I’ve got lists of things to do today, this week, this month, lists of dinner ideas, lists of things to sew, lists of things to blog about…you name it, I’ve got a list for it! One of my most useful lists though is a list of presents to give people for their birthdays. Family members each have their own lists, but I also keep a list of ideas for presents to give to friends. It helps with the last minute “not sure what to get them” rush as I have lots of ideas at my fingertips…
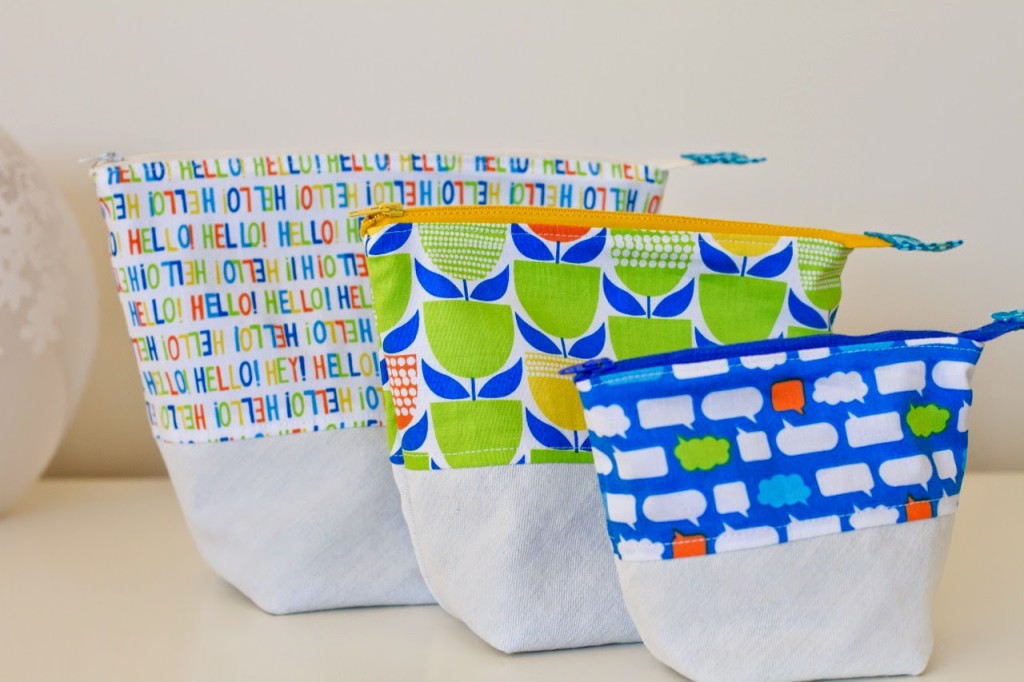
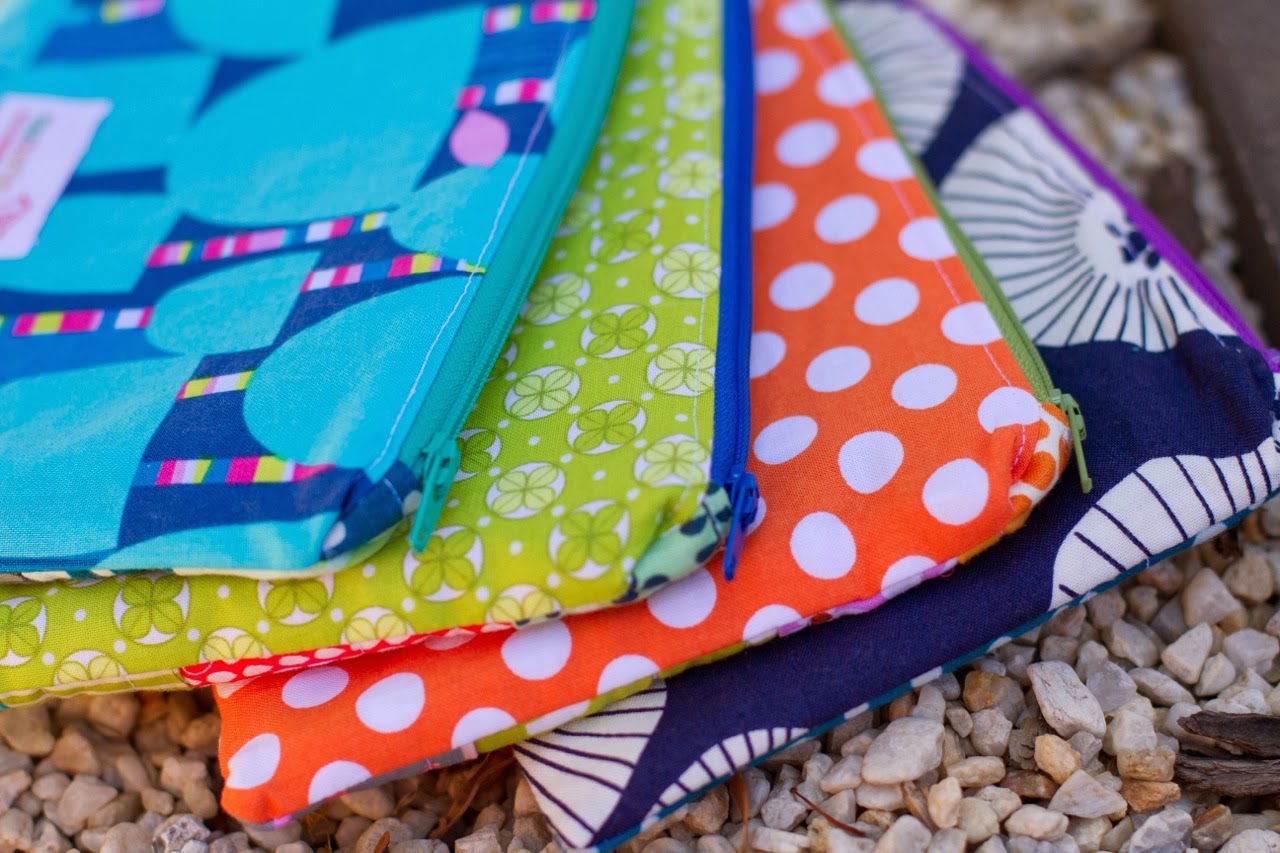
…Like these Open-Wide Zip Pouches (a free tutorial from Anna of Noodlehead.) I hadn’t made Anna’s Zip Pouches before, but have seen them made dozens of times so knew they would be perfect as a handmade gift for friends. I accompanied these pouches with a bag full of gourmet homemade trail mix (with lots of yummy treaty bits mixed through!)
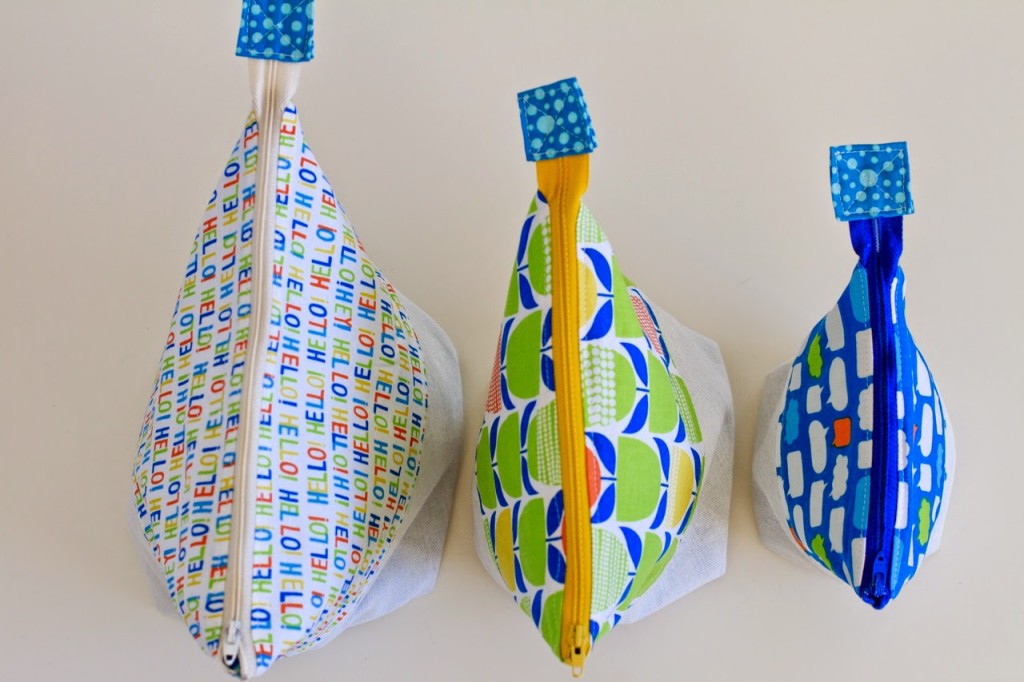
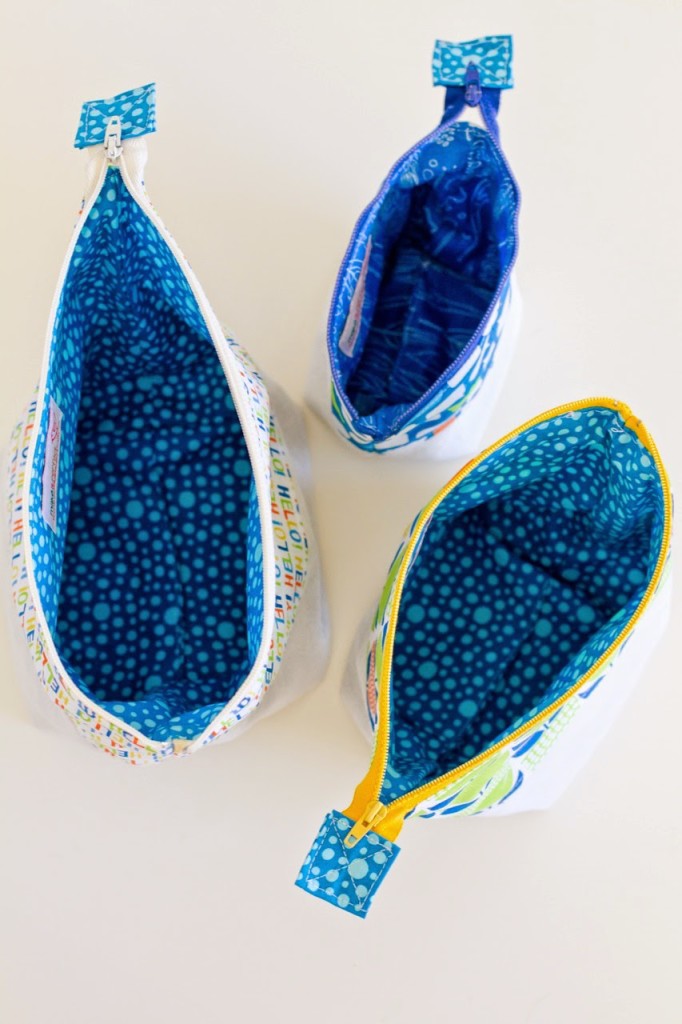
There are three different sizes given in the tutorial (although you could easily adjust the dimensions to suit yourself) and I knew that a trio of pouches would look great together. I actually stuffed up the dimensions a little so the finished pouches ended up a little taller and not as wide as they are supposed to be, no big deal though!
I really like the two-toned zippered pouches, on the bottom part of mine I cut up an old denim skirt that I haven’t worn for ages. Its a really light, washed denim and looks lovely paired with the bright coloured fabrics. I think I’ve come up with a use for all of the old pairs of jeans I have saved up for repurposing now!
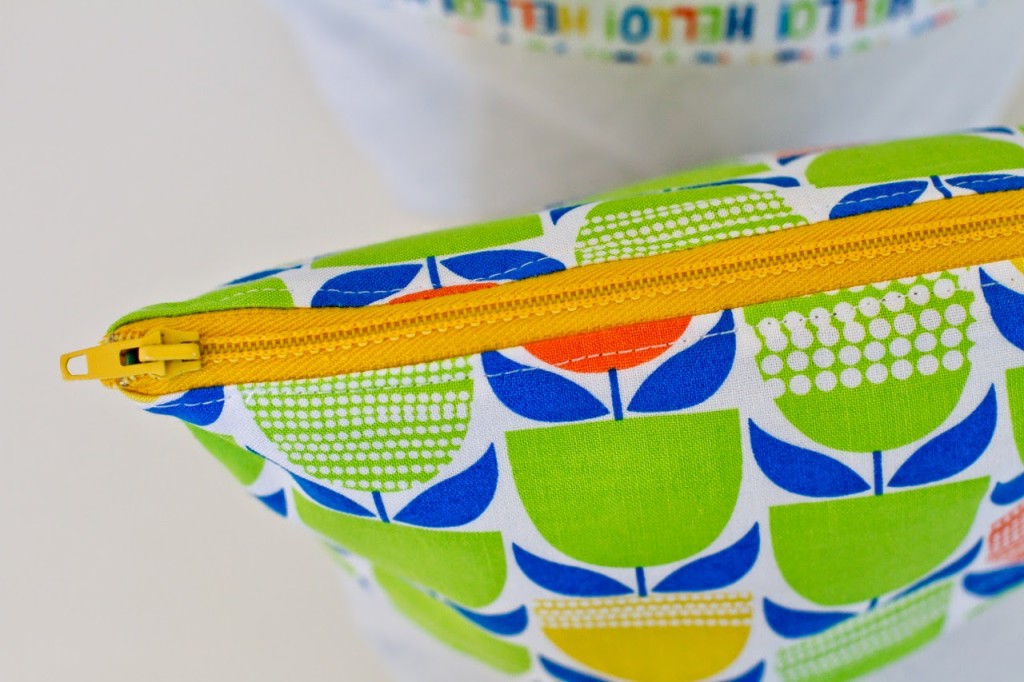
It was fun digging through my big stash of quilting cotton and choosing some fun prints. Now that most of my clothing sewing is using knit fabric and there are so many more apparel fabrics avaliable I don’t turn to my quilting cottons as much anymore. I forgot how fun they are!
SUPPLIES: Noodlehead, Open-Wide Zippered Pouch tutorial Repurposed denim skirt Erin McMorris, Moxie Talk Talk in Grass Erin McMorris, Moxie Buttercup in Grass Erin McMorris, Moxie Chatroom in Royal
This one has quilting cotton on the outside, knit jersey for the lining and the wadding was salvaged from one of the kids old polar fleece blankets! I held onto their old blankets when I made them all new ones this year for purposes just like this. Feels much better to re-use rather than throw them all out.
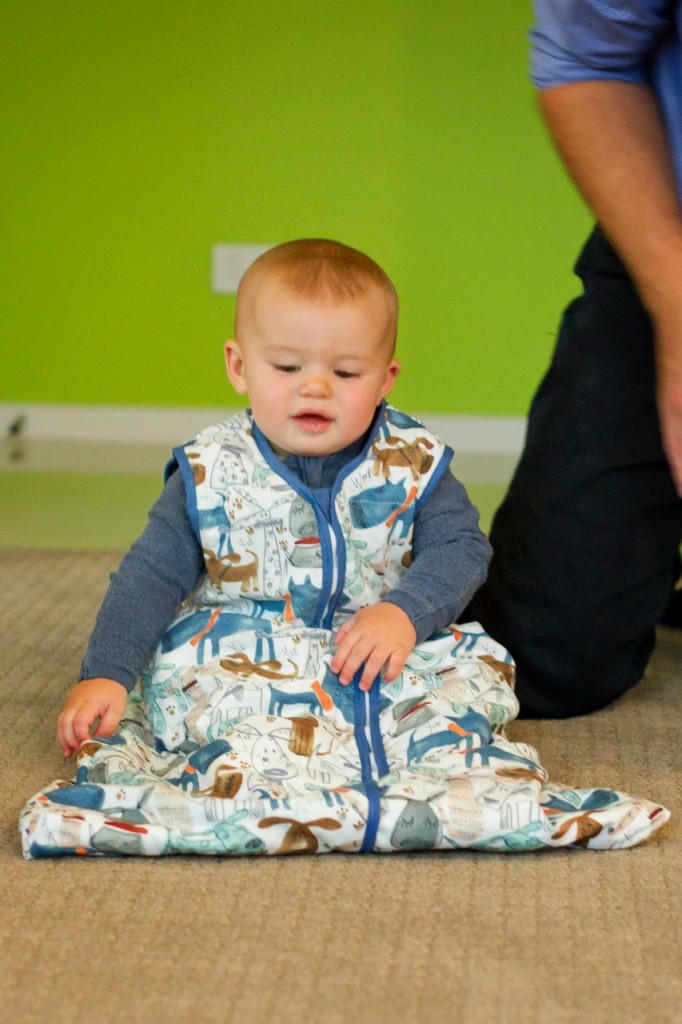
As much as Harvey loves his sleeping bags (he snuggles his head into it when he sees one!) he does NOT like putting one on when it is not sleeping time!
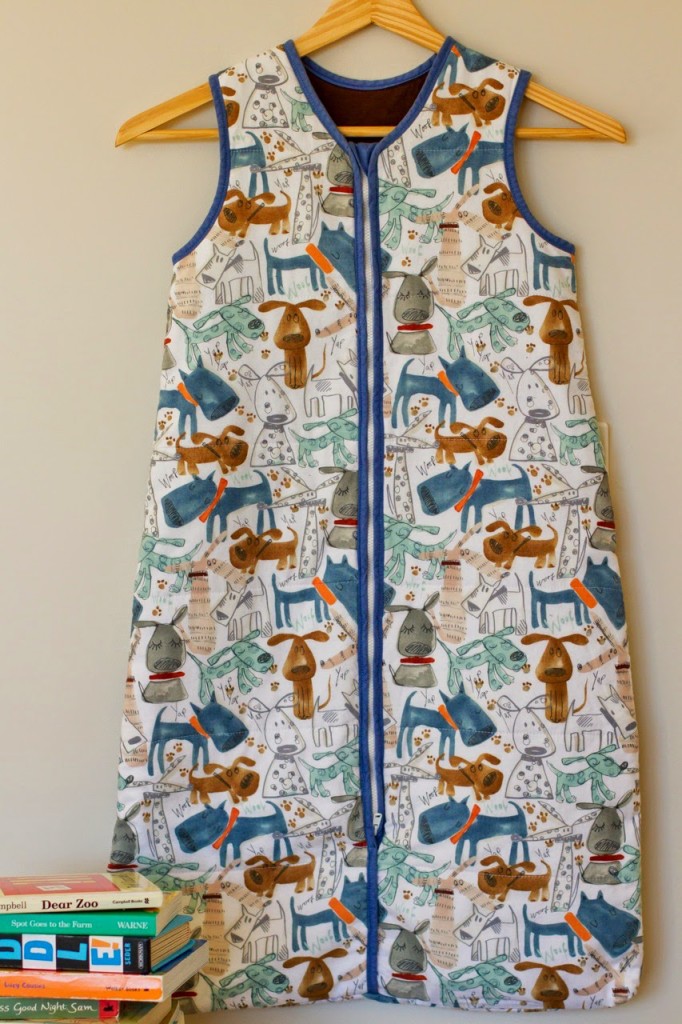
And here’s a close-up of the chin-guard over the end of the zipper to prevent any of the cold, hard zipper touching baby’s skin. Actually, the zipper guard goes right down inside the bag – I haven’t got a photo of it but take a look at my tester Peta’s Baby Dream Bag. It is just gorgeous and shows off the zipper guard really well.
This was my first proper test at sewing the pattern and isn’t 100% perfect, but worked out good enough to wear. Some of the changes I made to the final pattern were to bring the waist curve in a bit so that the vest has more shape to it. And I also lowered the zipper by about 1/2″ as it is sitting a bit high at the neckline on this vest and doesn’t quite reach all the way to the bottom of the waistband. Just a few minor details, but if you are studying this vest in anticipation of making your own, make sure you take those things into account!
For this vest, I used a plastic zipper, and while I like the look of the chunky zipper, after trying a few vests with metal zippers I can definitely say that the weight of the metal zipper makes the front of the vest sit much straighter than the plastic. Although it isn’t a total bother, you can see in a few of the photos that the zipper is a little bit wavy. Totally up to you whether you choose to go with plastic or metal though, they both work perfectly fine and metal are much more expensive than plastic so depends if you want to have a splurge or not.
Once again I have used flannel for the exterior of the vest (using a snugglier fabric like flannel makes the pockets extra warm too) and paired it with a dark grey polar fleece for the lining and light grey ribbing for all of the trim. Robert Kaufman’s range of Mammoth and Shetland flannels are awesome choices for the vest, particularly if you are having trouble choosing a fabric that doesn’t look too childish.
My sister quickly snapped these photos after we finished taking photos for the cover of the pattern…it was pouring with rain so don’t pay too much attention to my wild hair and red, cold nose – I’m glad I had my vest to keep me warm!
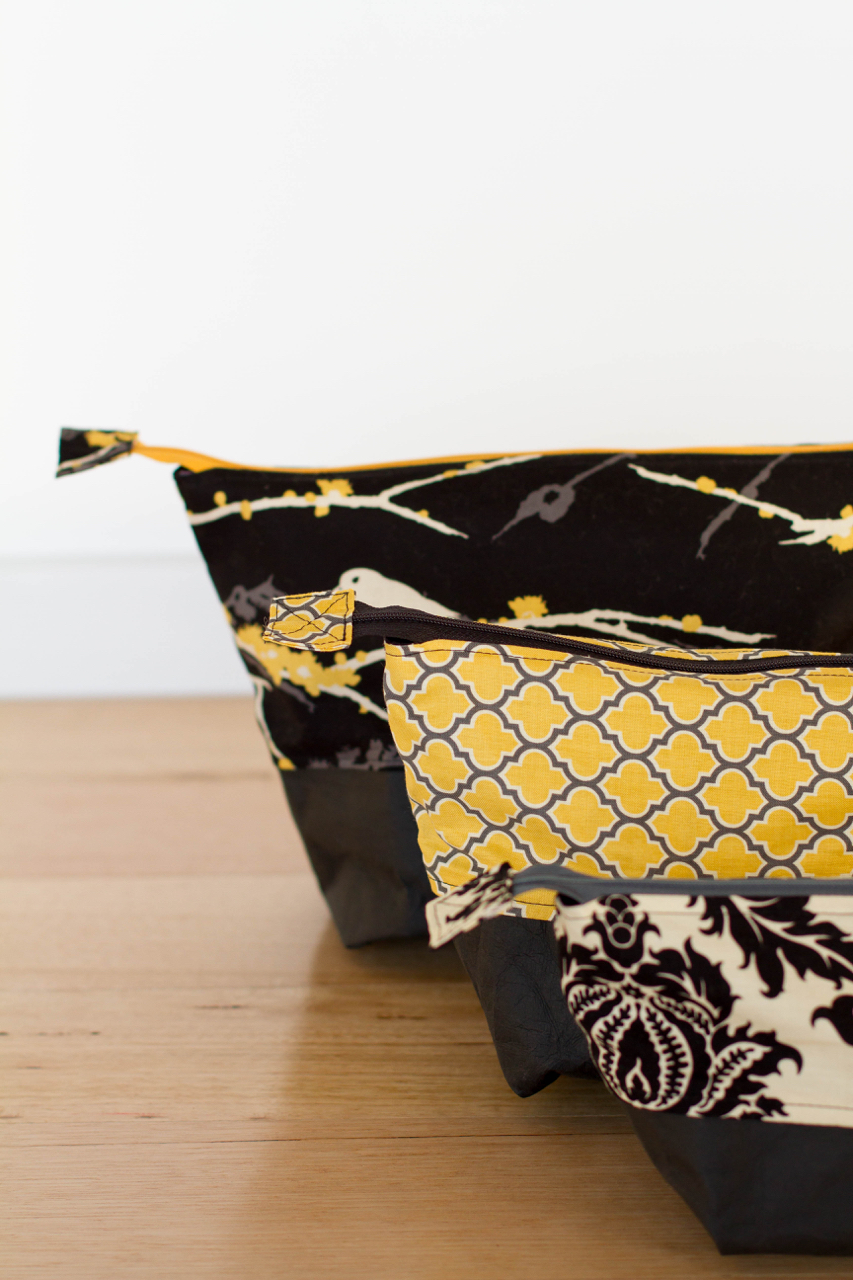
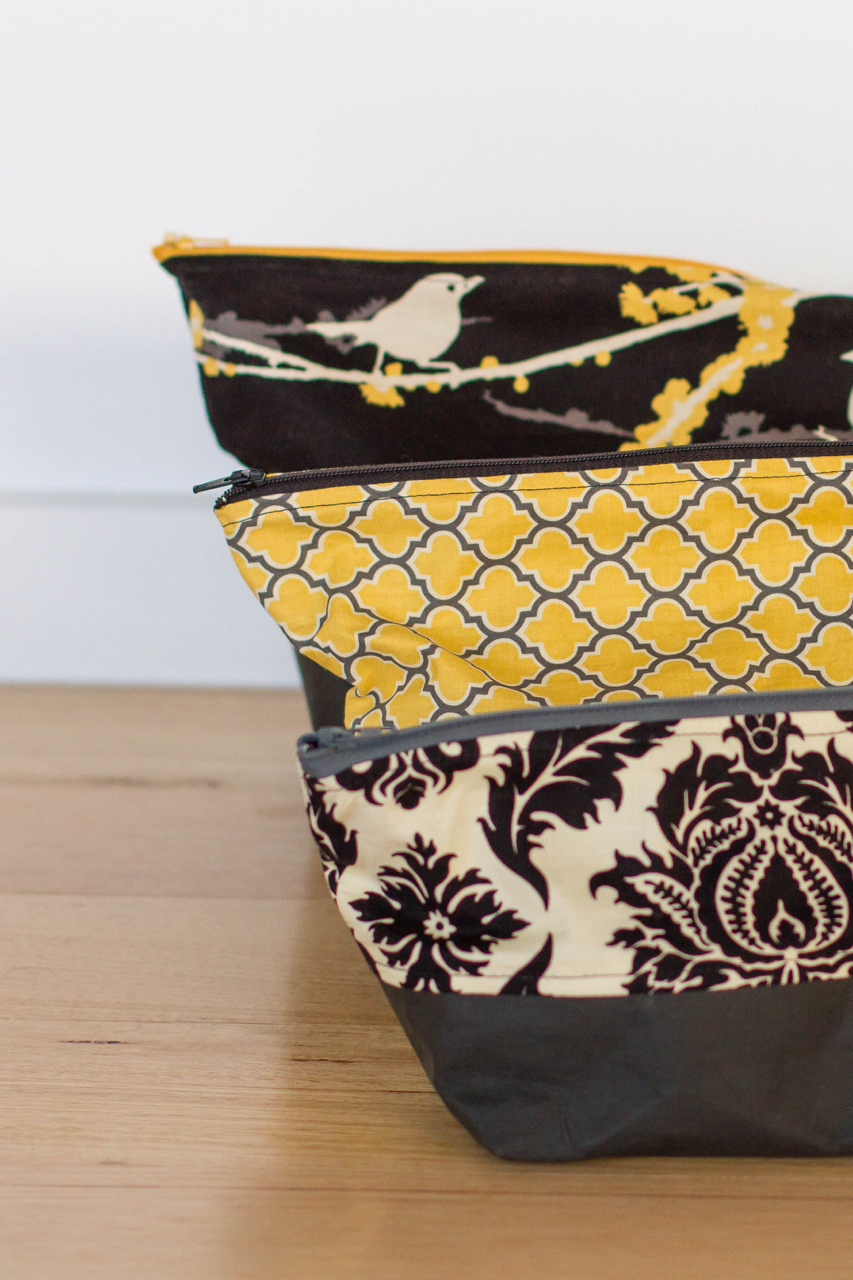
For Mother’s Day earlier this year, I made my Mother-In-Law a set of Open-Wide Zippered Pouches (free tutorial by Anna of Noodlehead). I’ve made a heap of these pouches in the past, but have only photographed one other set. I love them for last-minute gifts – hence, the reason I rarely get a chance to take photos of them finished…I’m too busy wrapping them up and rushing out the door!
My go-to base fabric for these pouches is denim – I’ve got a stash of old jeans in my sewing cupboard and they are great to cut up and give the base of the bags a sturdier finish. For this set of pouches though, I wanted to try out a new product called Kraft-tex. You can read more about it on the linked website, but basically it is a thick paper material that feels a little like leather and wears like fabric – yep, you can sew it and wash it and it gets softer and crumplier with age. I haven’t used Kraft-tex enough to have a real opinion yet, but it seems pretty cool. It starts off really stiff (like cardboard) so I scrunched it up in my hands before sewing and it softened up a bit. It is supposed to get that crumpled look to it after awhile. Kraft-tex seems to be similar to the washable paper baskets/plant holders that are trending at the moment. I bought my rolls of Kraft-tex to make some of these, but my plans diverted to the zippered pouches first! I still have a few rolls left to play around with so will eventually make some baskets. I bought my rolls of Kraft-tex here, it wasn’t available in Australia when I first purchased it but I think you should be able to find some in Australia now.
I paired the black Kraft-tex with some fabrics from Joel Dewberry’s Aviary 2 range. The black, grey, mustard and cream colour palette is modern and sophisticated and made for an easy to put-together gift that I didn’t even have to leave the house for!
The Baby Dream Bag is a baby essential to ensuring a good night’s sleep.
You will sleep soundly knowing that your baby is covered all night long without kicking off blankets and waking themselves and everyone else up.
Baby Dream bag includes a full-length zipper guard with generous chin protection ensuring that baby’s soft skin and inquisitive fingers aren’t able to access the zipper.
Night-time nappy changes are made easy by zipping the bag open from the bottom up.
By sewing your own Baby Dream Bag, you have control over how warm you want the sleeping bag to be. Whether you leave out the wadding for a summer-weight bag or make it with the warmest layers you can find, you will easily be able to customise the sleeping bag to suit your needs and climate.
This pattern includes sizes from newborn – 36 months.
Certainly not me!! I’m usually not one to go against my set plans, and this pattern was not in my 12 month pattern design plan…but I just couldn’t help myself. Too many requests from sewers out there for more boy pattens and after Uptown Girl was released I got lots of emails and requests for a similar style jacket for little boys. It just didn’t seem fair that the girls could have a stylish jacket this winter and the boys had to miss out!
So, let me present…
DOWNTOWN BOY
(yeah, yeah I know the name is a little corny…couldn’t help myself!)
Downtown Boy has been designed with trendy little boys in mind. This jacket is sure to keep your little man warm during the cooler months, it looks great worn during everyday play and can also be dressed up for going out.
Funky pockets on the front and sleeve of the jacket provide both practicality as well as masculine style.
Downtown boy can easily be made reversible with the use of a reversible zipper resulting in two cool jackets in one!
You may remember I mentioned starting on this pattern the day I went into labour with Tommy. I got heaps done that day, but then it sat on hold for the next few weeks. I actually don’t know how I managed to get it all nutted out and written up so quickly, but it all just seemed to flow came together nicely. (Or maybe I am just nutty!)
Anyways, I’m thinking this jacket is pretty cool. The boys in my household give it the thumbs up and I’ve even had my brother and brother-in-law request one in a bigger size for them to wear. I always worry when designing a pattern for boys that it is going to be too babyish and not appeal to older children, so I’m glad this one is appealing to big boys! The jacket is padded with pellon. It works really nicely, not too thick but still nice and warm. I’ve had a go using light-weight pellon (the blue jacket) and a thicker one (the brown jacket) and they both work really well depending on the warmth and look you are wanting. You could also use a home decorating weight fabric or cord and no padding for a lighter, warmer weather jacket. Downtown Boy can also be a fully reversible jacket. You just have to replace the jacket zipper with a reversible jacket zipper. Unfortunately in Australia I haven’t been able to find anywhere that sells a reversible jacket zipper – can anyone out there help? I have seen them available in America though but can’t see an online store to purchase them from. You could always go for a button closure option down the front if you aren’t comfortable with inserting a zipper, but trust me, it is not as difficult as it looks. So, if you are looking for a fun, trendy winter sewing project for your little boy, then look no further! Head over to the Make It Perfect website to see more photos and check out the fabric requirements for Downtown Boy. If you have a store and want to stock this or any other Make It Perfect patterns, contact Creative Abundance to place an order.
If you would like to purchase a copy of Downtown Boy for yourself, they should be popping up in retail stores very soon. Ask your favourite store to get one in for you! Keep checking back…I’ll get a giveaway sorted in the next few days!
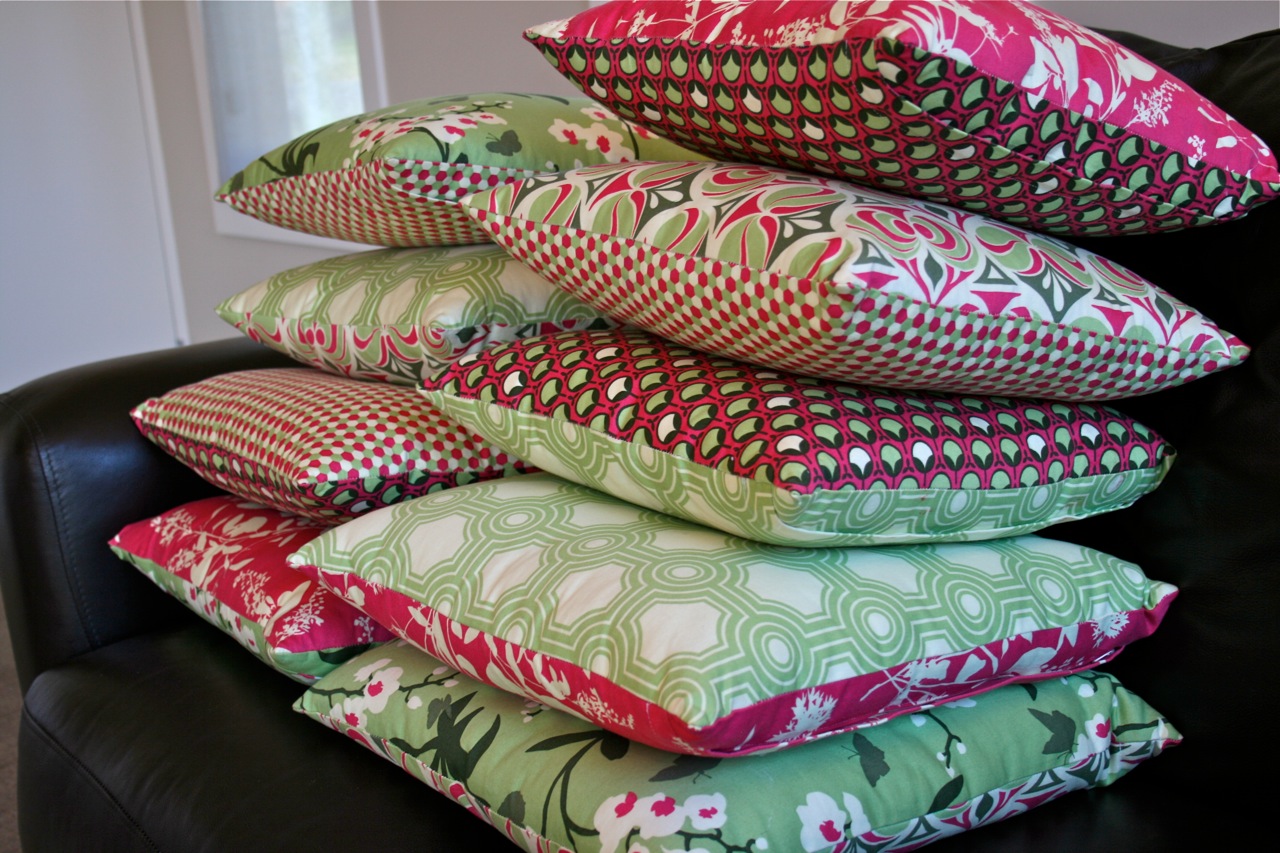
I finished these cushions in December, but am only blogging about them now because I don’t love them. I like them, and they are a nice change from the old cushion covers but something isn’t sitting right with me.
I think the problem might be the dark green colour in the fabric. although I love green, I am not a fan of a deep, forest green.
I do love that they are made out of home dec fabric though and retain a great shape and are sturdier than regular cotton covers. And I love the enclosed zipper finish – much nicer than seeing a zipper up one side seam.
But I’m still not in love with them. And you have to be in love with nine cushions that are scattered around your loungeroom all the time! So I think I’ll keep them out for another few months and in the meantime start hunting for the perfect fabric to make new covers with!
Just another project to add to my list of things to do… And what to do with the old covers??!
SUPPLIES: Joel Dewberry, assorted prints from the Ginseng range (home decor weight fabric)
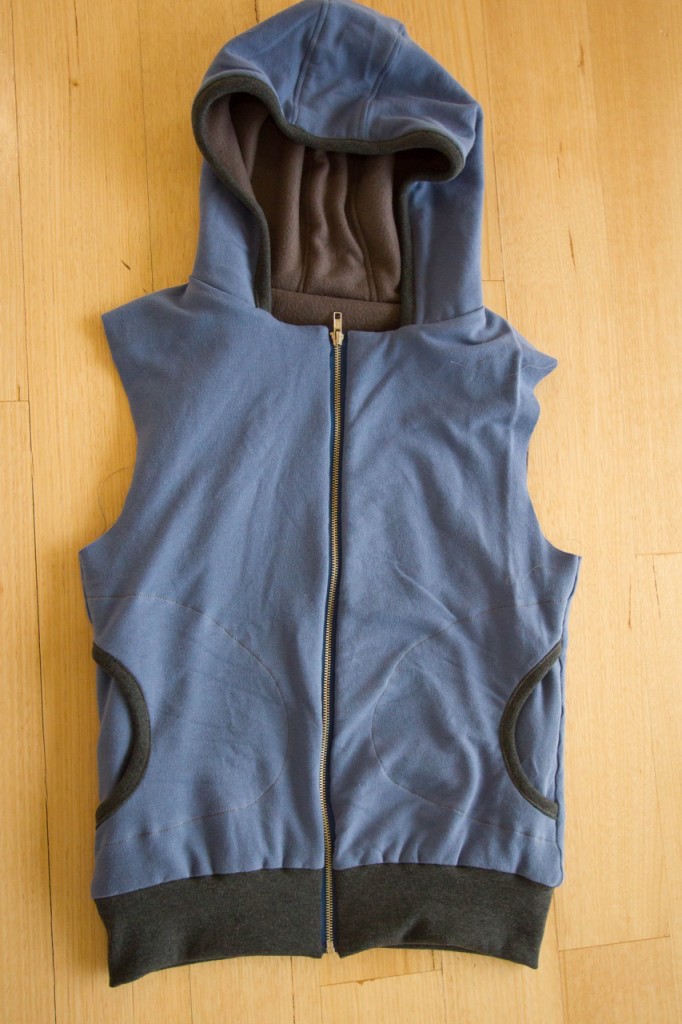
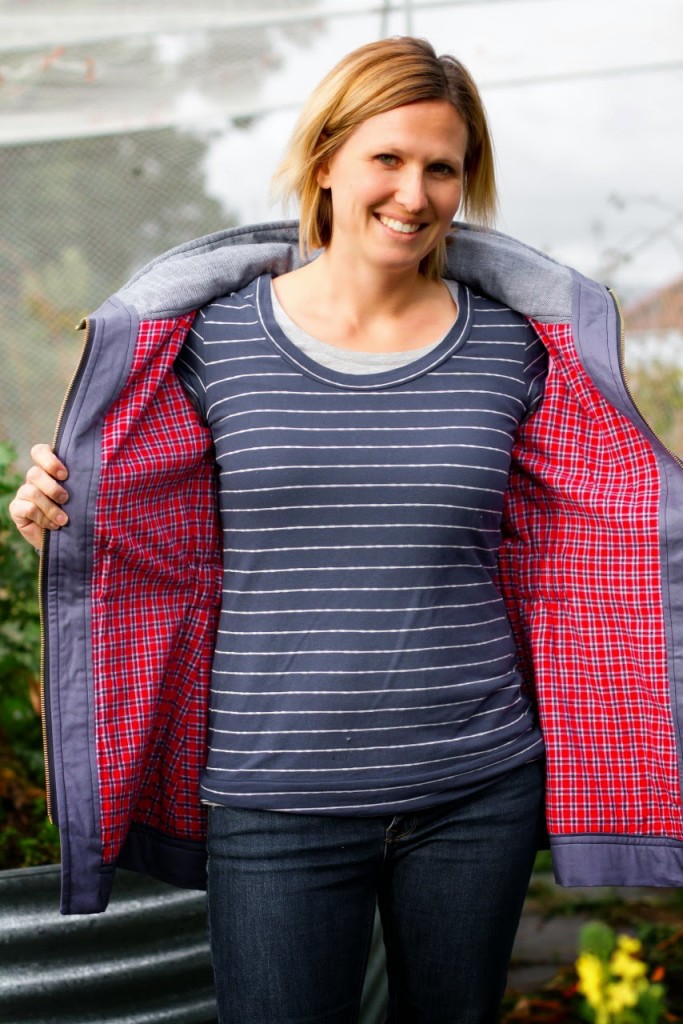
I’m back with another version of the Women’s Hero Vest. This is the one that I made for the Concealed Zipper Tutorial and it is the first one I have shared on the blog that is made using solid fabric.
For the exterior of this vest I have used a mid-blue french terry knit. I’m terrible at remembering where I sourced knit fabrics from (unless they have a selvedge with printed information on them!) so I can’t tell you where I bought this one from. I can tell you that it is one of my favourite french terry knits though. Really good amount of stretch and recovery, it holds it’s shape and doesn’t pill after many washes (I’ve also made myself a pair of trackies from this fabric so it has been put to the test! And I promise not to wear the trackies and vest at the same time…) The knit is also nice and thick which makes this Women’s Hero Vest even warmer. I used a grey polar fleece for the lining and a European charcoal ribbing for the waistband and all of the binding.
The fabrics combined together make a really comfortable and warm vest. I love making my kid’s Hero Vests with knit fabrics because they feel so much cosier, and this one really is super soft and cosy to wear.
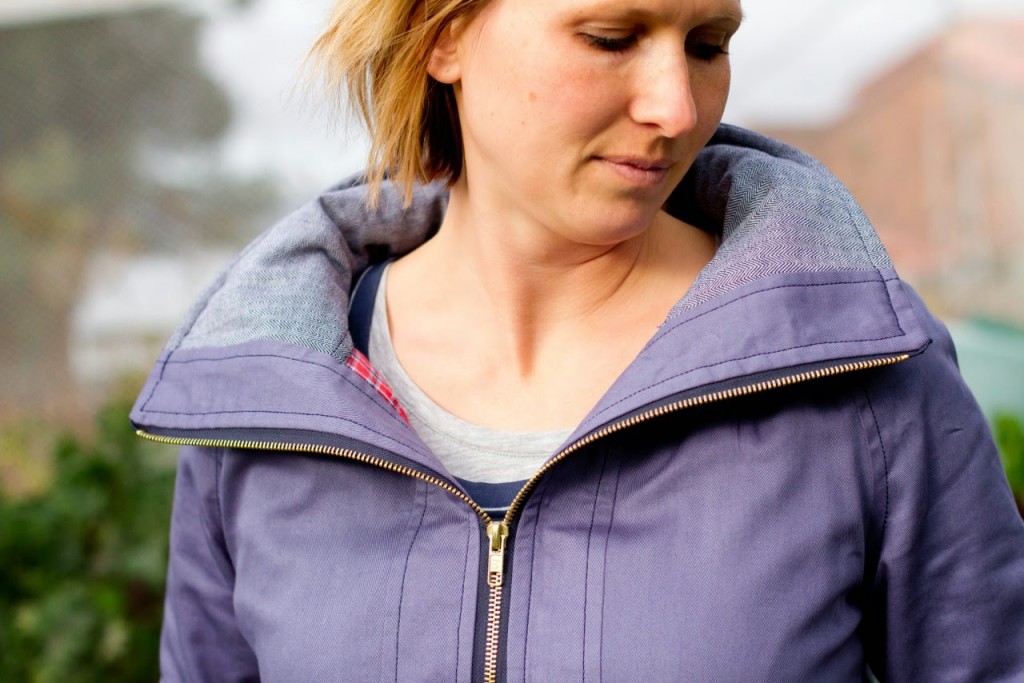
If you want to check out how the concealed zipper looks and works in more details, then make sure you take a good look at the inside of the vest in these photos. It is a really neat and professional finish and means that you can wear your vest unzipped without seeing any exposed seams. I used a metal zipper on this vest too and once again, the weight of the metal really does help the front of the vest sit flatter than a plastic zipper.
Not sure what else to say about this one that hasn’t been said before! Has anyone made a Women’s Hero Vest yet? If you have, pop into our Facebook Sharing Group and share a picture or feel free to email me one yourself!
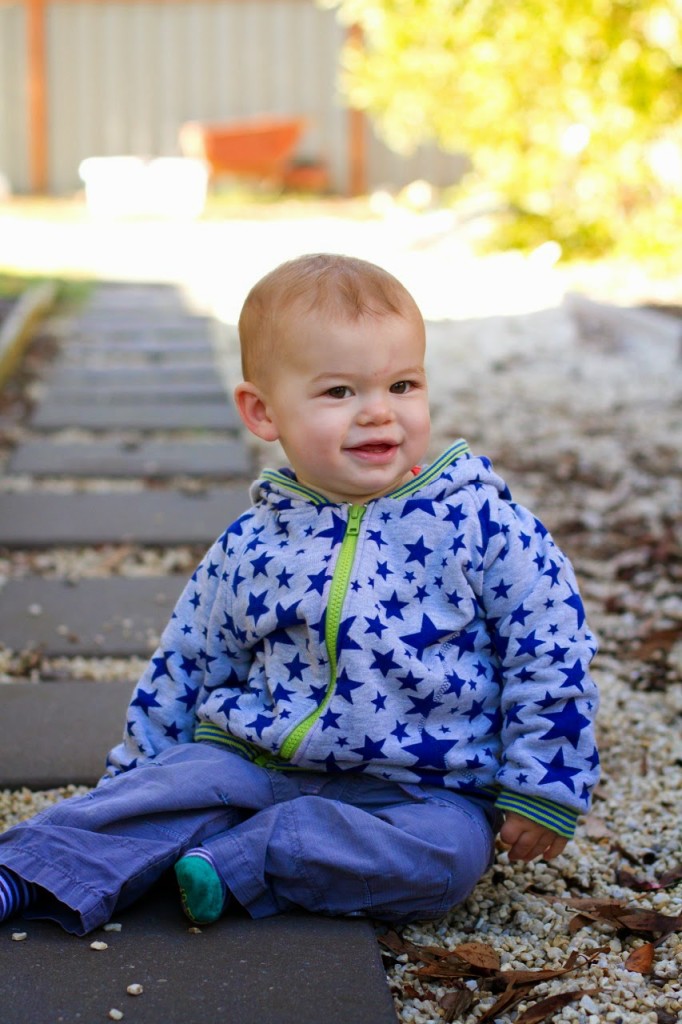
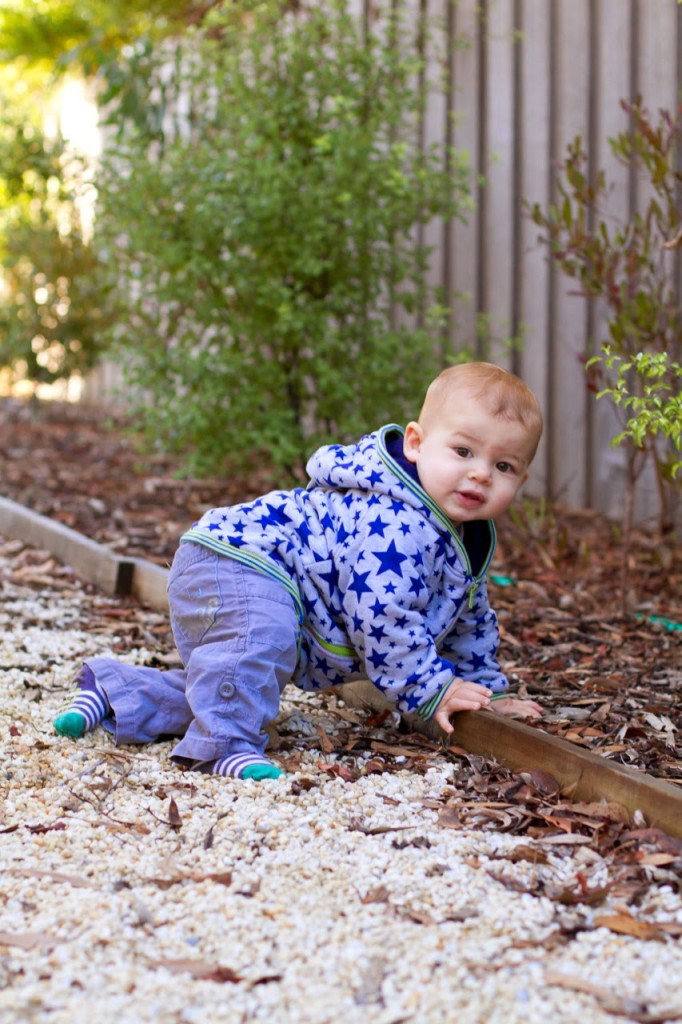
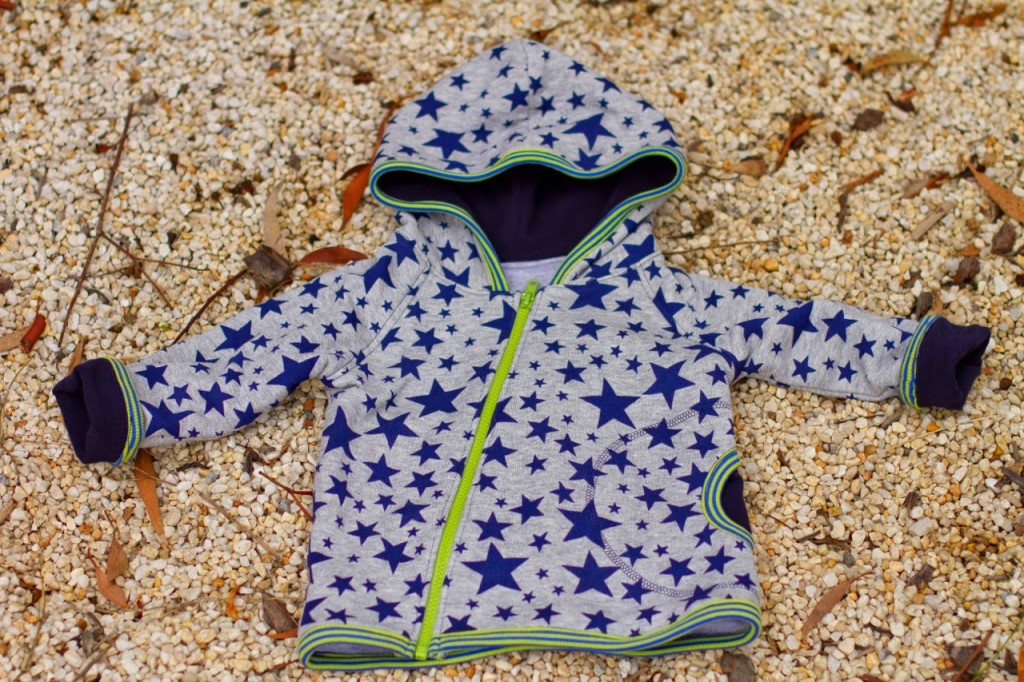
I’ve mentioned before how much I like to sew cold weather clothing, especially for the kids, and this jacket is no exception. It is extra warm, and soft and snuggly.
I purchased this star-print french terry lycra from Miss Matatabi at the beginning of the year with no plans for it’s life (all sold out, but a few other prints here.) I tend to do that when I see a boy-friendly fabric – especially one that will work well for all ages. They can be hard to come by so I like to stock up the stash when I find them.
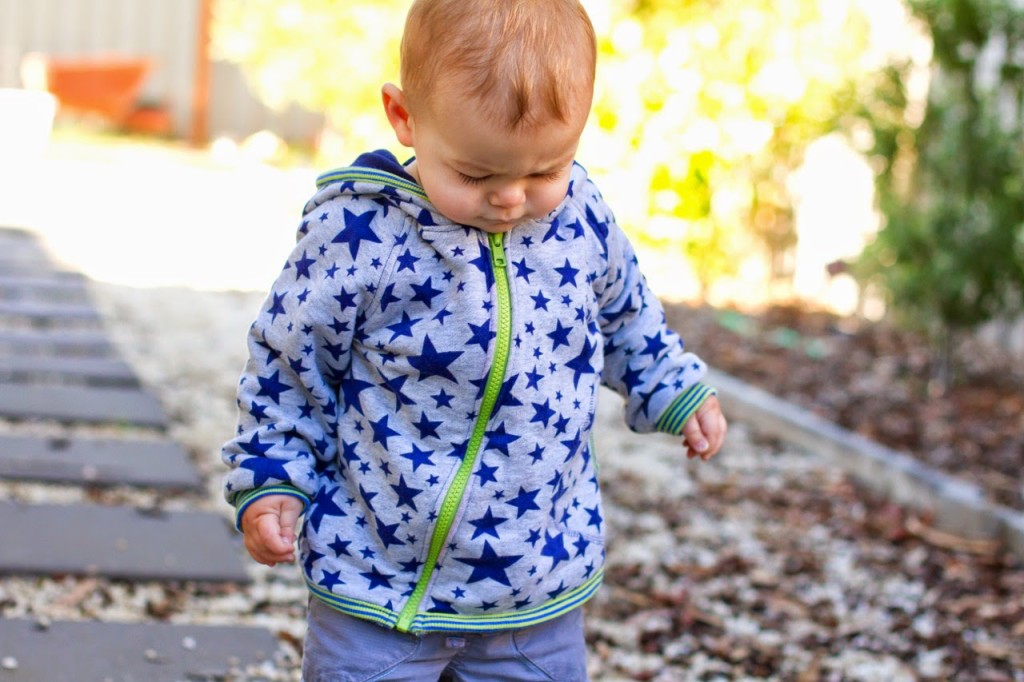
Then soccer season started and we found ourselves out in the cold on Saturday mornings and Thursday afternoons and Harvey had no jackets that fit him anymore. I still carry him in the ErgoBaby a lot, so knew that a jacket made from a knit fabric would be a lot more comfortable that one made from layers of quilt cotton and batting.
I sized it up so that the jacket could be layered over other clothing and with the hopes that it will still fit for next winter too. It certainly is roomy now, but I think that adds to the snuggly charm.
So, the pattern…from Ottobre of course! From issue 4/2013: Stardust Hooded Jacket with Diagonal Zipper. I loved the quirky feature of the diagonal zipper down the front and the only zipper I had that kind of matched was this bright green one, but it’s fun and adds a pop of colour to a dreary day! There is one circular pocket on the side too which is pretty cool. The only thing I did differently was to add sleeve cuffs instead of binding on the sleeve hems. The sleeves were extra long with the intention of being rolled back, but I didn’t like the thick band of navy blue showing so I cut a bit off the sleeve hems and cuffed them with the ribbing instead. The sleeves were quite wide to start with also, but the cuffs tighten them up a bit and keep his arms warmer too. You can see the original sleeves in the photo below:
The jacket is lined with a soft navy blue jersey and bound with some bright Hilco ribbing. I did have to shorten the zipper, which was much more difficult to do than I imagined, but we got there in the end!
Harvey used to hate wearing hoods, but now when we put them on his head he giggles and moves his eyes upwards trying to look at it! So no more cold baby winter head! He’s cute, isn’t he? And now he is warm too.
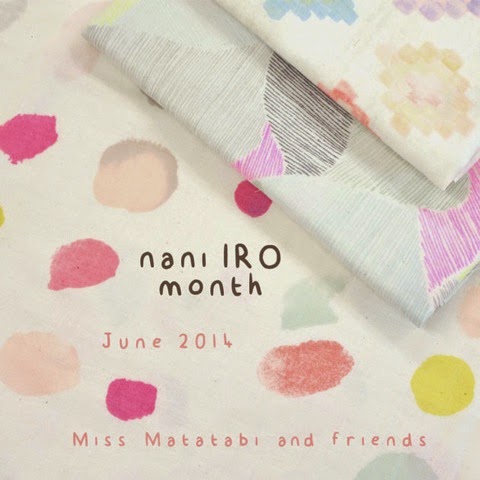
{While I’m on the subject of Miss Matatabi (I know I harp on about her all the time, but her store is great – and so is she!)…did you hear about the month of June being Nani IRO month? Well it is, you can read more about it on her blog here and tomorrow I’ll be back to share one of my Nani IRO projects as part of the Miss Matatabi and Friend’s team!}
(Taking a little break from the Pattern Parade today, there are only a few days unscheduled during the month…I kept Sundays free so that I’m not trying to link up blog posts before church and today is the only other free day so I’m making the most of it and sharing my latest finished sewing project…)
I’m in the middle of writing up a new pattern at the moment and have lost my momentum. I am *this* close to finishing, but just can’t find the last little push to get to the end. I know from previous experience that the best way out of this rut is to set the pattern aside and treat myself by spending some time sewing something “just for fun”and I had no difficulty settling on which project to tackle next.
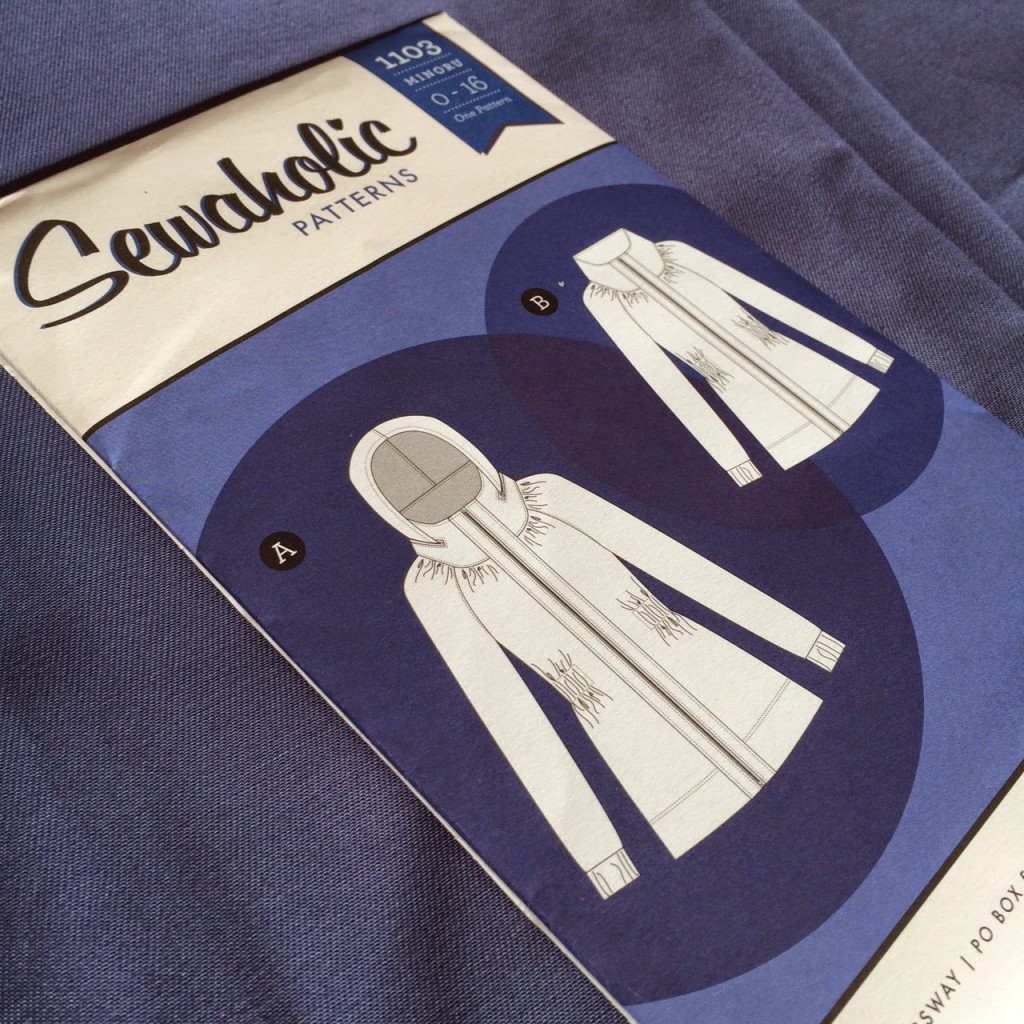
The Minoru Jacket from Sewaholic Patterns has been on the top of my list of things to sew for awhile now. And as every day is geting a bit colder I have been wanting to sew it NOW so that I can get as much wear out of it during winter as I can.
I posted this photo on Instagram on Monday morning and finished the jacket 3 days later. I only sew when Harvey is napping during the day and then when the kids are in bed at night so there were a few late nights thrown in there but I was on a roll and determined to get it finished quickly! I always get the “how do you find the time?” and “you must have more hours in the day than me” comments, but really…if you saw the state of my house (and the dark circles under my eyes) as I was snipping that final stray thread you would totally understand how I managed to squeeze in such a time consuming project!! Once I’ve started on a new sewing project I find it hard to set it aside and do anything else until it is finished – just like reading a good book! I knew that this jacket was going to be a time consuming sew and I did a lot of research based on other people’s experiences and variations before diving into it myself. After lots of reading I decided not to make too many changes to the original pattern and let this be the guinea pig to see what I did/didn’t like. My measurements fell into a size 6 so that is what I sewed and the fit is perfect. I was really hoping that the jacket wouldn’t end up too big because jackets have a tendency to make you look bulkier than you are but am really happy with the fit. (And I was too lazy to make a muslin so just crossed my fingers that it would all work out!)
So, the construction of the pattern was really good, everything came together without any hitches. If you are going to sew a Minoru, I would suggest visiting the Sewaholic blog for the Minoru sew-along. The paper instructions included with the pattern are VERY brief and I would have been stuck more than once if I didn’t have the sew-along to refer to. The sew-along is really thorough though and I think even a confident beginner sewer would manage with the detailed instructions included there. Personally I would have preferred more thorough instructions on the paper because it was a bit annoying having to go back to my phone or ipad for each step, but nothing worth complaining about.
Fabric…deciding on what fabric to use for the jacket probably took me longer than actually sewing it! I always find it hard to make a decision when there are a lot of different fabrics to decide upon! I started with the exterior and went with this cotton twill. In my photos the fabric looks a purpley blue but it is actually isn’t purple toned in real life. The image on fabric.com is closer to what it is like in real life. When I first got the fabric I thought that it was going to be too thin/flimsy for the jacket exterior but once I got all the layers sewn together it was fine. Even though most people seem to make this jacket as a lightweight Spring/Autumn jacket I wanted mine to be really warm because I am more likely to wear a jacket every day in Winter than any other time. When it came to the jacket lining I made myself select from my fabric stash. I wanted to use flannelette as the lining and really liked how this red tartan looked with the exterior but didn’t want it to be too visible from the outside because it would limit what I could wear the jacket with. So I lined the front and back pieces with the tartan flannel and then used some of this herringbone print chambray for the collar and hood lining that could be seen from the outside of the jacket.
And then there is my secret ingredient…green alien interlining! I almost don’t want to tell you about this because I’m sure that every time you see the jacket now you will be thinking about little aliens – haha! For even MORE warmth I put a layer of this flanellette (which is actually a cot sheet I’ve never used!) in between the exterior and lining of the jacket. I cut all of the lining pieces out of this flannel and pinned it to the jacket lining and worked with them as one piece of fabric. I made sure that the aliens couldn’t be seen through the exterior or lining fabrics (now that would be annoying!) but they were both thick and dark enough that nothing showed through. The result is a jacket that is really warm, but not too thick or bulky. For the sleeves, I lined them with some silky lining fabric that I cut out of an old ball skirt that is bright pink! A bit crazy, but you don’t notice it unless you are the one wearing the jacket. It was all I had on hand and I knew that I would appreciate a slippery sleeve to make putting it on much easier.
I love the length of the jacket, I think it’s really practical for cold weather. Also, the cinched waist is awesome – so flattering in what could be an otherwise drab-looking jacket.
I also love the elastic in the sleeve cuffs, I actually cut mine 1 1/2″ shorter than specified (I think 8″) because it seemed a bit loose with the specified amount and I wanted to make sure mine were much more fitted. The sleeve length is a bit longer than usual, I really like that (again, extra warm!) but thought that if the cuff was tighter they wouldn’t hang too low and annoy me. I left out all of the interior pockets because I know I will never use them, but I did add in some side seam pockets because I am always stashing my keys in pockets and like to have somewhere to keep my hands too. I placed these pockets 1 1/2″ down from the bottom edge of the elastic, but I think they would be better just 1/2″ down. I opted to line my hood because I think it looks more finished that way. The jacket is designed with a zipper in the back of the collar which the hood comes out of and then you have the option of rolling the hood up and storing it in the collar when you don’t want it to be seen. It’s a nice idea if you are actually going to use this feature, but I like the look of a hood hanging out even though I will rarely wear the hood and will never put it in the collar. I think mine is a bit too bulky being 3 layers of fabric anyway and makes the collar really puffy when it is rolled inside. If I had realised how prominent this zipper would be when the hood is being worn I would have taken more care to purchase a matching zipper, instead I didn’t buy one but just used one that I had in my zipper collection and light blue was the closest match. It really does stand out when the hood is being worn and if I was to sew the jacket again I would leave the zipper out completely and just attach the hood behind the collar. This would save a lot of time and still have the same look. The thing that I really found strange with the pattern (unless I did something wrong?) is that the inside of the collar (seen through the zipper) is unlined. My collar had the green alien interlining so if the zippered opening opened too much or flopped down a little bit then you could really see them – very annoying! I spent about an hour at the end of the project hand sewing the hood to the zippered opening so now I can’t use the zipper at all but at least the alien fabric is hidden! Good to remember for next time anyway…if you don’t think you will ever roll your hood up and hide it in the collar then skip the zipper. I really like the feature of the big collar, but would probably cut it an inch or so shorter if I made it again. It is nice but the ends of the zipper kept poking Harvey in the eye when I was carrying him around! When the jacket is completely zipped up, it makes a fun game of peek-a-boo with the baby! Oh, and would be handy for a really windy day…
(You can see how the collar zipper sometimes rolls opened in this photo…another reason I would leave it out – or at least use a coordinating colour!)
If I were to make another one, I think I would like to try a heavier exterior fabric – maybe a denim or some wool coating with no interlining. I have seen a few Minoru’s with elbow patches that were pretty cool too… Phew! This is getting really long…hopefully it will be helpful to you if you are thinking about sewing a Minoru though? I know I appreciated reading other people’s reviews, particularly because it is such a time-consuming sew and it’s good to learn from other’s experiences. All in all, great pattern and awesome jacket for everyday wear!
Mama’s and grandmothers of boys…I’ve got a new boy pattern for you today! I know how tricky it can be so sew for boys (especially for older ones) and I hope my newest pattern will put a smile on your face!
I don’t know about you, but I have such gratitude for my children’s school teachers. We have been so blessed to have an amazing bunch of school teachers again this year and it is always sad to say goodbye to them at the end of the school year.
I was super organised this year and started the teacher presents about a month before they were due to be gifted. Which was a good thing because all the kids came down sick during the last week of school and even missed out on a lot of the end of year fun at school so I wouldn’t have had time to put anything creative together.
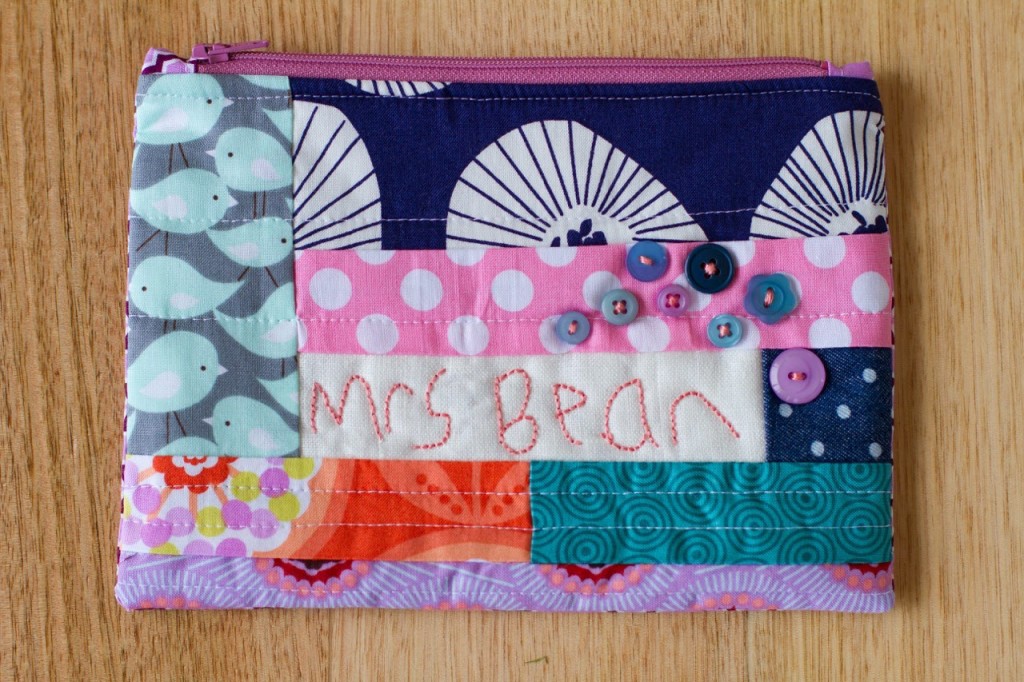
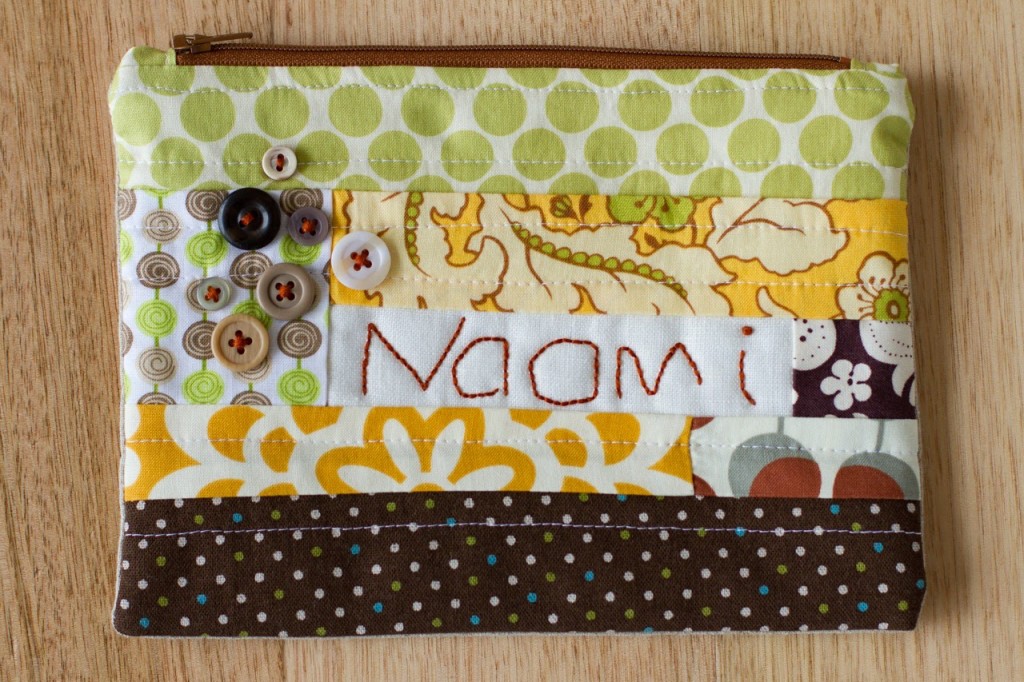
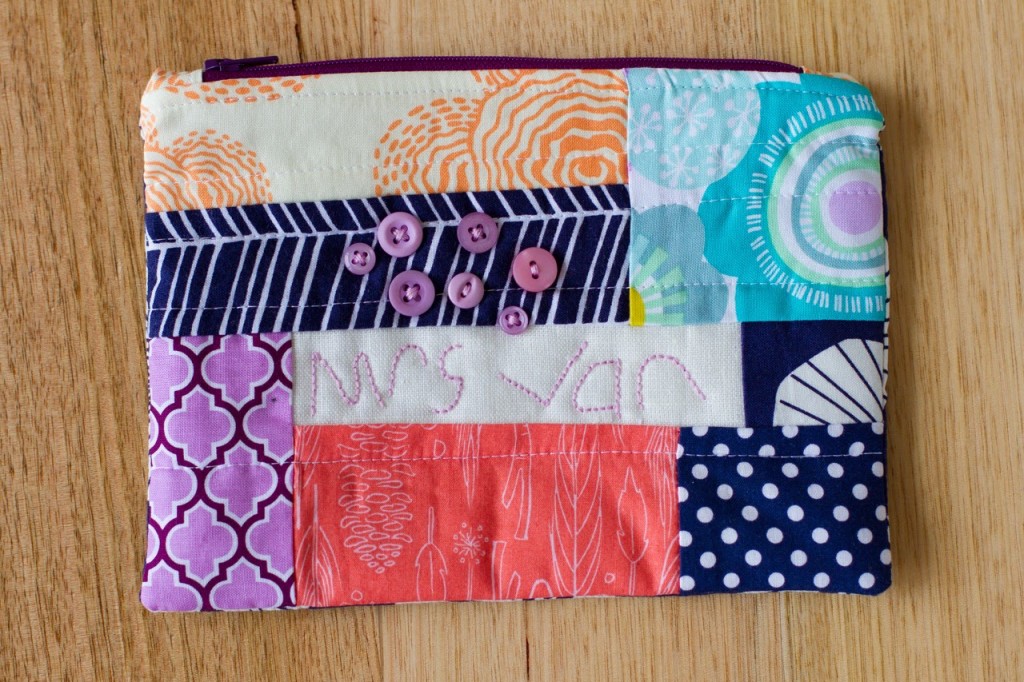
When I have made personalised zippered pencil cases for the teachers in thepast, they have been thrilled. The kids wrote their teachers names for me again, which traced using a water erasable pen and then embroidered.
(I love Tommy’s backwards “c”)
It’s been awhile since I last had a good dig through my fabric scrap bin, I had forgotten about some of the pretties in there! As usual, I used my zippered pouch tutorial for these.
And hip, hip horray! We are on Summer holidays. Such a good feeling to know that there is no morning rush or school drop off/pick up to time Harvey’s naps around. I love the Summer holidays and this year we have a very special surprise planned for the kids that they don’t know about yet, but will find out on Christmas day! It’s gonna be fun!


 Here is a close-up shot of the waistband attached to the bottom edge of the exterior vest.
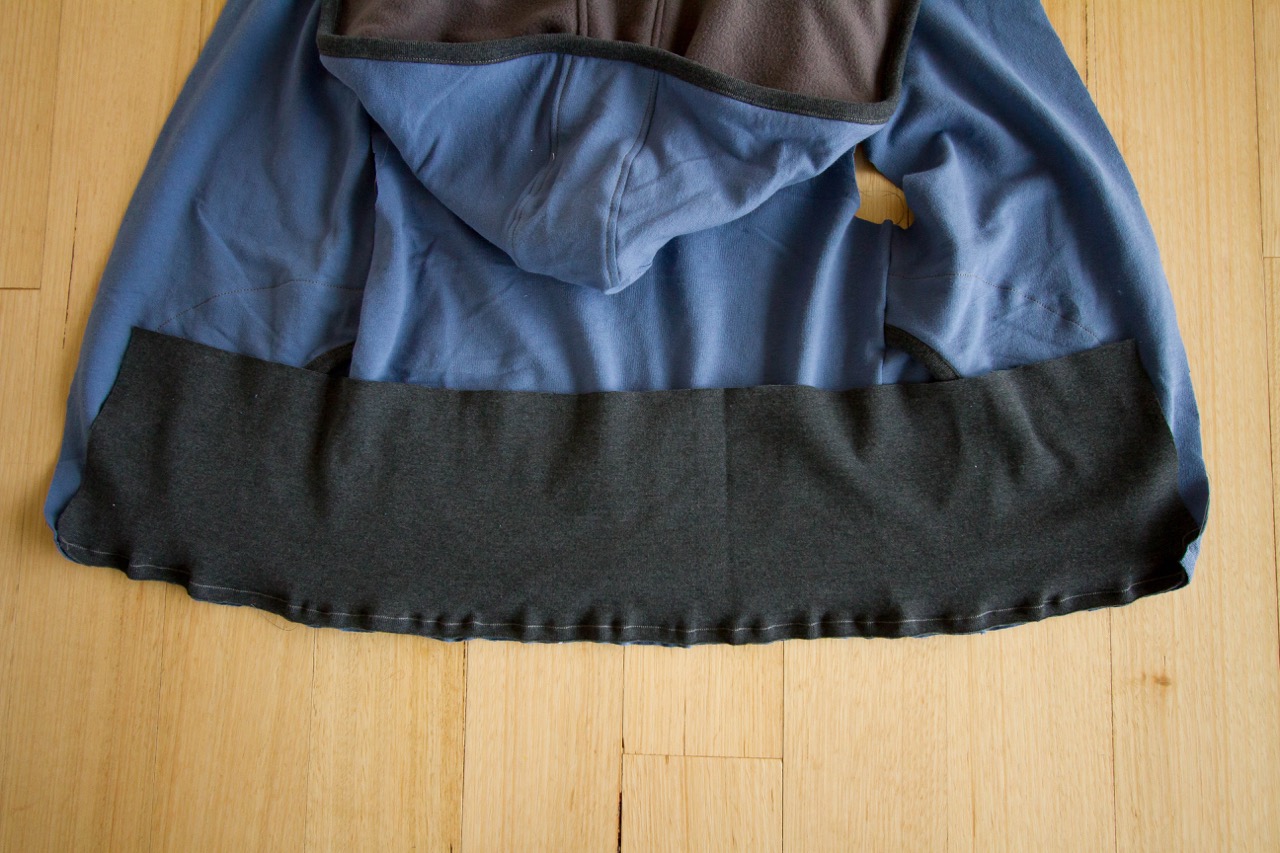
 Turn your vest right sides out and this is what it looks like from the lining side:
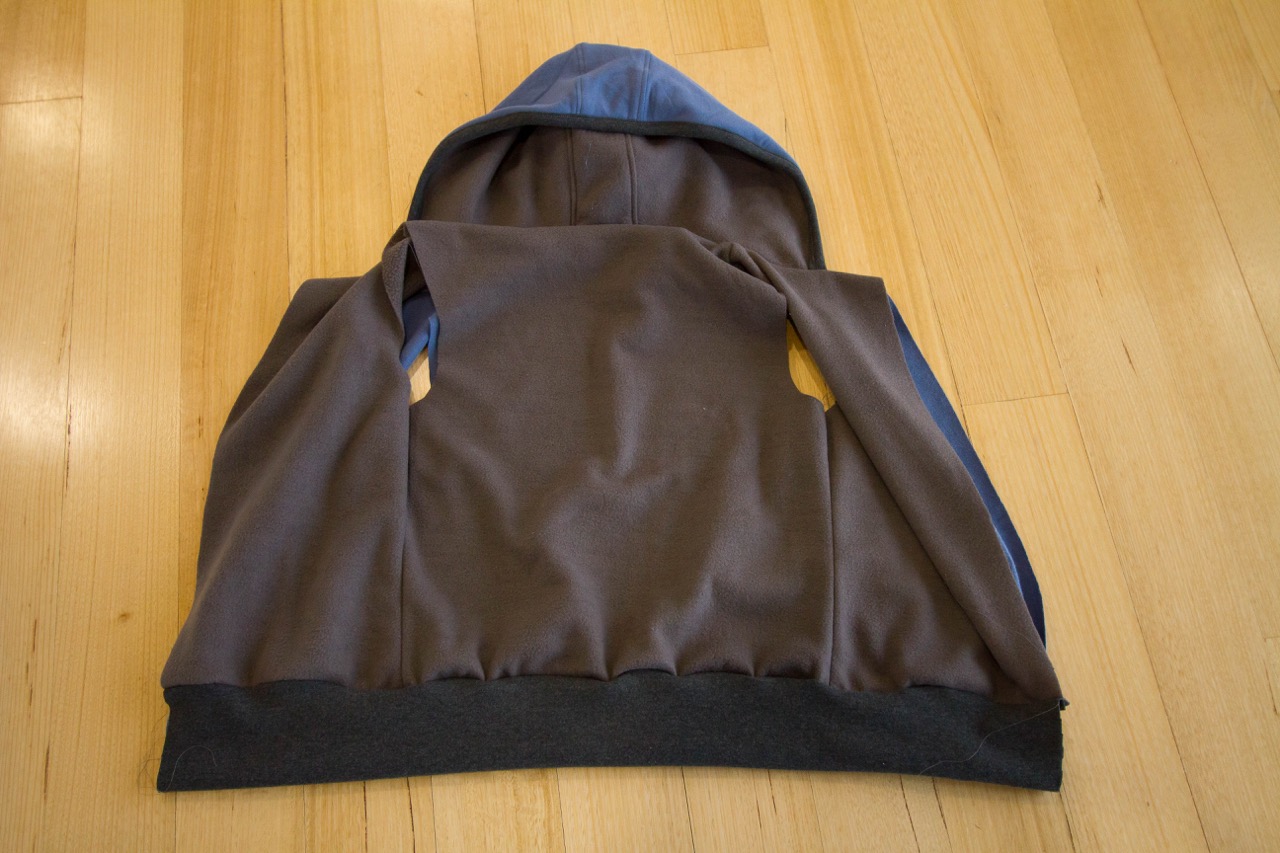


 Pin the top of your zipper to the top of the front edges of the vest. This helps you to know which side of the zipper is attached to which side of the vest when you go to insert it. (You can see how the top edge of the zipper tape is folded back and sewn down in the photo below.) Open up your zipper completely, leaving the two sides pinned to the vest, and turn your vest inside out again.
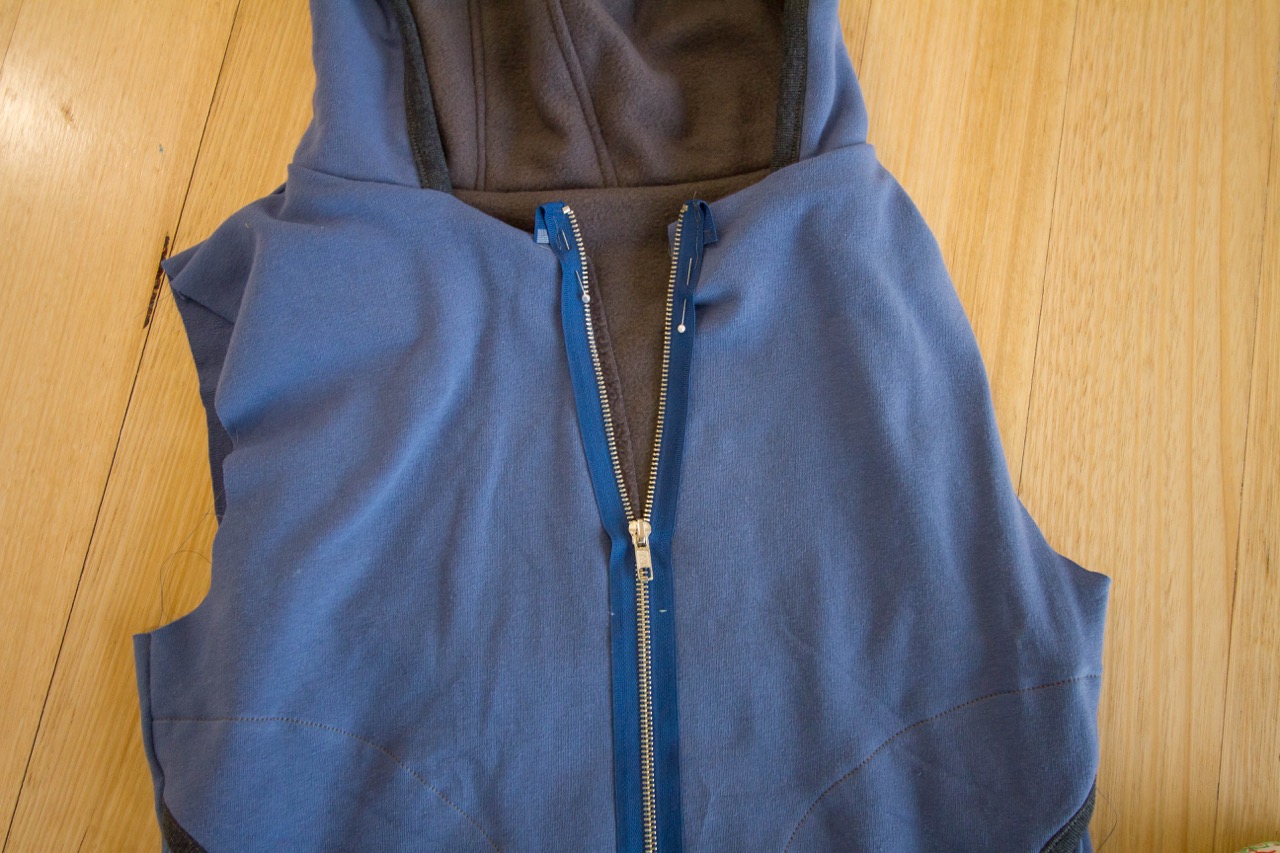

 Turn your vest right sides out (again!) and you will see one side of your zipper is sewn in! This next step is also really important, I didn’t do it on my first vest and ended up with the seam between my waistband and vest sitting higher on one side than the other. And you don’t want it all wonky-looking!
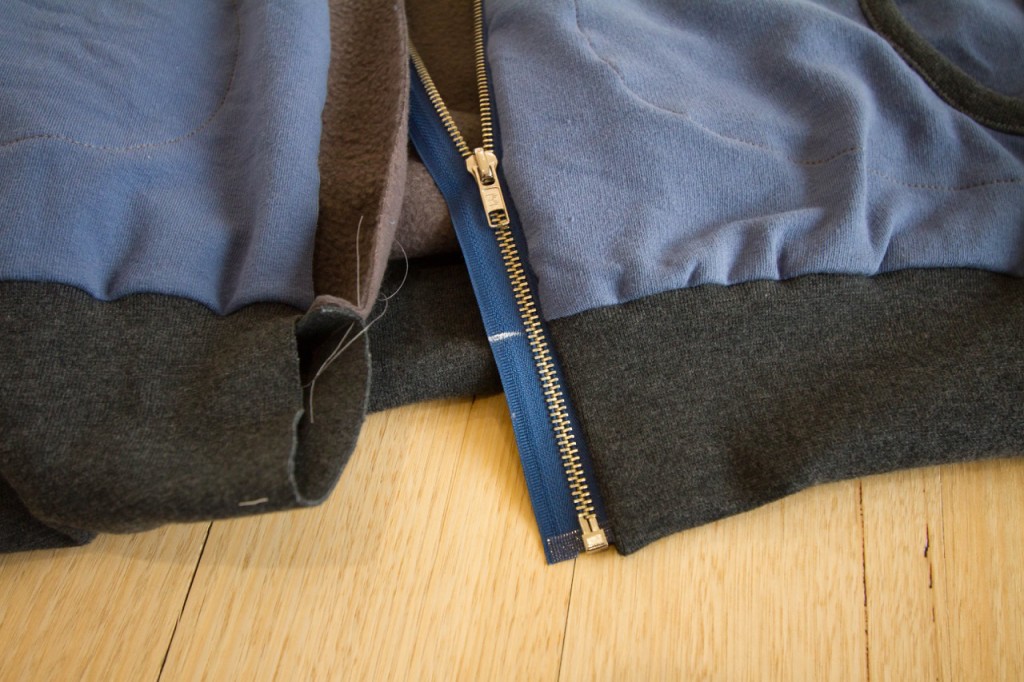 Follow the same instructions as above to find the fold in the bottom of your waistband and mark with a pin.
 Look at the inside of your vest and, ta-da! A completely concealed zipper!


