Make It Perfect, Raglan Twist Top

.Raglan Twist Tops in french terry.

raglan-twist-top-2 raglan-twist-top-11raglan-twist-top-9 raglan-twist-top-5raglan-twist-top-4raglan-twist-top-6 raglan-twist-top-7I have a couple more Raglan Twist Tops to share with you today! And this isn’t the end of it…I’ve got 10 hanging in my wardrobe! 

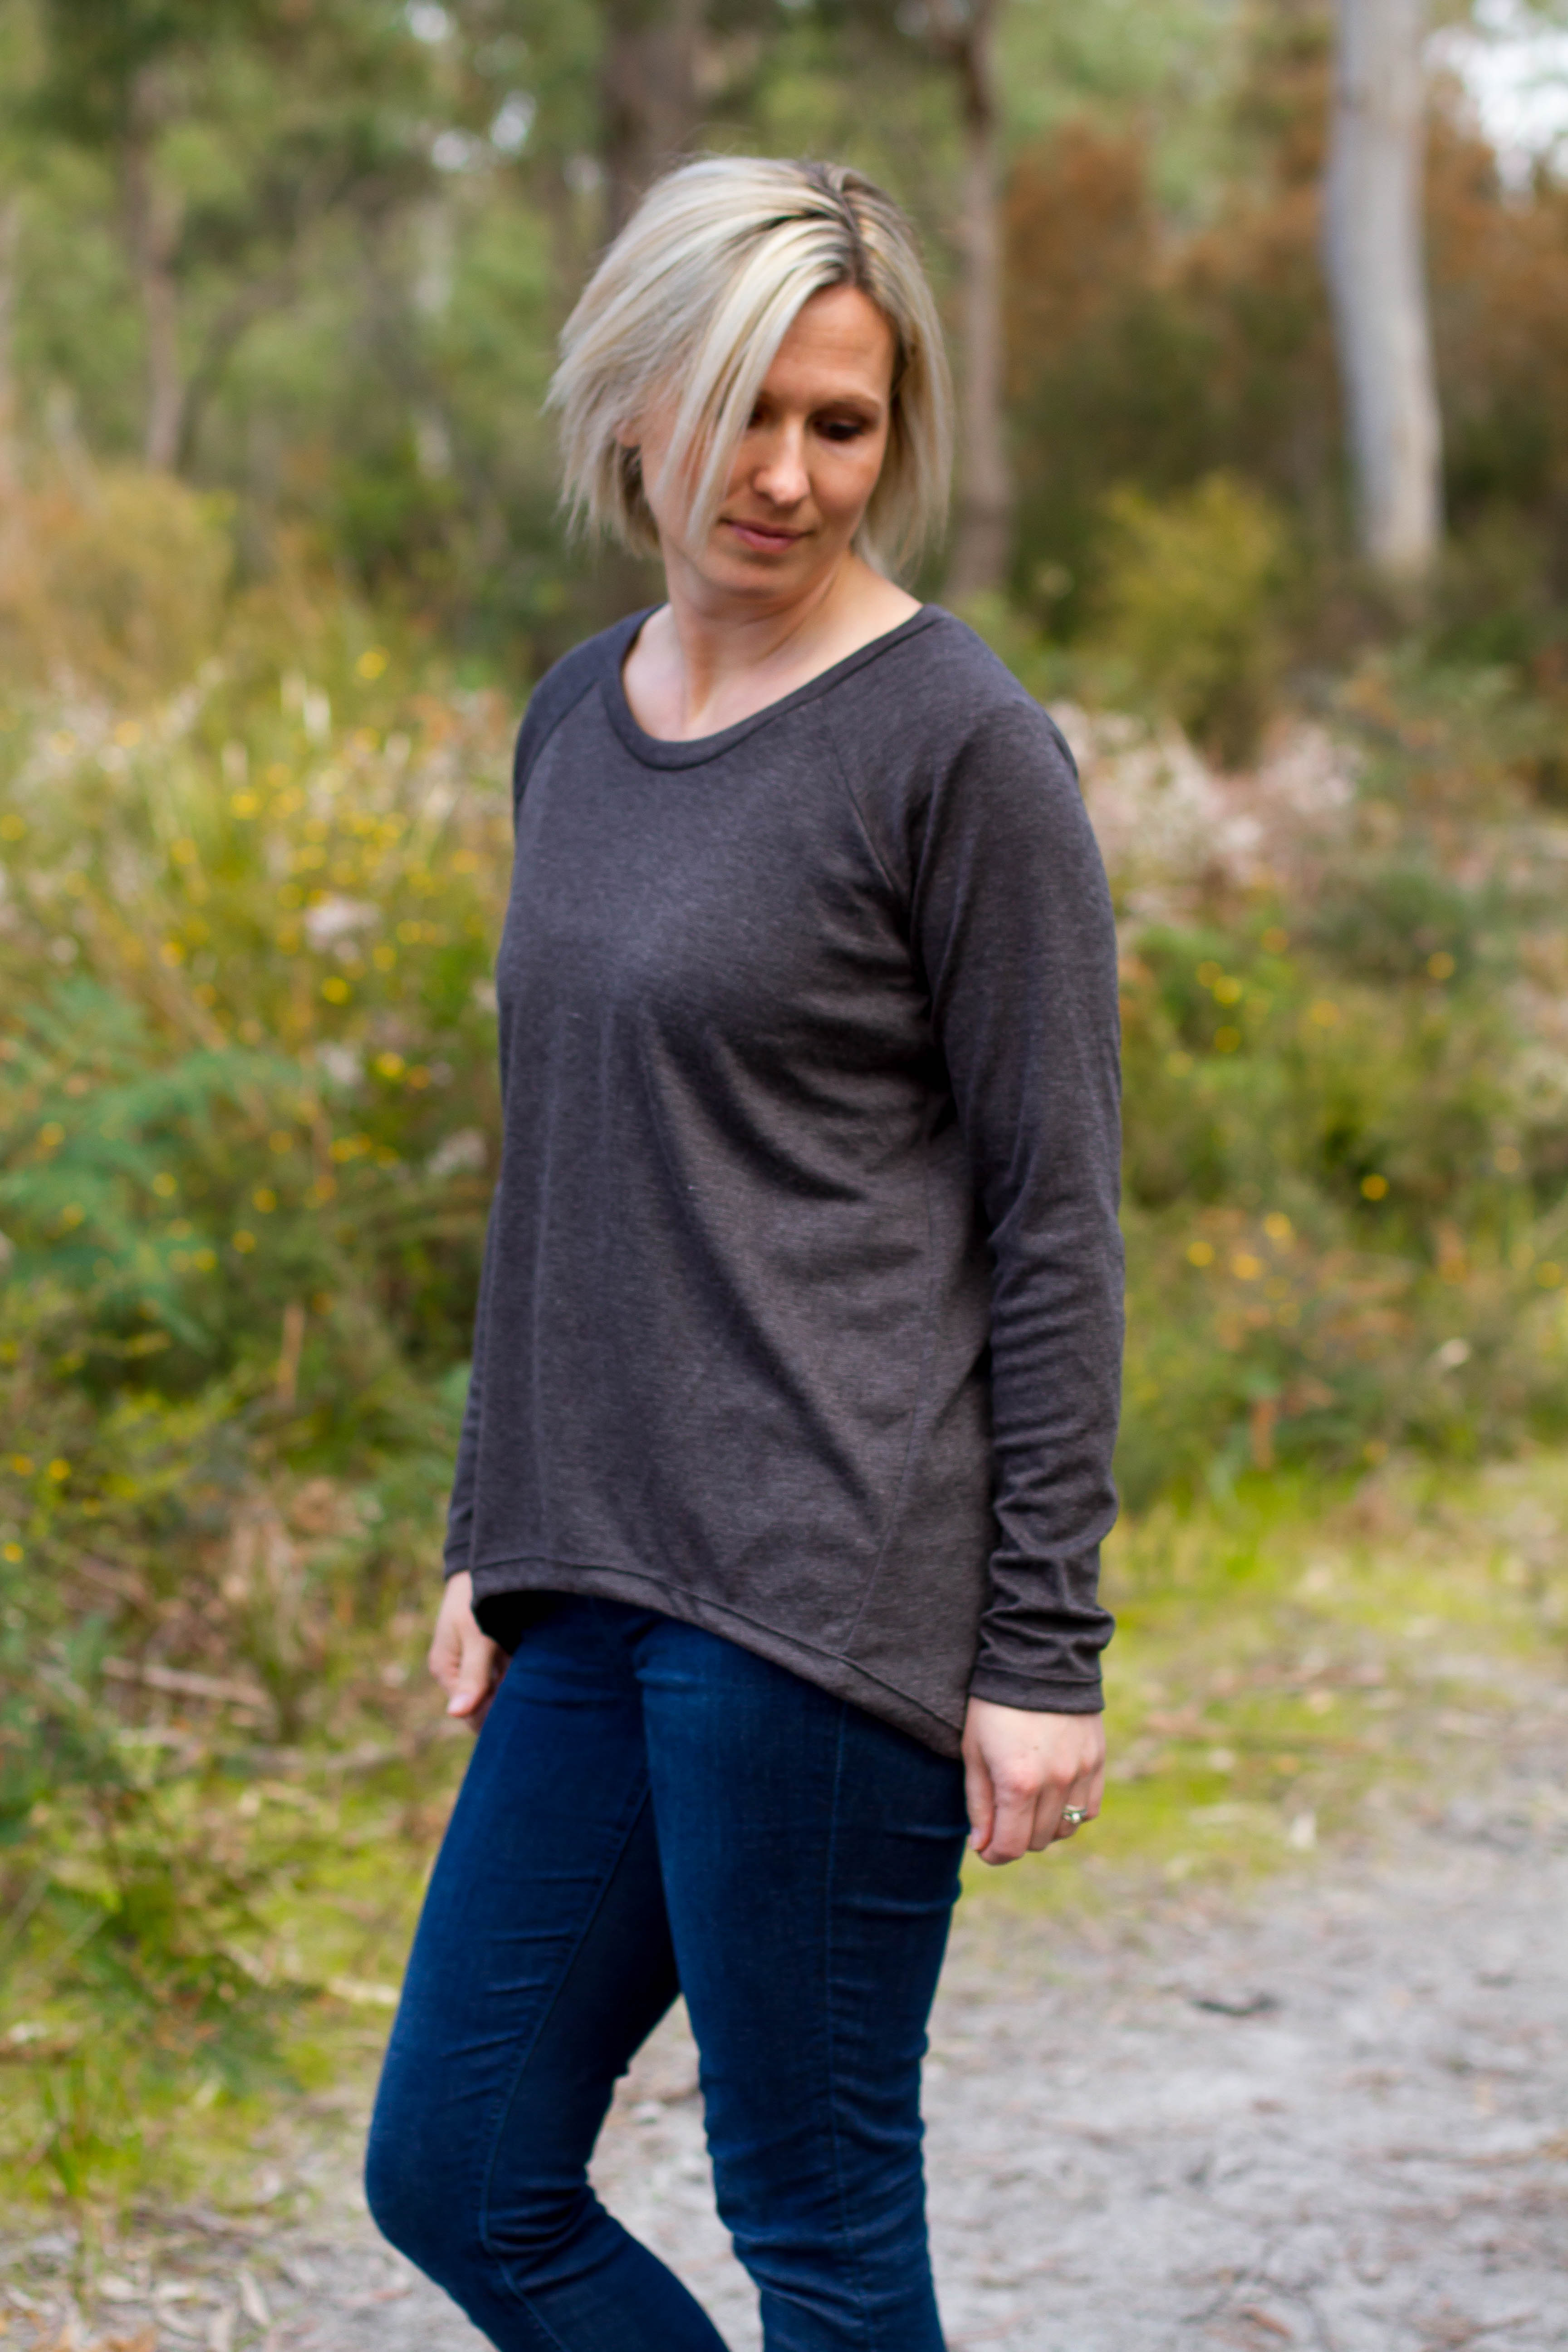
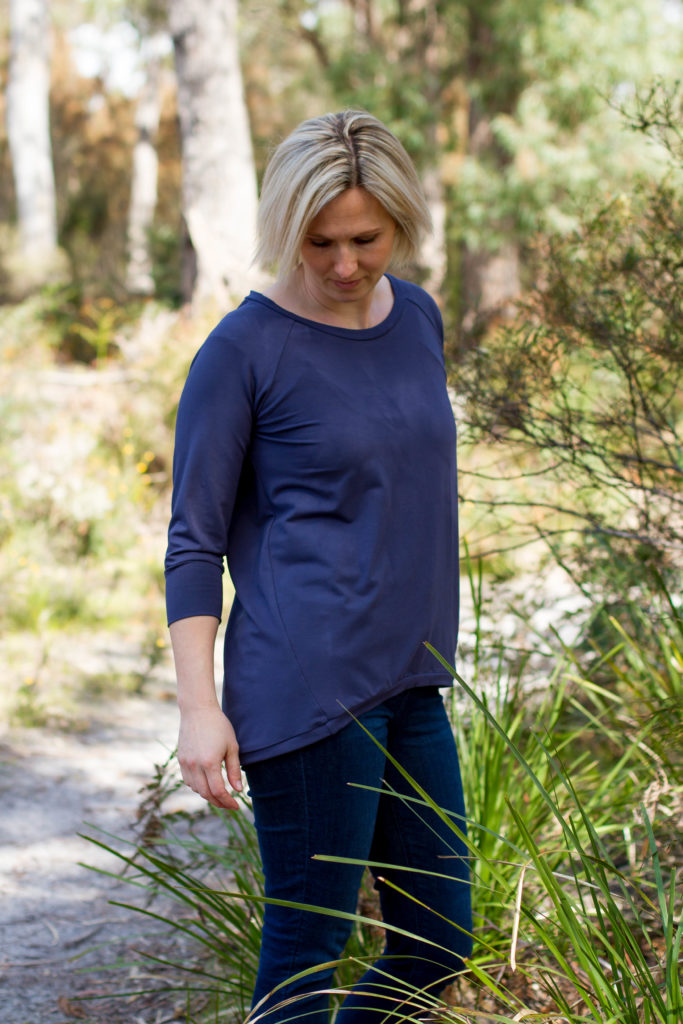
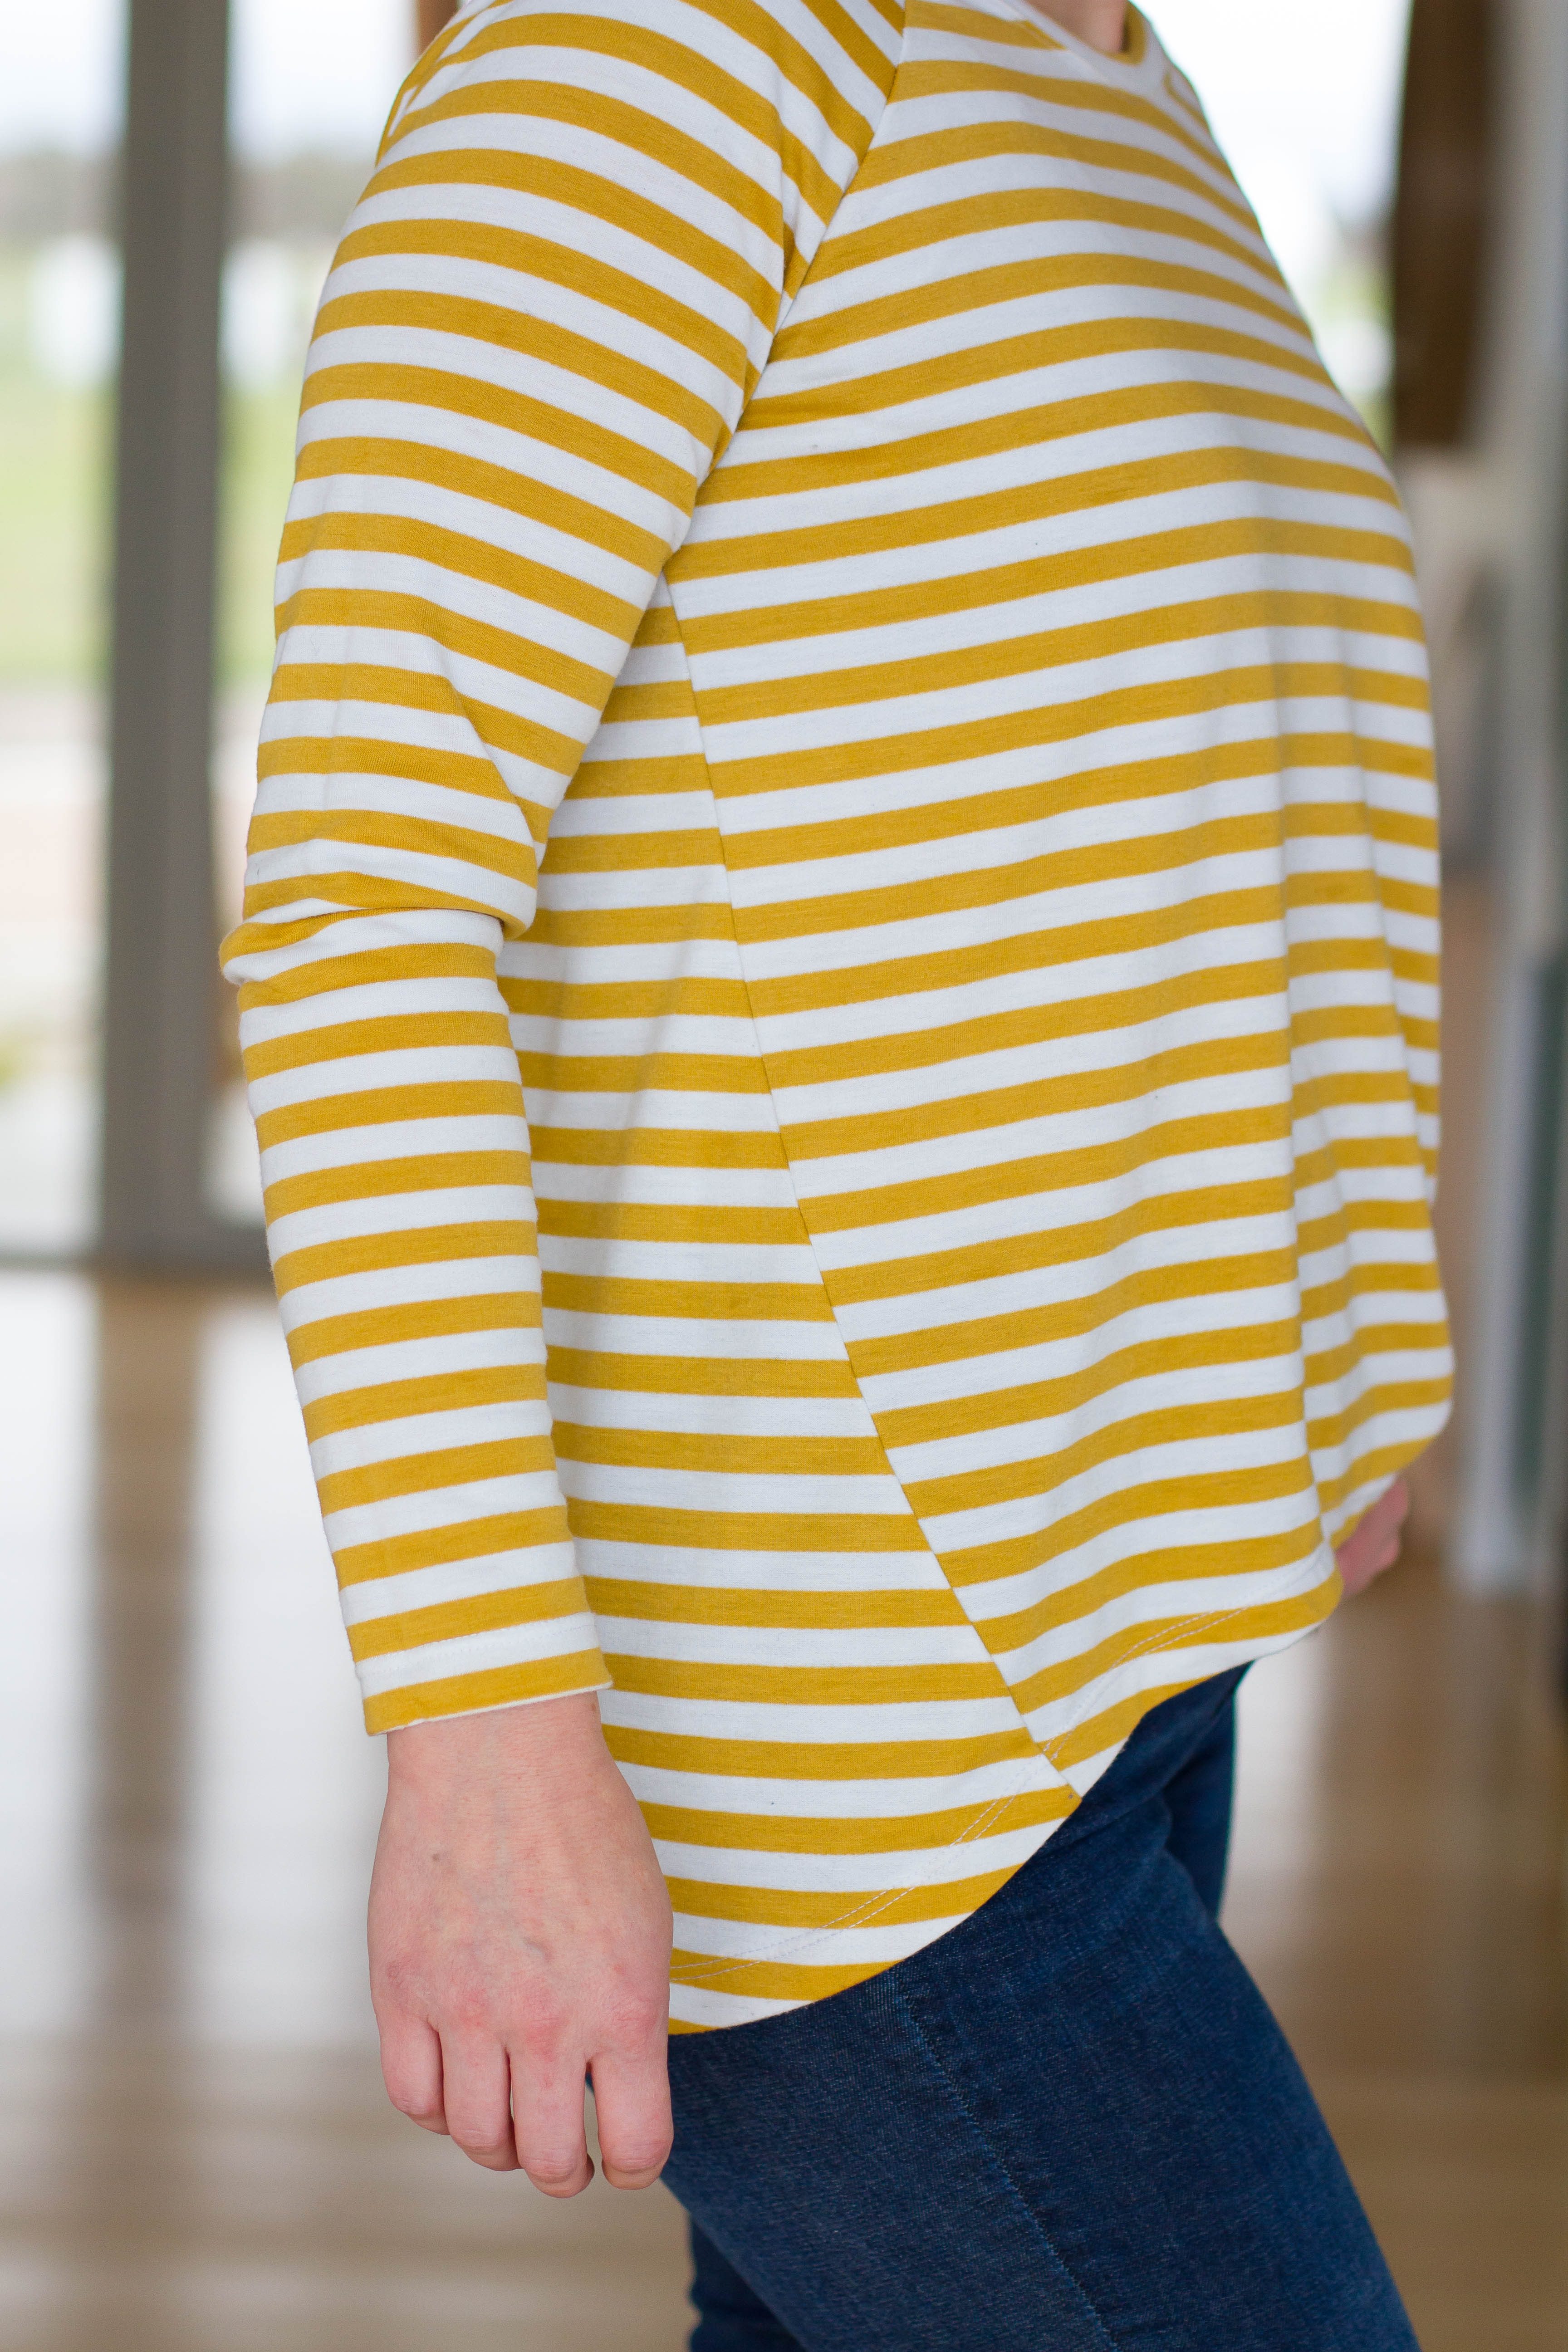
These are two of the first Raglan Twist Tops I made and they have been perfect for cool weather wear. The mustard and white striped fabric is this french terry from fabric.com. It’s a poly-cotton blend so I didn’t expect it to be very nice, but it is actually a decent fabric. Has pilled a little under the arms after a month or so of wearing but not too bad. I’ve come to the realisation that it is close to impossible to match side seam stripes when sewing the Raglan Twist Top – so if you can’t handle un-matched stripes then give striped fabric a miss with this one! It doesn’t really bother me too much though, so I’m rocking the wonky stripe look…the general public won’t mind, only sewers notice these fine details anyway! I really like the way this fabric works with the Raglan Twist Top though, it has a soft drape which helps it to fall nicely. I finished all of the hems with a regular fold-under hemline secured with a twin needle stitch. 

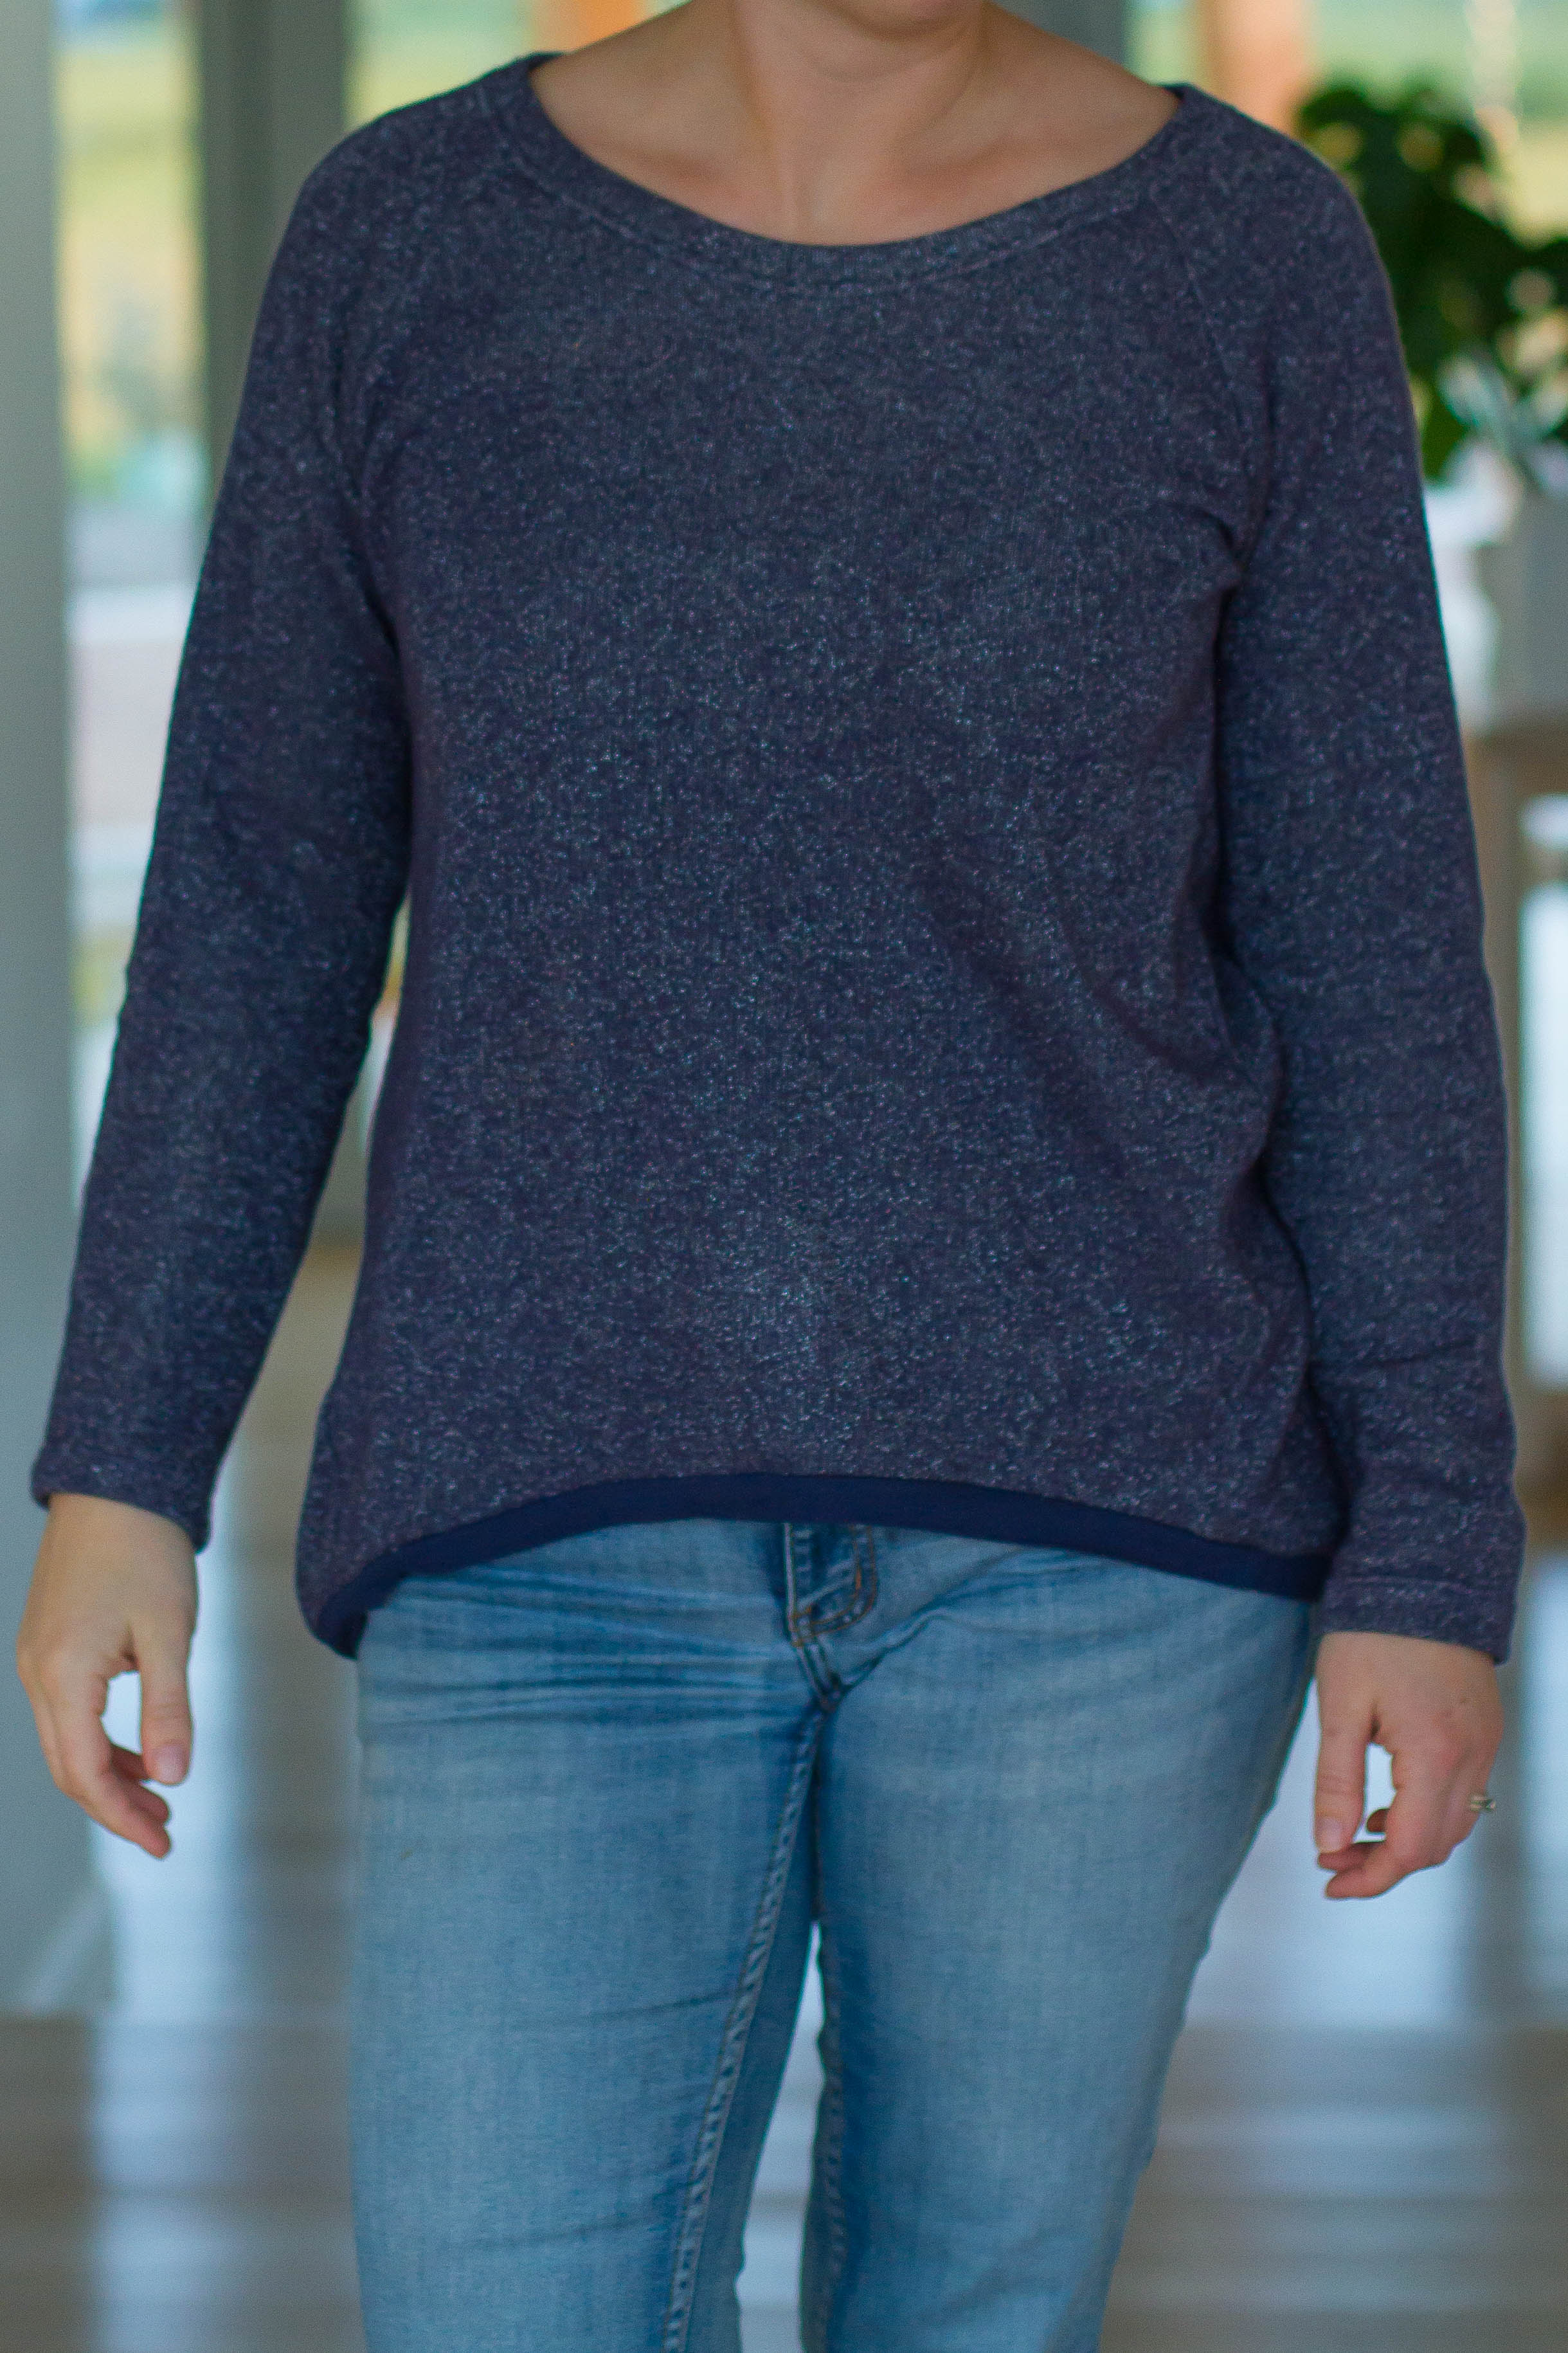
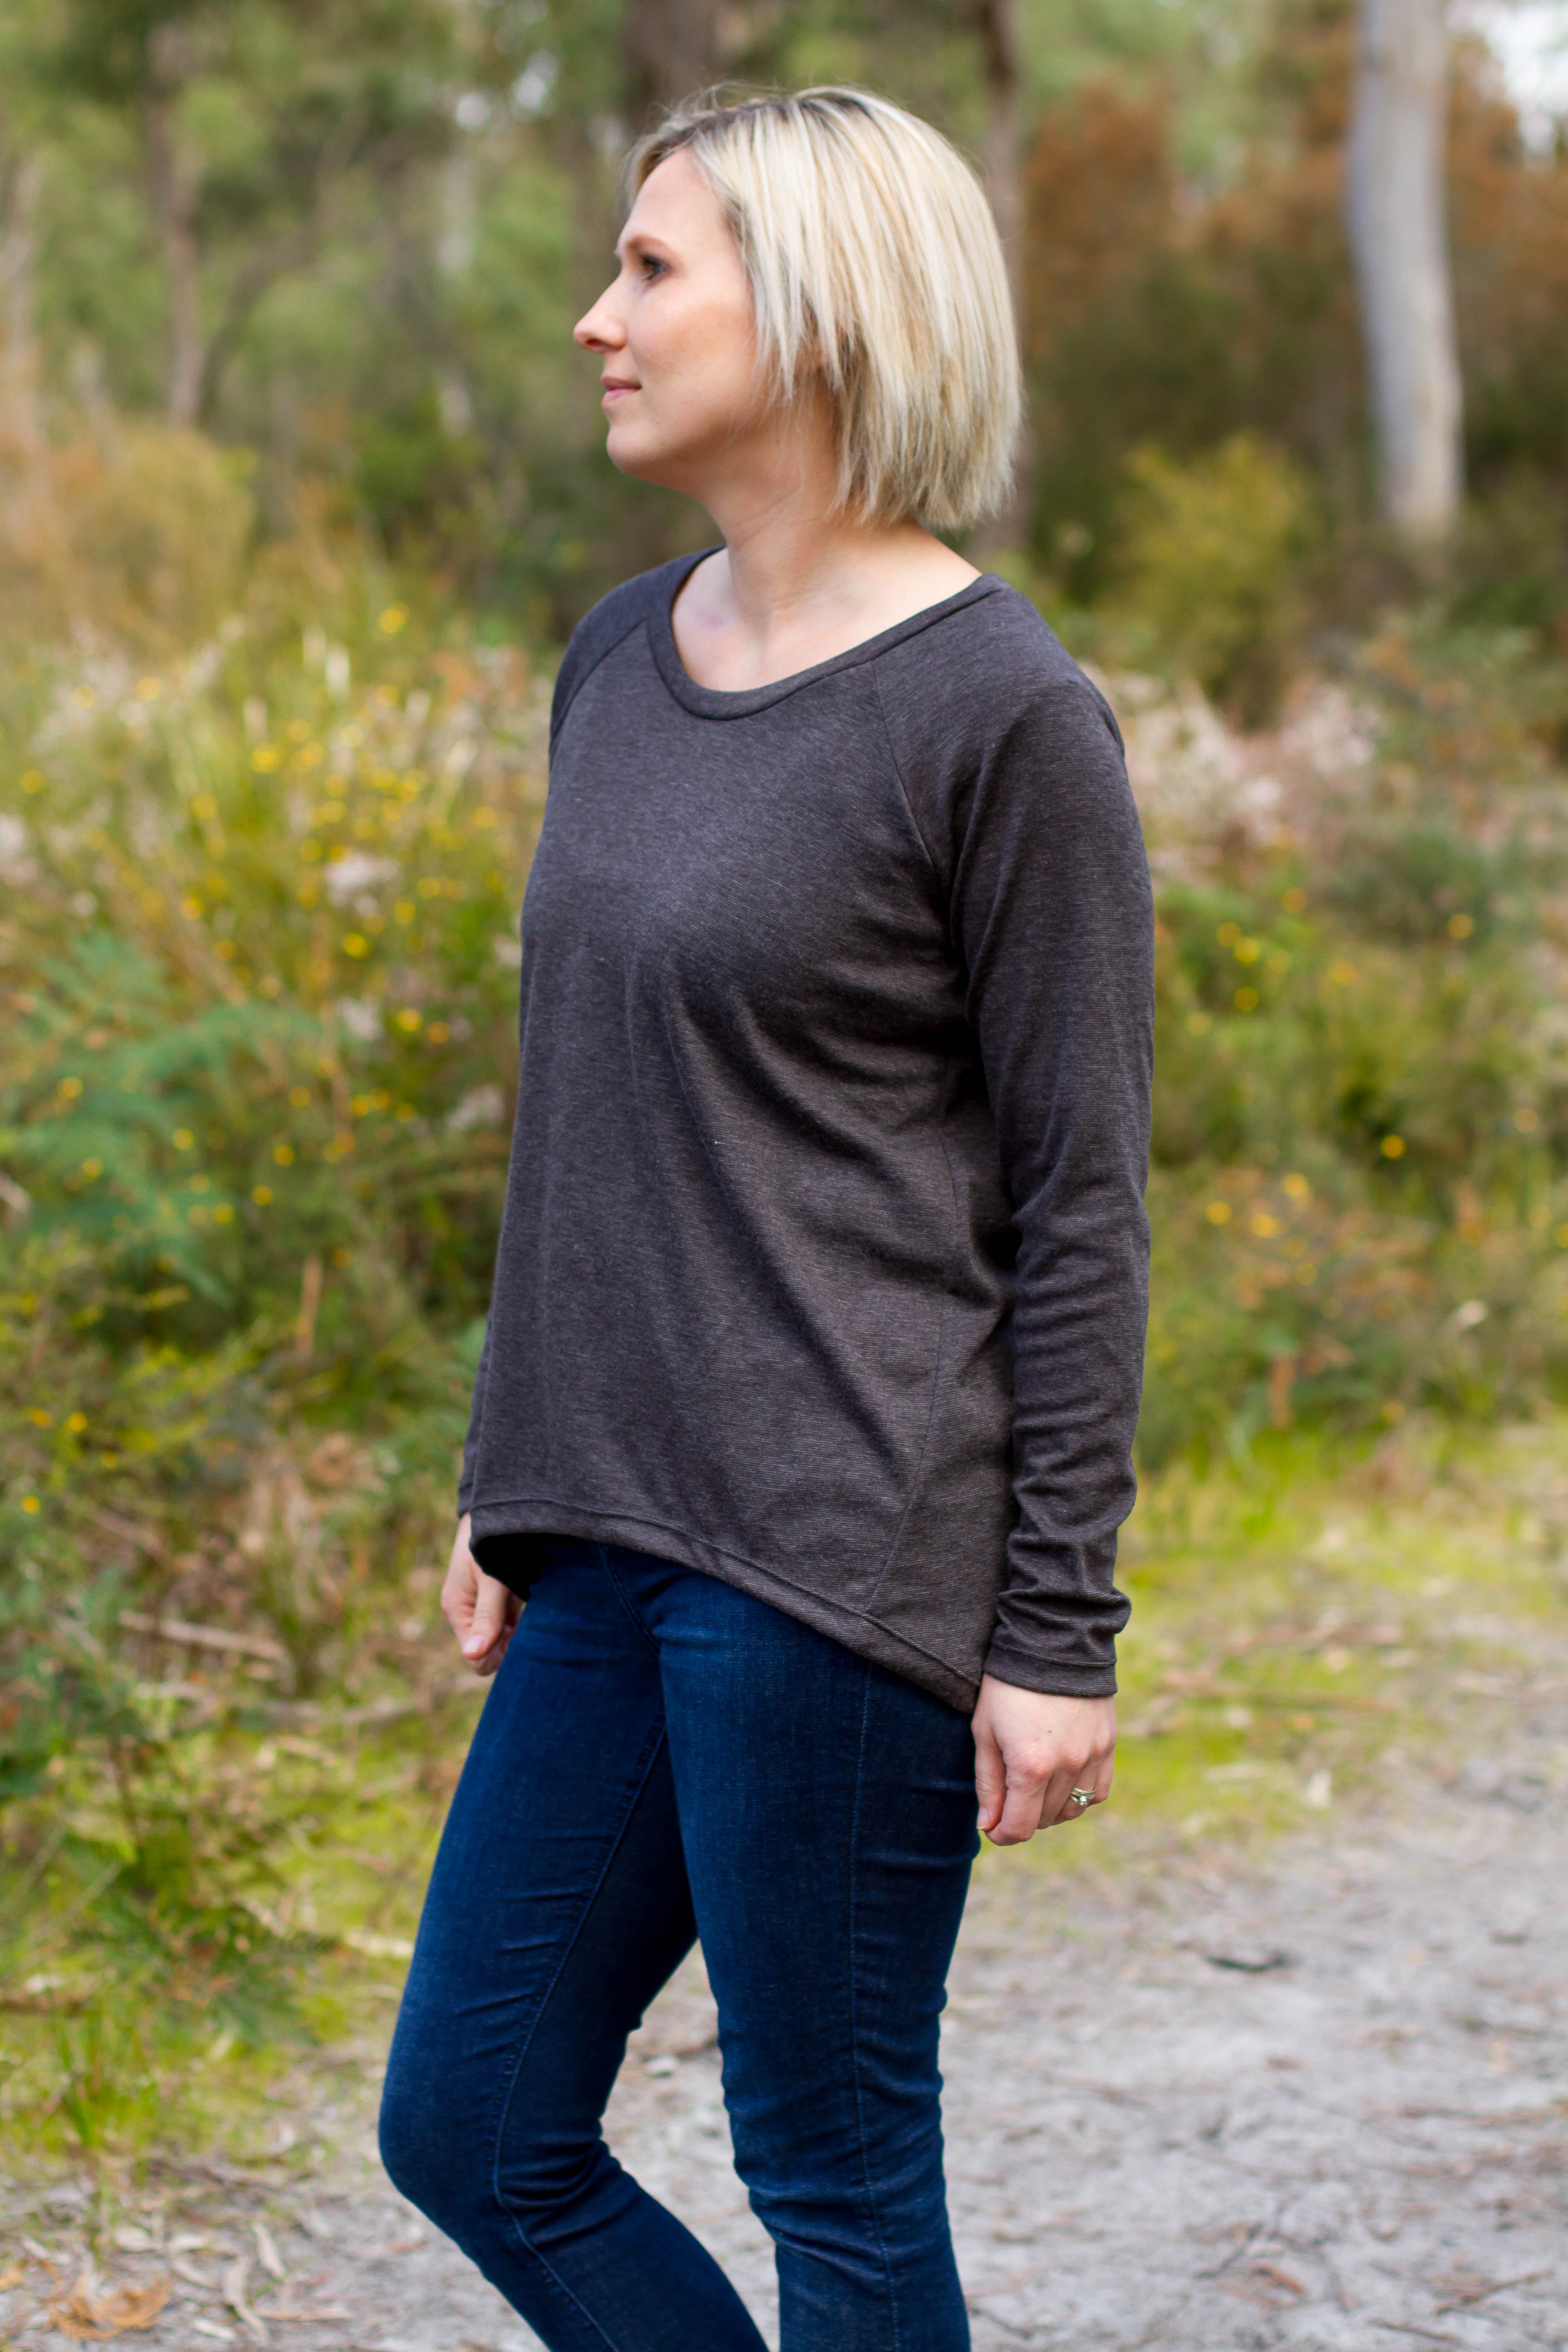
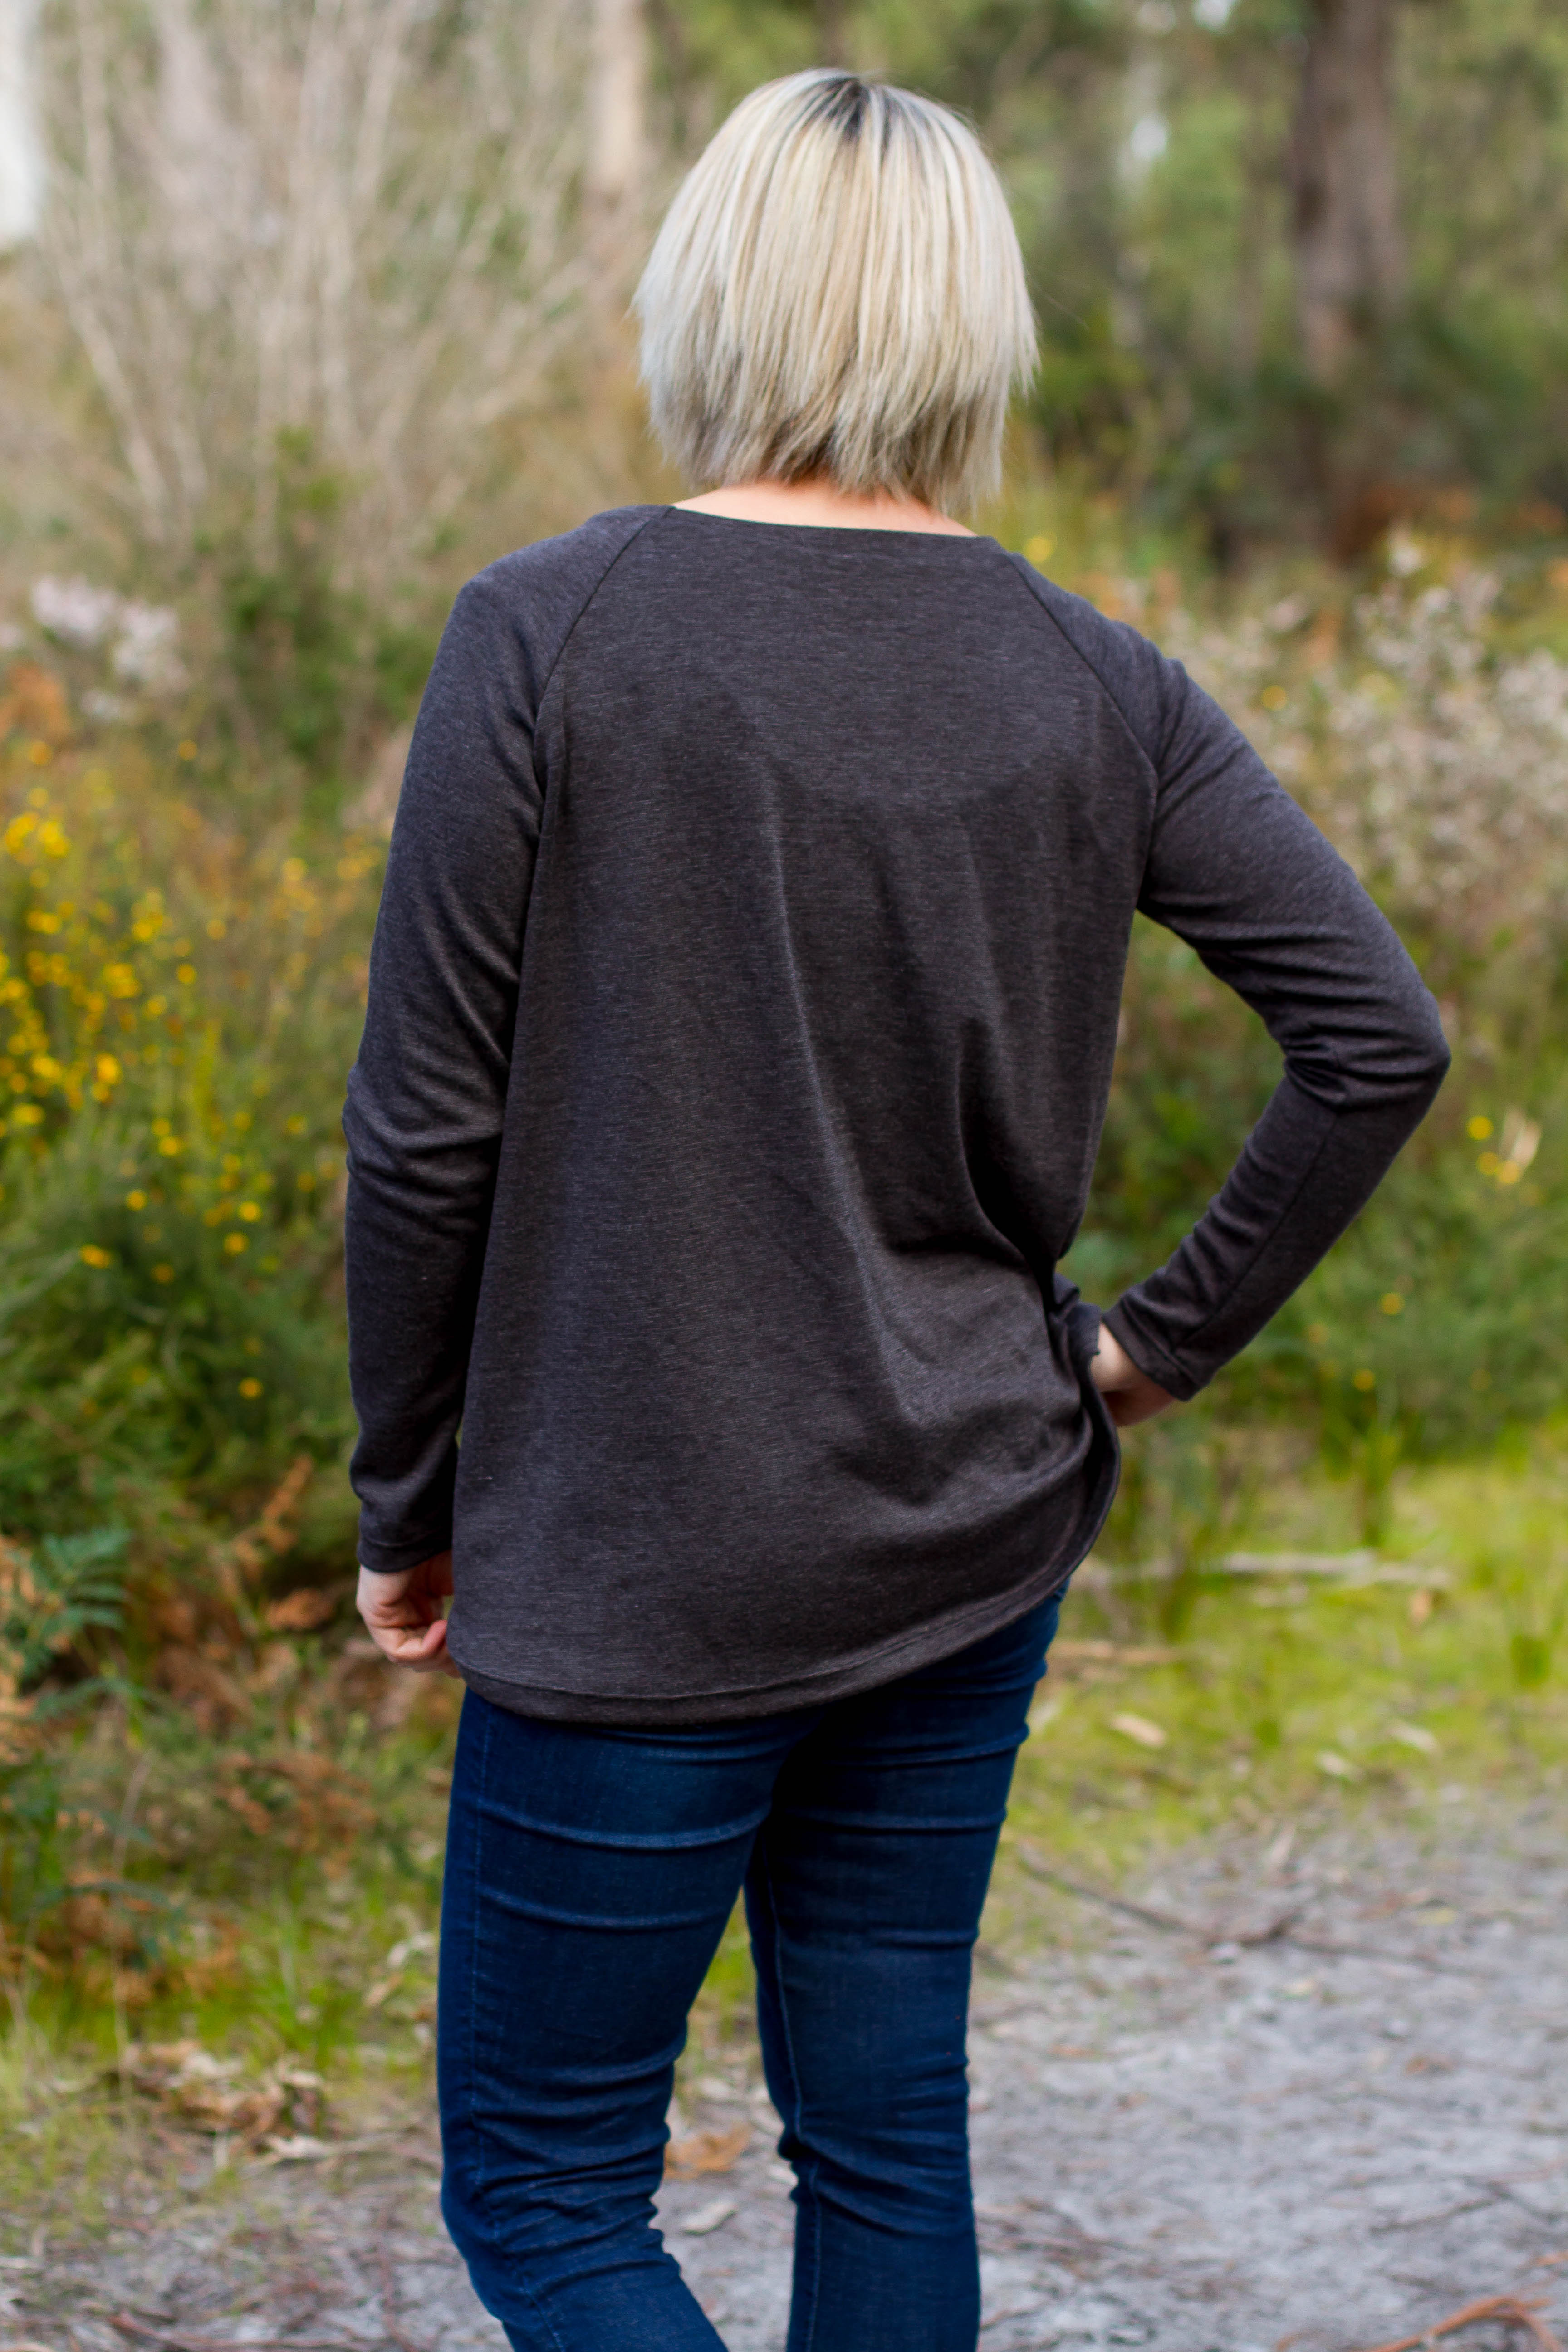
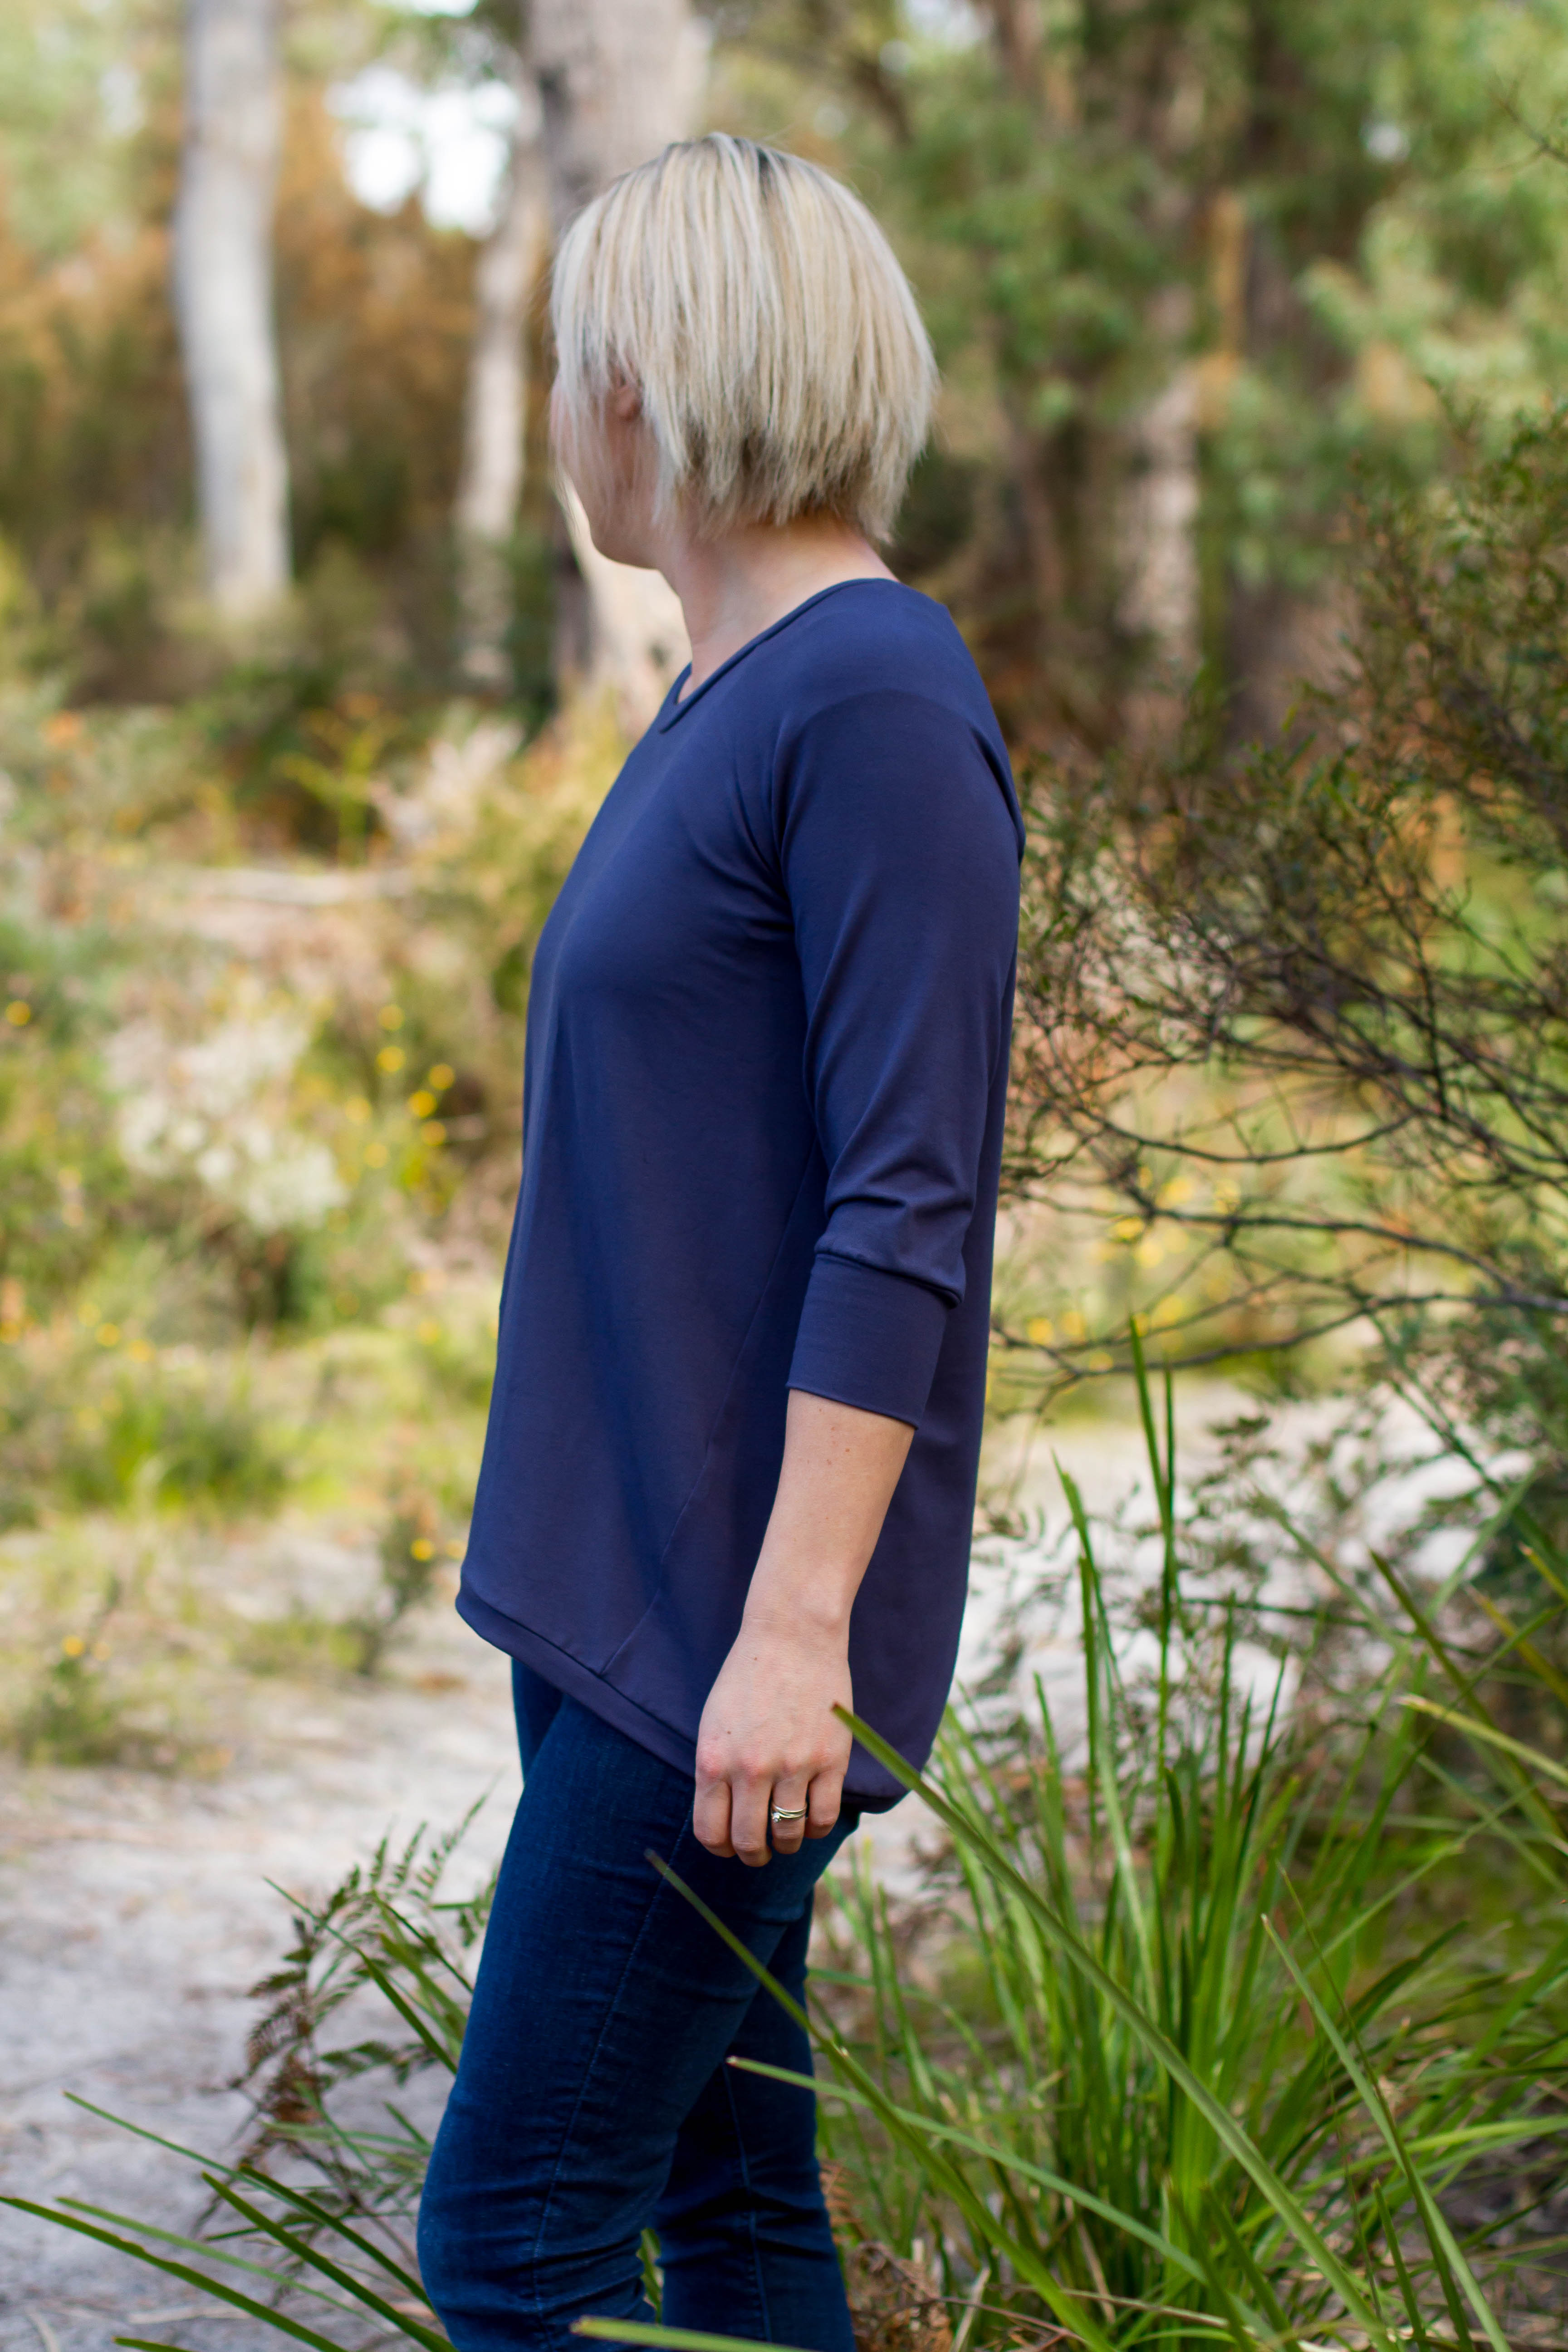
The dark blue top is made using a Lillestoff glitter sweat knit from Crafty Mamas. I love European knits so knew that I would love this fabric, I think the dark blue is sold out but here it is in another colourway. This sweater knit is gorgeous to wear – soft and bulky and not itchy at all resulting in a super cosy sweater. The only thing it lacks (like most bulky sweater knits) is a really good recovery. You can see that the top isn’t as snug fitting as the ones I’ve previously shared, not a bad thing, but a good illustration as to how all knits behave and look differently when sewn up. Because of the lack of recovery, the neckline sits slightly wider as there isn’t as much elasticity in the fabric to pull it back in. I don’t mind this at all, but would think about narrowing the neckline in slightly when I sew this top with a bulky, less stretchy knit again.

I finished the sleeve hems using a fold-under hem, but in order to retain the shape of the curved hem I sewed a contrasting navy blue jersey hemband to the bottom of this one. I tried just folding the hem under but no matter how much steam I applied or what I tried to do, it kept ending up all wavy and flipping outwards due to the lack of recovery in the fabric. The Raglan Twist Top includes instructions and pattern pieces to finish the hems with either fold-under hems or bands so there is plenty of choice depending on what fabric you are using and what look you want to achieve.

The Raglan Twist Top isn’t just for cold-weather wear. This versatile pattern includes options for long, 3/4 or short sleeve lengths so is a great wardrobe staple. Remember to grab your copy of the pattern at a discount of 20% if you purchase before Saturday night!

Make It Perfect, Raglan Twist Top

.Raglan Twist Top.

raglan-twist-top-coverIt’s fun to mix things up now and again, so we’ve put our twist on the classic raglan top.

Playful twisted side seams, extending to the front of the top give the Raglan Twist Top a super-flattering shape making it easy to wear for every body size.

With short, three-quarter or full-length sleeve options you can decide whether to finish the sleeves by adding cuffs or simply turning-up the sleeve hems.

The curved back hem and slight-bell shaped silhouette flatters your figure so cleverly that you’ll want to wear it with everything.

Experiment with different colour and pattern combinations, throw on with skinny jeans or a straight skirt and the Raglan Twist Top will fast become your new go-to!
raglan-twist-top-24raglan-twist-top-21 raglan-twist-top-14 raglan-twist-top-12 raglan-twist-top-10 raglan-twist-top-6raglan-twist-top-11
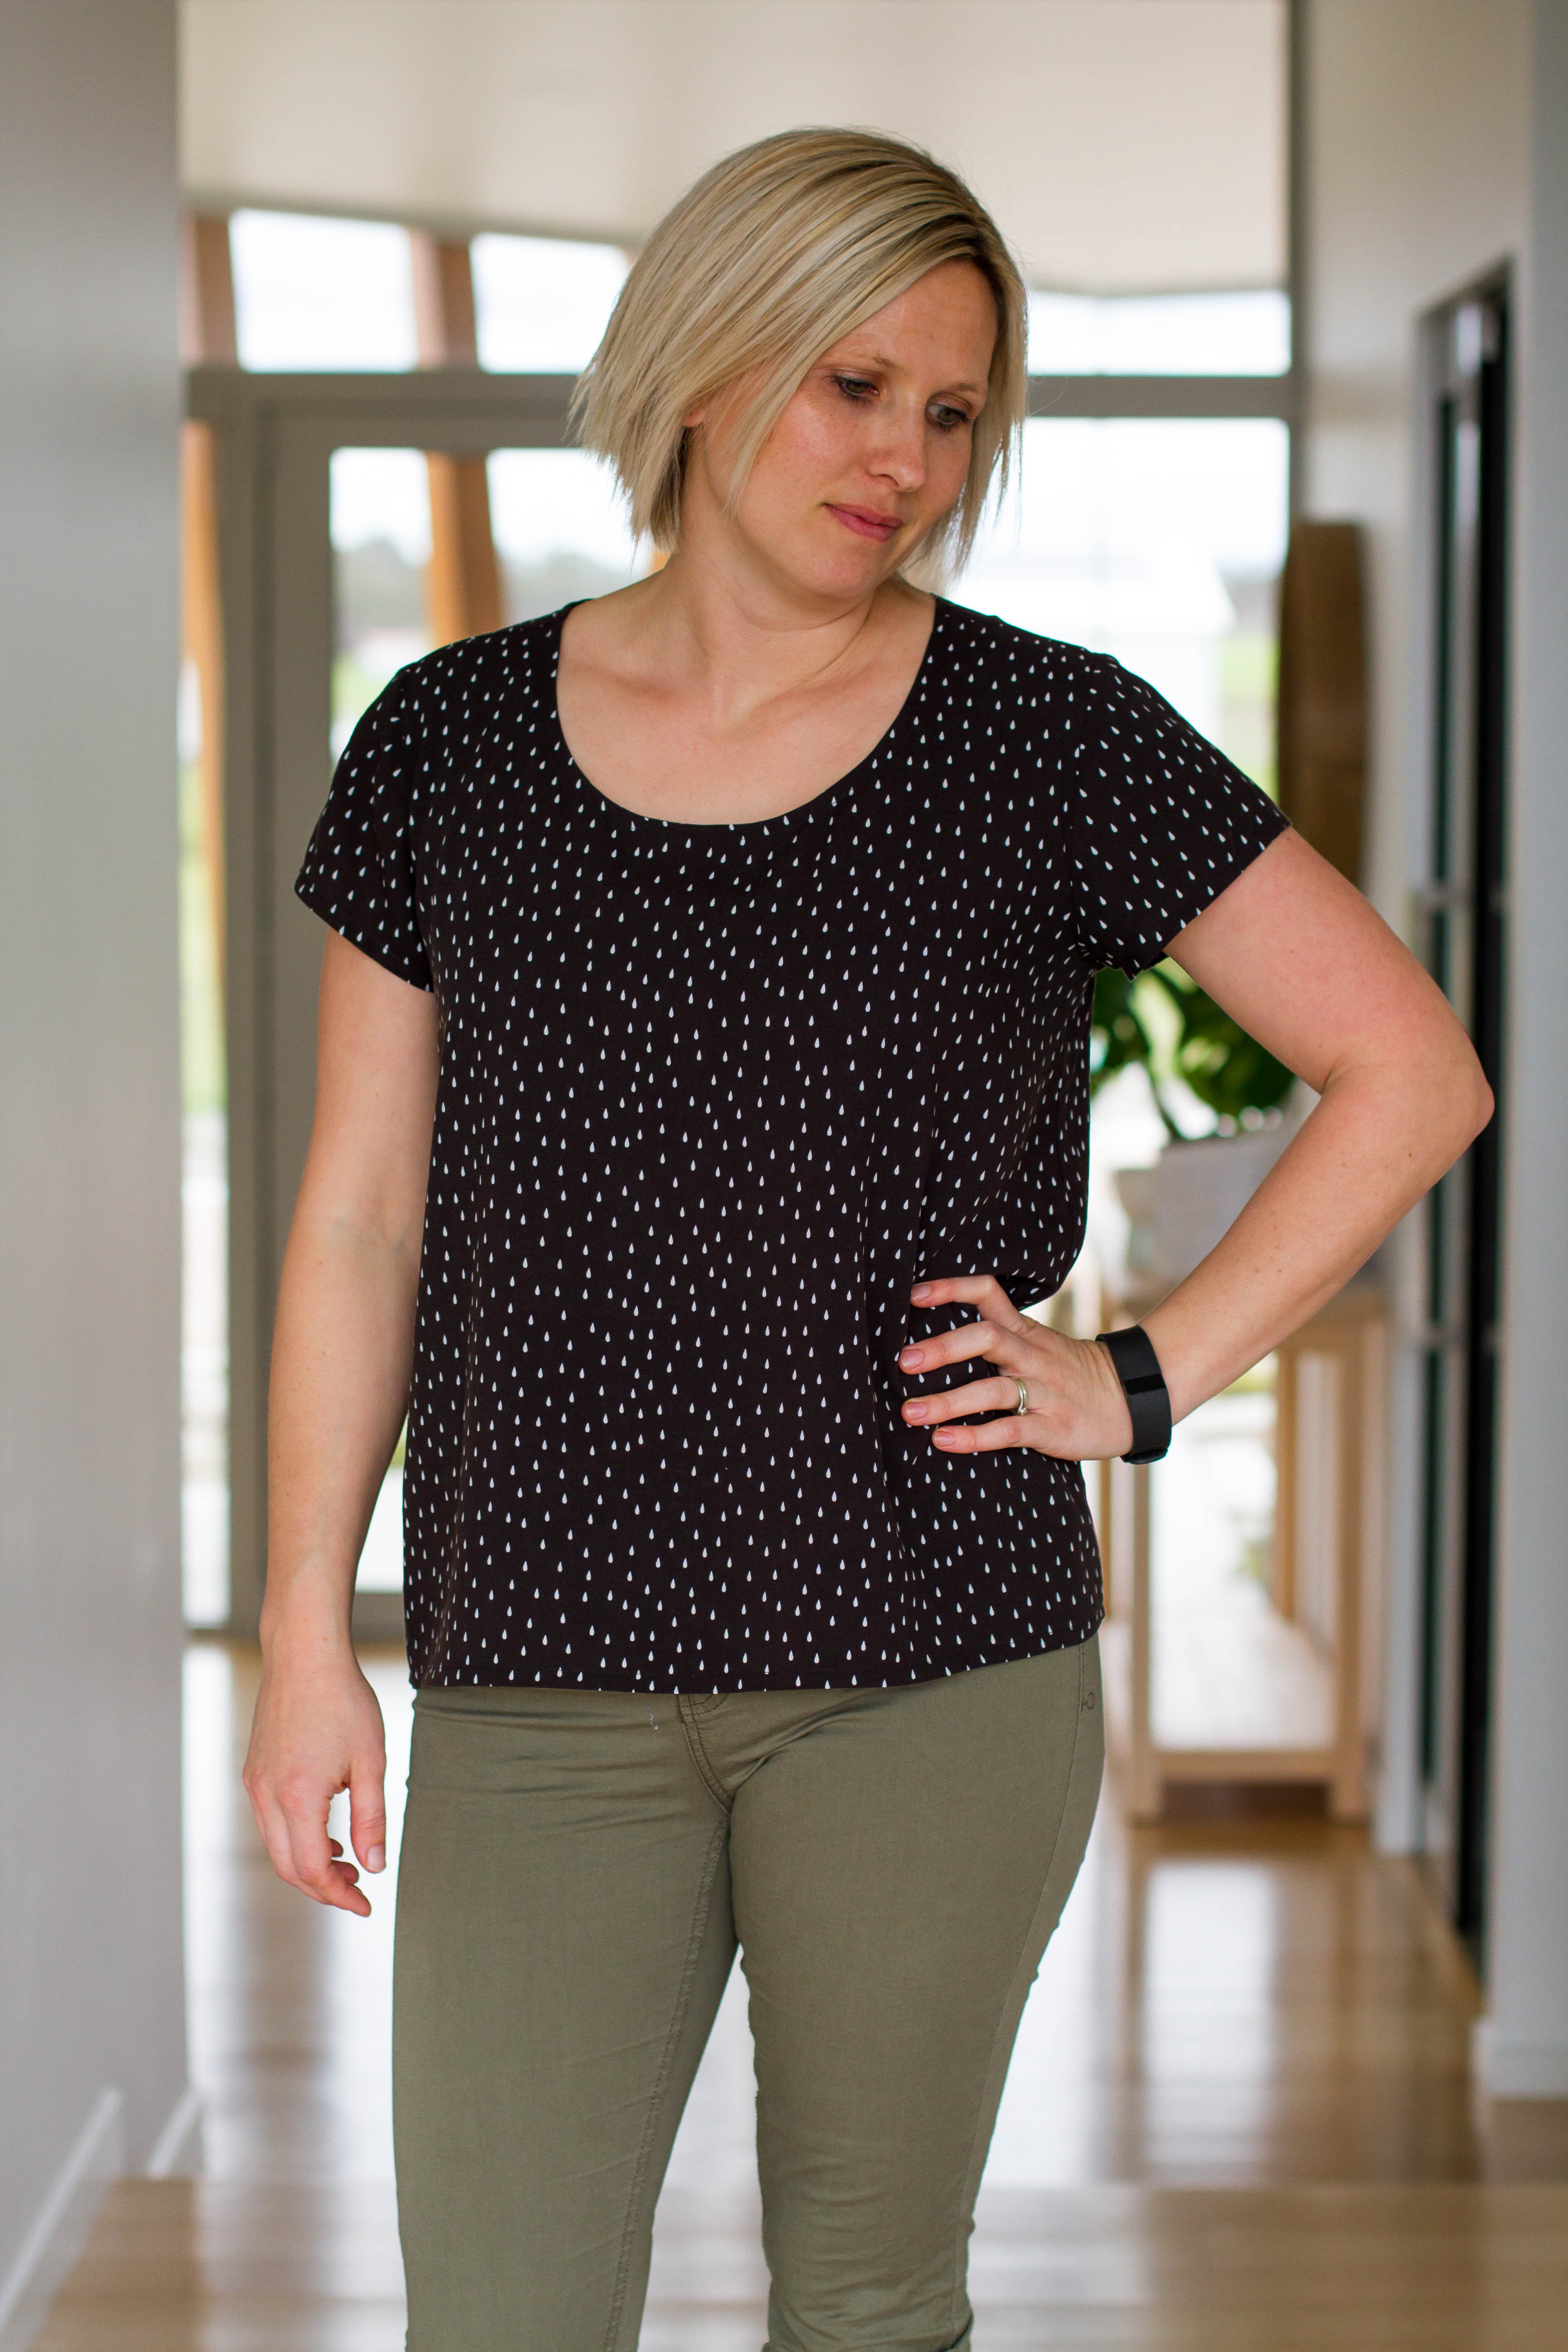
When it comes to sewing clothes for myself I’m always looking for style with comfort-factor. I figure if I’m going to put in the effort to sew myself something, it needs to be comfortable or else I’m not likely to wear it as much. The newest pattern to join the Make It Perfect collection is the Raglan Twist Top – an extremely comfortable raglan-style top with a clever twist.

The Raglan Twist Top is as comfy as your favourite sweatshirt, but with classy shape and style to not only flatter your body shape, but to make it just a little more sophisticated enabling you to wear it out and about with confidence. I’ve been living in my selection of Raglan Twist Tops since starting to design this pattern a couple of months ago. With a choice of short, 3/4 and long sleeves you can wear this pattern through all seasons and create an wardrobe of Raglan Twist Tops to keep you going!

When it comes to fabric choice for the Raglan Twist Top, the pattern is designed for use with stretchy knit fabrics. From my experience with the pattern, I’ve found that I prefer using jersey or french terry knits that have a really good recovery and a soft but heavy drape. The pattern includes a couple of different options for finishing the hems on your tops too…you can either fold the hem up and sew down using a stretch stitch (lots of options included in the pattern!) or you can finish all of the hems using sleeve cuffs and a hemband around the bottom hem for those of you who are a little daunted by hemming knit fabrics or simply like the look of a cuff.

One of my favourite features of the Raglan Twist Top is the dramatic scooped back hem. I love the slight bell-shape that the hem gives when combined with the twisted side seam. It feels pretty and feminine and is practical for all of the bending down and running around Mum-duties that other tops may restrict! The dramatic twisted side seam also allows you to play around with mixing and matching different colours, prints and patterns to create one-of-a-kind tops you won’t find anywhere else.

If you are looking for a super fast sew, then try out the Raglan Twist Top – I guarantee you will love this addition to your wardrobe!

I hope you are as excited about this new pattern as I am! I have plenty more versions to share with you over the next little while and can’t wait to see what you create with this pattern.

In the meantime, you can see and read more about the Raglan Twist Top in the store and the pattern will be on sale at 20% off until 10pm Saturday 1st October (AEST) – no coupon required!

(Wholesalers wishing to stock this pattern in their stores can contact my distributors here.)

Indie Sewing Patterns, Other

.Maai Design – See You At Six Blog Tour.

maai-blog-tour-7maai-blog-tour-3maai-blog-tour-6 maai-blog-tourmaai-blog-tour-5 maai-blog-tour-4maai-blog-tour-2

Hello, hello! The poor old blog has been totally neglected of late…I’m back to make a change to that today and have some beautiful fabric to share with you!

Today I am participating in the Maai DesignSee You At Six” Blog Tour. A couple of months ago I received an email from Maaike (owner of Maai Design) letting me know about an amazing new European fabric that she would be adding to the store soon. Now, to be honest, I’m a sucker for pretty much any European fabric! It always promises top quality and unique prints but up until now I have only really sewn with European knits. I didn’t hesitate in joining in the blog tour fun because I knew the fabric would be awesome AND I loved the new range by See You At Six. Maai Designs stocks 12 gorgeous prints in this unique 100% cotton viscose/rayon fabric – the best part is that they are all suited to sewing garments for the GROWN UPS! I do get sucked in by cutesy prints, my fabric stash is full of them and I need to start shopping more for fabric that I will wear myself. The entire See You At Six range fits this brief perfectly.

On receiving the fabric, I was 100% impressed with the quality. It has the most incredible drape and is super soft to feel with a nice, tight weave, producing a fabric that is perfect for sewing tops, skirts and dresses for women (and kids…but I personally want to keep this one all to myself!) I did pre-wash and tumble dry my fabric as instructed on the website to account for the small shrinkage factor. I’m not great at pre-washing woven fabrics, but am always happy when I do it and then dry in the dryer because I know the finished garment can be thrown into the dryer without having to worry about shrinkage in the future.

For the blog tour I choose to make myself a couple of tops using the Drops in Black & White and Flowers Blue fabrics. I love how each of these prints are busy enough to keep them interesting but subtle enough to wear without feeling like you are drawing too much attention to yourself (did I just totally contradict myself there, or what?!) I thought that I would take the opportunity to sew something different for myself and had a flick through my not-yet-used pattern stash. After a bit of thought I decided to use the Grainline Scout Tee as my base pattern. This pattern has been around forever but it wasn’t until just recently that I decided I liked it…and now that I have made a couple I have decided that I love it!! It is a super speedy sew AND is really easy and flattering to wear. 

I made the black tee first, sewing a size 6 and using the pattern without any modifications. Completely happy with the results, but then I remembered seeing a few peplum variations of the tee around and knew that the See You At Six fabric with amazing drape would work perfectly in a peplum so decided to give a peplum-hack a go. I didn’t think too much about it, just cut the main body of the tee shorter then cut a big strip of fabric for the ruffle about 1.5 times longer than the bottom hem of the shirt. I did have a little play around getting the fit right – I think I ended up grading in the side seams of the tee and ruffle because it was just a bit too wide and frumpy with all of that extra width at the bottom but other than that it was really easy. I wasn’t sure I loved the look on me to start with – I’m about 2 years late to the peplum party, this being the first I have ever made (or owned!) and my husband did ask what the heck was going on with that little skirt at the bottom of my top, haha! But after wearing it a couple of times, I am sold. And when I wore it to school last week (I’m primary school teaching now) I was complimented by a large number of skirt-loving girls, so it is a winner in the eyes of the little ones!

If you love sewing for yourself, or want to start but don’t know what to use – then I recommend this gorgeous fabric. And to make your purchase a little easier, MaaiDesign is offering you a 10% discount on the See You At Six collection until the 30th September 2016! Simply use the code: seeyouatsix


12th of September: Shelley from Bartacks and Singletrack

13th of September: Kate from Sewing With Kate

14th of September: Nicola from Create.nic

15th of September: Anna from Blogless Anna

16th of September: Caroline from Usefulbox

17th of September: Suz from Sewpony

18th of September: Allison from The Tall Mama

19th of September: Toni from Make It Perfect

20th of September: Suzanne from Dressed in Pretty Little Things

21st of September: Natalie from Sew Outnumbered

22nd of September: Jenya from While She Was Sleeping

23rd of September: Maaike from MaaiDesign

Catnap Pyjamas, Make It Perfect

.Catnap PJ pants for a 10 year old.

plaid PJSplaid PJS-2 plaid PJS-3

I thought my days of sewing clothes for Oscar were well and truly over. He is quite picky with what he wears and I really didn’t think that he would want a pair of PJ pants because he has only been happy to wear shorts to bed since he was about 5 years old.

You can only imagine me surprise when he actually ASKED me to make him a pair of warm PJ pants just after I released the Catnap Pyjamas pattern. The nights had just started to cool down and I guess he was feeling it. I had this plaid flannel in my stash that was big enough to accommodate a pair of pants and thought it would make a good pair of pants for a 10 year old.

Because Oscar is quite tall, I sewed a size 10 and added an extra 1 1/2″ to the length of the pants – you can see in the first photo that they are actually nice and long on him, and a bit of growing room is just what I wanted because I have a feeling that he is going too keep growing at a fast rate! I didn’t have enough fabric to match any of the plaid lines, but they are just PJs so I wasn’t too fussed.

I made these pants about a month ago and am happy to say that they have been worn a lot! Yay! Maybe I will be able to sew PJ pants for him for the rest of his life 😉

SUPPLIES: Make It Perfect, Catnap Pyjamas pattern, Robert Kaufman, Mammoth Flannel in Sundance.

Indie Sewing Patterns

.A Mini Super Tote.

IMG_9816IMG_9860IMG_9843IMG_9853IMG_9838IMG_9829IMG_9856 IMG_9825
Lately when we are going places, Lil seems to be carrying around a little collection of things with her…drawing supplies, drink bottle, a book to read,etc. It is cute seeing her moving into a more independent phase and wanting to take care of herself a little more.

The problem is, that I was always left lugging around her belongings! Or they would end up being left in the car or scattered where ever we were visiting. Such a pain! Time for a grown-up bag? I think so!

I looked around for awhile but couldn’t find a pattern that would be good for what she needed. Nothing too fancy, just a big compartment inside, some way to close the bag up and maybe an outside pocket or two. All of the patterns that I could see were too big or too complicated or not really suitable for an 8 year old. I was actually looking for something similar to the Super Tote bag by Noodlehead that I had sewn for myself previously. Then I realised that the only problem with the Super Tote was it’s size and…duh! Shrink it!

So I did a bit of quick measuring and decided (well, crossed my fingers!) that if I printed the pattern with the scaling set to 80% (instead of 100%) it would turn out the perfect size – and it did! It was such a simple modification. The only part of the pattern I had to use my brain to work out were the handles (because there isn’t a pattern template piece for these) but that wasn’t too difficult.

By printing the bag at 80%, it ended up 12″ tall, 11″wide and 4 1/2″ deep. I cut the handles 27″ long (for future reference, or if you want to sew a mini version and don’t want to use your brain!) These measurements would actually make a nice sized smaller Super Tote for an adult (probably with longer handles though) if you like the look of the bag but don’t need it quite so big – because the original is a really big bag!

For Lil’s bag, I kept the outside pocket – not sure if she really uses it but it might come in handy one day! And I omitted all of the interior pockets because I thought it would be more functional just having one big open space inside rather than pockets that might get in the way and probably wouldn’t be used. When I was choosing fabric, I put a few different combos together for her and she made the final choice. I love the bright, cheery colours and prints she choose.

It was fun to sew a bag again, it has been awhile and I forget how much I enjoy the process and seeing it all come together. I think I need to sew a new bag for myself…mine are all getting a bit ratty, but which pattern to choose?!

SUPPLIES: Noodlehead, Super Tote pattern // Dear Stella, Bay Breeze, Watermelons in pink // Ann Kelle, Remix, Bright Crosses // Heavy weight denim