Browsing Category

Indie Sewing Patterns

Indie Sewing Patterns

.Open-Wide Zippered Pouches.

IMG_5274IMG_5259IMG_5257 IMG_5256IMG_5271For Mother’s Day earlier this year, I made my Mother-In-Law a set of Open-Wide Zippered Pouches (free tutorial by Anna of Noodlehead). I’ve made a heap of these pouches in the past, but have only photographed one other set. I love them for last-minute gifts – hence, the reason I rarely get a chance to take photos of them finished…I’m too busy wrapping them up and rushing out the door! 

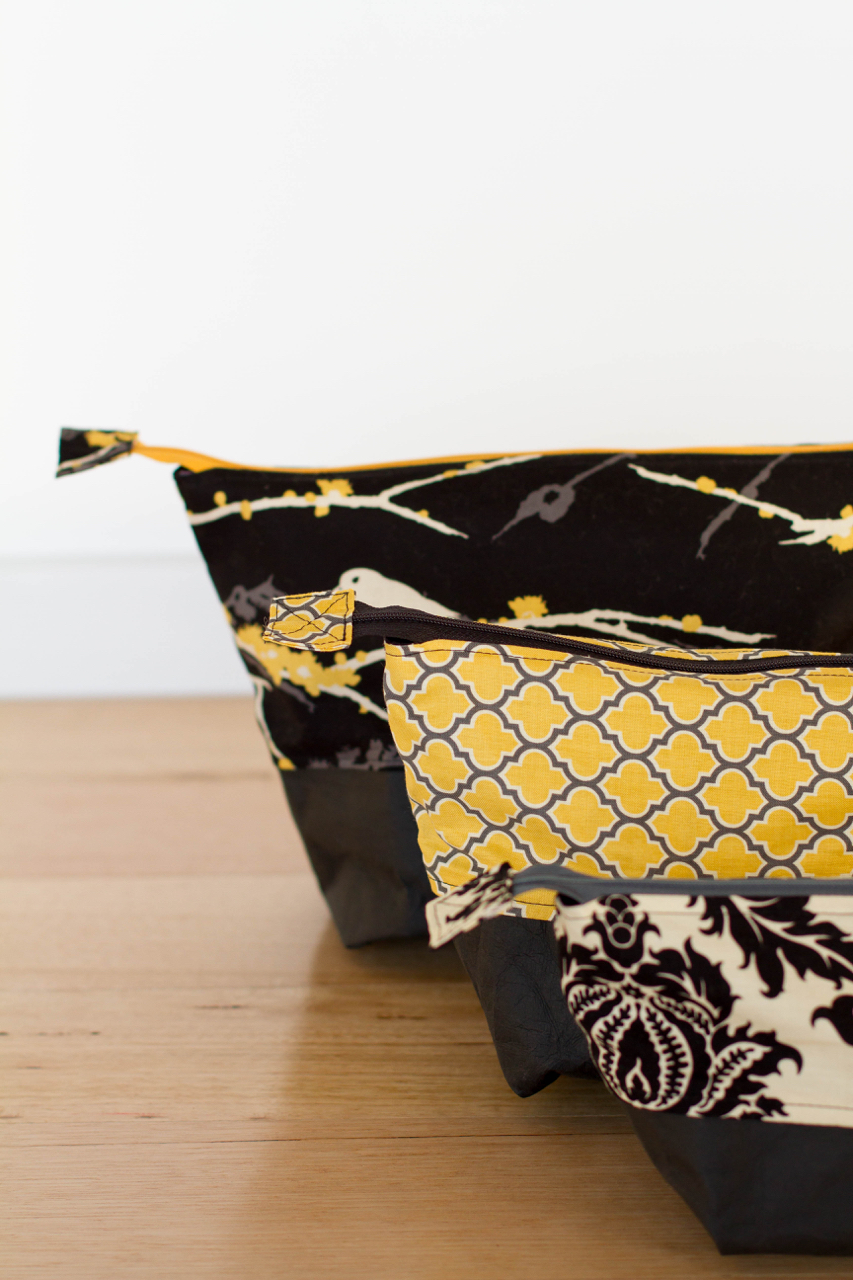
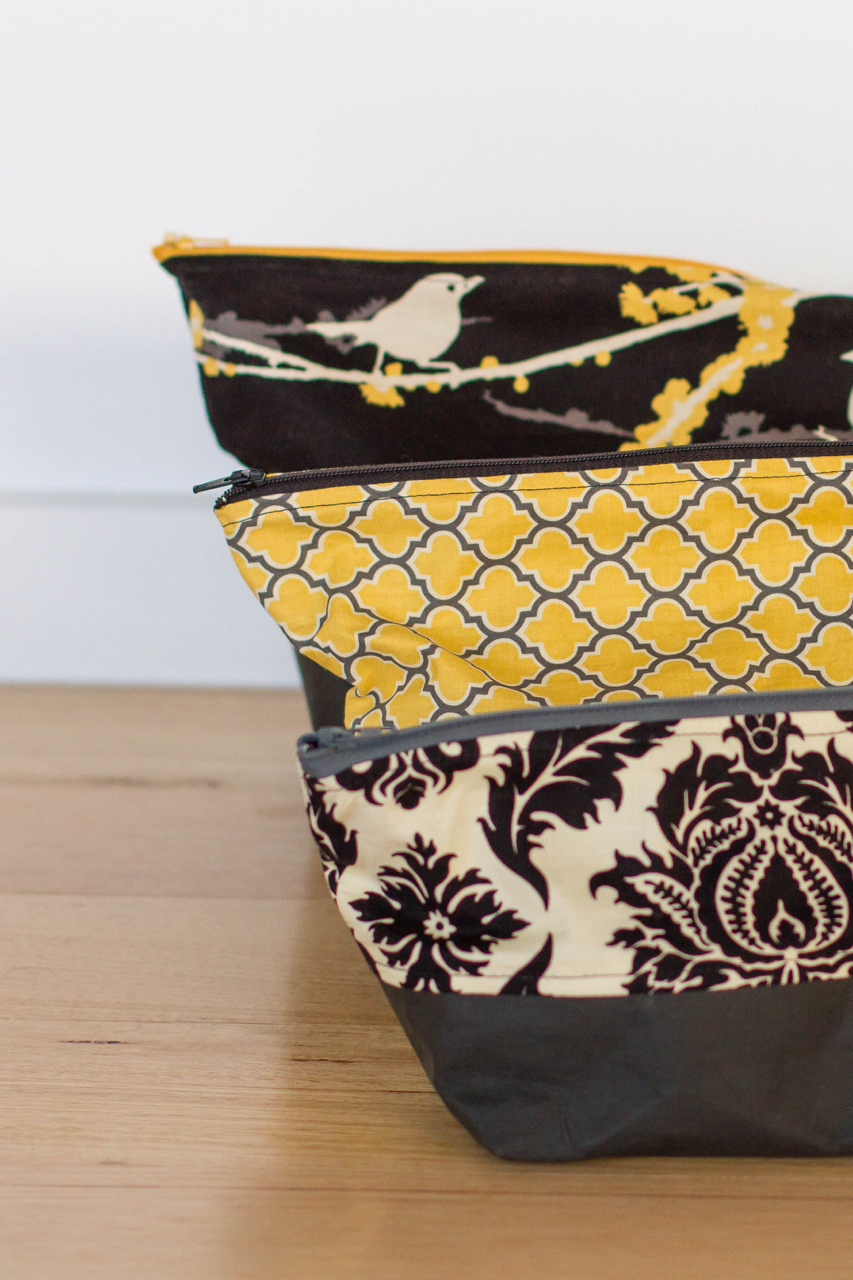
My go-to base fabric for these pouches is denim – I’ve got a stash of old jeans in my sewing cupboard and they are great to cut up and give the base of the bags a sturdier finish. For this set of pouches though, I wanted to try out a new product called Kraft-tex. You can read more about it on the linked website, but basically it is a thick paper material that feels a little like leather and wears like fabric – yep, you can sew it and wash it and it gets softer and crumplier with age. I haven’t used Kraft-tex enough to have a real opinion yet, but it seems pretty cool. It starts off really stiff (like cardboard) so I scrunched it up in my hands before sewing and it softened up a bit. It is supposed to get that crumpled look to it after awhile. Kraft-tex seems to be similar to the washable paper baskets/plant holders that are trending at the moment. I bought my rolls of Kraft-tex to make some of these, but my plans diverted to the zippered pouches first! I still have a few rolls left to play around with so will eventually make some baskets. I bought my rolls of Kraft-tex here, it wasn’t available in Australia when I first purchased it but I think you should be able to find some in Australia now.

I paired the black Kraft-tex with some fabrics from Joel Dewberry’s Aviary 2 range. The black, grey, mustard and cream colour palette is modern and sophisticated and made for an easy to put-together gift that I didn’t even have to leave the house for!


Indie Sewing Patterns

.Lane Raglan.


I’m still in a sewing slump. I’m finding it hard to settle into my new sewing area and have been working on a few new patterns, but not feeling like I am making great progress with any of them. In past experience, the best thing to do when I’m not feeling enthused by any of my sewing projects is to let them go for a little while and get stuck into something “just for fun” – so I did just that! 

Our weather has really started to turn, we are still getting some warm days but there is a chill in the air that is hinting towards Winter and for some reason, cold weather sewing is my favourite. I like making snuggly clothes that will keep me (or the kids) warm and cosy and prefer buying winter-weight fabric over lightweight.


So I flicked through my pile of unsewn sewing patterns (yes, I have a big collection of patterns I have never used too!) and decided to give the Lane Raglan by Hey Juen a turn. I remember seeing a few Raglans sewn by Kelly of Cut Cut Sew (here, here, here) in the past and they are exactly what I feel like wearing at the moment. Comfortable, casual and perfect to wear day after day.

I would usually sew a size small in a top like this, but I didn’t want my raglan to be a fitted tee, more like a slouchy sweater, so I cut out a medium instead. Perfect fit for the look I was after. This is such a versatile pattern and really well written. With just a few little changes you can achieve a different look every time you sew it. By sizing up or down you can get a more snug or loose fit. And the type of knit fabric you use changes the look completely too.


I wanted my raglan to be like a jumper – soft, loose and baggy and used a hoarded french terry knit I bought awhile ago from Ixat. It is the best fabric – a light marle grey with red/blue/purple specks all over it. It isn’t too thick and is really soft and squishy and just lovely to wear. I purchased 2 yards so still have plenty left over but wish I had bought more now because I will use it for everything! I also bought the same fabric but with a black background and multi-coloured specks that I’m hanging out to use too now.

I know this jumper is really going to get a workout this Winter – I have already worn it more days than not since I made it and finally managed to wash it over the weekend ready to wear again and again and again! And yes, I’ve since made another raglan and have been wearing that one on the other days!

Indie Sewing Patterns

.Grainline Archer.

I’m getting to the end of my “unblogged” sewing projects pile. Now I’ll have to start sewing again so that I have something to blog about! There hasn’t been a whole lot of sewing going on since moving house, but I’m really missing it so will definitley start making some more time for the sewing room now that we are feeling more settled.
I’m sure this pattern doesn’t really need much of an introduction, the Grainline Archer Shirt is everywhere! And when I see a pattern sewn and blogged about in such abundance I can’t help but give it a try myself.
This is definitley a “slow and steady” project, it was completed in a few sessions over a week or two. Although it is a little more complicated than most patterns I sew, it wasn’t difficult, just a little tedious and detailed.

I used a piece of chambray (Robert Kaufman Slub Chambray in Indigo) that I have had in my stash for awhile. You can’t beat a good chambray and Robert Kaufman knows how to make them. 

This shirt is definitley a wardrobe staple. It coordinates with everything and is easy and comfortable to wear. I’m not a fan of wearing the sleeves down so always roll them up or wear a jacket over the top when I wear the shirt. Because of the loose, boxy fit of the shirt I feel a bit frumpy when the sleeves are down, but I like the rolled up look so that works for me!

 I’m debating on whether I should curve in the side seams a little when I make another, just to add a more feminine shape. I made a size 6 and am really happy with the fit.

The only thing that kind of bugs me about the shirt is the blue tone of the chambray is similar to most of my jeans so I feel like I’m a bit “double denim” when I wear it with jeans! Overall though, I give this pattern two big thumbs up – the sew-along is a great reference too for unfamiliar parts of the shirt and it comes together beautifully.

Indie Sewing Patterns

.Bombshell Swimsuit.


It was only a matter of time before I joined the Bombshell Swimsuit bandwagon. I first noticed this pattern in the middle of 2014, Winter for us, and I wasn’t really interested in spending my sewing time on Summer attire so I popped it away for warmer days. And stocked up on some swimwear fabric in the meantime.

After a few beach trips this Summer, I was well and truly sick of my current swimmers and that was good enough incentive to spend a few evenings sewing myself a new pair – and here they are!

The pattern was great, I had a few issues getting an even zig-zag stitch with the rubbery swimwear elastic I bought but it ended up okay in the end. My sewing machine doesn’t sew well with cheap thread on any decorative stitches and I had no polyester navy blue thread in my stash so I ended up doing all of my topstitching with 100% cotton thread in order to get an even stitch…so I’m really hoping that it holds up in the elements! I don’t really go swimming that much and I’m sure I will make myself a few more swim suits in the future so I think we will be okay! There are still a few areas of skipped stitches but they aren’t noticeable enough to be an eyesore.

This pair of swimmers is my trial version…I’ve got a few other lovely swimwear fabrics in my stash that I want to use on another pair – or maybe even another pattern? But thought this navy blue fabric (from the Fabric Fairy) would be a good, basic design to start with. I lined the entire swimsuit in nude lining also. 

For future Bombshells, I wouldn’t change much at all except increase the shape and support in the bust! I knew that I would like a pair of swimmers with good bust support but for this pair I pulled out some cups from an old pair of swimmers I had in my cupboard and they weren’t very supportive at all!

I really like how modest this swimsuit is, it provides good coverage in all the right places and is comfortable to wear. Nothing worse that being at the beach in something that doesn’t make you feel good! Plus, the extreme gathering on the side and back seams really helps to disguise parts of the body that aren’t in such good shape!

Anyway, if you are wanting to sew swimwear for yourself, you should really try this pattern as a starter to help you get the feel for it. I didn’t find the experience hard, but there were some parts where I didn’t really get what was happening but just keep following the instructions and it all makes sense in the end! 
Indie Sewing Patterns

.Tova #2: the muslin that should have been first.

Back in October I blogged about my first Tova top. The one that I was sure would be a great fit so cut into some of my precious Nani IRO, only to end up with a beautiful top that was just too tight for me across the bust and underarm area. I have since handed it off to my little sister and after lots of feedback from you lovely blog readers, Instagram and Facebook followers I didn’t feel so bad about the poor fit because it seems as though many others have experienced the same issues as I did!
So, I did what I really should have done at the beginning of my sewing experience with the Tova and made myself a muslin! To be honest, I hate making muslins. They seem like such a waste of good sewing time, but I know that it is valuable when you aren’t getting a good fit from a particular pattern. For this muslin, I went with a brushed cotton fabric I had in the stash. I bought this super cheap (like $3m?) on clearance at Spotlight once. I think I must have bought about 5m of it because it just keeps on going and going! I used it to line my Minoru jacket and still have a decent amount left over.
So, this time around I decided to sew a size medium, with no adjustments (I sewed a straight small last time.) I also added a fair bit of length to the top because I thought it could look cute as a dress. Here are the two options below…I asked for opinions of dress or top on FB and IG and both versions got a decent vote…but a few people did mention that the dress looked a bit like a nightie in this fabric (which I was kind of worried about, myself) so I chopped it off and stuck with the top!

The fit this time is a lot better across the chest, but if I am being super picky, I feel like the sleeves and underarm area are a bit loose and baggy so I would probably reduce some of the bulk next time. I also took in the side seams a lot – I think I curved them in at the waist a bit to give the shirt more shape and like how this looks a lot more than the straight, boxy look the size medium had before.
I also added a couple of buttons to close the front placket up a bit because it was a little too low for my liking.

Prior to this top, I haven’t worn red clothing in a
very long time. I just don’t feel comfortable in it so I thought that
this top would never be worn. But I was totally wrong! I wear it HEAPS. So maybe red isn’t a bad colour for me afterall?! Or perhaps it just works in this particular top and the blue plaid check lines help to break the boldness of the red up a bit? I don’t know, but I am happy that my muslin is completely wearable and wasn’t a waste of my time!

Will there be a third Tova? I do think so. It is such a comfortable top to wear – especially in the cosy brushed cotton fabric.