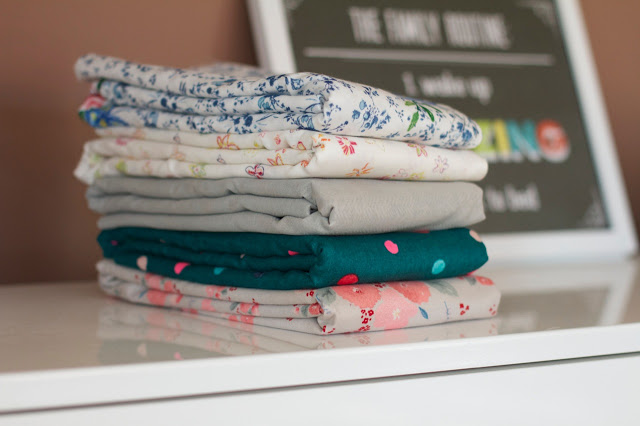
Just wanted to share with you some beautiful Nani Iro prints I received from Miss Matatabi during the week.
They are so dreamy that I couldn’t keep them all to myself. These are all double gauze – except the coral floral on beige background…that one’s a brushed cotton. You can’t really tell in the pictures, but it’s got little metallic bits through it. So pretty.
Nani Iro fabrics are by far my favourites. I’m sucked in every time they bring out a new season. And the double gauze is perfect for apparel sewing and really lovely to wear. These fabrics were purchased from the gorgeous Miss Matatabi Etsy store. Frances gets the entire range in each season, it’s rare to find another store that stocks the entire range but makes the decision of choosing just a few prints very difficult! If only I were a quilter, than I could stick to fat quarters and get a bit of everything. My usual minimum cut is 1.5 metres though if I’m not sure what I’m going to do with the fabric – that way I can be mostly guaranteed that I have enough fabric to sew something for myself. Happy Sewing! I’m off to cut into some fabric now 🙂
I’m officially into maternity clothes. I’ve been putting it off for as long as I can, but I’ve finally had to delve into the old maternity clothes bags that have been circulating between my sisters, our friends and myself for the last 10 years. There are still a few items in my “regular” wardrobe that are maternity-friendly (stretchy skirts, loose tops and of course, the trackies!) but my clothing choices are starting to feel restricted.
And those maternity clothes bags…talk about more than 2/3 of the items being badly dated and daggy now! I had the widest bell-bottom leg jeans that were super cool when I was pregnant with Oscar – a few months ago I cut them off and made them into some comfy denim shorts!
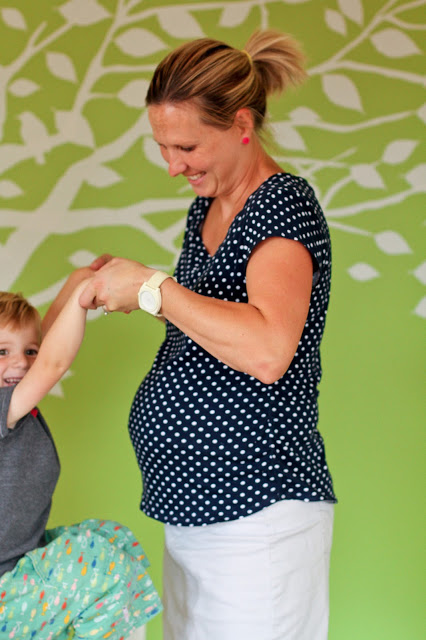
I could go to the shops and buy some maternity clothes…but for 13 weeks of wearing I can’t really be bothered or justify spending the money. So, last night I took a good-fitting top that I like wearing at the moment (see the end of this post) and drafted a simple pattern from it. I had a heap of this navy spotty knit fabric in my stash – I bought a few meters of it last year on clearance (for $4 a metre) from Spotlight. The quality actually isn’t too bad, we’ll see how well it washes and wears after awhile though. A couple of hours later, I had a brand new, comfy top that I can wear for the next few months (and what ever time I need to after the baby is born!)
I do love the white spot on navy – if I was game, I would sew myself a pair of leggings out of it but I’m not sure that I could pull them off! Lil could though, so one of us will end up with spotty leggings soon enough!!
I’ve finally decided on some goals for 2013 (who cares that we’re already 1/6 into the year!) They are photography-related this year. I have no intentions of becoming a pro photographer, but I do want to get more comfortable with using my camera and taking better photos of the family. Recently I’ve changed the screensaver to flash through photos from my computer and way too many of them are things that I’ve made or cooked (which isn’t bad) but I do realise that I need to pick up the camera more spontaneously and take photos of the people who actually live in this house too! Last year I did a course through ClickinMoms to learn how to use my camera in manual mode. It was brilliant and I learned so much. Next week I start another course learning how to use Lightroom properly for my editing. I’ve had Lightroom for about 6 months and I’m just winging it at the moment so I’m really looking forward to learning how to use it properly.
So, my photography goals for 2013…inspired by this lady, I am going to take a decent portrait of each of my children each week for the year. I figure this will be motivation enough to help me pick up the camera and take a few more photos than I already week. My second goal is to capture moments from my day-to-day life. Inspired by this cool blog, I am going to participate in the 12 on 12 challenge – to take 12 photos documenting your day on the 12th day of every month. Sounds easy now…I’m going to have to set myself some reminders so that I don’t forget!
Fabric lovers – it’s time for me to introduce another great fabric store to you today…Lemon Tree Fabrics.
Lemon Tree Fabrics is dedicated to selling high quality designer fabrics at affordable prices. You’ll find a huge selection of quilting cottons to meet all of your sewing needs. Lemon Tree Fabrics has exceptional customer service and stock a great range of fabrics from your favourite designers and manufacturers.
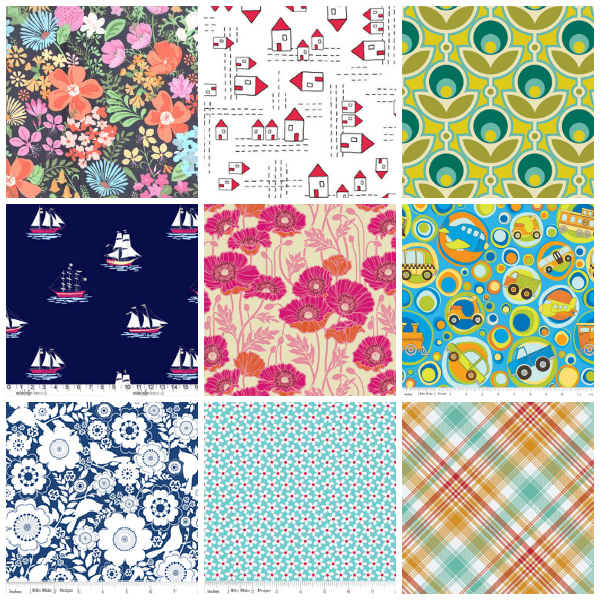
I especially love these gorgeous Suzy Ultman fabrics from her new range “Suzie’s Dollhouse.”
And take a look at these lovely fabric selections avaliable at Lemon Tree Fabrics:
Lemon Tree Fabrics is offering Make It Perfect readers 10% off their purchases from now until 31st March. Simply enter the code “PERFECT” during checkout to redeem your discount!
You can also stay connected with Lemon Tree Fabrics on Facebook and Etsy.
So, what are you waiting for – go and visit Lemon Tree Fabrics and make use of that great discount!
I’ve recently discovered a new Aussie online fabric store and am excited to share it with you today:
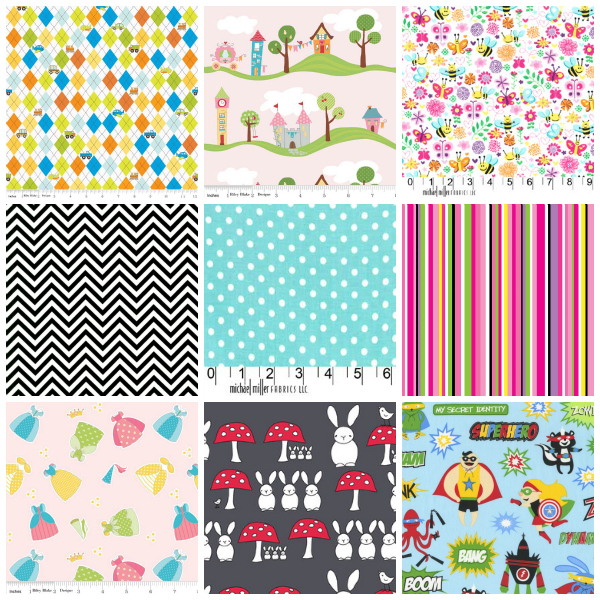
Fabric2Go is your “go to” store for fabrics and trims. Specialising in gorgeous fabrics and trims produced by Riley Blake, you’ll find a rainbow of awesome designs at amazing prices right here in Australia.
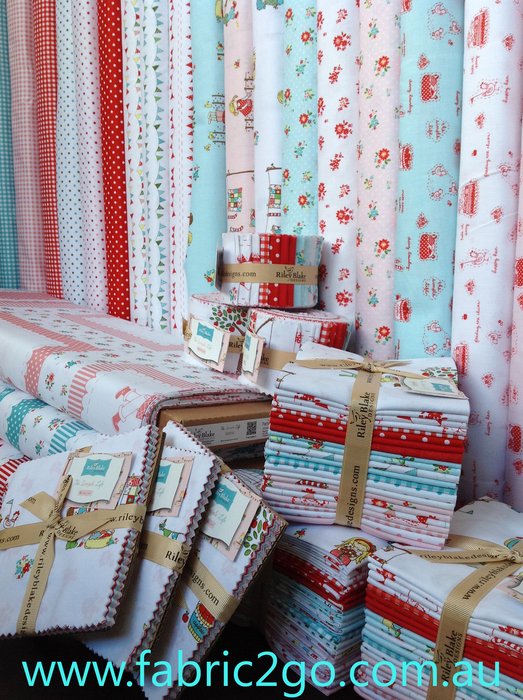
Fabric2Go has a great range of fabrics, including the popular Riley Blake dots and chevrons, each in three different sizes. You’ll also find a great range of laminates and flannels for all of your sewing projects.
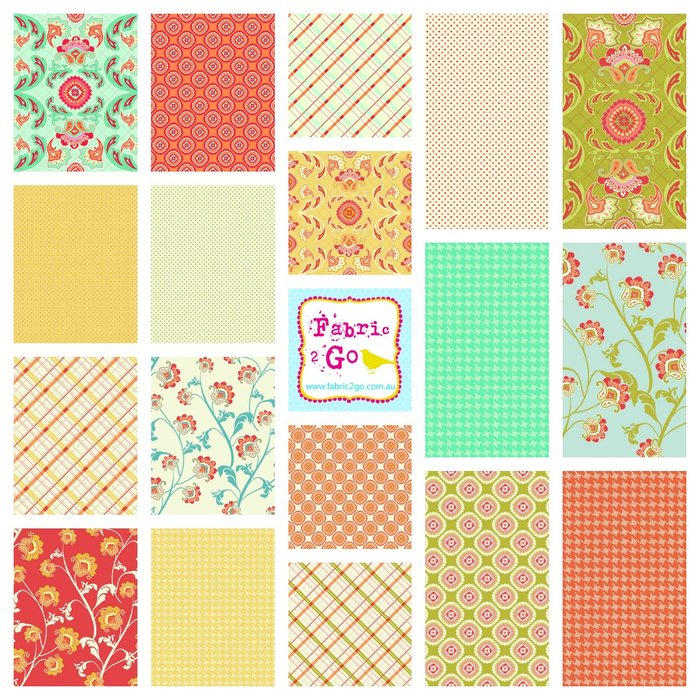
If you’re looking for quality solids at an affordable price, there is a huge range of colours to choose from here. As well as a great selection of Shades *almost* solids if you want something with a big more dimension.
Take a look around their shop, I’m sure you will fall in love. To make things even easier for you, postage is free within Australia for all orders over $50! And if you order before 2pm AEST, your order will be shipped on the same day. Wondering if what your fabric choices are going to look like when put together? Simply add them to your shopping cart and move them around on the interactive design wall to see what they look like!
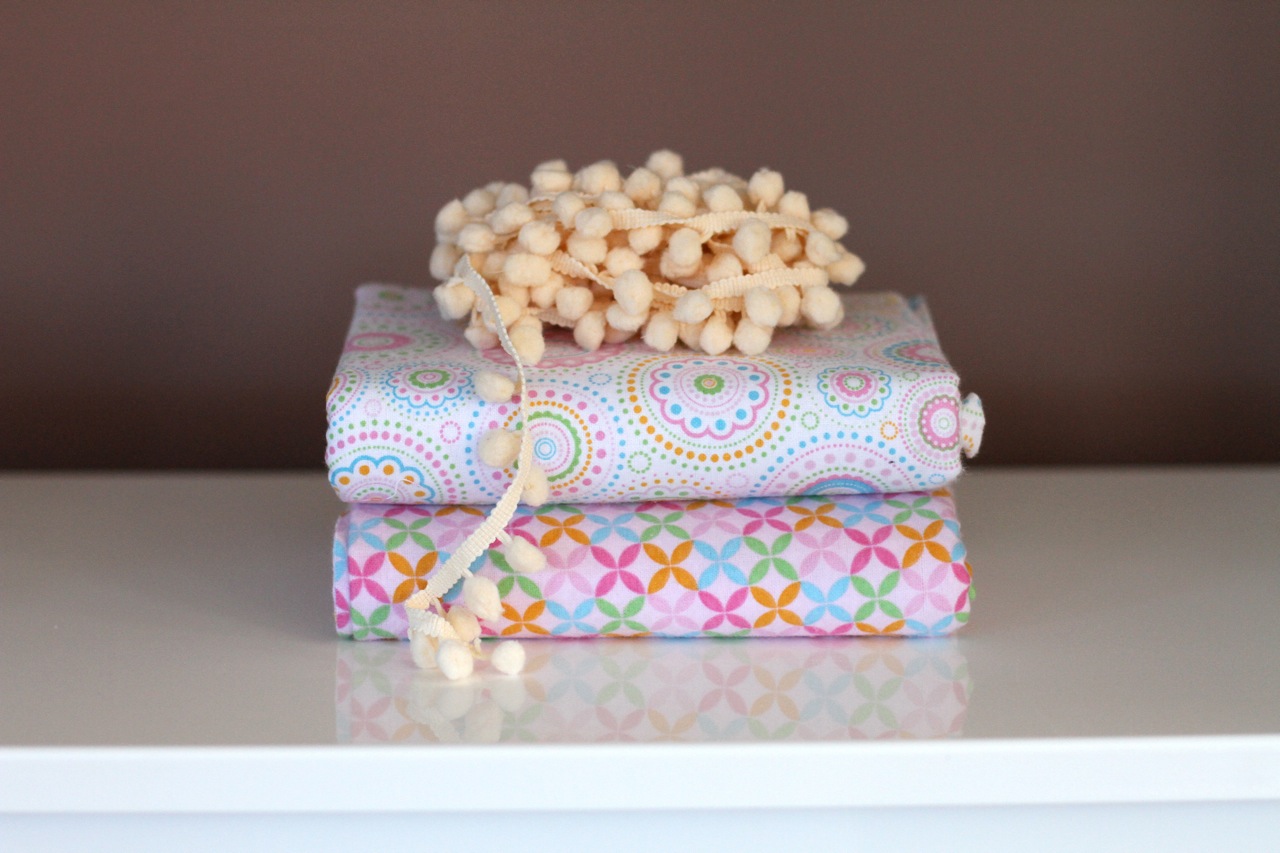
I got some lovely fabric from Fabric2Go before Christmas. My polka dot stash was running low so I stocked up on this gorgeous rainbow of medium dots. I use dots a lot in my sewing, they seem to coordinate with everything else and look great when put together.
I also added these flannels to the stash – at $12 a meter, they will be great for some winter sewing.
I’ve got a thing for pompoms at the moment and love this pompom trim too.
Along with each product image, you’ll also find a photograph of the bolts in the range. I find it particularly helpful to see the fabric on the bolt when you are trying to determine the scale of a particular print – something I often struggle with when shopping for fabric online.
Fabric2Go is offering a discount of 15% off all orders placed between now and the 30th January. Simply enter the discount code Make it Perfect during checkout to receive bargain priced fabric!
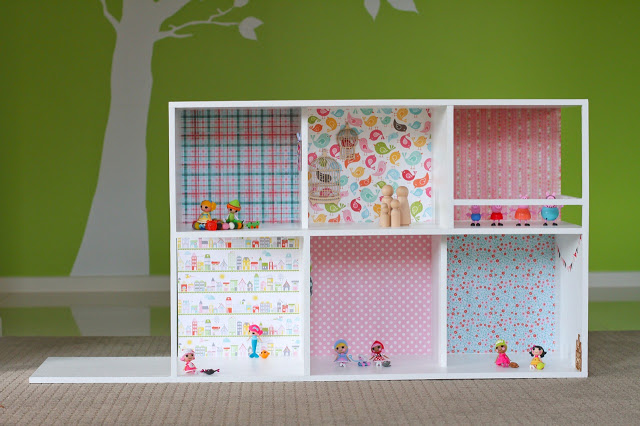
It feels like ages ago we were staying up late at night working on the dollhouse. We managed to get it “finished enough” for giving on Christmas, it was a big job though! I didn’t realise that the painting would be such an enormous task. We used a regular interior wall paint with a sheen, the only reason we choose to use this particular paint is because it was reduced to $10 for a 2L tin – way cheaper than buying a $40 tin of enamel paint. It seems sturdy enough to withstand playing and we can always touch it up if needed. We ended up having to apply SIX coats of paint to the dollhouse though to get a nice, even coverage. It took forever! In hindsight (and if we ever build something like this again) we thought we should have painted the big MDF sheets BEFORE cutting and constructing then we would only have had to touch up bits and pieces instead of trying to get our little rollers into every crevice!
I say it is “finished enough”because it is done enough to start playing with, but I still want to get around to more decorating, maybe some floor coverings, fake windows and curtains, and of course furniture to finish it off some more. But I definitley need a break from it for awhile before I start getting crafty again!
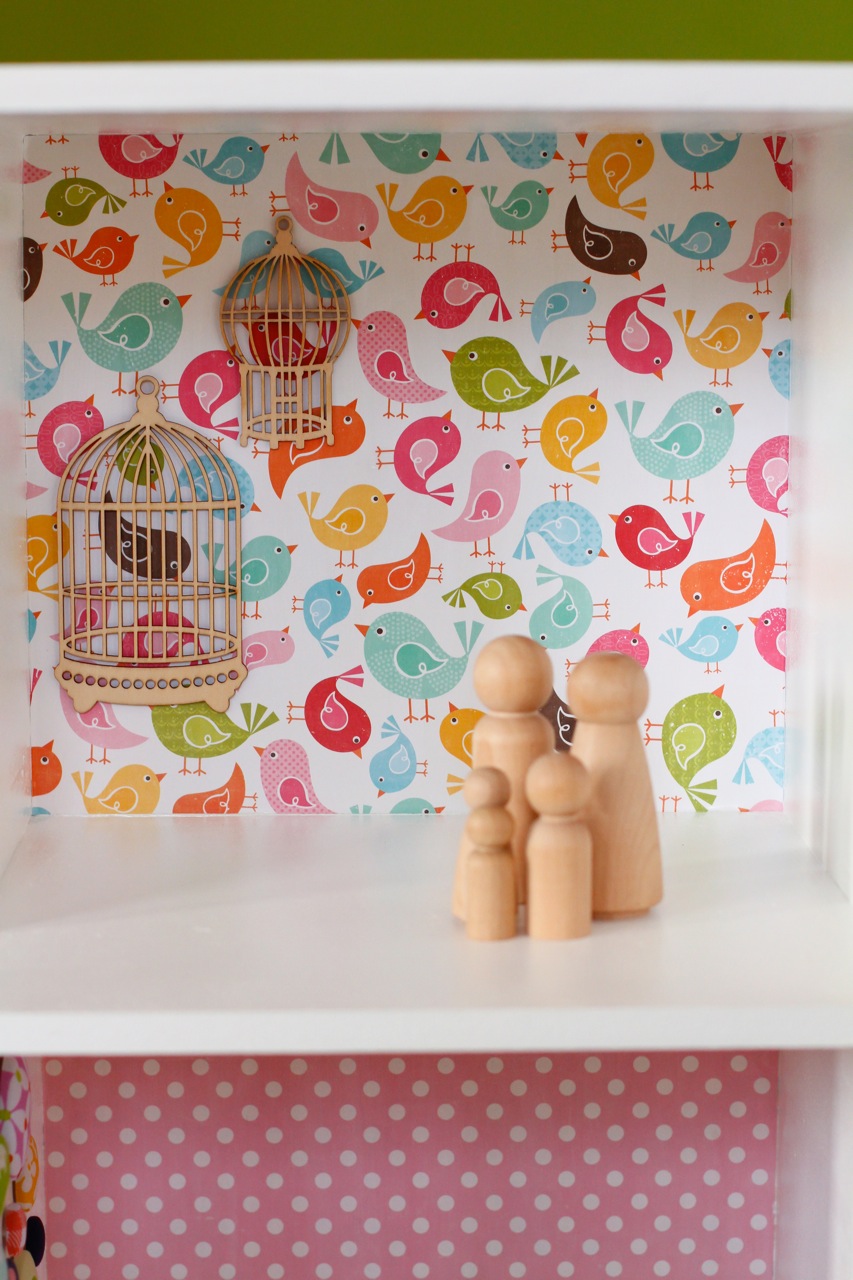
The back walls were all covered with scrapbooking paper. I measured each wall then cut the paper slightly bigger and carefully trimmed little strips off each side until it fit perfectly. I found a decent layer of PVA glue painted to the back of the paper with a paint brush to work really well, then I quickly stuck it in place and rubbed it all over with a soft, dry cloth to get rid of any air bubbles until the glue took hold. Once the glue had dried I painted a layer of mod podge over the sheet of paper to give it a bit of extra protection also.
I added a few little decorations to some of the walls to give it a bit more detail. This little bunting was made with triangles cut from washi tape.
For this wall, I covered different sized buttons with fabric and stuck them to the wall using a raised double sided tape.
I found some wooden cut out shapes at the scrapbook shop and stuck them to these two walls with double sided tape.
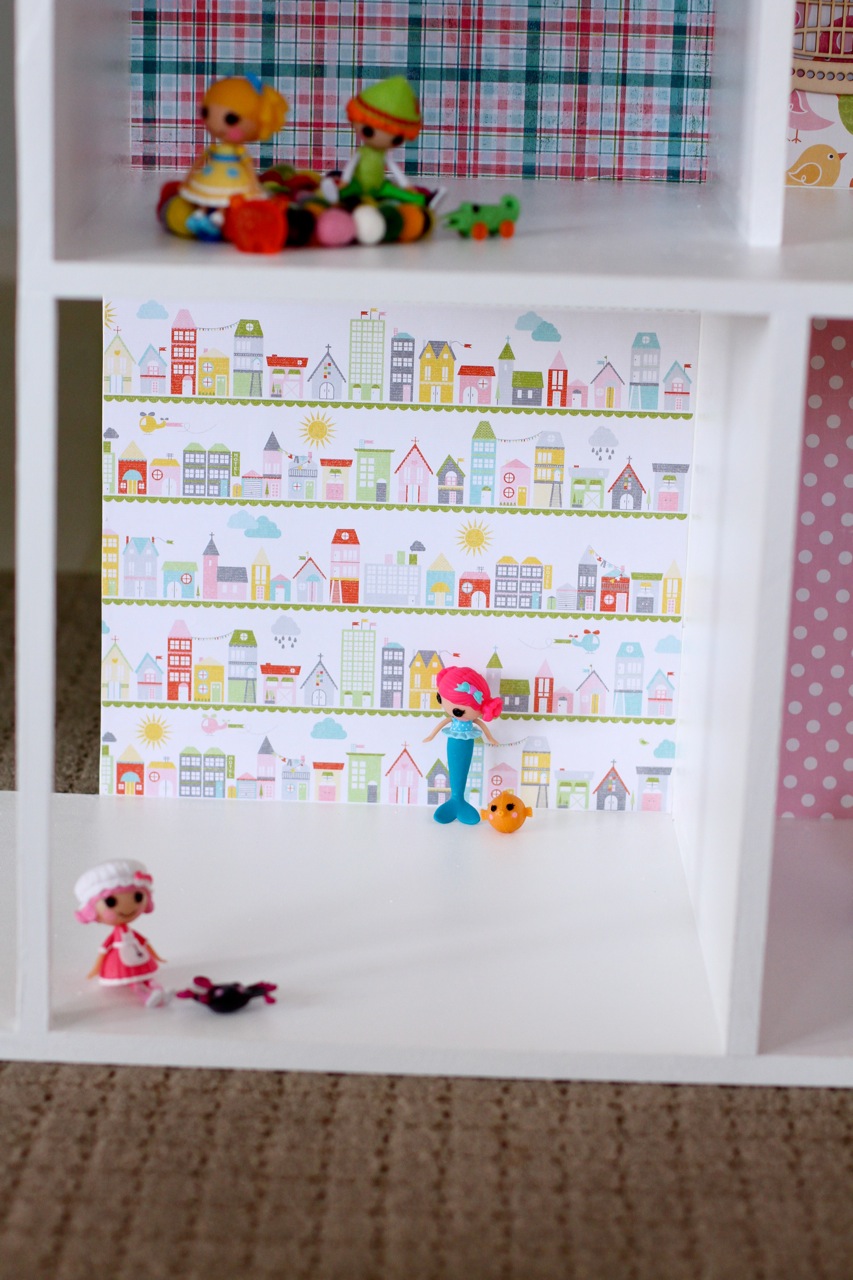
This “room” of the house has potential to be the pool/deck area. I want to eventually add a pool to the left-hand overhanging piece and make it look more like an outdoor area.
I spent HOURS rolling these felt balls from wool roving to make a mini freckle rug. The balls are tiny – about 1cm in diameter and I sewed them together with some strong thread. Lil helped me make some of them and she was so excited to see them made into a rug in the house.
I filled the house with some cute mini La-La-Loopsy figurines I found at Kmart before Christmas, as well as some of our wooden dolls. Tommy got the Peppa Pig figurines for Christmas and they have since taken up residence too! We wanted this to be Lil’s big present from Santa, but didn’t want the mystery guy to be given all of the credit for our hard work, so told her that we helped Santa out by making this one for him! That way, it will hopefully be more meaningful to her and she will treasure it for a long time. So that’s it all done for now! Feels good to have all of the hard work finished and now we can add little bits and pieces as time goes by to fill it up and give it a bit more character.

 Just wanted to share with you some beautiful Nani Iro prints I received from Miss Matatabi during the week.