Who is getting ready to sew some kiddo PJs? I’ve had so much fun sewing Catnap Pyjamas for my kids and I have to say, they are looking pretty cute after bath each night now!
I like to make sure that all of my patterns are easy to follow and give satisfying results for all skill levels. When I was writing the instructions for the Catnap Pyjamas, I knew that the collar insertion was probably the trickiest part of the whole project. When I say “tricky” I don’t mean “hard” – not at all! In fact, once you’ve sewn one collar you will feel pretty proud of yourself and realise that it is actually easy peasy. BUT until you have done it successfully the instructions can look a bit tricky.
For those of you who are having trouble figuring this step out in the pattern or for those of you who are big visual learners and like to have step-by-step photographs to refer to, I have decided to pop a little sew-along on the blog today for you to refer to and help you make sense of this step.
Okay, let’s get collar sewing!!
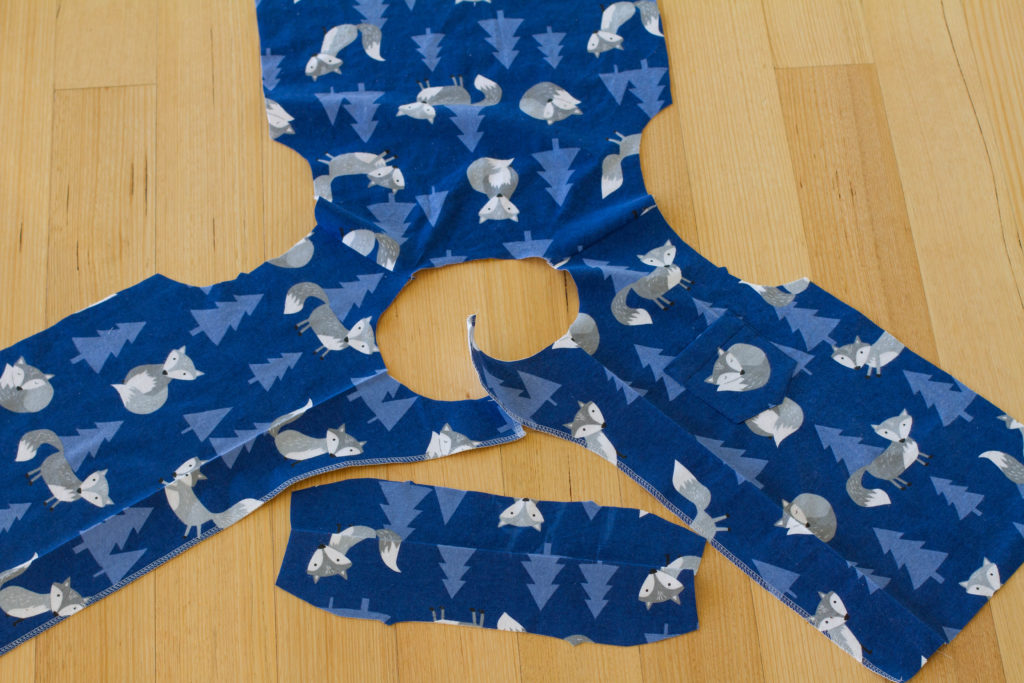
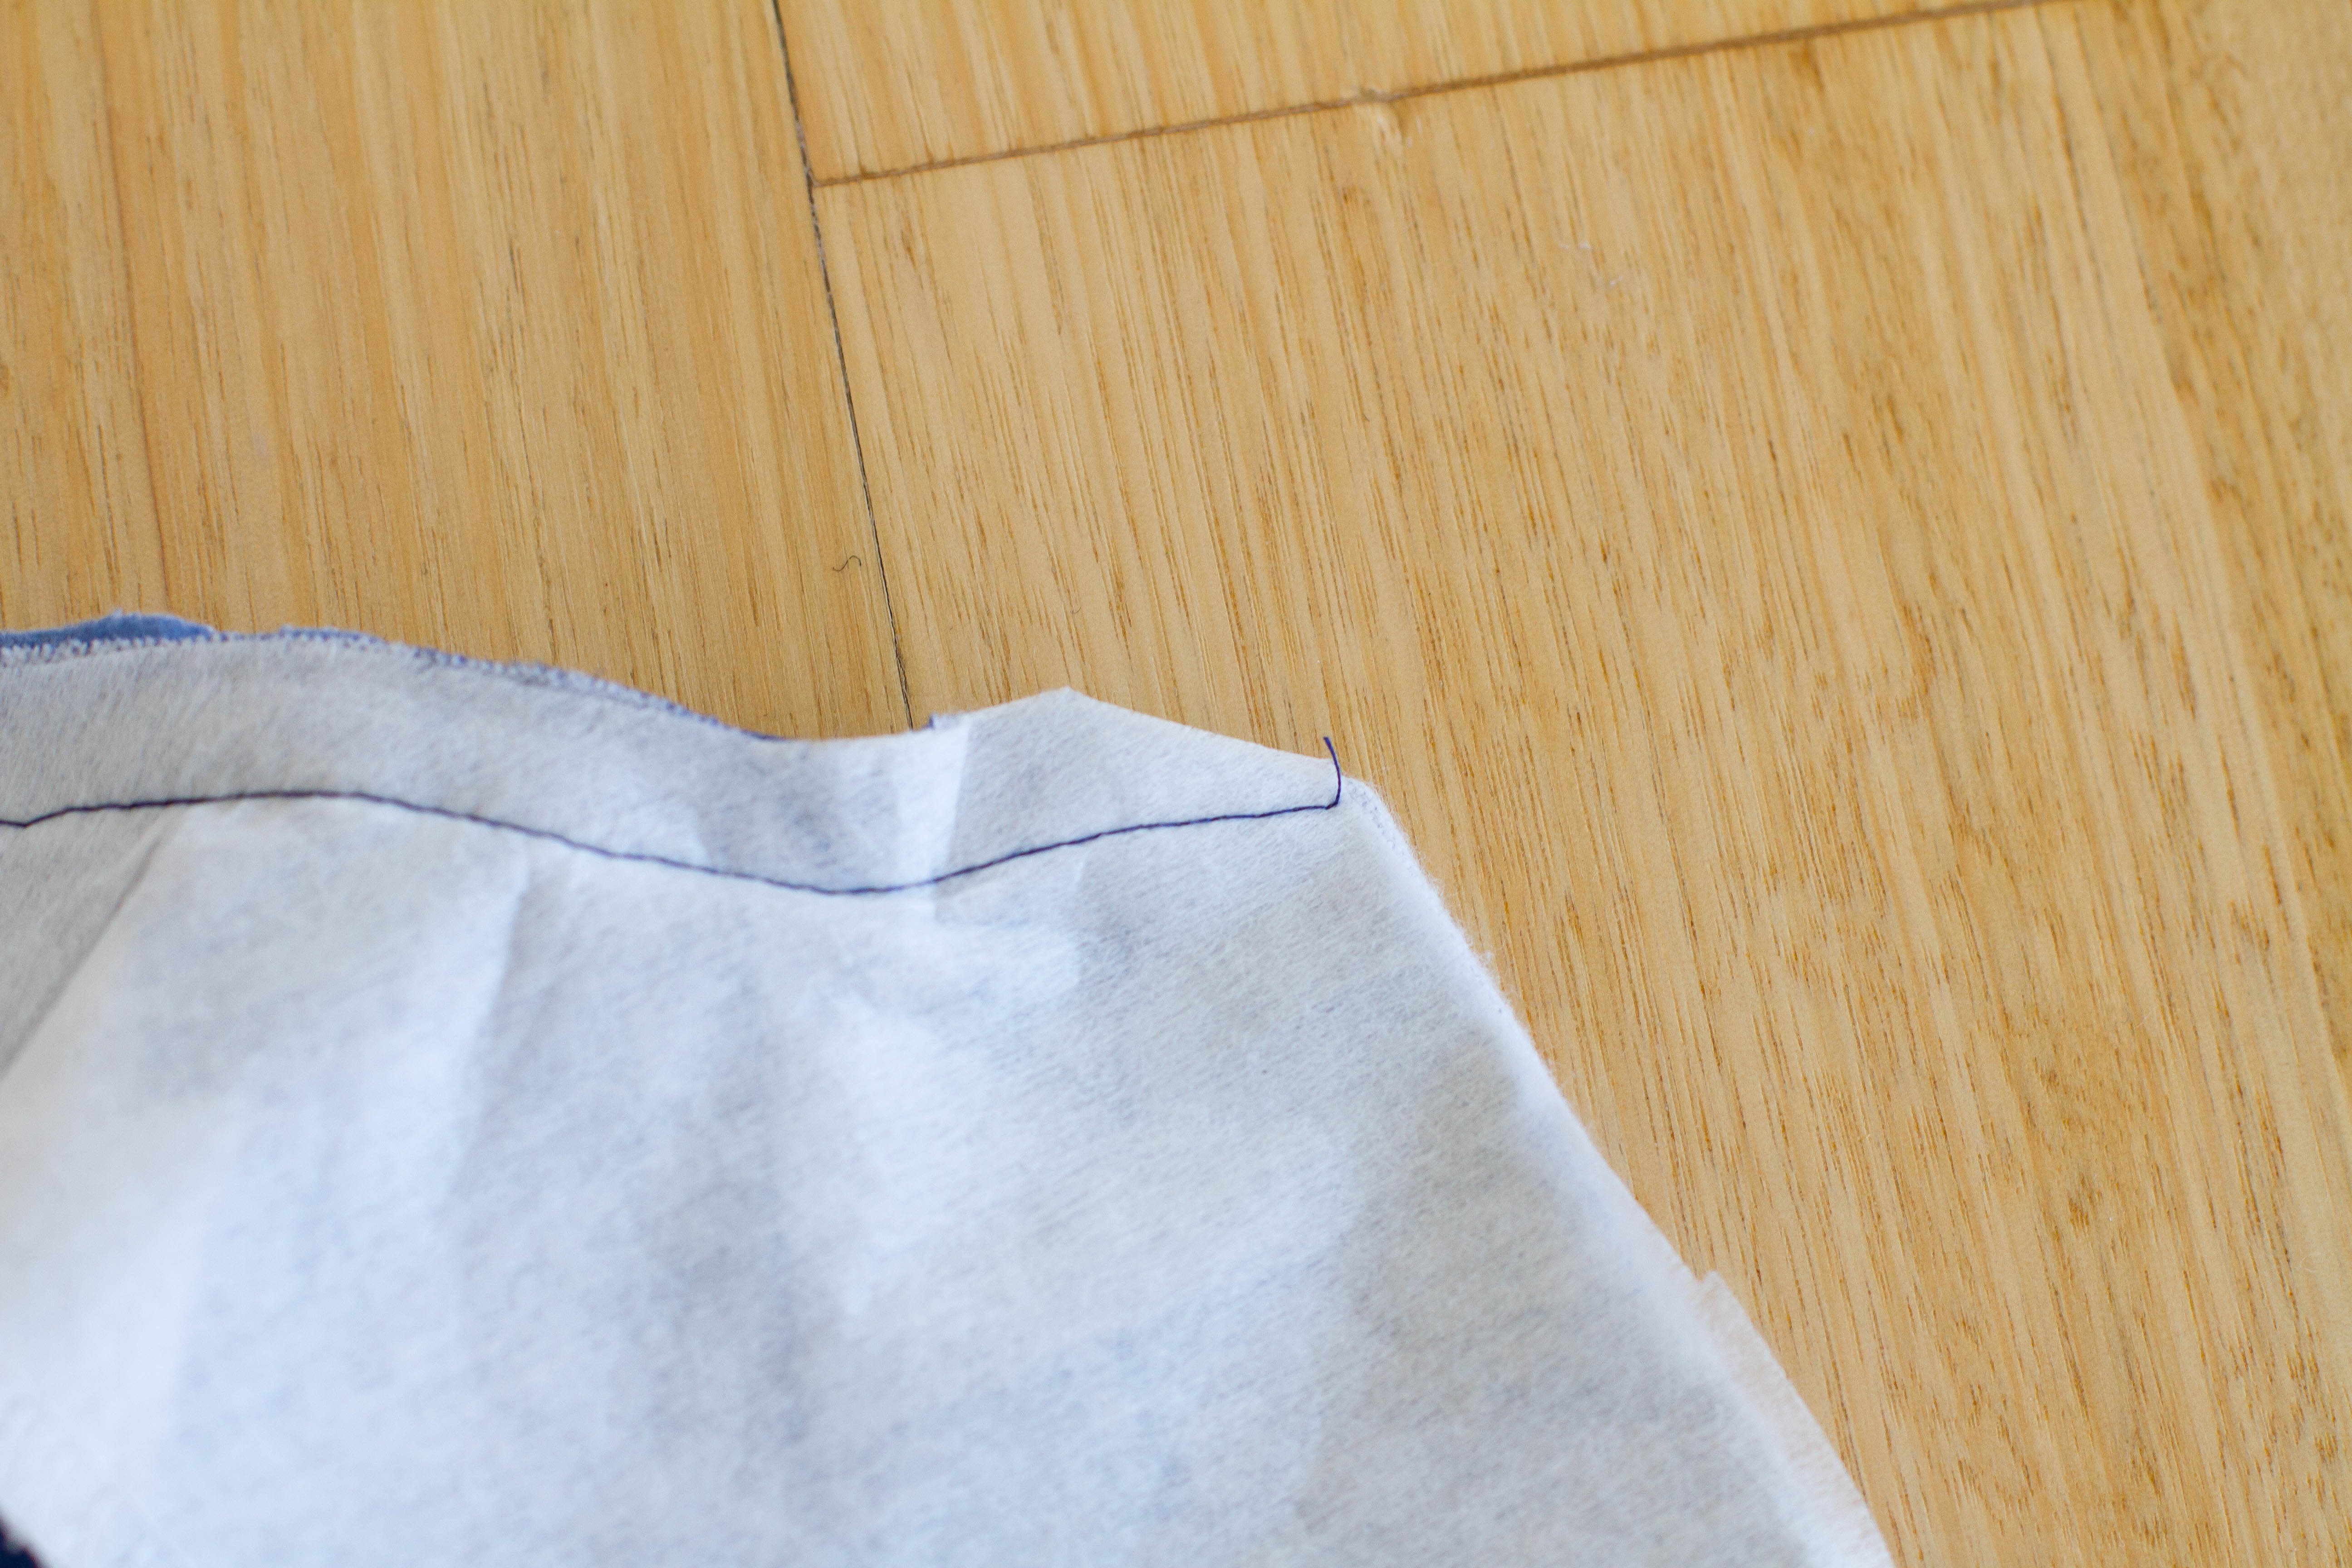
You will need to follow the instructions in the pattern up until Step 3, d. At this stage you will have fused the interfacing to your PJ top front pieces and collar piece and pressed folds in all pieces. Here are the pieces we are working with for this sew-along…The big piece is the PJ top back with front pieces joined at the shoulder seams and the little piece is the collar – folded in half.
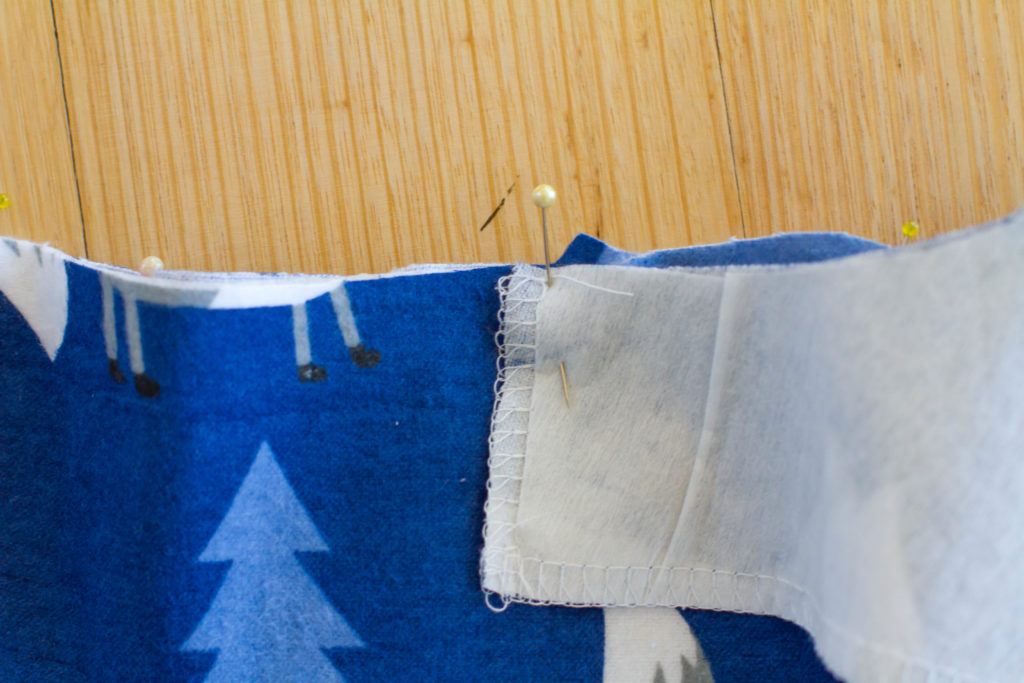
 First of all, you will need to unfold the front facings on the PJ front pieces. Then take your folded collar piece and place the raw edge of the collar onto the right side of the PJ top neckline. Make sure that the NON-INTERFACED side of the collar is facing the right side of the PJ top.
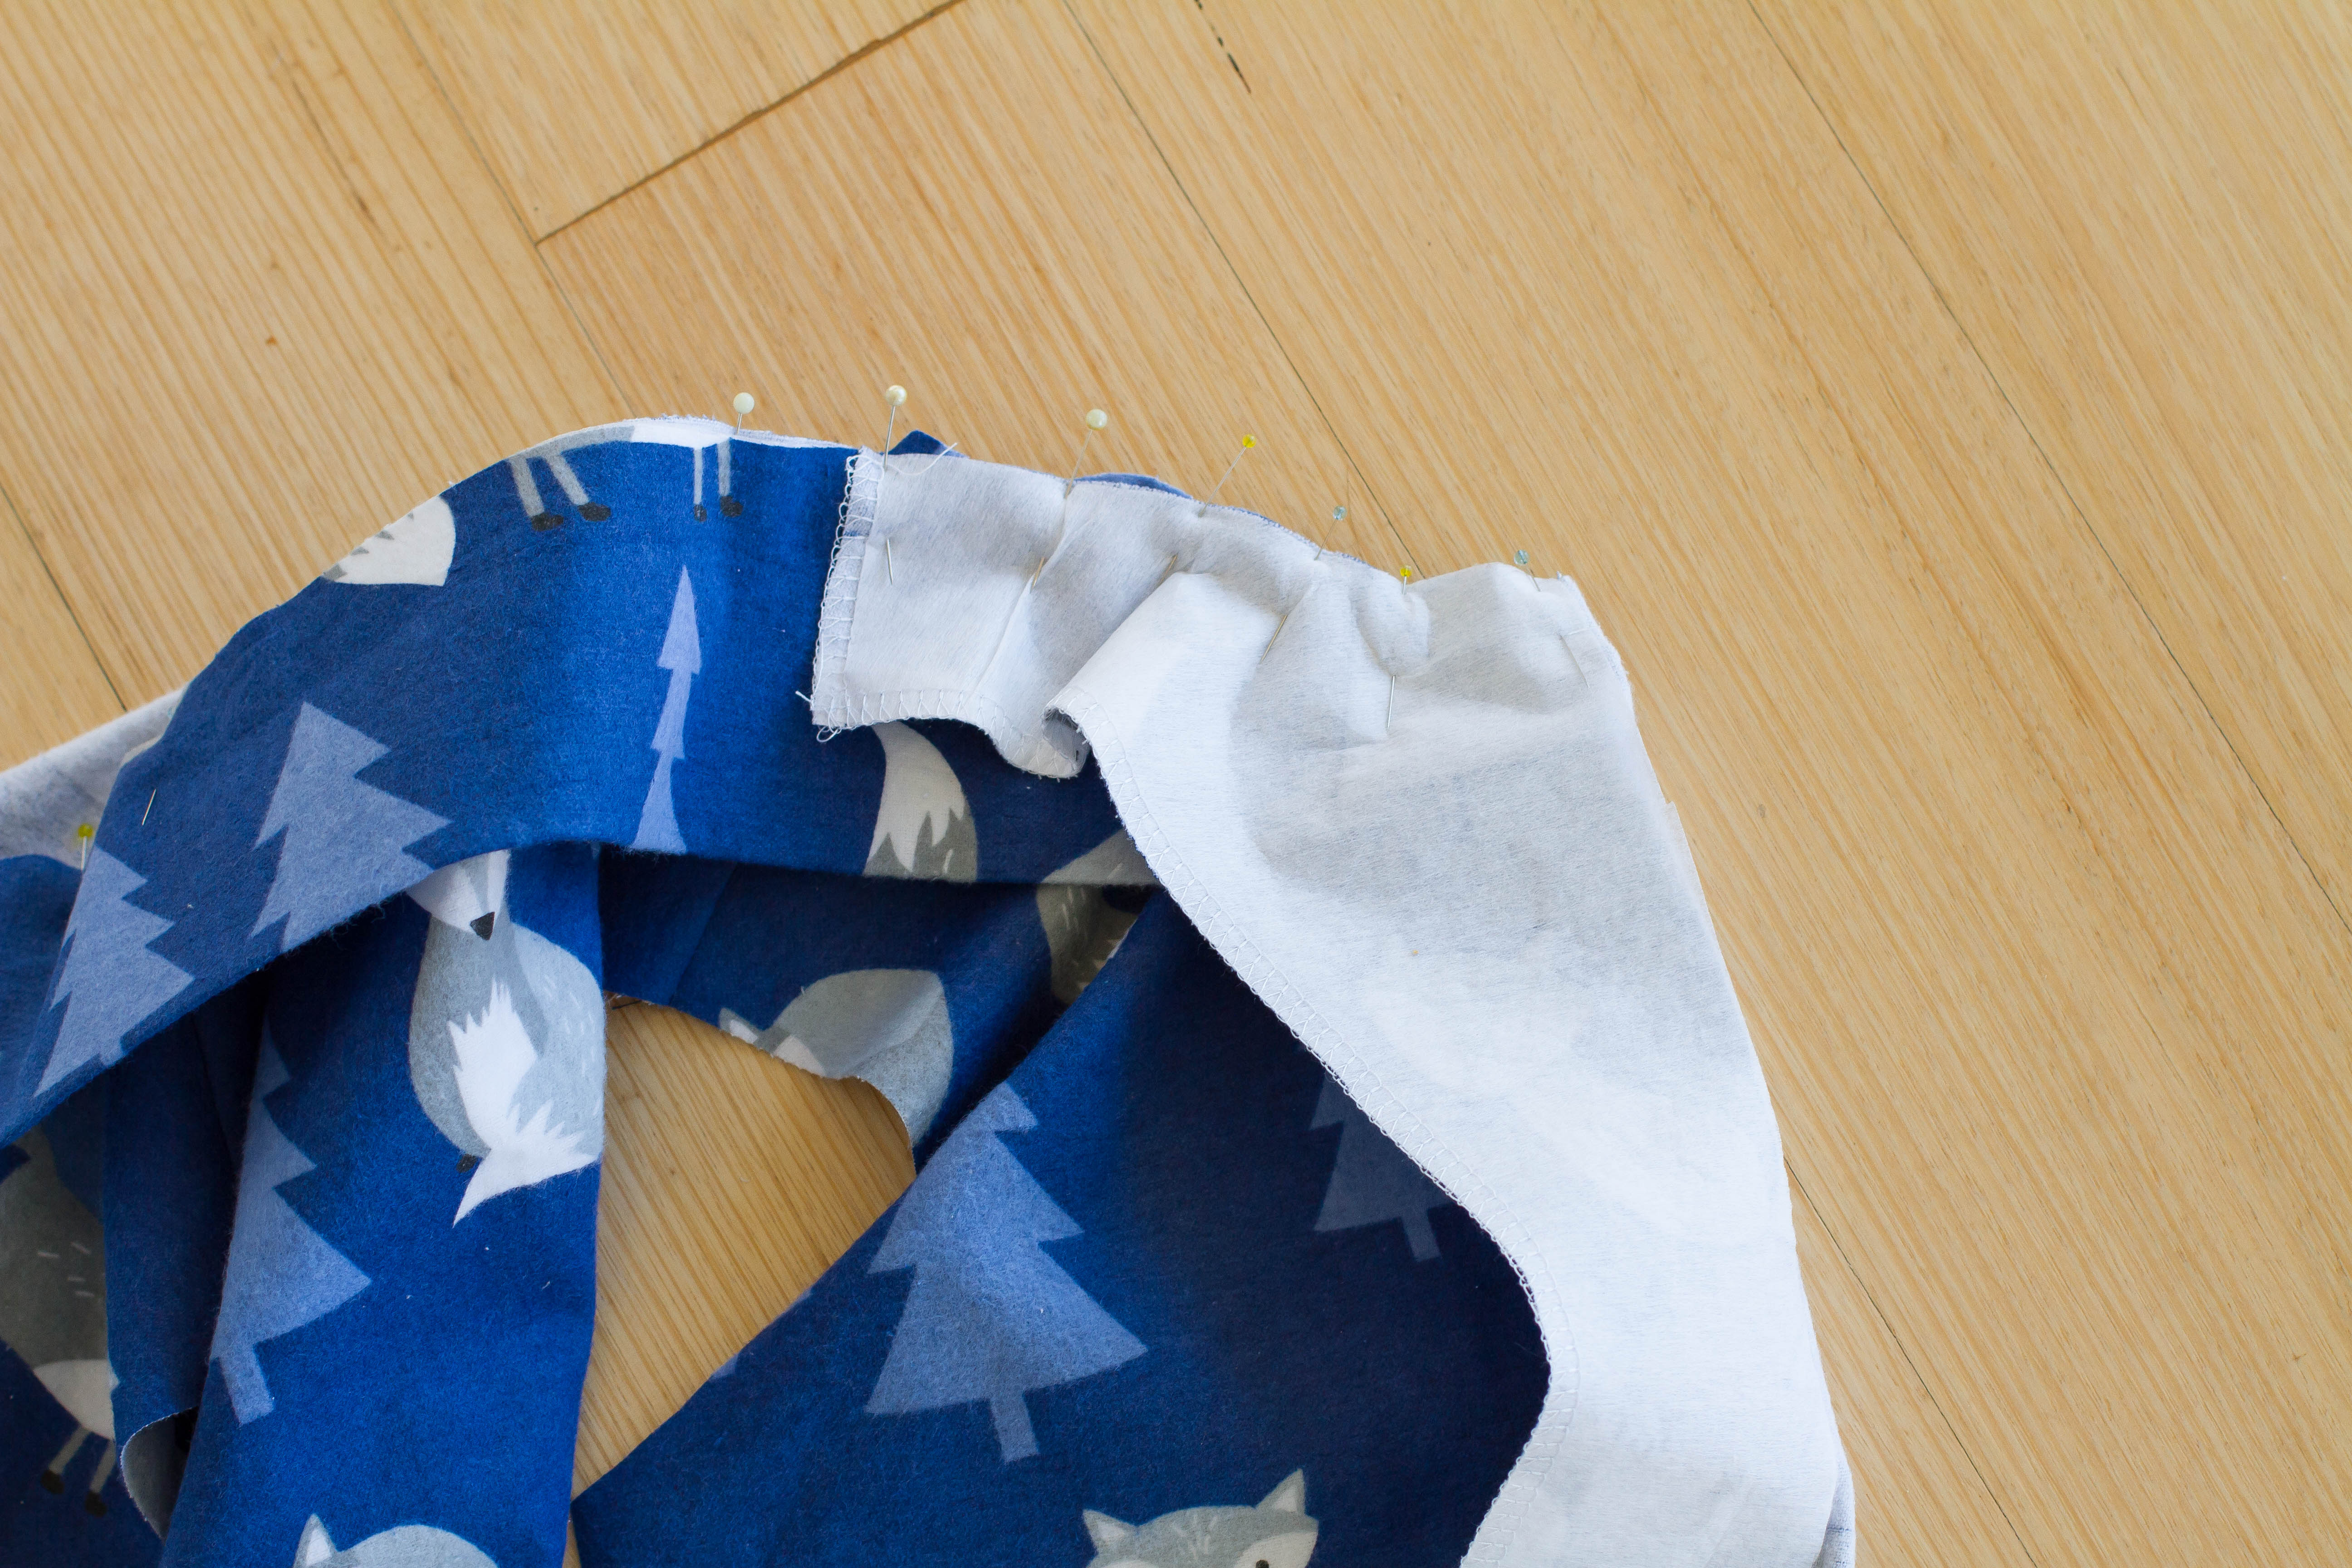
Pin the collar to the PJ top – I start by pinning the collar notches to the shoulder seams, then extending the ends of the collar around the front of the top. Make sure that the ends of the collar finish at equal distances at both sides of the PJ top neckline. You don’t want an uneven collar!!
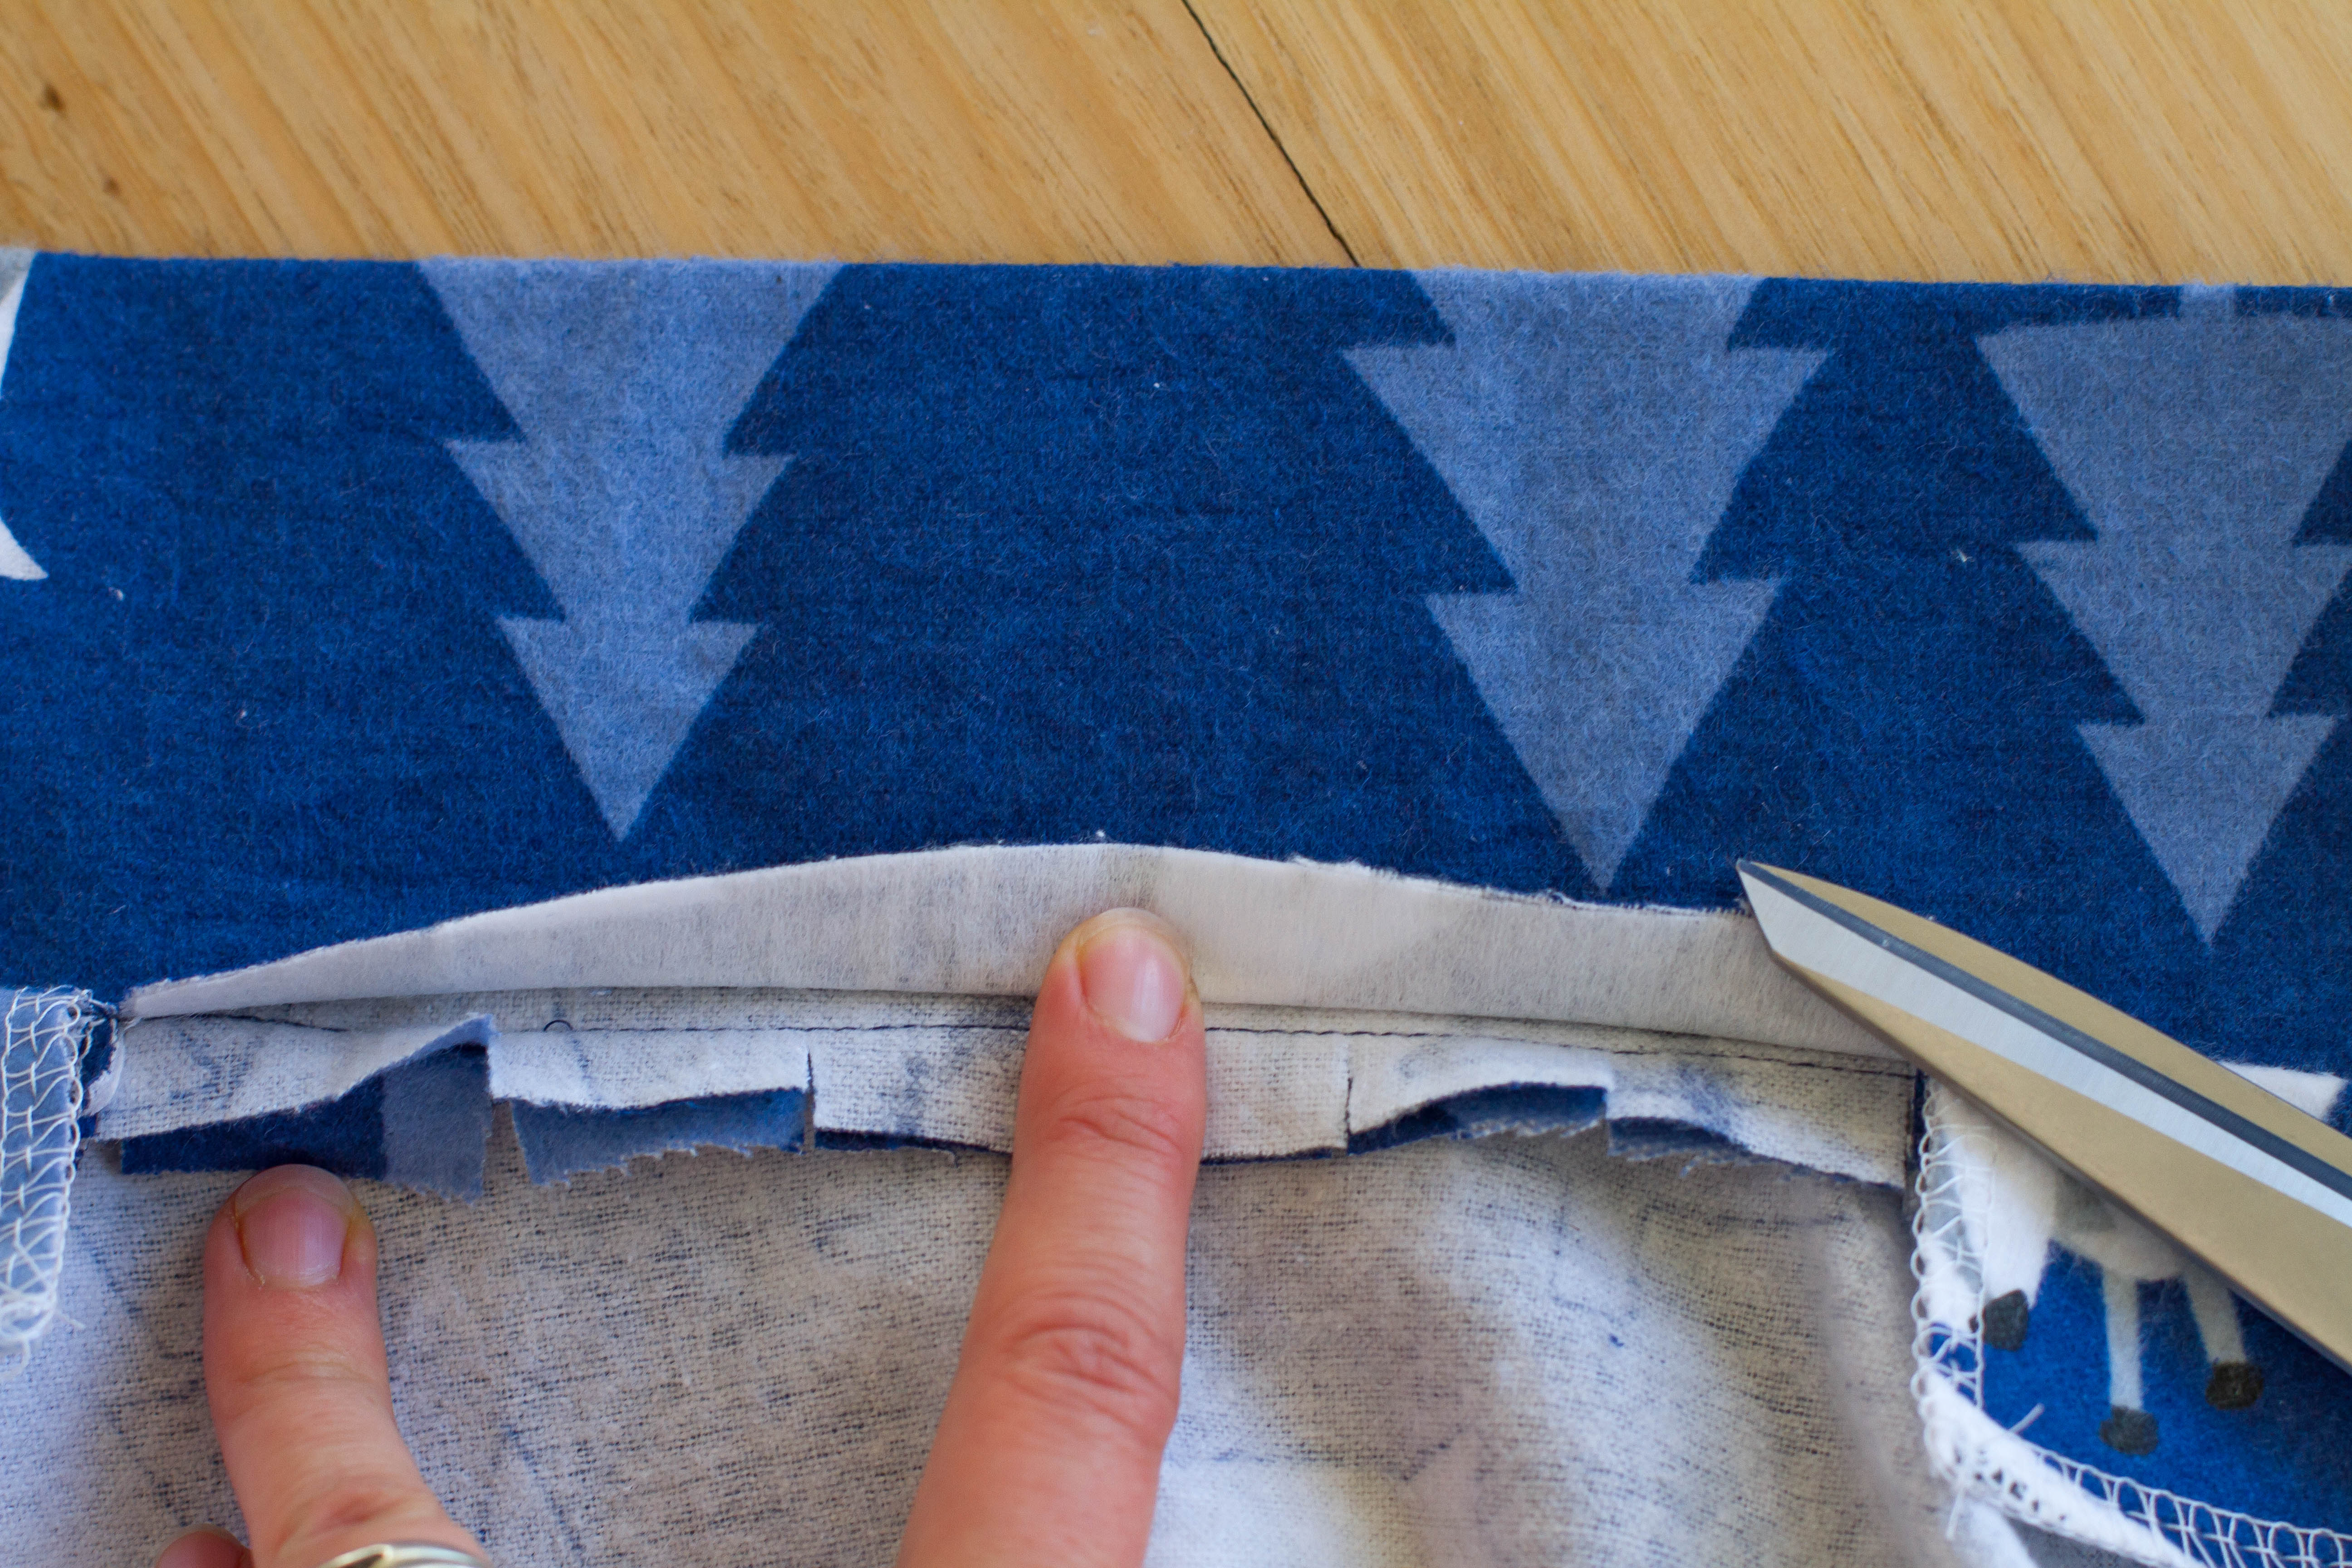
When you are ready to pin the collar to the back neckline, you need to ONLY pin the NON-INTERFACED side of the collar to the neckline. To do this, gently fold the interfaced side of the collar back out of the way. (I am using my scissors as a weight here to hold the collar down out of the way while I take the photo!)
 With everything pinned into place, you now need to take the front facings (interfaced parts of the front pieces) and fold them BACK over the top of the collar so that the interfacing is facing up.
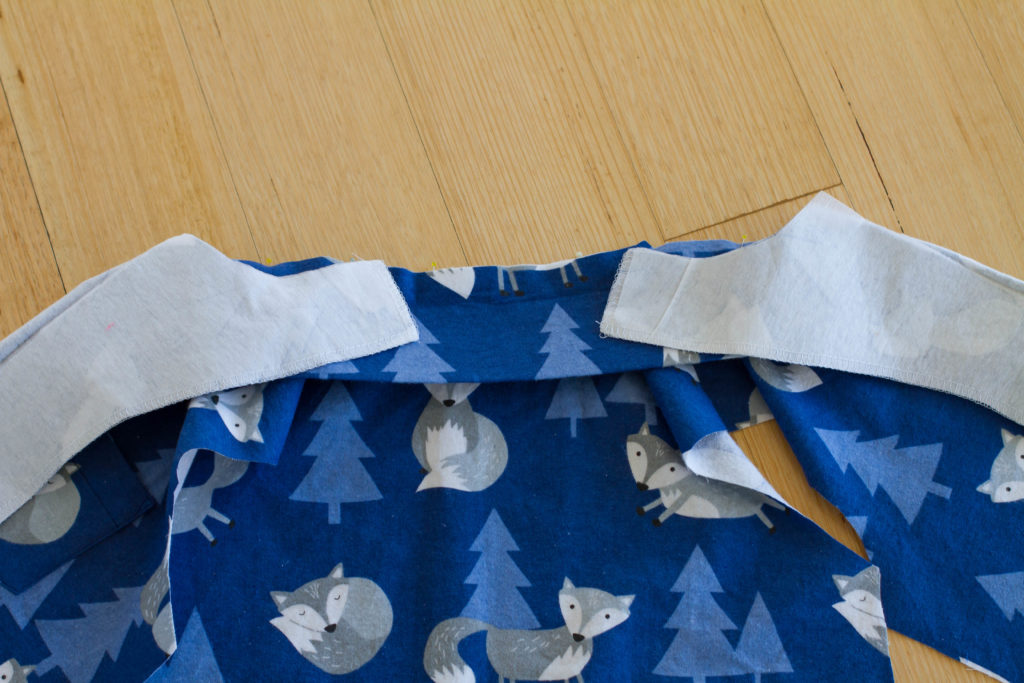
The collar should be sandwiched between the front pieces and the front facings. Make sure that the ends of the facings extend about 1/4″ past the shoulder seams and collar notches.
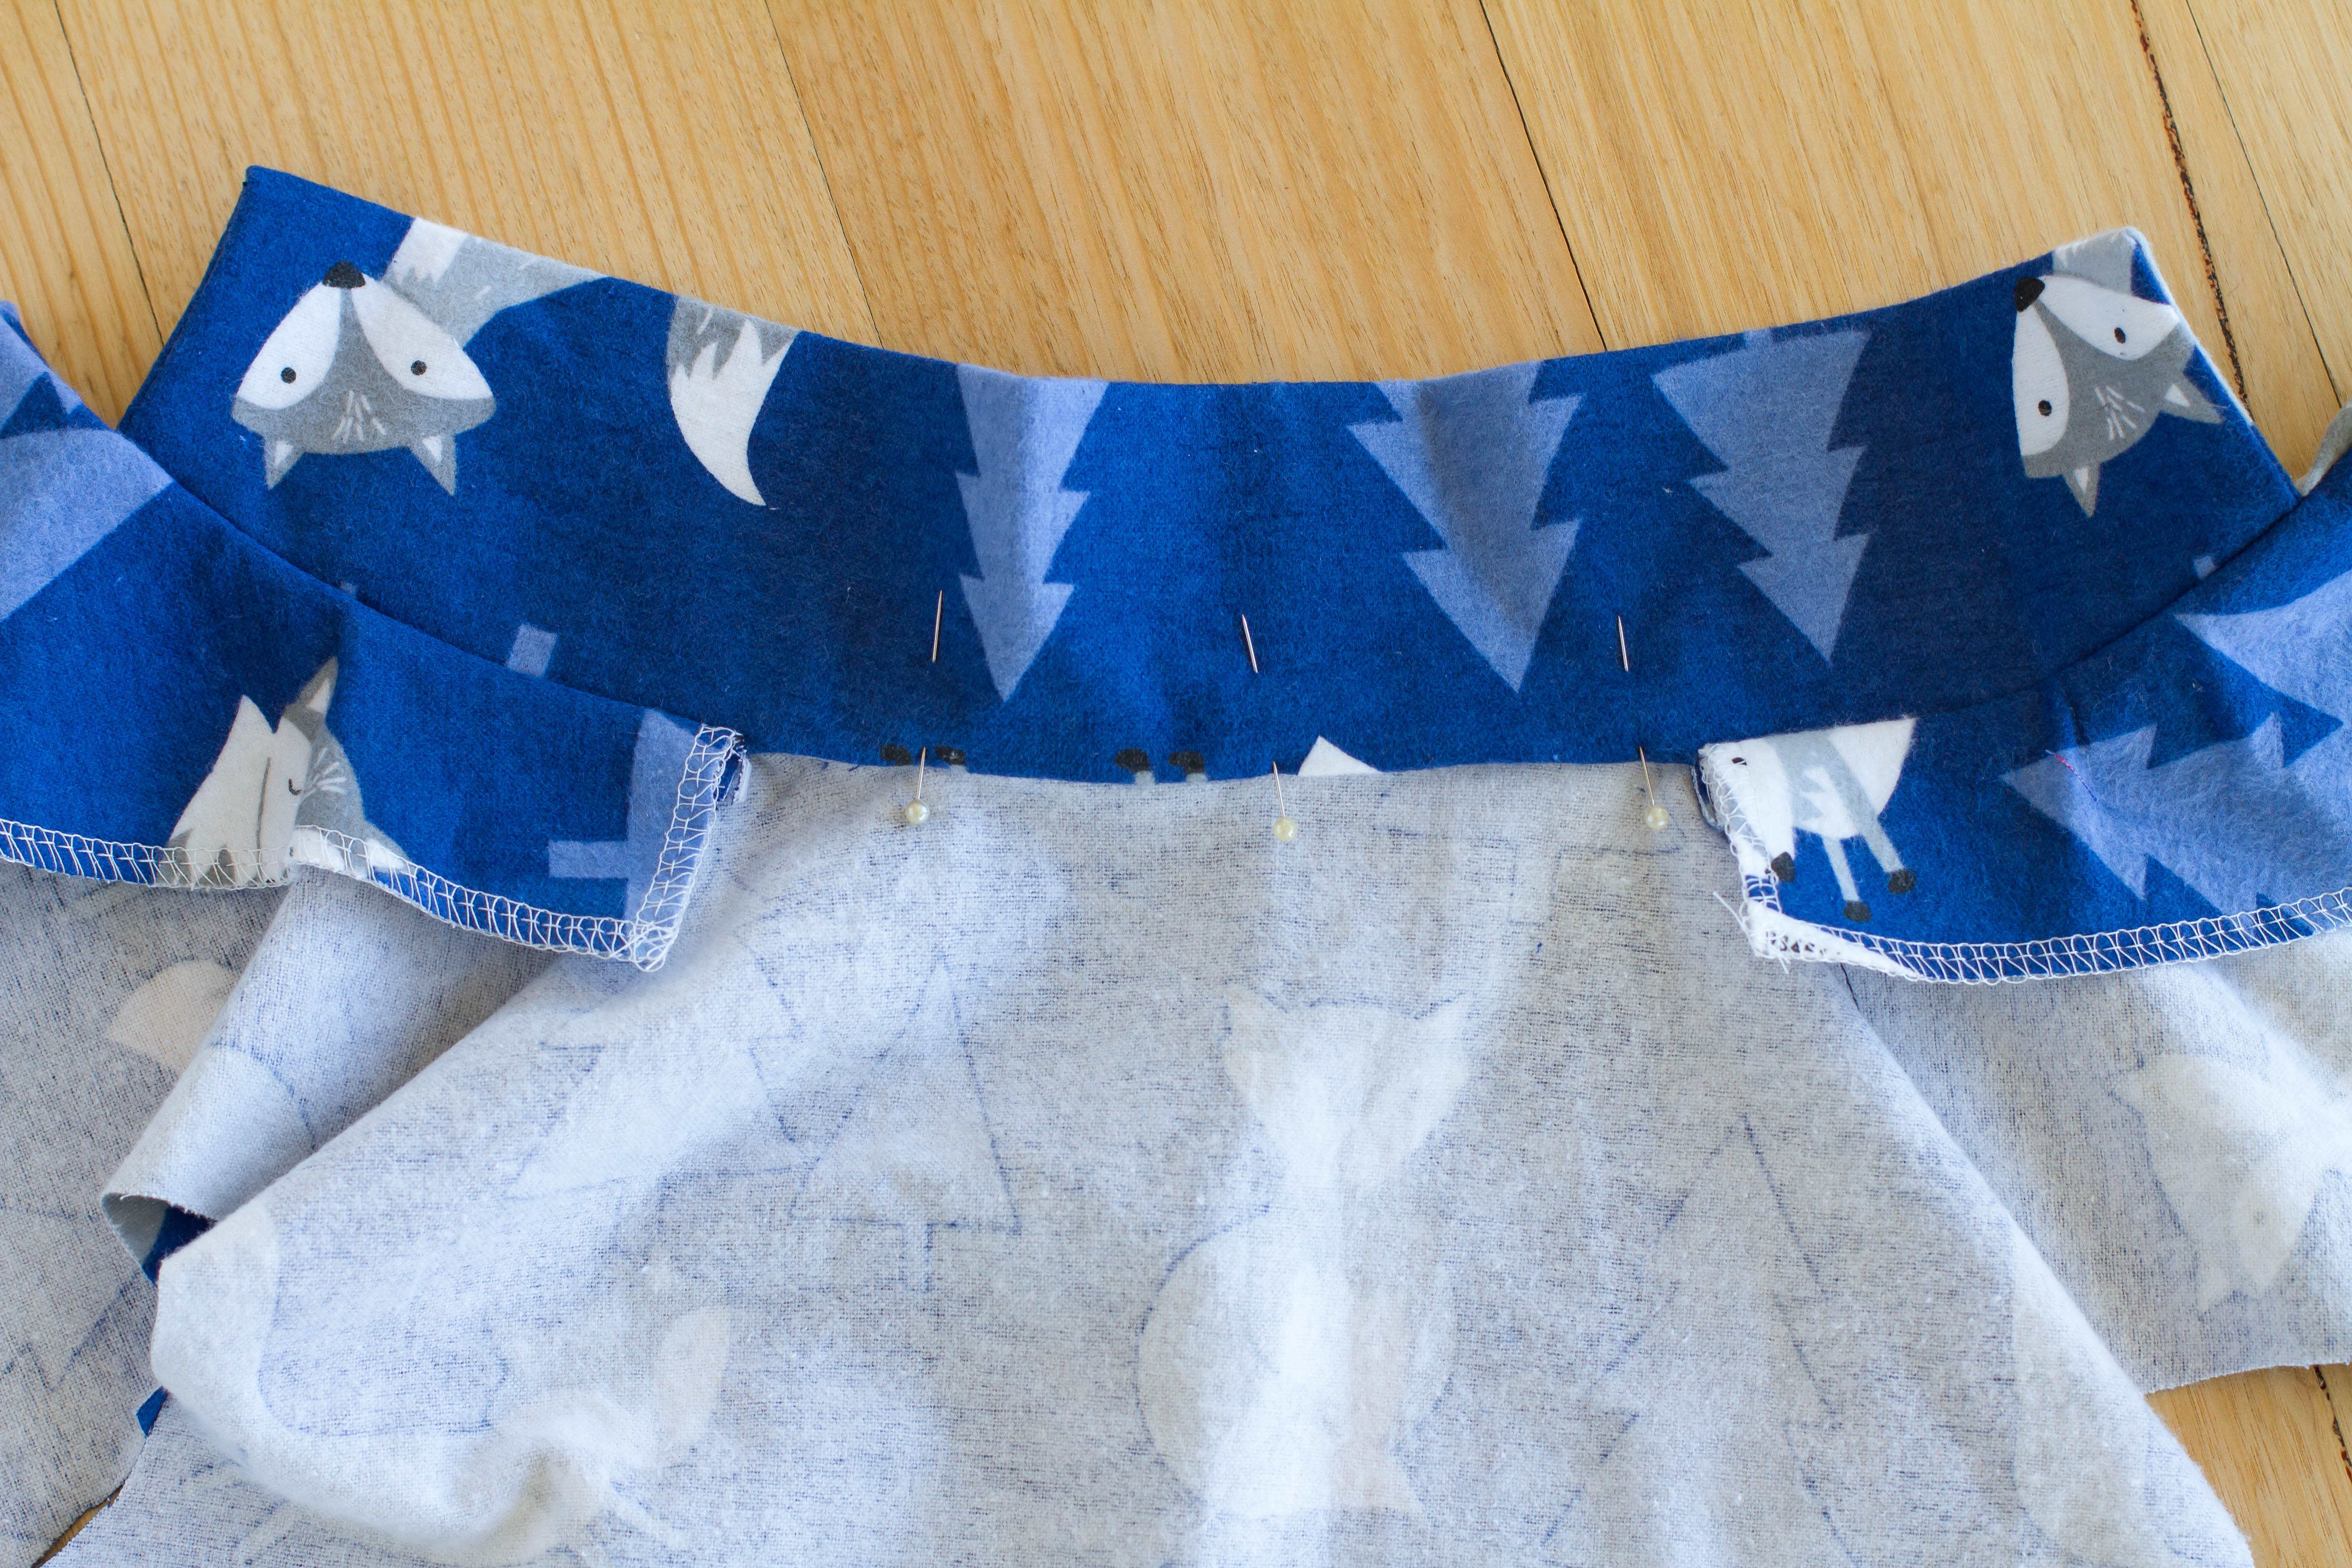
Pin facings into place. (You can remove the pins underneath the front facings if you want to now to reduce bulk.) It is a good idea to check both sides of the neckline edge at this stage and make sure that there aren’t any puckers along the pinned edge. It can feel a bit wonky pinning everything together at the moment, but it works out in the end! If you are really struggling with puckers, try using more pins or making a few 1/4″ clips along the neckline to give you a bit of wriggle room.
To prepare the collar for sewing, make two little clips in the upper collar (interfaced side) which is just less than 1/2″ long. The clips should sit right next to the ends of the front facing. Make sure that you ONLY clip the interfaced side of the collar.

This is what the whole piece should look like now – you can see the upper collar clipped at both ends right next to the front facings. 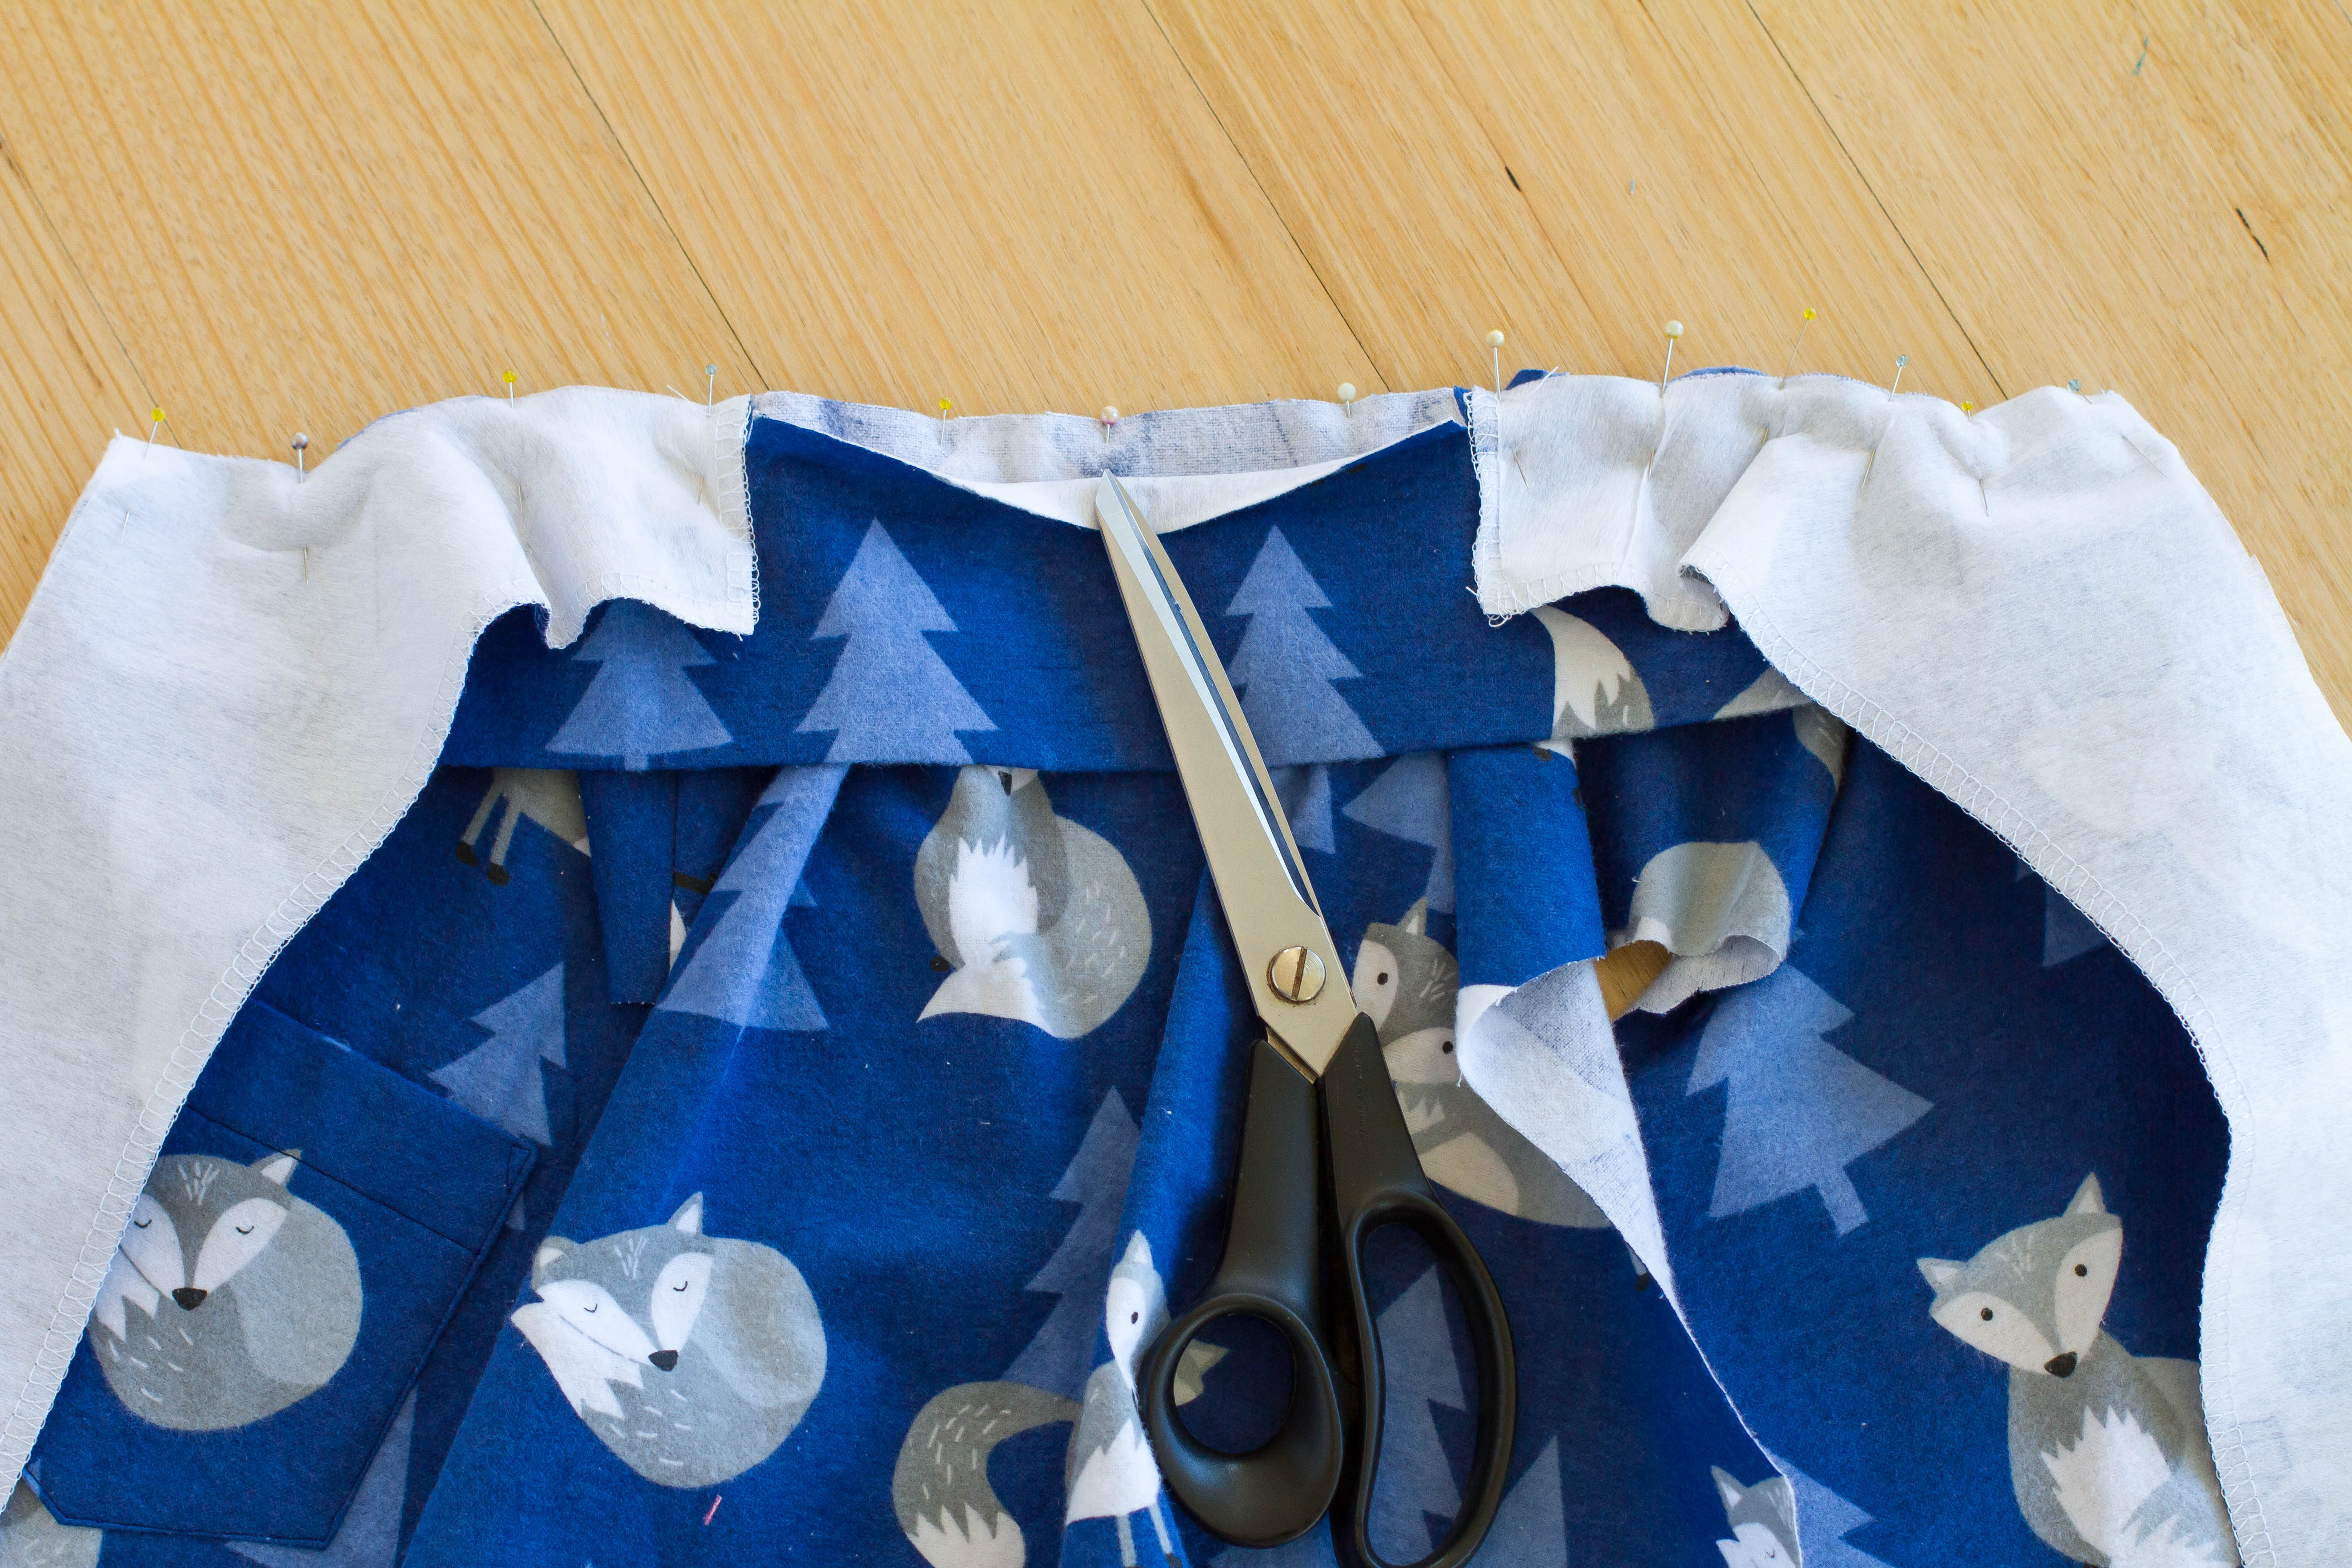
Now it is time to sew the collar to the neckline! Sew through all the pinned layers using a 1/2″ seam. Make sure that you keep the upper collar folded back when you sew the middle section of the collar to the neckline.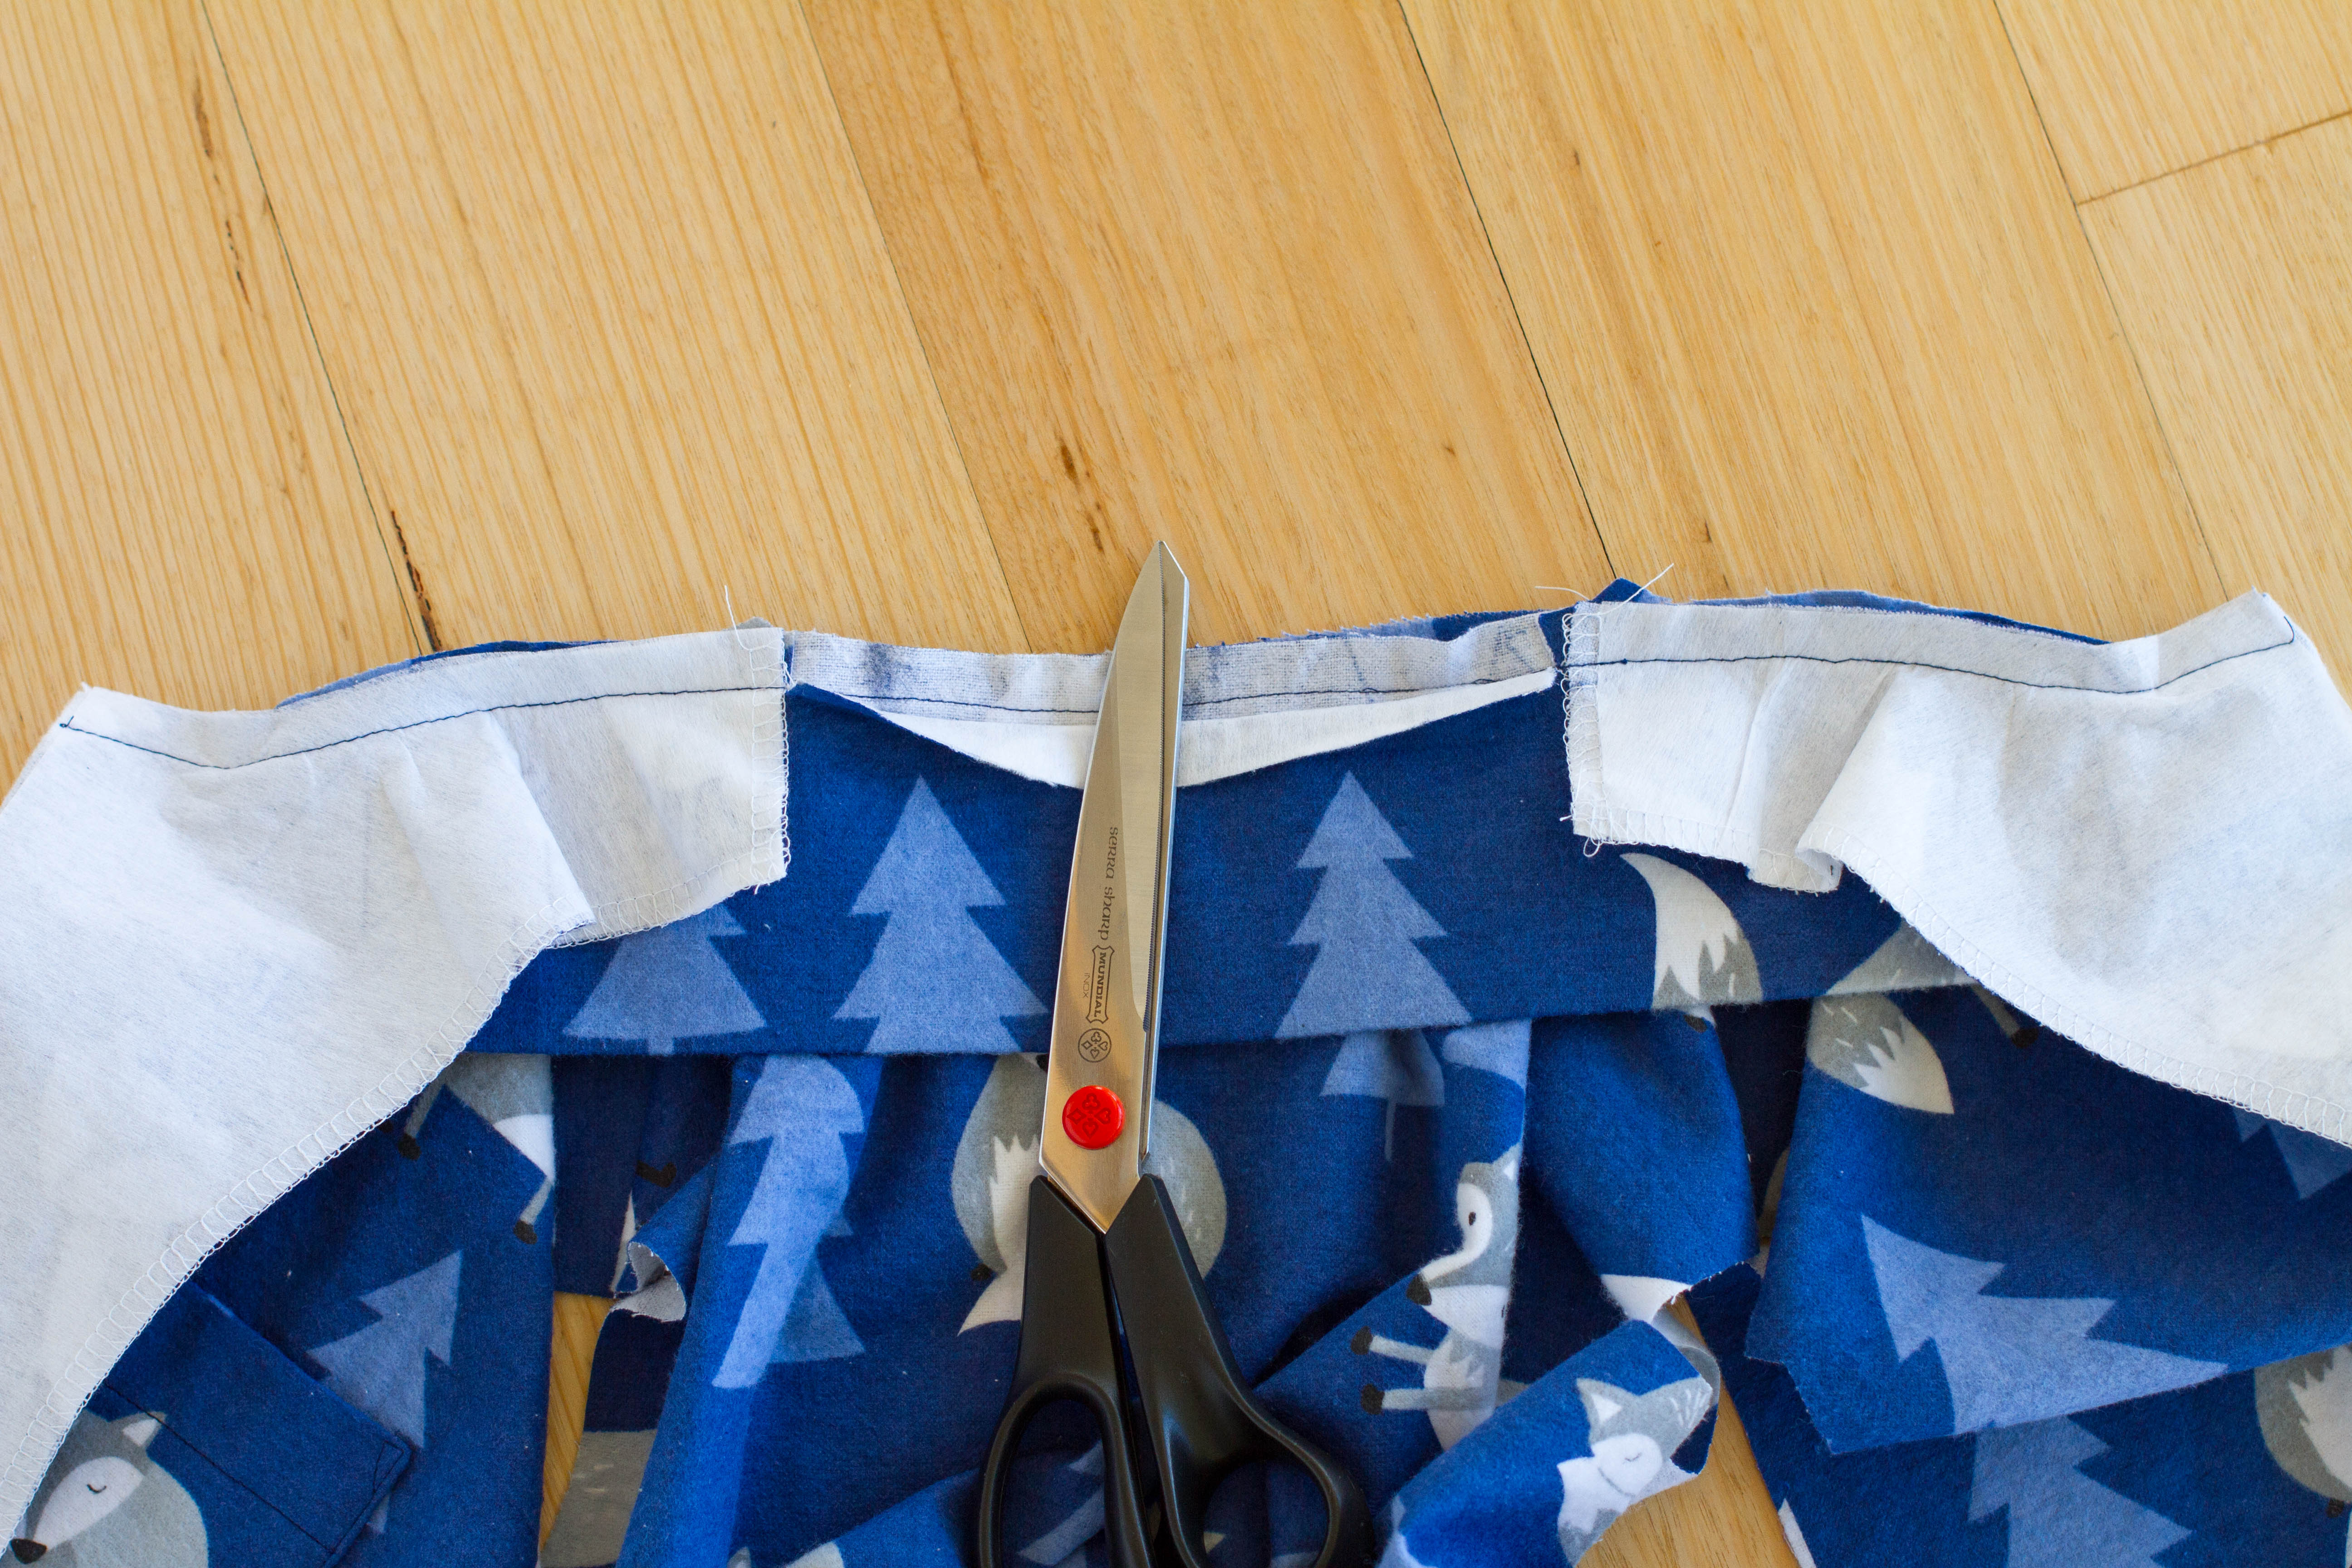
Clip the corners at both ends of the front facings.
Then turn the facings back to the wrong side of the PJ top and press into place. Use a pointy object like a pencil or the end of your closed scissors to make sharp corners at the ends of your facings
To finish attaching the collar to the neckline, clip into the seam allowance at the ends of the front facings. Don’t clip the upper collar, just the under collar and neckline seam allowance.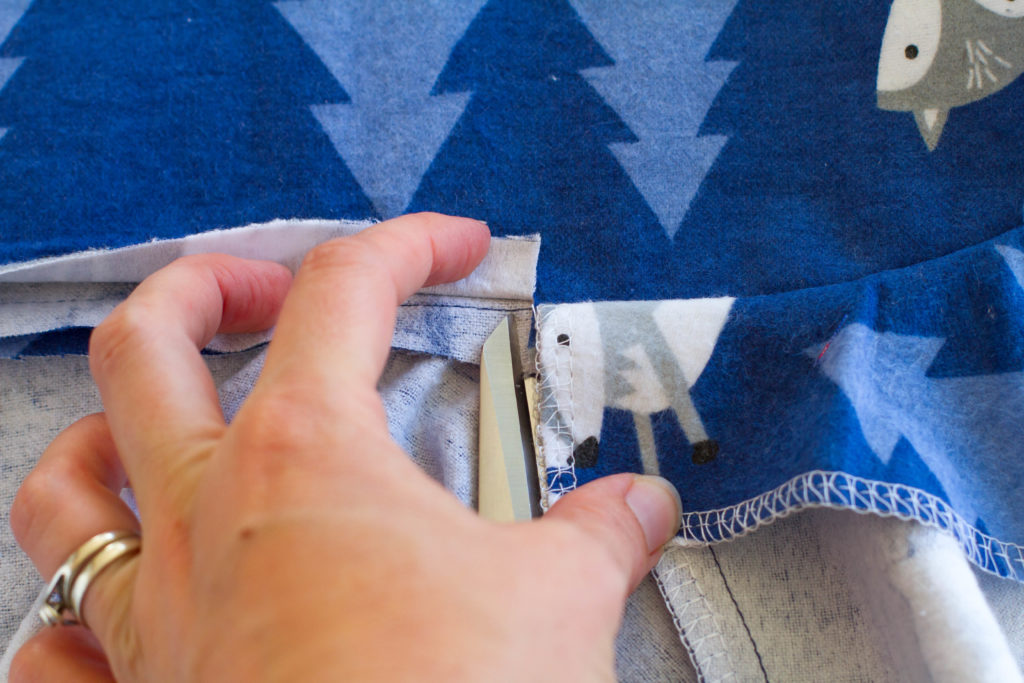
Then make a few small clips in the seam allowance of the neckline making sure that you don’t clip your stitching. Notice that I have only clipped into the sewn seam allowance – NOT the interfaced upper collar. Use your fingers to push the clipped seam allowance up towards the collar and tuck them underneath the upper collar.
Then fold the upper collar under 1/2″ to the wrong side of the collar.

Pin the folded edge of the upper collar down. The folded edge should sit right on top of the neckline stitching that you are trying to hide. You might need to adjust folds a little bit to make it all look nice and neat.
When you are happy with how the collar looks, sew the folded edge down and you are done!
(Ready for the next step in the pattern…pinning the ends of the front facings over the shoulder seams ready to sew them down.)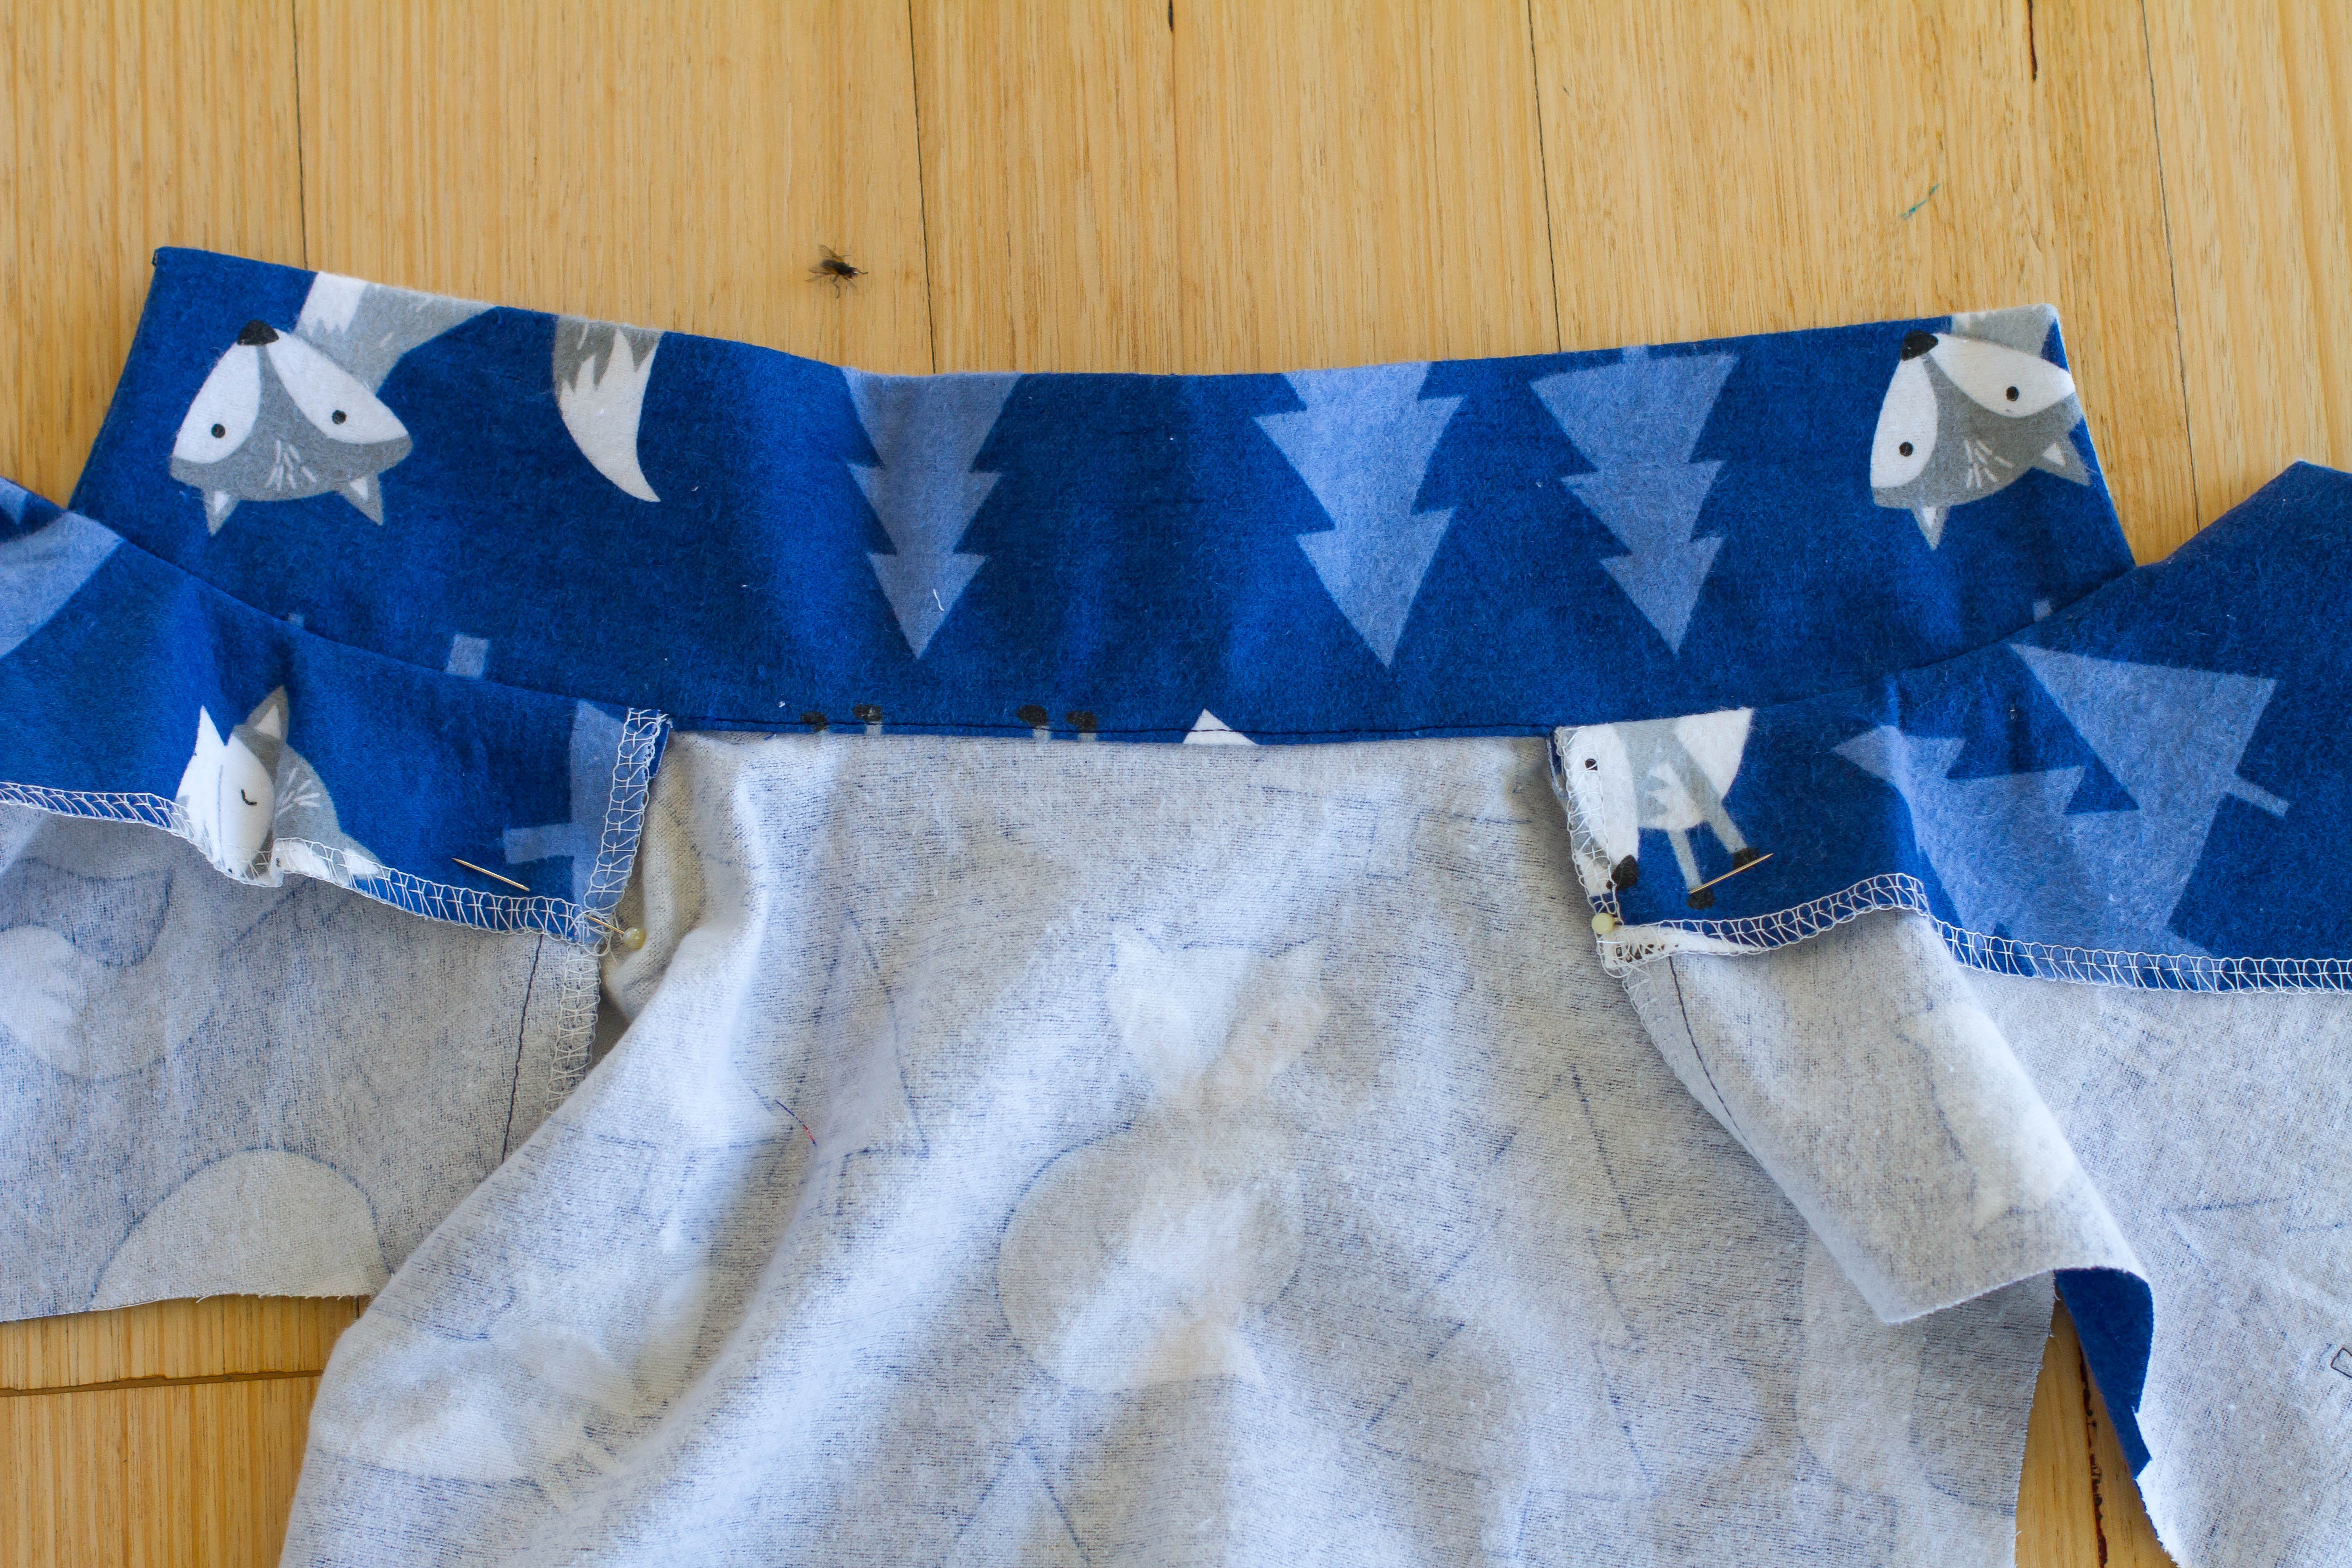
I hope this helps you visualise the collar insertion and makes sewing the Catnap Pyjamas a breeze! Like I said before, this is the trickiest step so once you’ve mastered this bit the rest is easy peasy!!!