Not surprisingly, she’s done it again. I’m a sucker for Amy Butler books (and fabric and patterns…) and am very impressed with her new book, Style Stitches.
I’m pretty picky when it comes to bag patterns and find it quite difficult to find ones that suit my needs. They need to be big (I have tried small bags and they don’t work!), a bit stylish – not too “cute”, easy to carry, a big pocket or two and quick and easy to make. Previously, Amy’s Nappy Bag and Birdie Sling patterns have been my “go-to” bag patterns. But after a few years of using these bags, they are turning up everywhere and I have been ready to try a new bag pattern for awhile. Enter Style Stitches…a book full of BAG patterns!
It really is a great book – there are at least 4 patterns I am very sure I will be trying out, which is a good indicator of a worthwhile purchase! Just after I received the book, I got an email from Quilt Home with a newsletter special of 40% off their Home Dec fabrics. A few of the bags I wanted to make specified Home Dec fabric, so I made the most of the special and purchased some.
There has been a bit of a sewing-lull around here lately. I’ve got a lot of projects on my “to-do” list but the motivation just isn’t there. I get like this from time to time and just have to wait for the desire to resurface – not so good when Quilt Market is just around the corner though and I really need to get designing some new patterns and sewing some new samples for it!
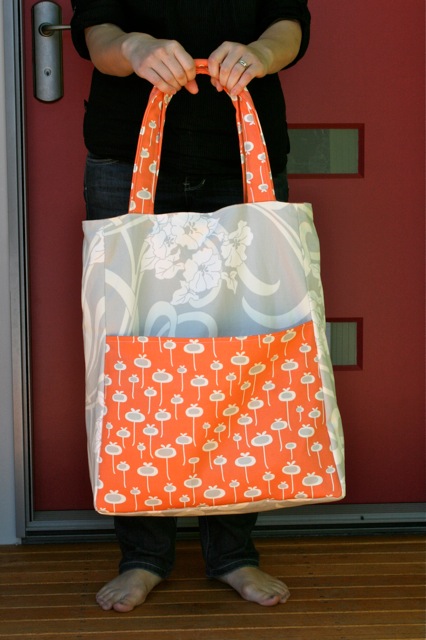
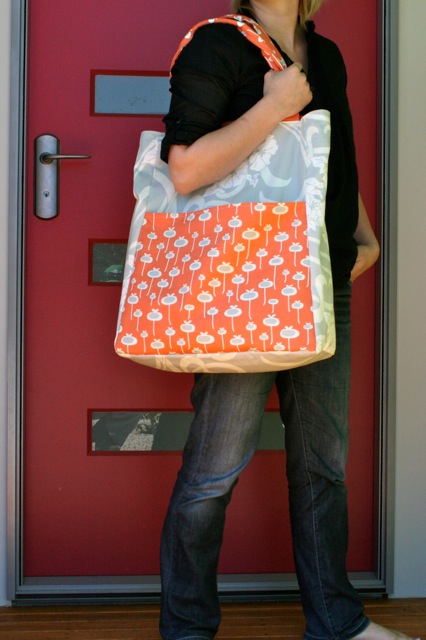
Last night a little window of desire surfaced though…Jaron was out at basket ball, the kids went to bed (AND sleep) early and the house was mostly tidy so I pulled out my sewing supplies and spent the evening sewing the Reversible Everyday Shopper.
I was very pleased that this bag only took me two hours from the time I traced and cut out the pattern pieces to the end! It was very simple to sew, gotta love an instant-gratification sewing project!
And, yep, it ticks all of the boxes…big (in fact, it is massive!), stylish, easy to carry, pockets and quick and easy to make! My intention for this bag is to carry all of the “kid stuff” that goes with me from day to day. They are a bit old for nappy bag attire now and I find that my bag is stuffed with 3 lunchboxes, 3 drink bottles, 3 hats, 3 jumpers, some wipes, a nappy as well as my essentials. My bag is always overflowing, but this one is definitely going to fit the mould! It will also be perfect for taking to church and filling with colouring books, pencils, books, snacks and bits and pieces to keep the kids quiet.
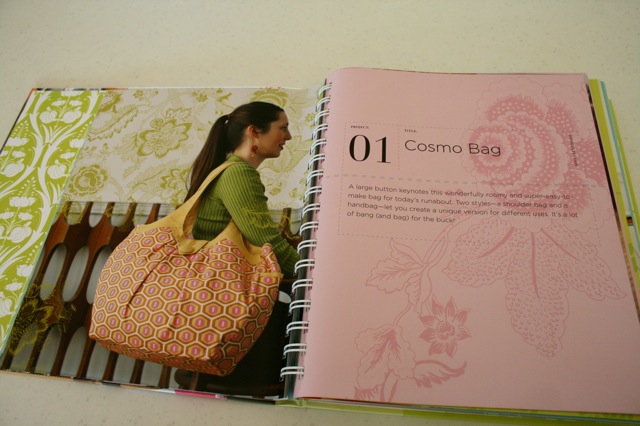
Other Style Stiches projects that have caught my eye…
Cosmo Bag (another good, big, carry-all) – I’ve selected my fabric for this one already and am looking forward to making it:
And the Blossom Handbag. This one is really cute – roomy, but less “Motherly” than my other bags! Good for when I am going out without all of the kid paraphernalia!! I want to make it using Home Dec fabric so that it is nice and sturdy so will have to keep my eye out for the perfect fabric to use:
And, I’m happy to say that I think the sewing-bug is slowly creeping back – phew!
SUPPLIES:
Amy Butler August Fields, Fresh Start in Tangerine
Giveaway now closed – feel free to still leave a comment though!
{Thanks for the Toy Sack-love 🙂 If you need an introduction to these toy sacks then read my previous post here.}
This is a long tutorial…stick with me…if you keep scrolling all the way down to the end, I’ve got a toy sack to GIVE AWAY! So if you aren’t a sewer or want a toy sack without any work, now is your chance to enter 🙂
“Peek-A-Boo” Toy Sacks Tutorial!!!
To make a “Peek-A-Boo” Toy Sack, you will need:
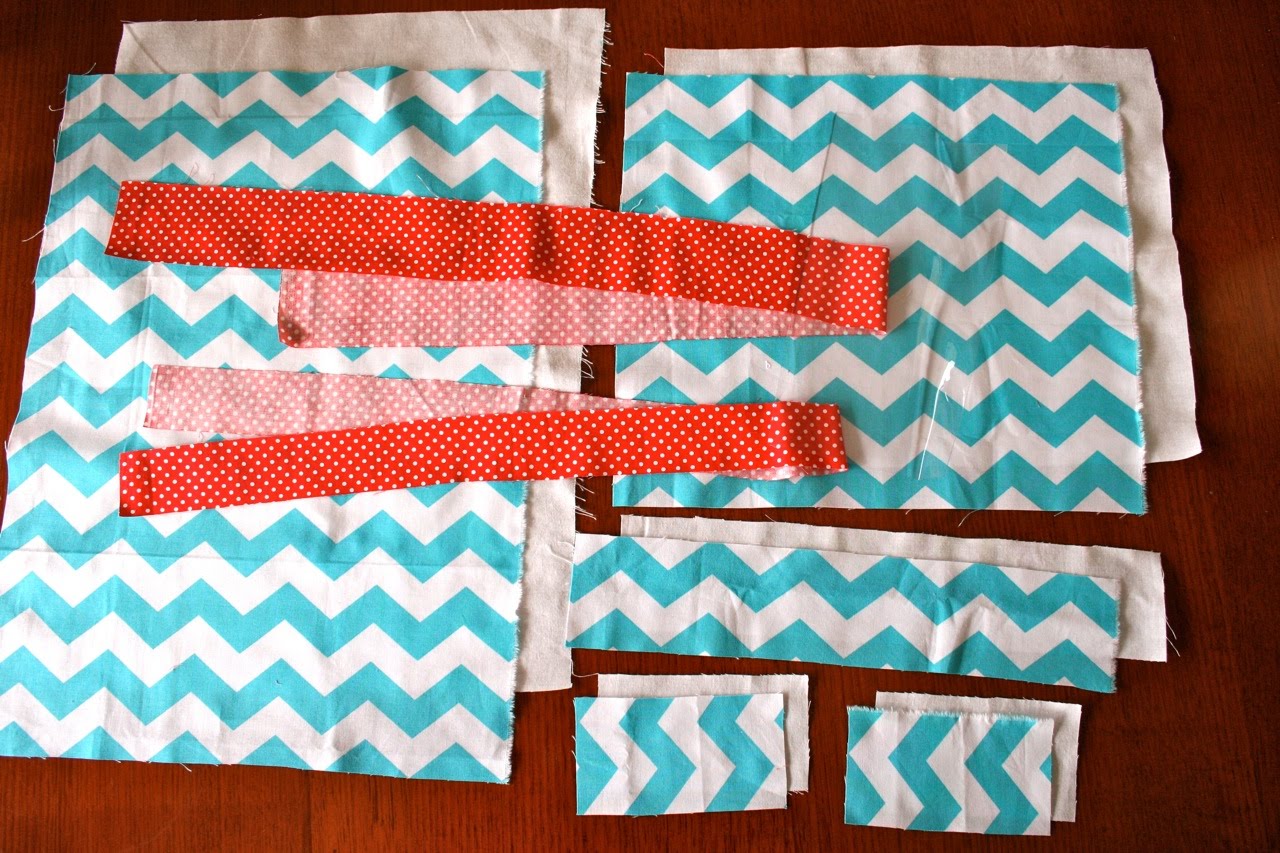
One 10 3/4″ x 12 1/2″ rectangle of fabric cut from exterior and lining for front of bag One 2 1/2″ x 12 1/2″ rectangle of fabric cut from exterior and lining for front of bag Two 4 1/2″ x 2 1/2″ rectangles of fabric cut from exterior and lining for front of bag One 16 3/4″ x 12 1/2″ rectangle of fabric cut from exterior and lining for back of bag One 4 1/2″ x 8 1/2″ rectangle cut from tablecloth plastic for window One 1 1/2″ x width of the fabric (40″-44″) strip cut from contrast fabric for drawstring One 2″ x width of the fabric (40″-44″) strip cut from contrast fabric for casing
FYI: * Exterior fabric is blue/white zigzag * Lining fabric is white * Casing and drawstring fabric is red * Plastic window is clear PVC “tablecloth” plastic – this comes in 3 thicknesses (from Spotlight), I use the middle thickness because it is strong but thin enough to use your regular sewing machine needle on.
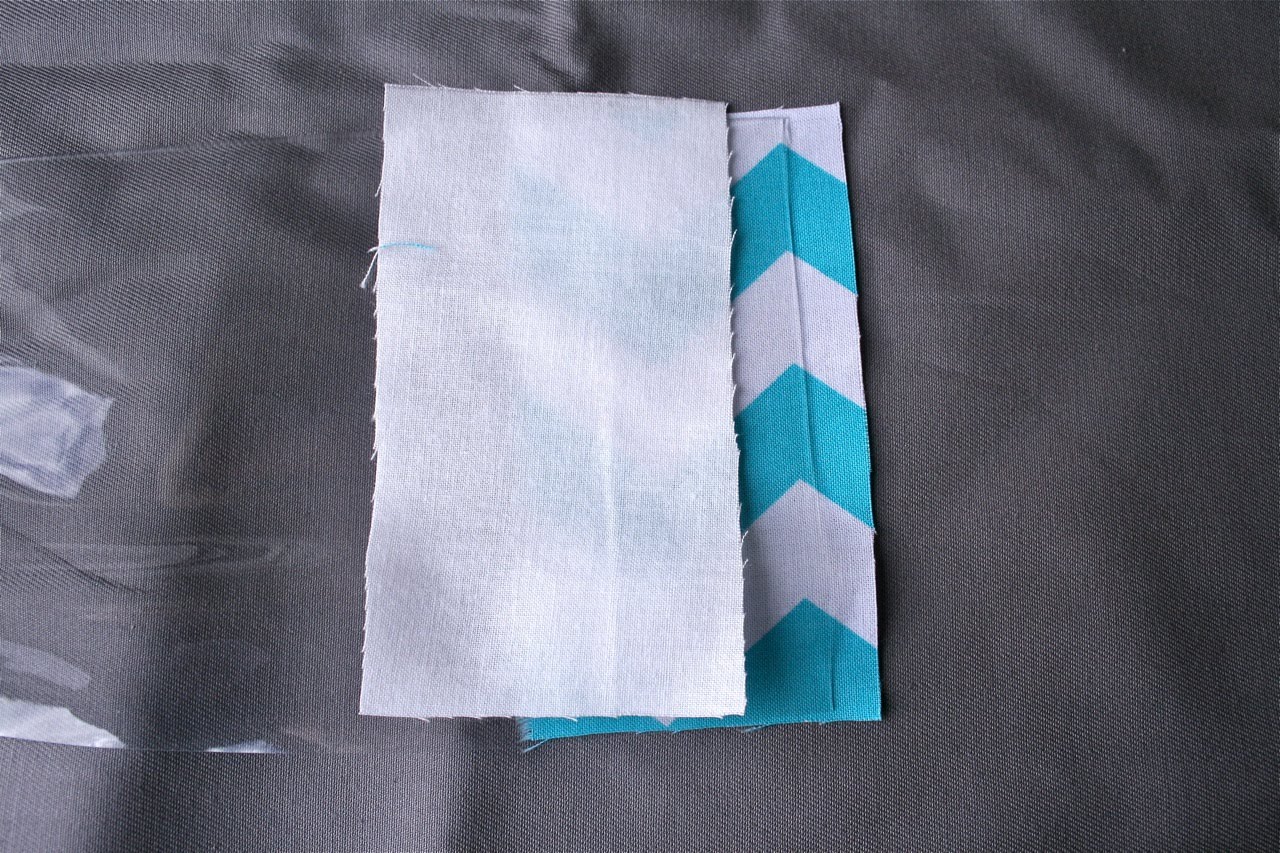
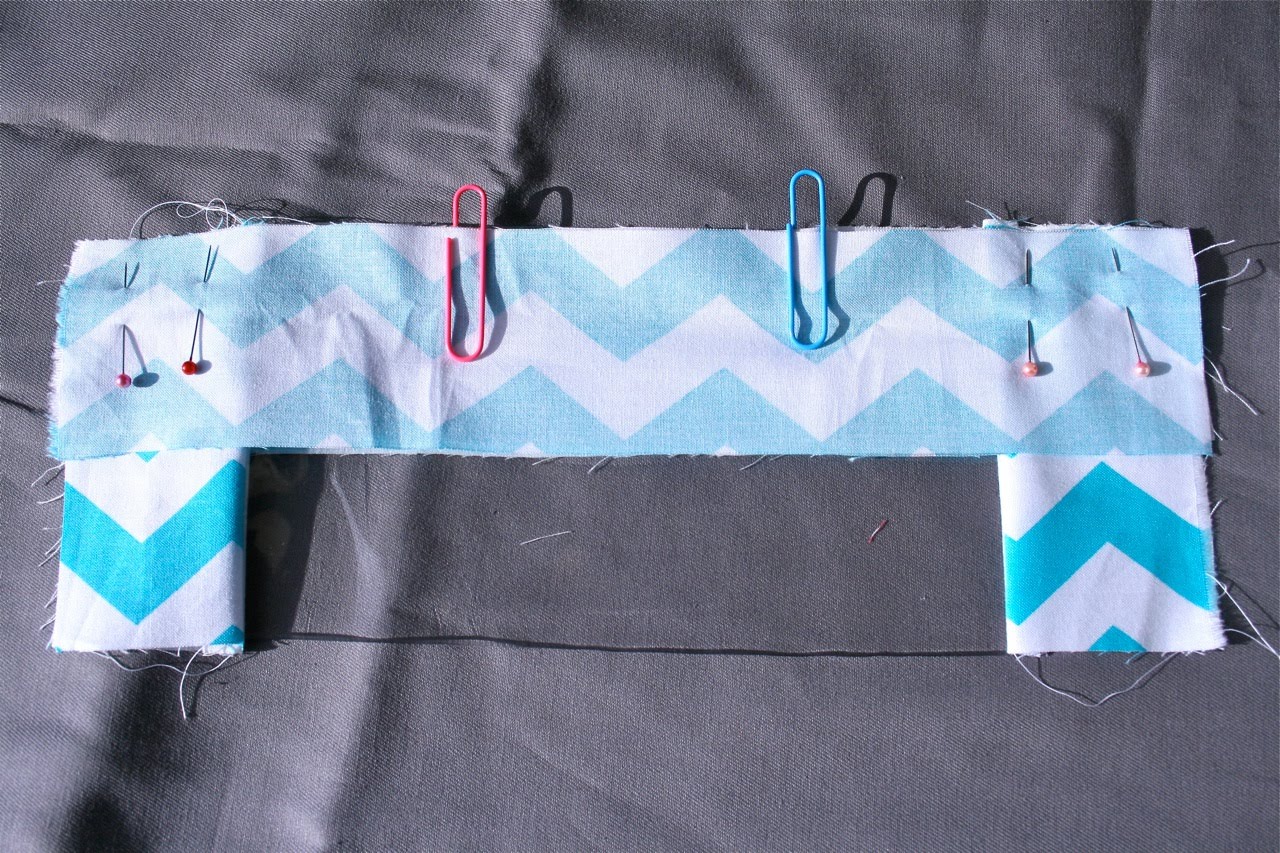
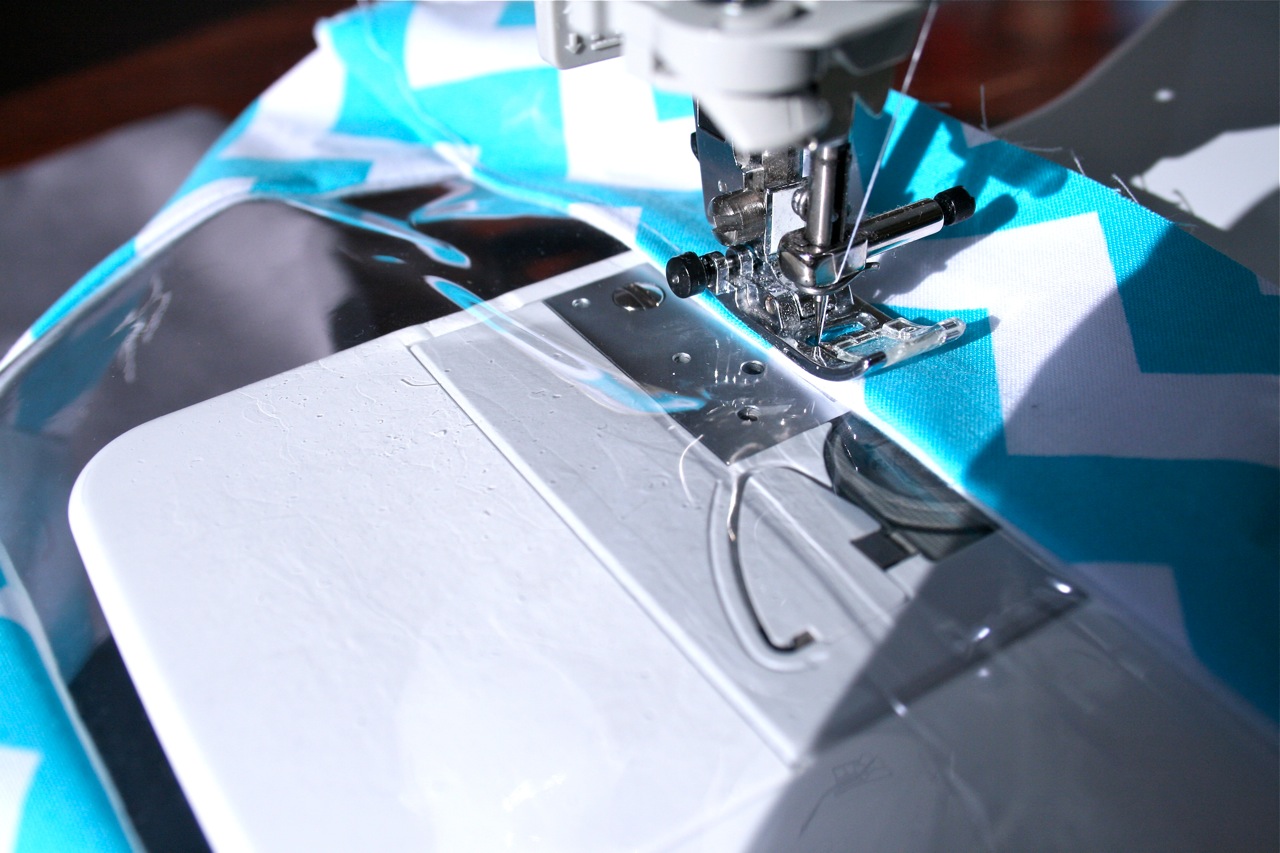
Step 1. Take one of the 4 1/2″ x 2 1/2″ rectangles of fabric cut from exterior and lay on the table with right side facing up. Take your rectangle cut from plastic sheet and lay on top of exterior fabric, matching up short edge of plastic strip with long edge of exterior fabric. Take one of the 4 1/2″ x 2 1/2″ rectangles of fabric cut from lining and lay on top of the plastic sheet with right side facing down. Match up raw edges (the plastic sheet should be sandwiched between the exterior and lining fabrics). Using pins on the plastic sheet will make holes, to hold in place, use a few paper clips along the raw edge. Sew together along paper clipped edge, using 1/4″ seam. Repeat to attach other 4 1/2″ x 2 1/2″ rectangles of fabric cut from exterior and lining on the opposite short edge of plastic sheet. Fold fabric out so that wrong sides are touching. You can’t iron near the plastic sheet, so firmly press seams flat with your fingertips. Step 2. Take the 2 1/2″ x 12 1/2″ rectangles of fabric cut from exterior and lining and attach to the bottom long edge of the plastic sheet and side pieces of fabric in the same way you attached the side pieces. Match up raw edges and pin or paper clip into place. You can use pins where you are joining fabric to fabric.
Sew along pinned/paperclipped edge using a 1/4″ seam. Open out fabric so that wrong sides are touching and firmly press seams flat using fingertips.
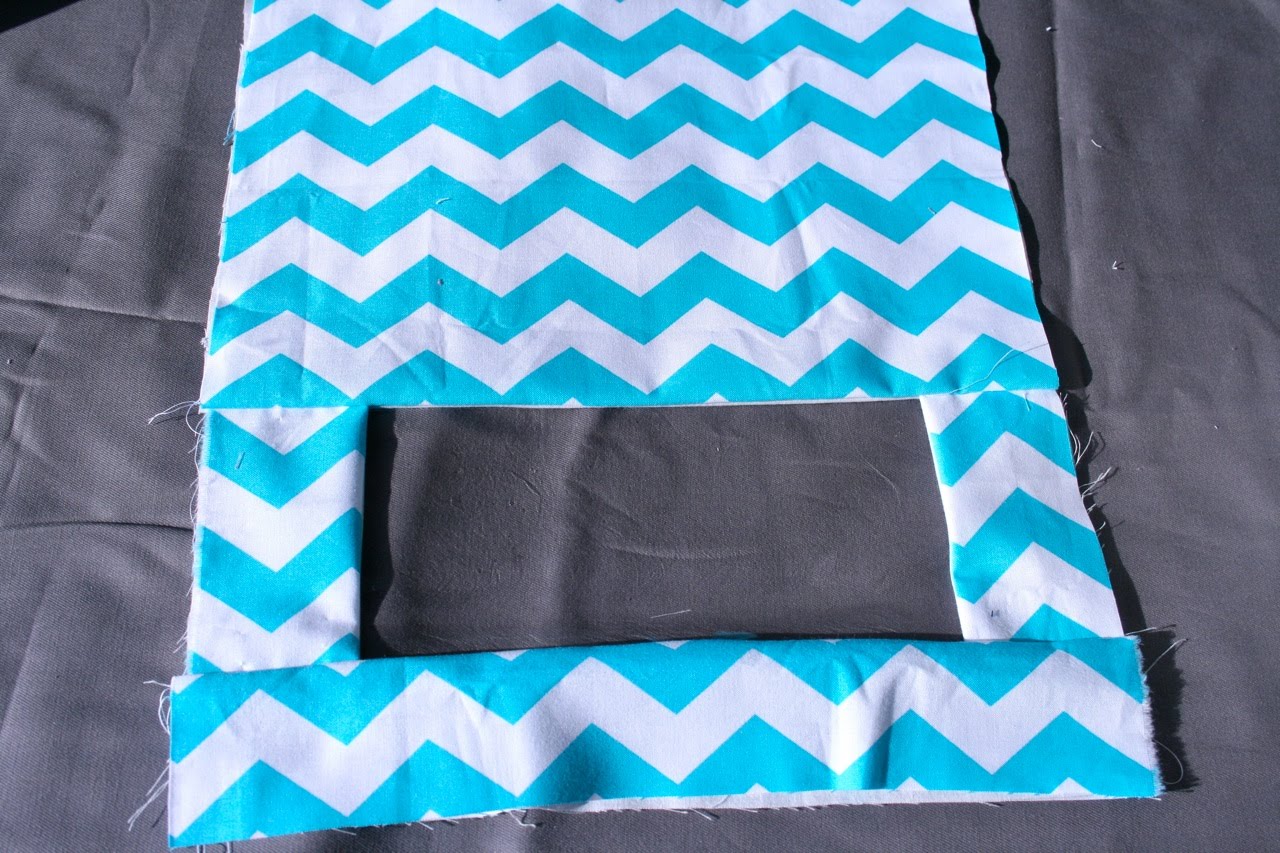
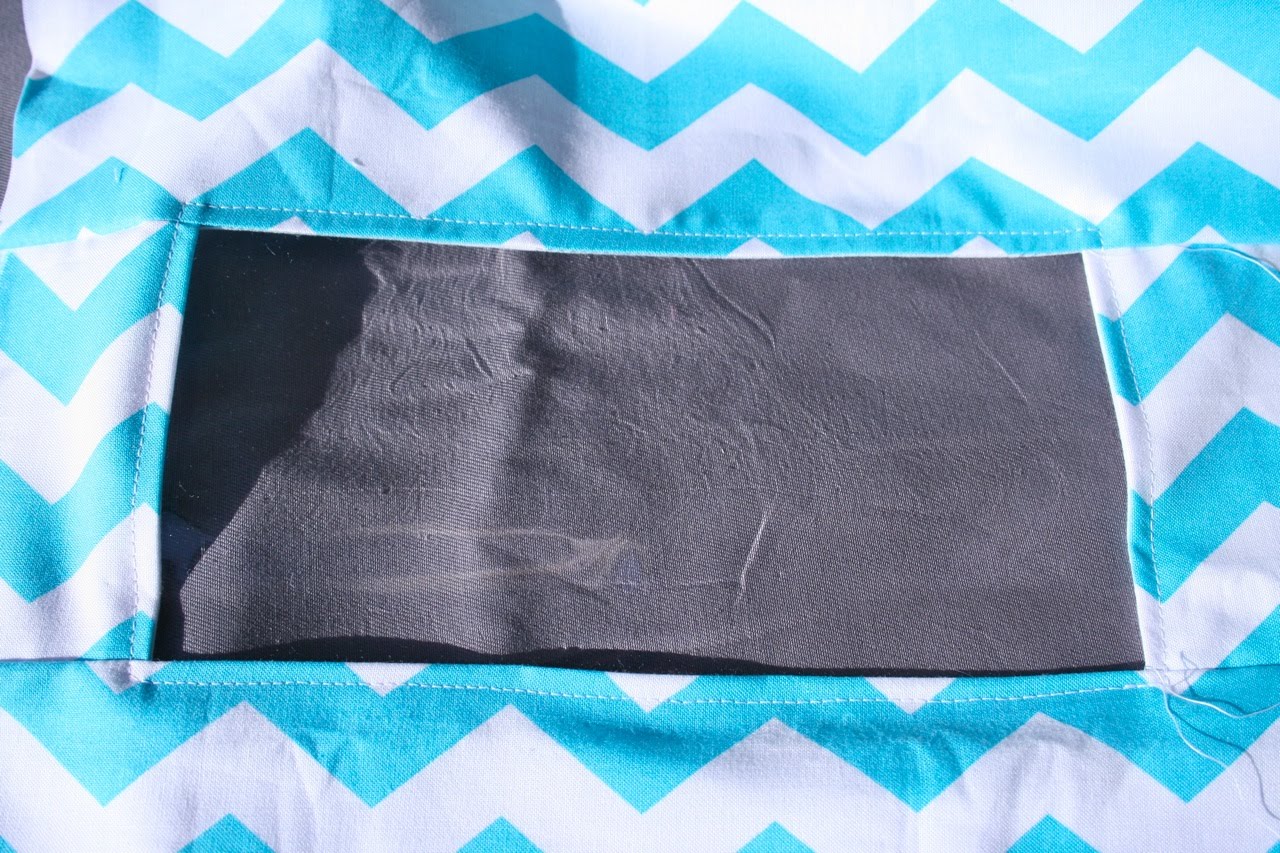
Step 3. Take the 10 3/4″ x 12 1/2″ rectangles of fabric cut from exterior and lining and attach the top long edge of the plastic sheet and side pieces of fabric in the same way you attached the bottom piece. Open out fabric so that wrong sides are facing and firmly press seams flat using fingertips.
{Exterior of front of sack}
{Lining of front of sack}
Topstitch about 1/8″ away from the edge around the entire window.
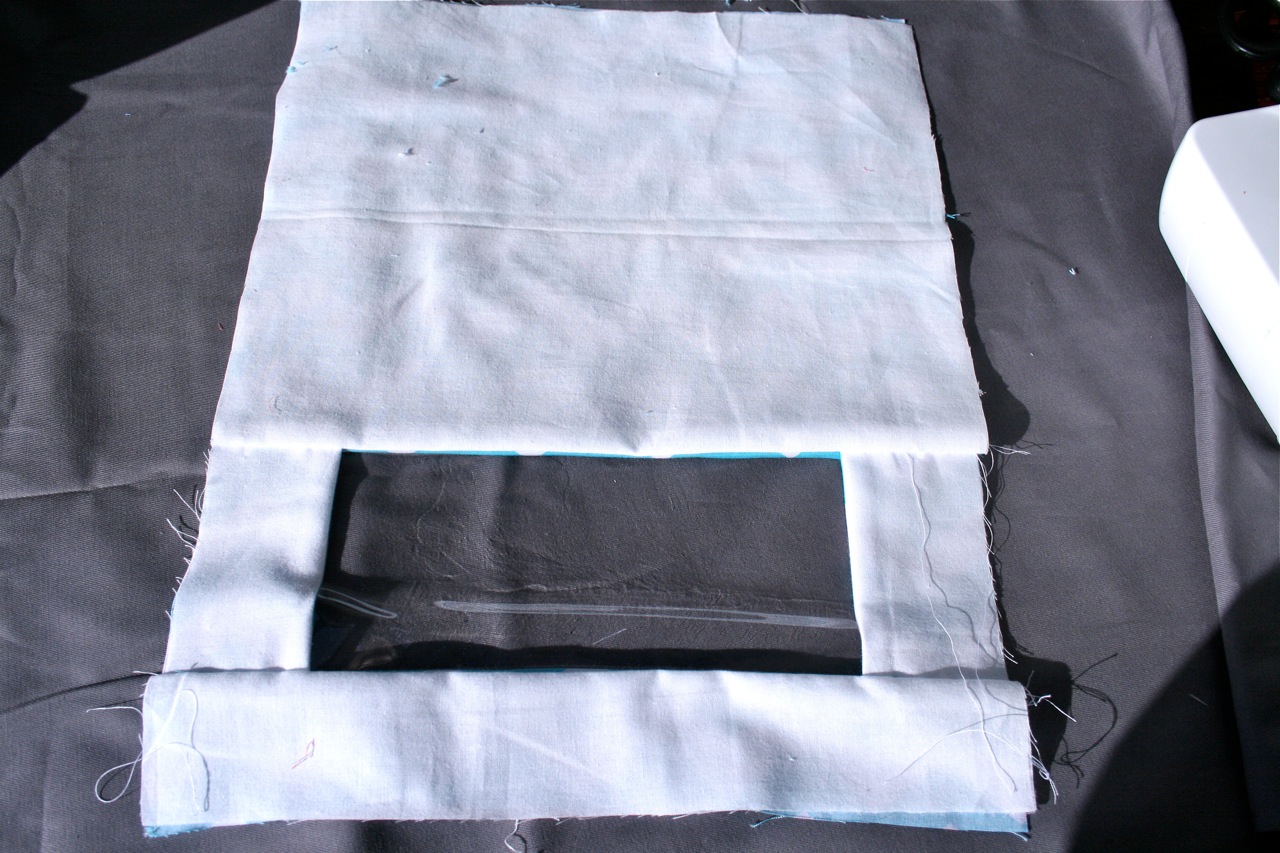
Step 4. Make a hem at the top of the sack by taking front of sack and folding the right side of the top raw edge of exterior and lining fabrics under 1/2″. Take the 16 3/4″ x 12 1/2″ rectangles of fabric cut from exterior and lining and fold the right side of the top raw edge of both pieces of fabric under 1/2″.
Take lining back piece and lay on the table with right side facing up. Place front of sack so that exterior is facing up and front lining is facing back lining piece . Take exterior back piece and lay on top of the stack with wrong side up so that right sides of exterior fabric are facing.
Match up top folded edges of all four layers of fabric so that they are perfectly aligned (this will ensure a neat finish to the top hem of your sack.) Match up raw side and bottom edges of sack and pin into place. You should have four layers of fabric pinned together.
Sew together around pinned edge using a 1/4″ seam. Trim bottom corners off sack, making sure not to clip your stitching.
Turn bag right sides out, pushing lining fabric inside exterior. Match up top folded edge of sack and pin front exterior and lining pieces together and back exterior and lining pieces together. Sew around pinned edge, close to the folded edge of the fabric.
Step 4. Take strips cut from contrasting fabric for casing and drawstring and make a center fold by folding in half, length ways, so that wrong sides of fabric are touching. Open out and fold both long raw edges of fabric in towards the center fold.
A much, much easier way to do this is to invest in a couple of bias binding makers…they are GREAT! Very affordable (I think about $10 each?) and make light work of making binding. The two I used for this project are made by Clover. The pink one – 18mm is used for the 1 1/2″ wide strip of fabric and is the size I use most often when making clothing. The blue one – 25mm is used for the 2″ wide strip of fabric. (Nicole Mallalieu has a great tutorial showing how to use these cool gadgets on her blog).
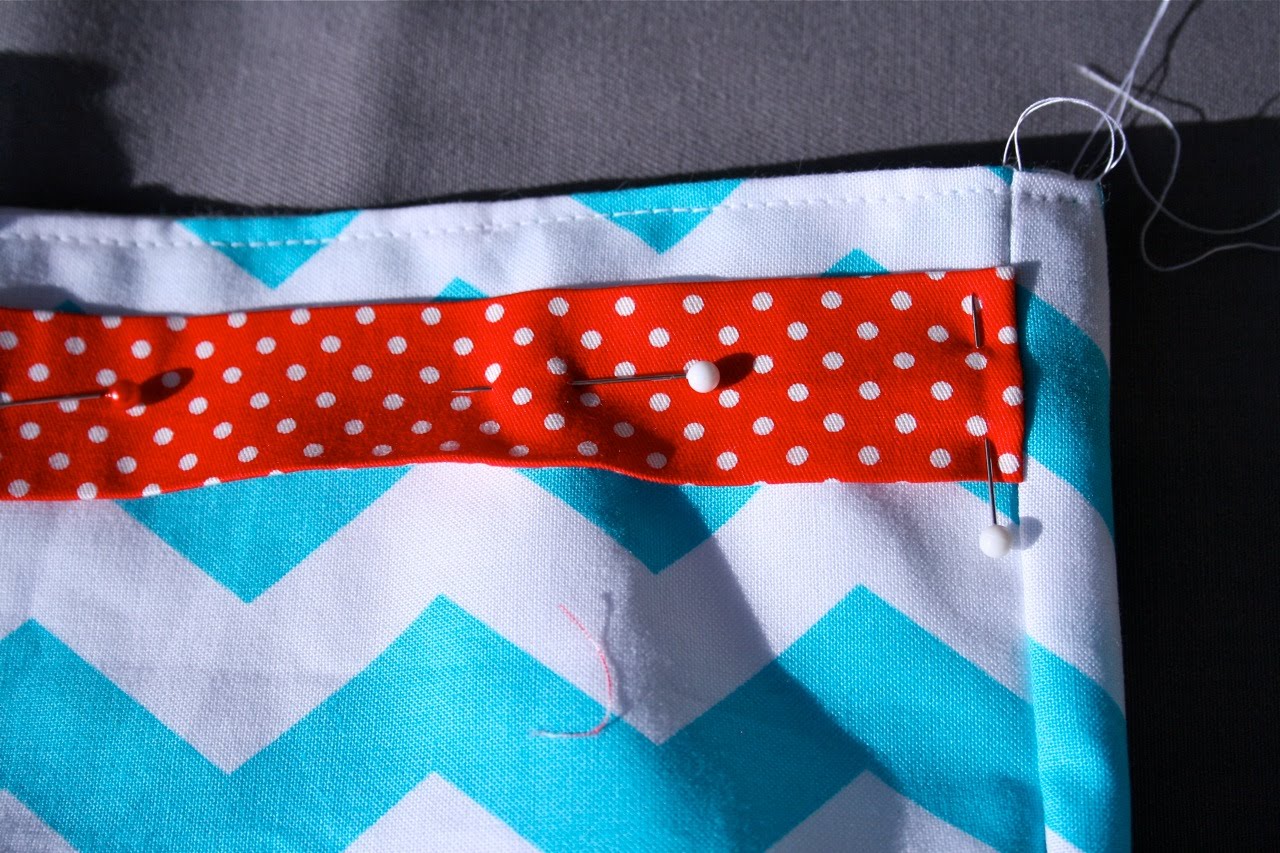
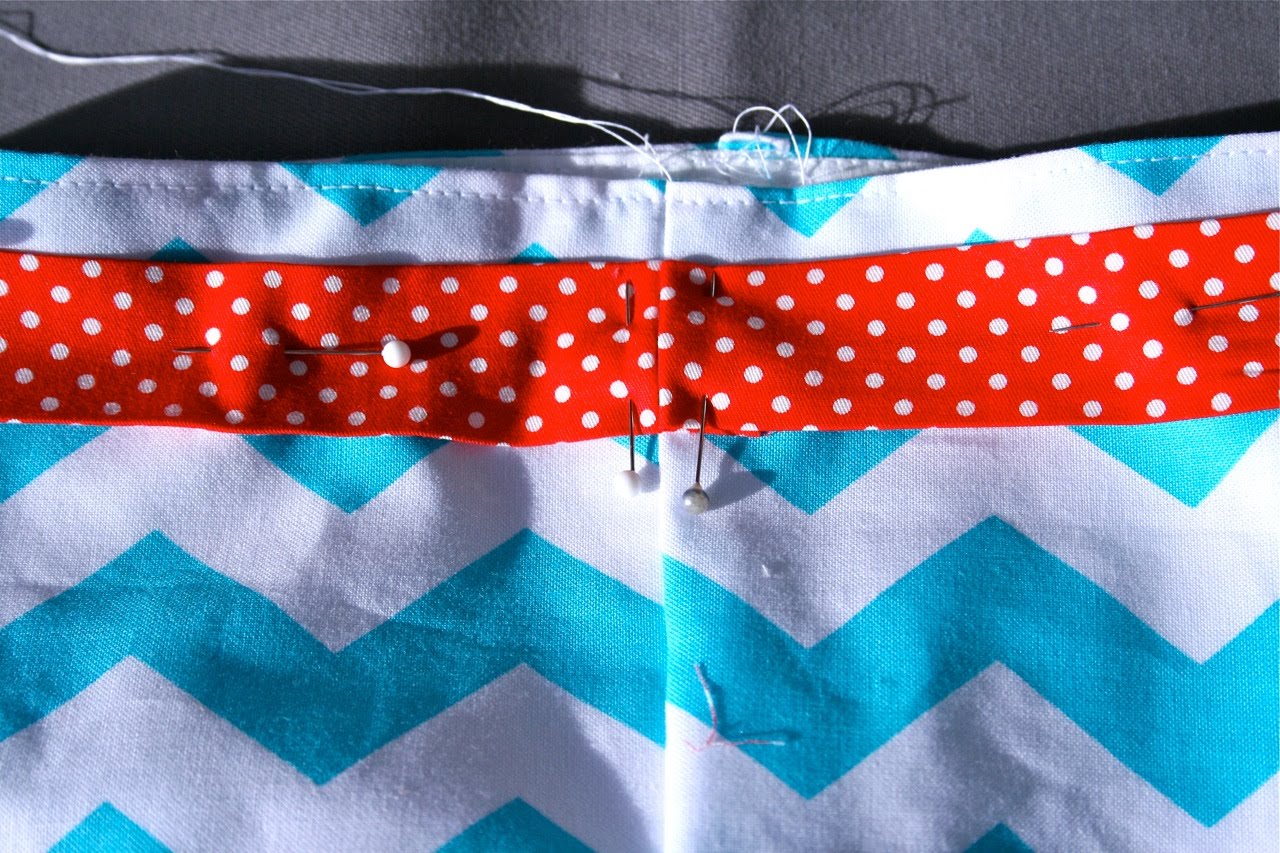
Set thin drawstring strip aside for now. Step 5. Take thicker strip for casing and fold one short raw edge under about 1/2″. Press. Align folded edge of strip with side seam of sack. Position strip so that it is sitting about 1/2″ from top edge of sack and pin into place. Continue pinning until strip has made it’s way around the entire sack.
When you get back to the side seam you started at, trim the strip so that it overlaps the beginning of the strip about 1/2″, then fold short raw edge of the end of the strip under 1/2″ and align folded edge with the side seam of the sack. There should be an opening between the two folded ends of the strip, this is where you will insert your drawstring. Pin into place.
Sew around the top and bottom edges of the strip, close to the edge to secure strip into place and form casing for drawstring.
Take thin drawstring strip and fold in half, length wise once again so that raw edges of the strip are enclosed. Sew down opened edge of the strip, close to the edge to secure.
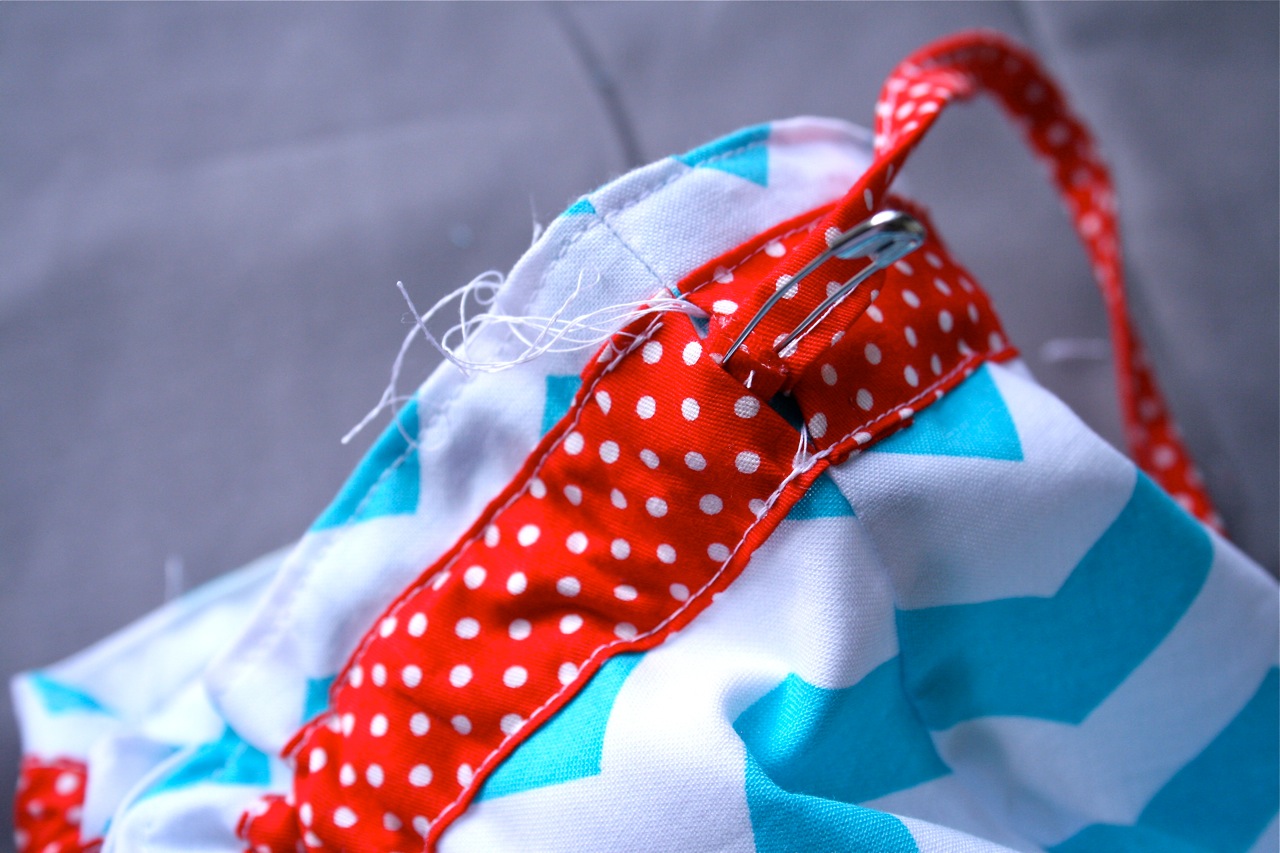
Attach a safety pin to one end of the drawstring and thread through the casing. Tie a knot at each end of the drawstring.
Snip stray threads and you are done!!
If you make a “Peek-A-Boo” Toy Sack, I would love to see it! Send me an email or add your photo to the Make It Perfect Flickr Group.
Okay – for the giveaway…
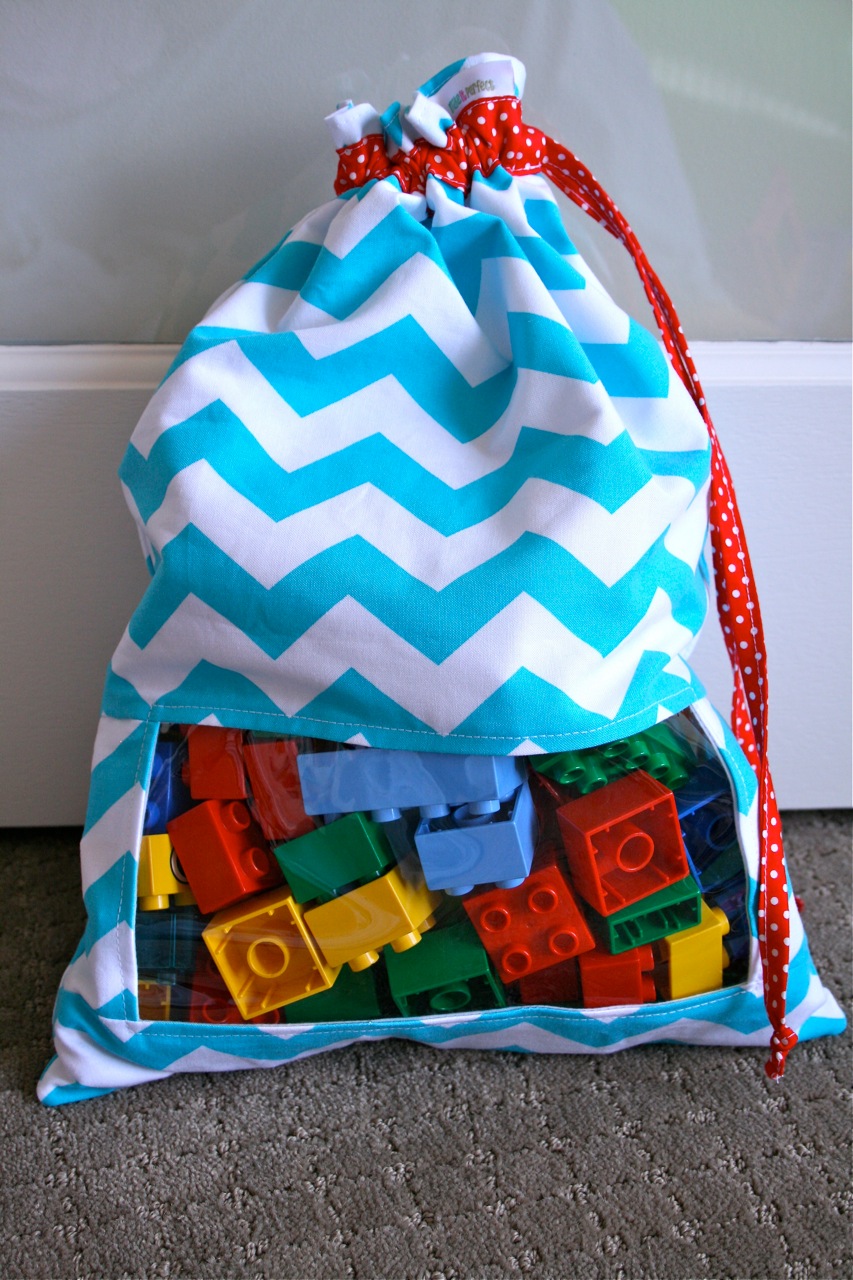
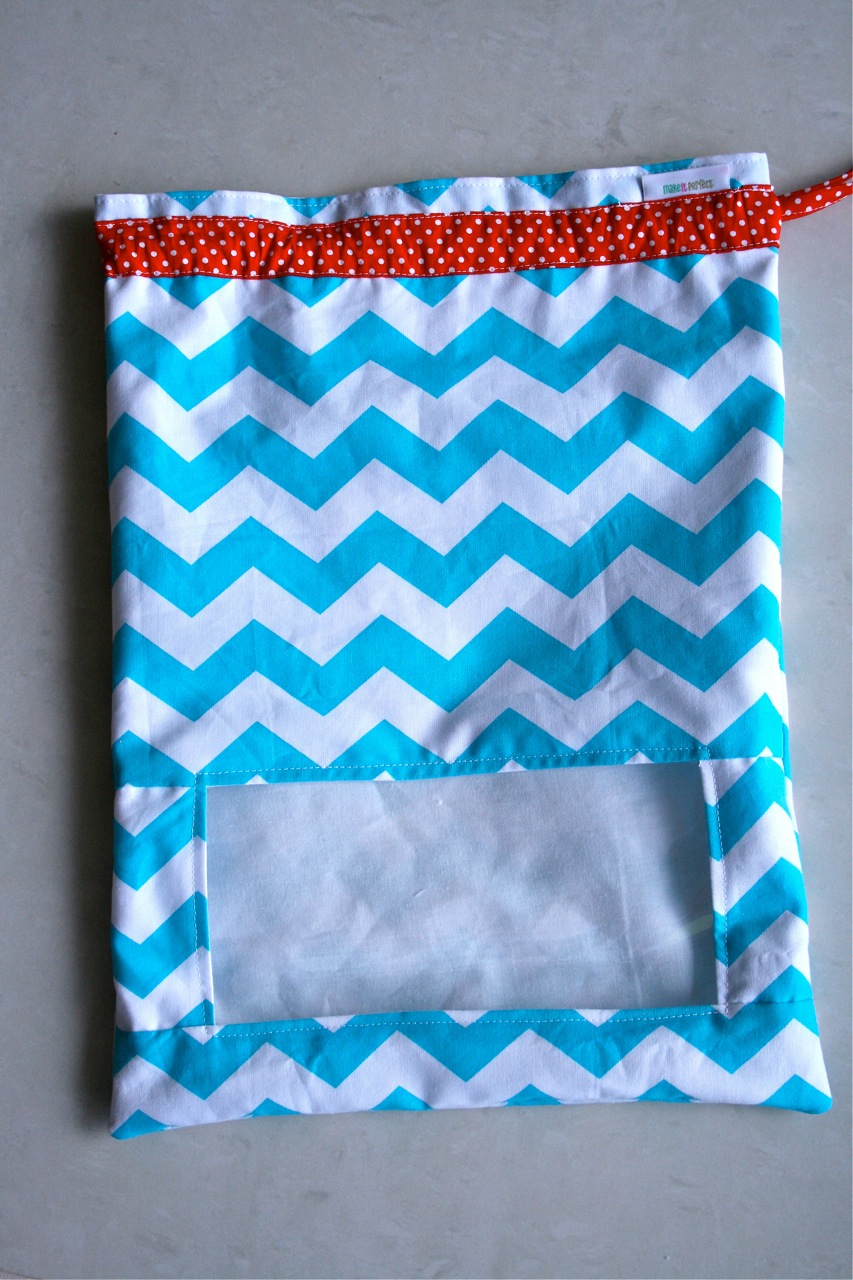
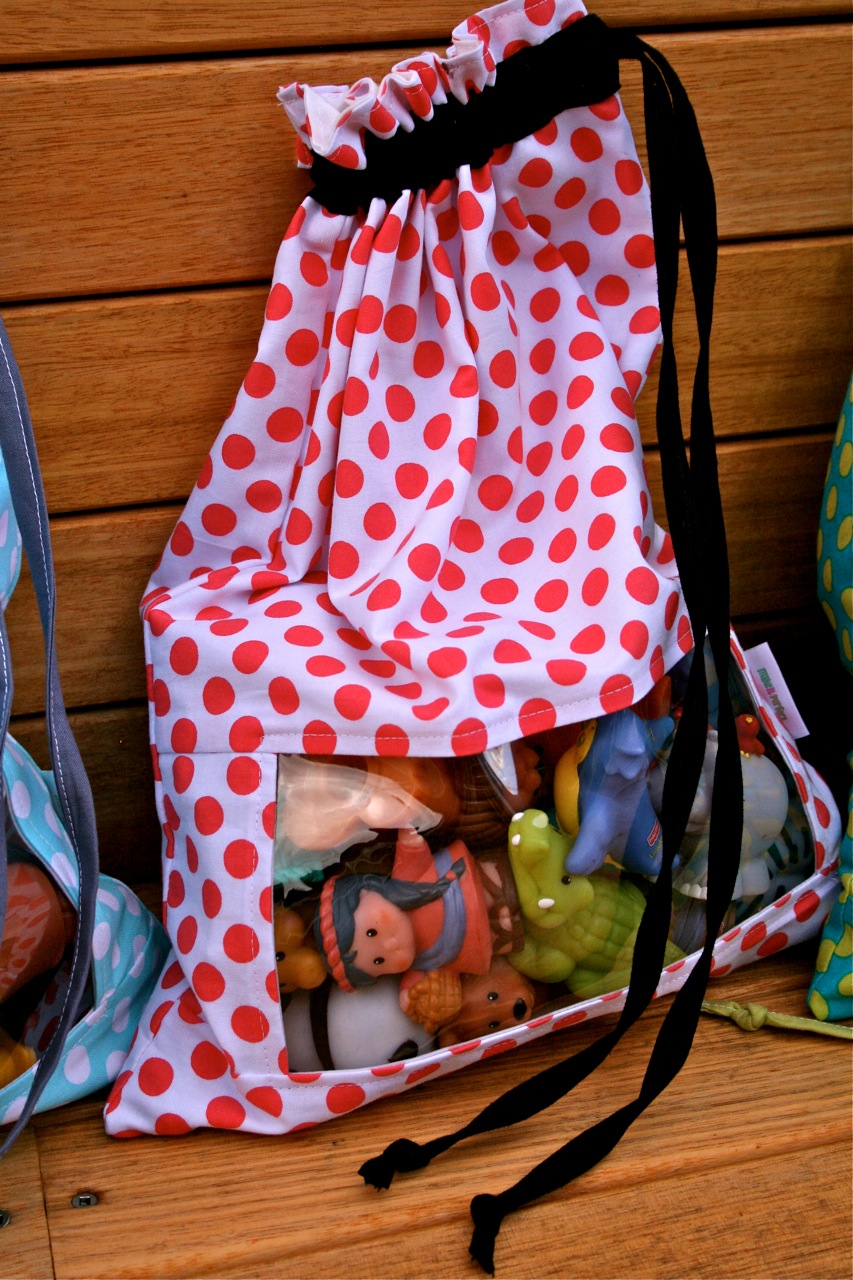
To win THIS “Peek-A-Boo” Toy Sack (made from Paula Prass, Summer Soiree, Chevron in Aqua) as well as eight 10″ x 12″ squares of Ta Dot fabric (used in my toy sacks) leave a comment on this blog post and share what else you could use a toy sack for besides organising toys…
For an extra entry, become a follower of my blog and leave a separate comment to tell me that you follow. If you are already a follower, leave a separate comment telling me so and you will receive an extra entry too. The giveaway winner will be draw randomly next Monday evening, 28th June and is open to everyone 🙂
I don’t know about you, but I am sick of toys everywhere. We try and have a good toy clean out every few months and get rid of broken or unused toys each time. My kids aren’t really “into” toys…they will tip the toy bins out and sift through them every now and then but when it comes to hard-core playing they are really only into certain things.
For Oscar it used to be his train set but now it is Lego, Lego, Lego.
At the moment Lil loves to draw and play with play dough. If she is playing with toys it is usually Duplo, dress ups or dolls.
Tommy is happy to chew on what ever the other two have lying around!
I’ve come to realise that they are happier playing with sets of toys rather than just random bits and pieces so I am slowly trying to eliminate the toys that don’t get played with much to reduce clutter. We encourage them to play with toys that promote creativity, problem-solving and imagination.
Toy storage is something that I struggle with. I’ve gone from clear plastic boxes with lids to big flexible round tubs to a wooden blanket box and haven’t been happy with anything. If I could have my way this would be my ultimate toy storage solution – I love the idea of sorting toys into categories and each of them having their own tub to live in, but there is no Ikea in Tasmania and I want to do something now!! I have had this idea floating around in my head for a few weeks and finally found some spare sewing time to bring it to life this week…
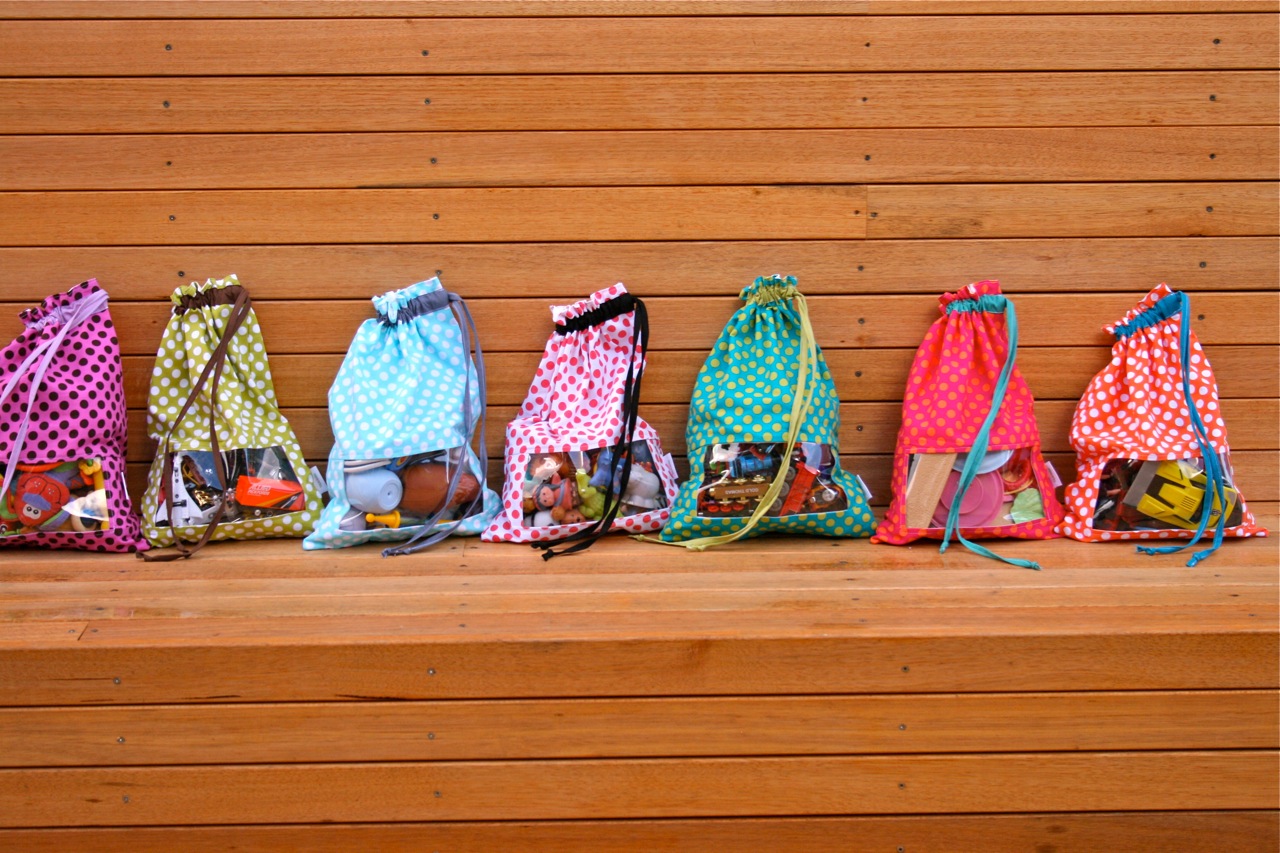
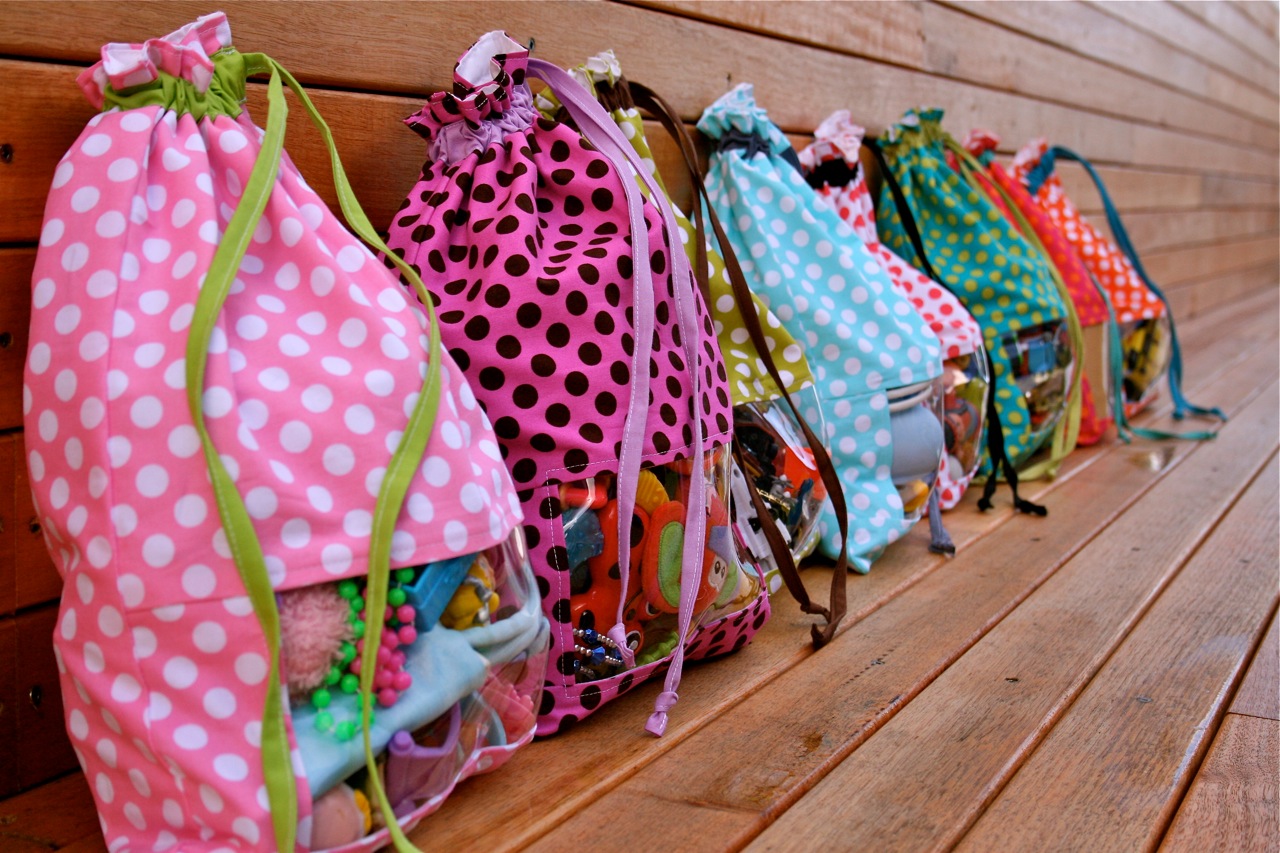
“Peek-A-Boo” Toy Sacks!!!
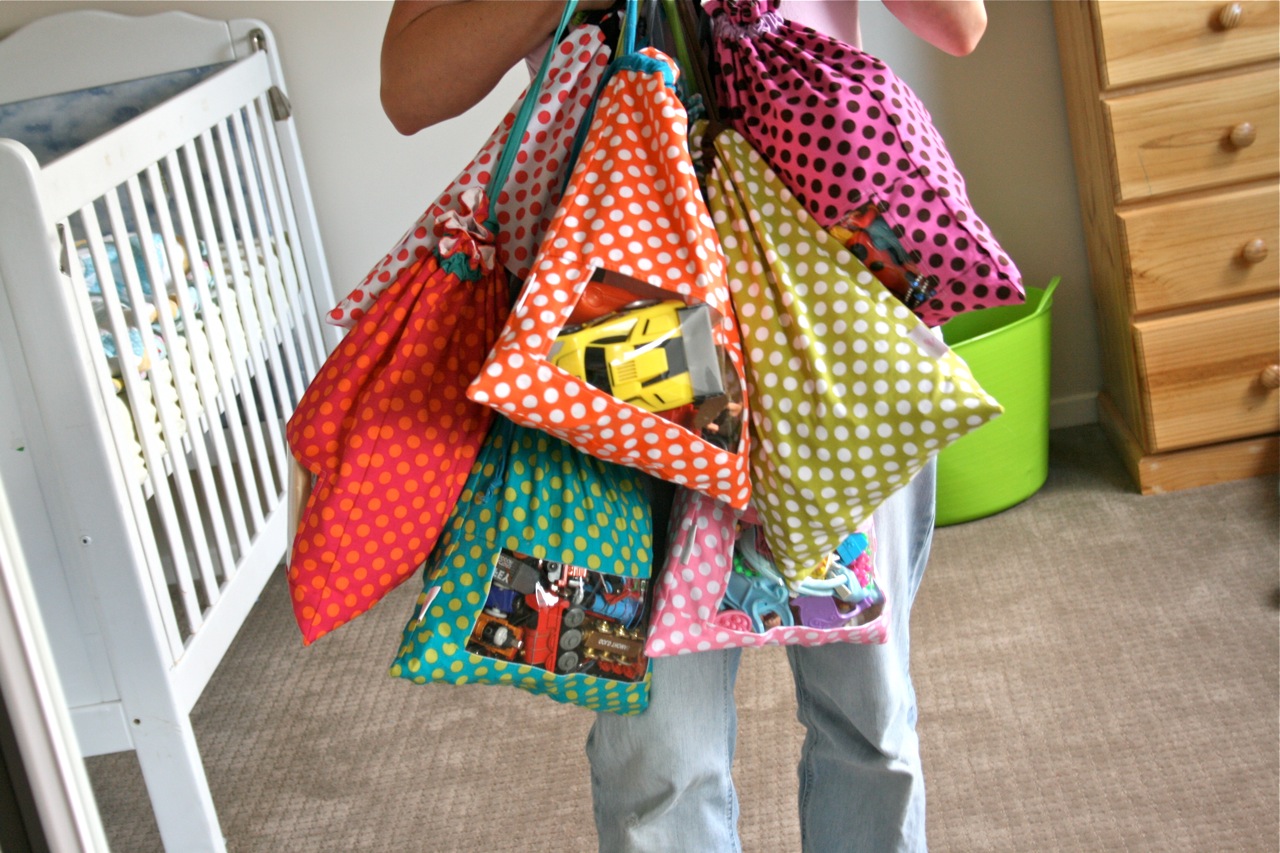
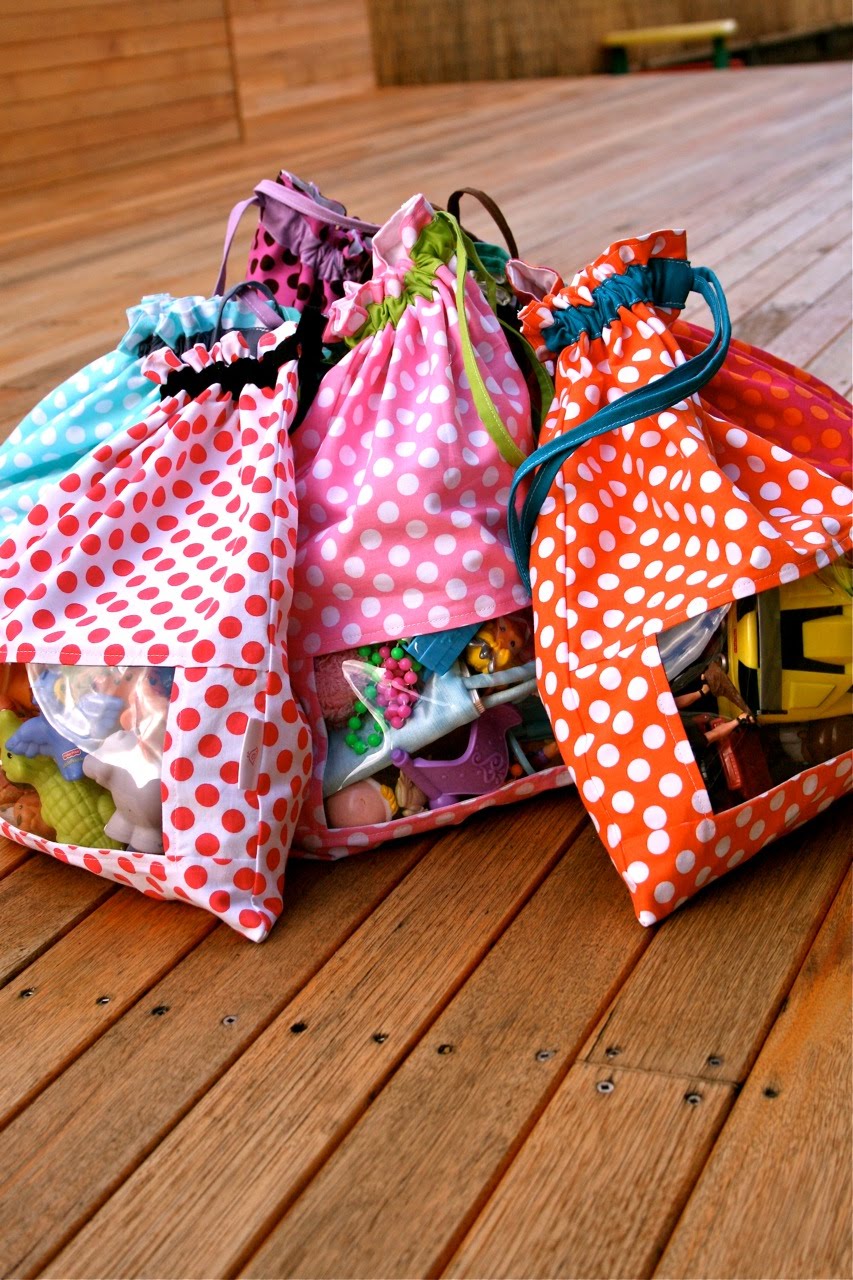
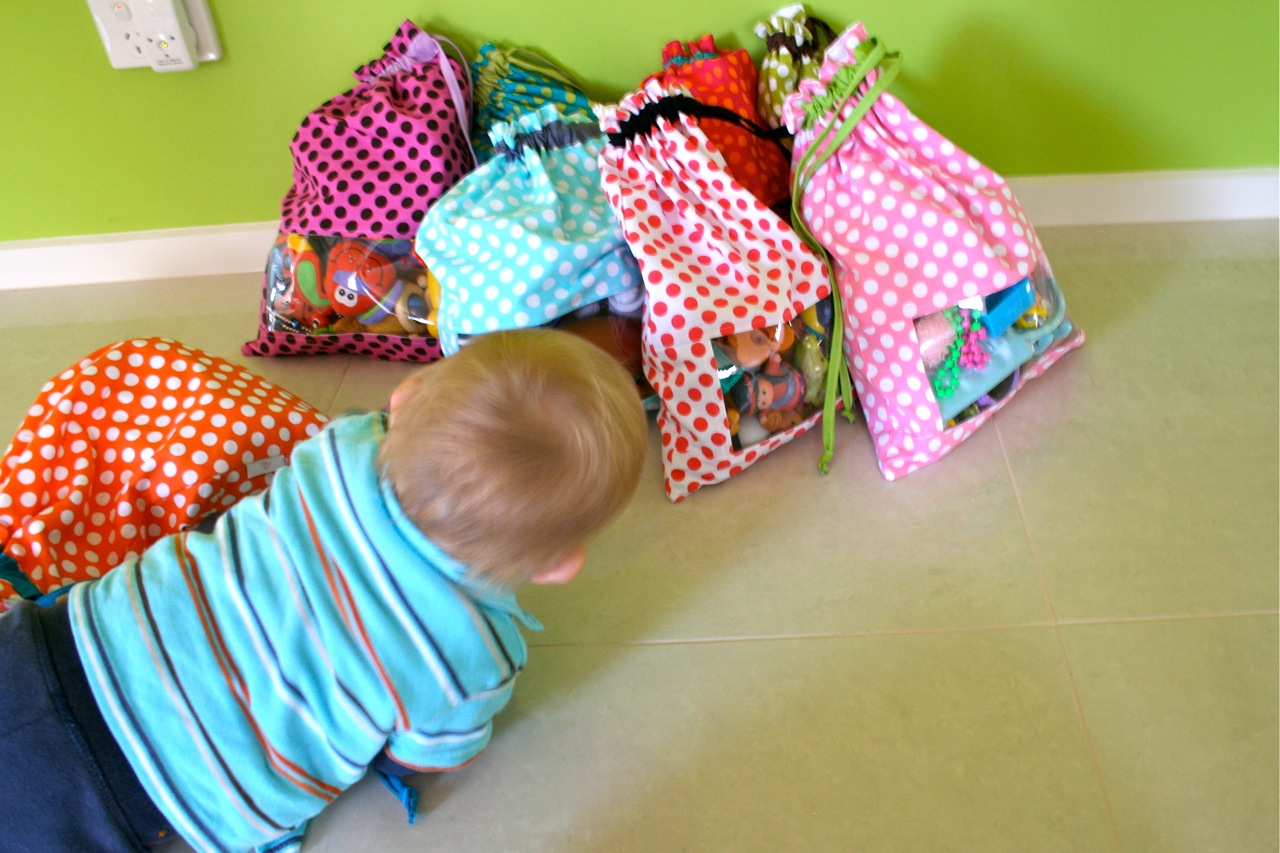
I’ve sewed 8 big toy sacks and sorted the kids toys into them. The cool thing about these sacks is that they have a big plastic window on the front so that everyone can see exactly what is inside them without having to open the bag and tip the contents all over the floor!
They are fully lined so look just as neat on the inside as they do on the outside and should be really durable. Spots rock and you can’t have too much of a good thing so I pulled out my stash of Michael Miller Ta Dot fabrics and used the 8 that I have. Buying more Ta Dot is on the list for my next fabric purchase because I want to make a few more sacks now! I thought that keeping Lego in a plastic box would be best but when Oscar came home from school this afternoon he insisted that keeping his Lego in a “Peek-A-Boo” Sack would be cool.
So, at the moment we have the 8 sacks, a box of Duplo, a box of Lego and 3 flexible plastic tubs – one with train tracks, one with dress-ups and dolls/softies and another with bigger toys that get a decent work out. This sized sack is too small for dress-ups and dolls but I might have a go at making a couple of bigger bags to fit those things in so that we can get rid of a plastic tub.
I know this won’t solve the dilemma of having all of the toys dumped onto the floor, but I like a bit of toy organisation and it may aswell look good! We have to clean up anyway and it is actually easier to get the kids to help if they have responsibility for picking up a certain toy…now I can give Oscar the car bag and he can be in charge of packing up all the cars and Lil can have the animals bag and pick up all the animals, etc. It makes the job seem easier and I can still hurry around and clean up the rest of the toys while still giving them a bit of responsibility.
Jaron and I were discussing tonight that the bags would look really cool hanging from a heap of hooks on the wall or in a big cane basket with no lid. At the moment they are piled in a corner in the studio and looking for a more permanent home. I’m sure they will stay that way for awhile but in the meantime I can keep my eyes open for somewhere to keep them.
Hehe – had to share this pic of Tommy…he crawled up to the bags and was trying so hard to get the toys out through the plastic window!!! So cute! If you want to make some “Peek-A-Boo” Toy Sacks for yourself, I’ll be sharing the tutorial tomorrow…I say “some” because they are fast and addictive to make and I assure you that once you get started, you won’t be stopping at one!!!
Introducing the latest Make It Perfect pattern to join the growing collection (this is number 22…who would have thought?!!)
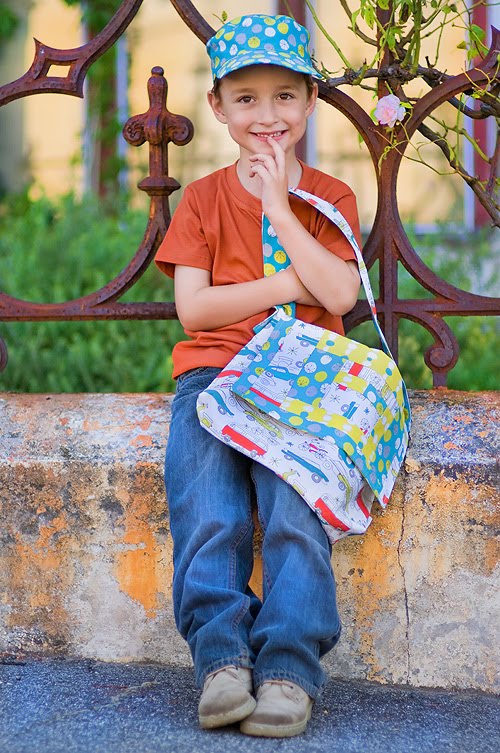
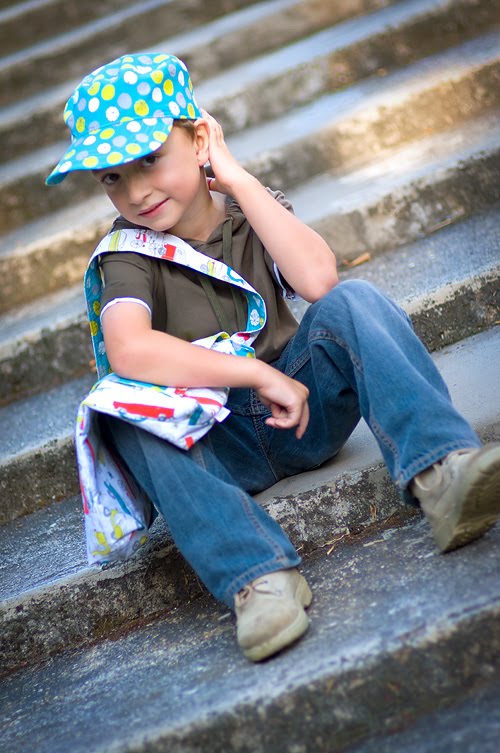
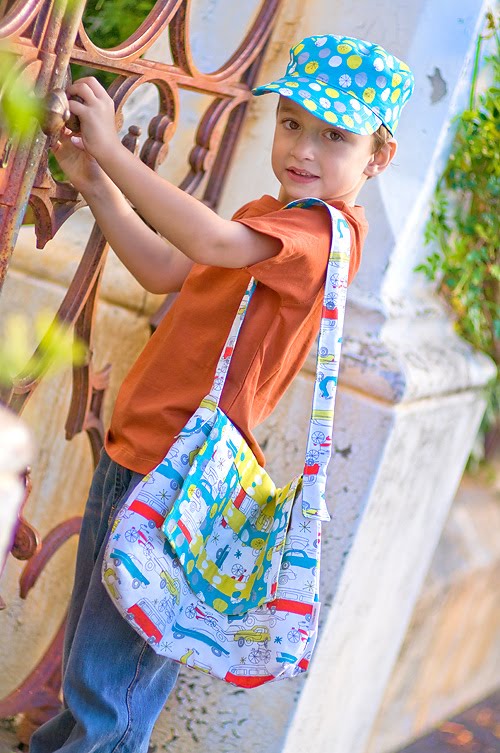
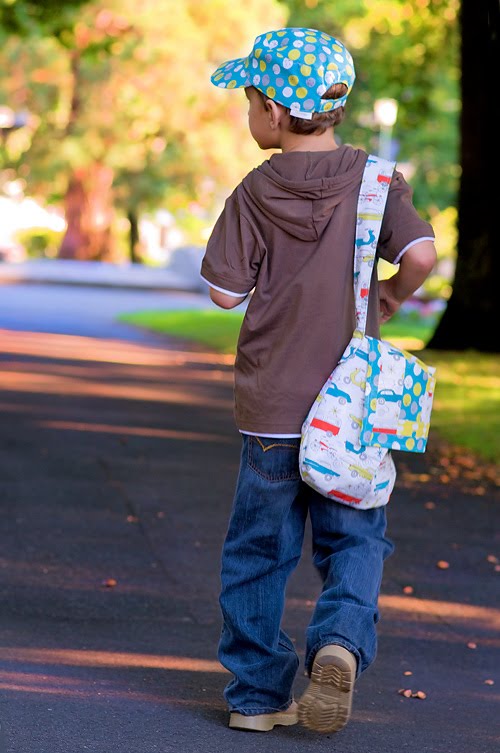
ABOUT A BOY
“About A Boy” is a hip cap and satchel bag set to keep active, energetic boys happy. This is the cap your boy will always reach for first. With adjustable velcro tabs at the back, it won’t fly off his head when a sudden gust of wind blows and will protect him from the heat of the sun.
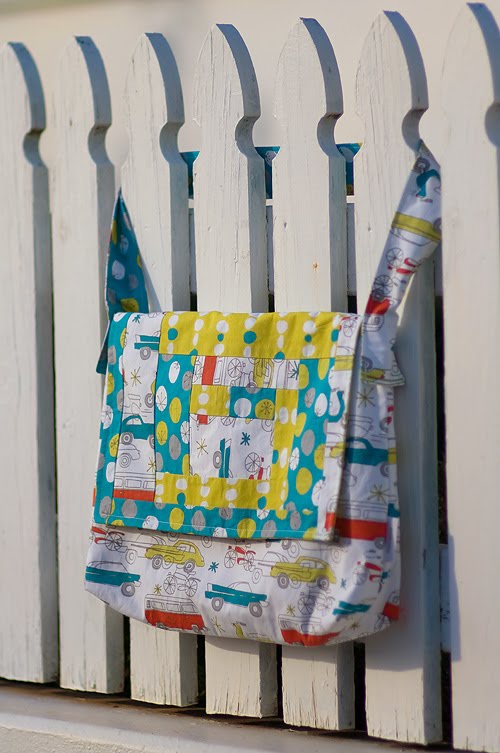
The satisfying satchel bag is made especially with boys in mind. The patchwork detail on the flap gives it a bit of funk without going overboard.
This macho-style set is a must-have for every boy!
This version of About A Boy was made using 100% organic fabric, “Circa 50” by Monaluna for Birch Fabrics. I absolutely love the funky boy-friendly prints…the cars are my favourites by far! Head over to the Make It Perfect website to see more photos and check out the fabric requirements for About A Boy. If you have a store and want to stock this or any other Make It Perfect patterns, contact Creative Abundanceto place an order. If you would like to purchase a copy of About A Boy for yourself, they should be popping up in retail stores very soon. Ask your favourite store to get one in for you!
My wonderful friend, Fiona Harding is responsible for the outstanding photography for this pattern – thanks Fiona…you are the best!!
And how cool is our little model, Harri? I have never met a kid who likes having his photograph taken so much!
I love giveaways a lot…I love the feedback and I love reading all of your comments.
I am so excited to be giving away a copy of About A Boy PLUS a cap (size small) like the one seen on the cover of the pattern! Simply leave a comment on this post and let me know which Make It Perfect pattern is your favourite! For a bonus entry, post about this giveaway on your blog, then come back and leave another comment letting me know that you have blogged about it! (Giveaway will close Wednesday 31st March and winner will be drawn via a random number generator.)
When I got word that my nephew was attending school using a green enviro supermarket bag as a library bag, I knew what I should make him for Christmas!
I used my Play School library bag pattern to make this for Mason…And seeing as Maya is starting school too this year, I made one for her aswell… I’m sure the kids weren’t thrilled with their gifts, but their Mum was! They serve a useful purpose at least!
SUPPLIES: Mason’s Bag – Sprout Design One Fish, Two Fish in Red/Blue Red linen Jennefer Moore Mingle, Circles in Espresso Blue homespun Red spot – unknown Maya’s Bag – Amy Schimler Creatures and Critters, Tropical Snails in pink Yellow spot – unknown Erin McMorris Park Slope, Leaf Dots in Green Valori Wells Olive Rose, Curves in Red Amy Butler Midwest Modern, Fresh Poppies in Rose


