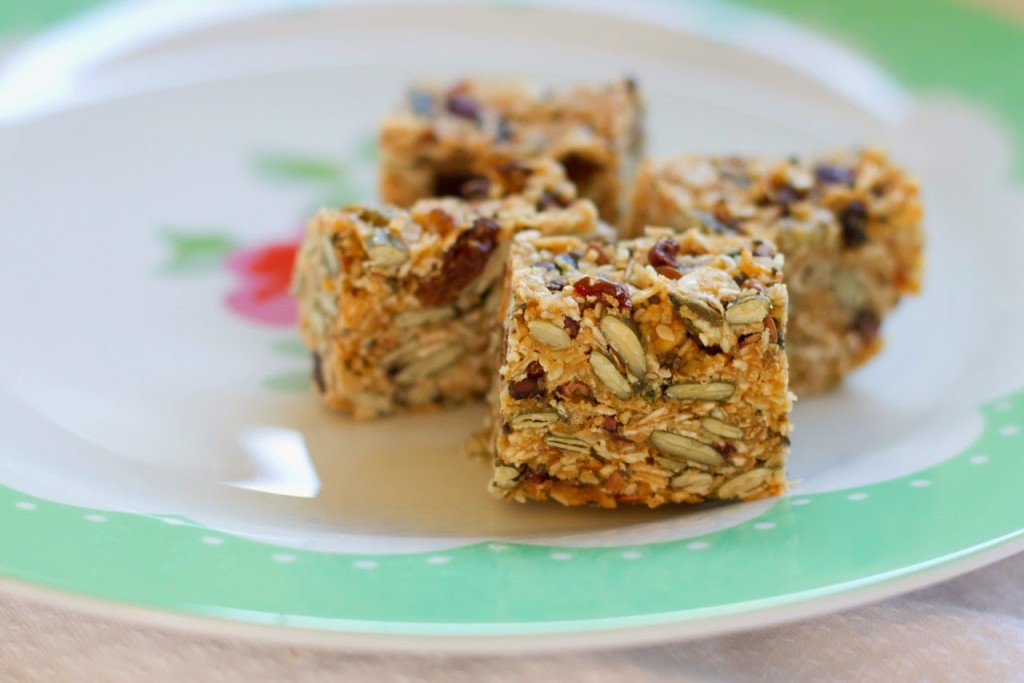
Sharing a recipe for Birdseed Bars today – with no refined sugar! And they can be nut, dairy and gluten free too if you make some simple changes. These homemade muesli bars are sweet and chewy with tonnes of flavour. I can even manage to get my pickiest kids to have a little piece with afternoon tea so that makes it an instant winner in my books!
There are lots of recipes for homemade muesli bars out there, but most of them are laden with sugar, honey and peanut butter. Probably better than a store-bought bar, but still not ideal. These are much tastier and filling than anything you will buy in a box! The best thing about them is that you can make them with pretty much any dry ingredient you have around or want to add in…leave the oats out and replace with lots of chopped nuts, increase or decrease quantities of seeds, etc. Work with what you like to eat and what you have in the pantry!
This recipe is for Thermomix cooking, but you can easily make it on the stove too by toasting the dry ingredients in a dry pan (stir often and check that it doesn’t burn!) and then bring the wet ingredients to boil for 4 or 5 minutes in another pan.
Place dry ingredients (not fruit) into Thermomix bowl and toast for 5 minutes on varoma temperature, reverse speed 1. Remove from bowl and set aside. Place butter or oil and rice malt syrup into Thermomix bowl and cook for 6 minutes on varoma temperature, speed 4. Add toasted dry ingredients and dried fruit into bowl. Mix together for 20 seconds, reverse speed 3. Spread mixture into a square cake tin lined with baking paper. Press down firmly. Place in the fridge to set and cool completely. Slice. Best kept stored in a container in the fridge.
VARIATIONS: To make gluten-free, leave out the oats and replace with more seeds, nuts, puffed rice, quinoa flakes, etc. As long as your dry ingredients measure about 400g, you can pretty much add anything you like to the mix! A small handful of cacao nibs are a delicious addition.
If you follow me on Instagram (make_it_perfect), I did promise awhile ago that I would share some recipes for some healthier snacks that I’ve been cooking lately.
About a month ago I got all hard core and decided that I was going to quit sugar…I was awesome for about 2 weeks and then school holidays kicked in and Harvey stopped sleeping and I lost motivation. I felt great while I was doing it though and it really wasn’t as difficult as I thought it would be. I read “I Quit Sugar” by Sarah Wilson, it is a quick, interesting and motivating read and I highly recommend it to anyone wanting to make some healthier changes to their eating habits. Although her approach is extreme, even if you aren’t wanting to totally get rid of sugar there are a lot of good tips to take away and make little changes for good in your diet. She uses rice malt syrup a lot as a sweetner – you can get it at health food stores or the health food section in Coles. It is a little midler in sweetness than honey but really yummy especially drizzled over some greek yoghurt.
Another recommendation is “Sweet Poison” by David Wilson. I bought his cookbook and it has a whole heap of yummy sweet recipes that are all fructose free. David is an advocate for using dextrose (a form of pure glucose) in replacement of sugar in cooking, I managed to track some down in Coles but you won’t find it in the baking aisle – this stuff is used for brewing beer so look in the home brew section! In my experimenting I think that dextrose is best for cakes and muffins, not so good fro anything you want to stay nice and crisp like biscuits. Here’s a picture so you know what you are looking for:
So, if you are like me and a total sugar/sweet/chocolate addict, these two books and websites are great to help get you educated and make some changes…I’m trying to get motivated to get back on track before the silly season rolls in!
When it comes to eating well, I don’t have a problem with breakfast, lunch and dinner…it’s the snacking in between that kills me. Particularly if I’m really hungry, I always find myself reaching for a quick sugar hit to keep me going. I’m sure that there are lots of people out there just like me, so here are a few recipes that I’ve been using that are much healthier than the originals and taste just as good too!
BLISS BALLS
If you do a google/pinterest search for bliss balls, you will come up with HEAPS of great recipe ideas. Basically they are made with a combination of nuts and dried fruit, plus other good things to give extra flavour.
The ones on the left are chocolate bliss balls made with: 1 cup cashews 2 Tbs raw honey or rice malt syrup 1 tsp vanilla 8 mejool dates 2 Tbs cacao or cocoa powder 2 Tbs coconut oil Place all ingredients into the thermomix or or processer/blender and process until smooth. Roll into balls and roll in coconut. Chill and store in fridge.
The ones on the right are apple and apricot bliss balls. I didn’t write down the exact measurements but I used dried apricots, dried apples, almonds, brazil nuts, coconut oil and rice malt syrup, then rolled balls in coconut.
CARAMEL POPCORN
This caramel popcorn has become one of our all-time favourites. I love that it is good for us and still just as yummy as a sugar-laden homemade caramel popcorn recipe.
1/2 cup popcorn kernels, popped 3 Tbs coconut oil 1/3 cup rice malt syrup 1/4 tsp salt pinch baking soda
Heat coconut oil, rice malt syrup and salt in saucepan until bubbly. Simmer for 3-4 minutes until it becomes golden and a bit thick. Add baking soda and mix quickly. Place popcorn in a large, greased baking dish. Pour caramel over popcorn, mix to coat. Bake in 140 degree celsius oven for 30 minutes, stirring after 15 minutes.
RASPBERRY & APPLE MUFFINS
This muffin base can be used for any fruit muffins – try replacing white sugar in cakes or muffins with dextrose. It isn’t as sweet as white sugar so the taste won’t be exactly the same. Also, dextrose soaks up liquid in a recipe so you might have to add a bit of extra liquid to get the mixture to the usual consistency.
2 cups SR flour
1 cup dextrose
2 eggs
3/4 cup olive oil
1 cup buttermilk (or milk mixed with a Tbs vinegar)
250g frozen raspberries
1 apple, grated
Place flour and dextrose into large bowl.
Whisk eggs, oil and buttermilk together in a sepearate bowl.
Add wet ingredients to dry and mix until just combined.
Stir thorough fruit.
Divide between 12 muffin holes and cook in moderate oven for about 20 minutes until cooked through.
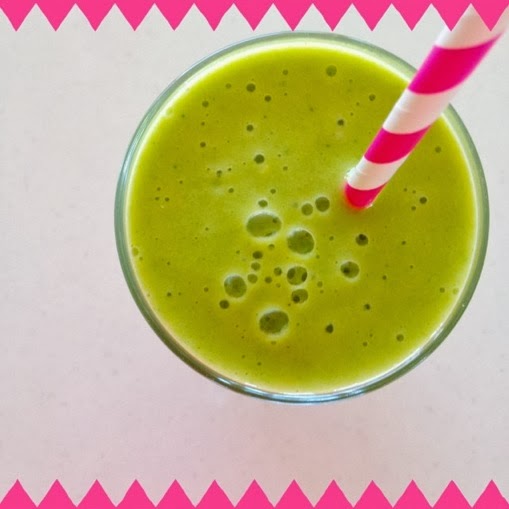
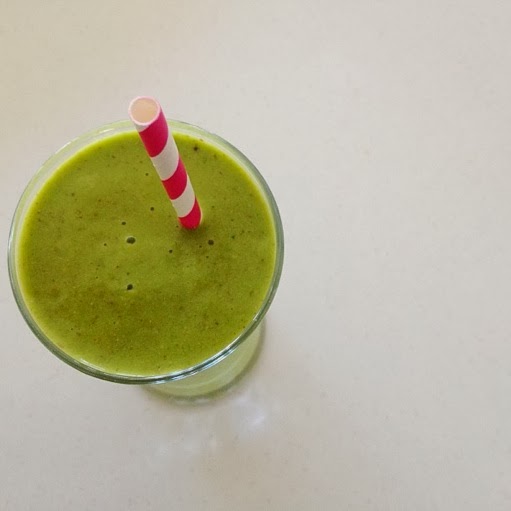
The one thing that has been an absolute lifesaver, especially when I get to that 3pm slump (and could easily devour a block of chocolate if I had one around!) is green smoothies. I tried making green smoothies ages ago and they were always yucky, I can’t remember what I did at the time to know why they were so gross, but I was really turned off! A friend shared some recipes and samples with us at a recent Relief Society activity and they were so good – I am hooked now and can’t do without my afternoon green smoothie! They are also great if I can’t be bothered cooking dinner (the kids have them with a piece of toast!) or I’ve been too busy to eat properly throughout the day.
You can add pretty much anything you want to a green smoothie, the key is to blend them like crazy because if you are left with any lumpy bits from the greens it can be a real turn-off! I blend mine for 1 minute on speed 10 in the thermomix, and sometimes a little longer if it needs it.
My favourite combination is: handful baby spinach handful baby kale 1 orange 1 lemon 1 cup frozen mango 1 banana coconut water (or water or almond milk)
YUM! There are heaps of recipes and ideas on this website, Simple Green Smoothies. I’ve played around with lots of different combinations, but I can’t beat the one above.
Hopefully these recipes and ideas help you out with some healthier snack options. I’m already feeling motivated to get back on track!
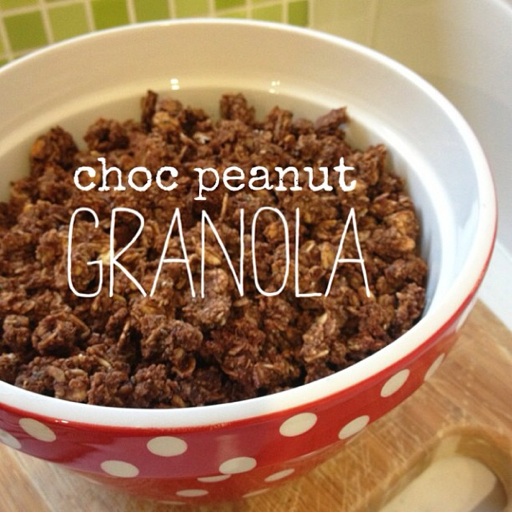
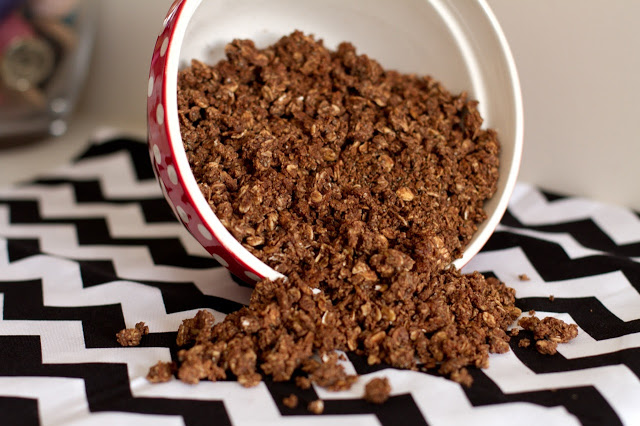
The original recipe for this tasty granola comes from this great blog. I have changed things up a bit and modified the instructions to make the granola in the thermomix before cooking it in the oven.
The end result was less chunky oats and more crunchy clusters – my kids will often screw their noses up at whole oats, but made and cooked this way, they think this granola is a tasty snack! We haven’t had it for breakfast, but it is nice to grab a small handful of when you are having a craving for chocolate during the day – fills you up, satisfies the craving, and it’s good for you!
Choc Peanut Granola
2 apples, peeled
130g peanut butter (I used homemade peanut butter)
100g maple syrup
1 tsp vanilla
1 Tbs milk
300g rolled oats
20g chia seeds
3 Tbs cacao (or cocoa) powder
Place apples in thermomix. Chop on speed 4 for 10 seconds.
Scrape apple from sides of the bowl. Cook on 100 degrees, speed 2 for 5 minutes until soft.
Puree on speed 9 for 10 seconds.
Add peanut butter, maple syrup, vanilla and milk to pureed apples. Cook on 80 degrees, speed 1 for 2 minutes.
Add rolled oats, chia seeds and cacao to wet mixture, mix together on speed 4 for 20 seconds. Mixture will be quite wet.
Spread granola onto lined baking trays.
Bake in 160 degree oven for up to 1 hour, stirring to break granola up into little clusters every 10-15 minutes.
Granola will not become hard and crunchy in the oven, it will get crunchy as it cools. To test if granola is ready, take a little bit from the tray and sit on a plate to cool. Test for crunchiness when cool and cook for longer if required.
I always try to have a breakfast that will keep me full up until lunch time and toast and cereals just don’t cut it. CADA is still a favourite but I’ve had it so much that if I overdo it I get sick of it very quickly. A couple of times a week I’ll have porridge made with oats for breakfast. I’m not crazy about it, but I keep eating it anyway. It does fill me up, but feels really heavy sitting in my stomach and makes me feel bloated.
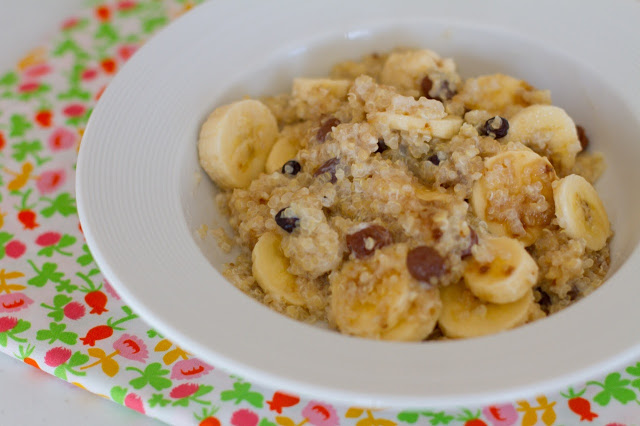
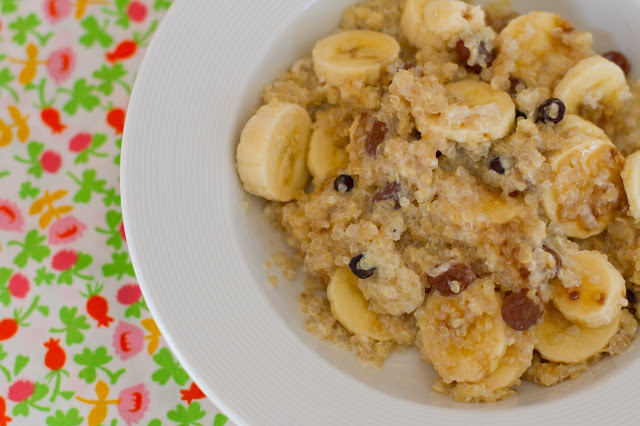
Last week I decided to give quinoa porridge a try. And I’m so glad I did because it is absolutely divine! It is delicious and a bowlful keeps me going for about 4 hours with no yuck, heavy, bloated feeling. I like to sweeten mine with rapadura sugar – maple syrup is good too. You can easily customise this porridge to suit your tastes – have it with or without yoghurt, berries, fruit and nuts. At the moment I’m enjoying a simple banana – and I usually don’t eat bananas but they are really good mixed through the porridge!
Quinoa Porridge
85g quinoa 125g water 125g milk 1 tsp vanilla pinch salt 100g milk 2 Tbs sultanas sweetner of choice (maple syrup, honey, sugar) fruit/nuts/yoghurt to serve
Before cooking quinoa, you need to wash and rinse it REALLY well to get rid of the naturally-occuring insect repellant the plant produces which causes a bitter taste. Some people like to soak their quinoa for an hour or so first, but I am never that organised so just rinse it through a fine sieve a few times. Place quinoa, 125g water, 125g milk, vanilla and salt into thermomix. Cook for 15 minutes on 90 degrees, reverse, speed 1. Add 100g milk and sultanas. Cook for 10 minutes on 100 degrees, reverse, speed 1. Leave porridge for 5-10 minutes to soak up extra liquid. Spoon into bowls and add sweetener of choice. Garnish with what ever fruit, yoghurt or nuts you like! This recipe makes enough for two serves. I put the second serve in the fridge and re-heat it to eat the next morning.
So, I am totally repulsed by chocolate at the moment (as is usual for me in early pregnancy). It’s a strange feeling as I will see chocolate and have the urge to eat it, but as soon as I smell or taste it, remember how gross it is to me right now! I’m making the most of it, as I know my chocoholic urges will hit me strong in a few months!
I am, however, loving anything creamy or buttery. Usually I couldn’t care less for cream, but now it is divine! Yesterday I made a vanilla slice in the Thermomix. Oh, it was SO good! Topped my usual vanilla slice over the stove recipe and was absolutely delicious. And 100 times easier to make in the Thermomix, as all you have to do it press a few buttons and walk away then you are left with a perfectly smooth, creamy custard filling. So, here it is. And if you don’t have a Thermomix, follow the usual method for making custard on the stove-top using the same ingredients.
Preheat oven to 220 degrees celsius. Place puff pastry on baking trays and bake in oven for 10-12 minutes until just brown. Remove from oven and press down a spatula while still hot to flatten. Allow to cool. Place sugar in TMX bowl, and grind on speed 9 for 5 seconds. Add remaining ingredients and cook on 80 degrees for 15 minutes at speed 4. Have a taste of the custard and if it tastes too floury, cook for another 5 minutes at 80 degrees. Increase temperature to 100 degrees and cook for 7 minutes at speed 4. Line a 25cm square tin with baking paper, so that it extends up all four sides of the tin. Trim pastry sheet to fit the bottom of the tin, and place in the tin with browned side facing up. Pour custard over pastry, spreading it out nice and smooth. Trim remaining pastry sheet to fit top of the tin and place on top of custard with browned side facing down. Refrigerate for 4-5 hours until completely cold (you can pop it in the freezer for the first 30-40 minutes to speed up the chilling process but don’t forget to take it out and place in the fridge.) Spread top of slice with icing made from a little melted butter, icing sugar and hot water. Allow to set before removing slice from tin, cutting into slices and serving. Makes 16 large squares.