about our natural, neutral palette at the new house. The first house we built was very “out there” as far as colours go. Lime green accent walls, lime green mosaic tiles in the kitchen and bathroom, splashes of scarlet red and brown tones throughout. It was a fun house with a lot of character but we felt ready to tone things down this time around and reflect the beautiful countryside and nature surrounding us.
We decided to stick with light timber, lots of stark white and concrete/grey throughout the house. Our house has a lot of North-facing windows and is really bright and fresh, which is only enhanced by the clean, neutral design and colours inside.
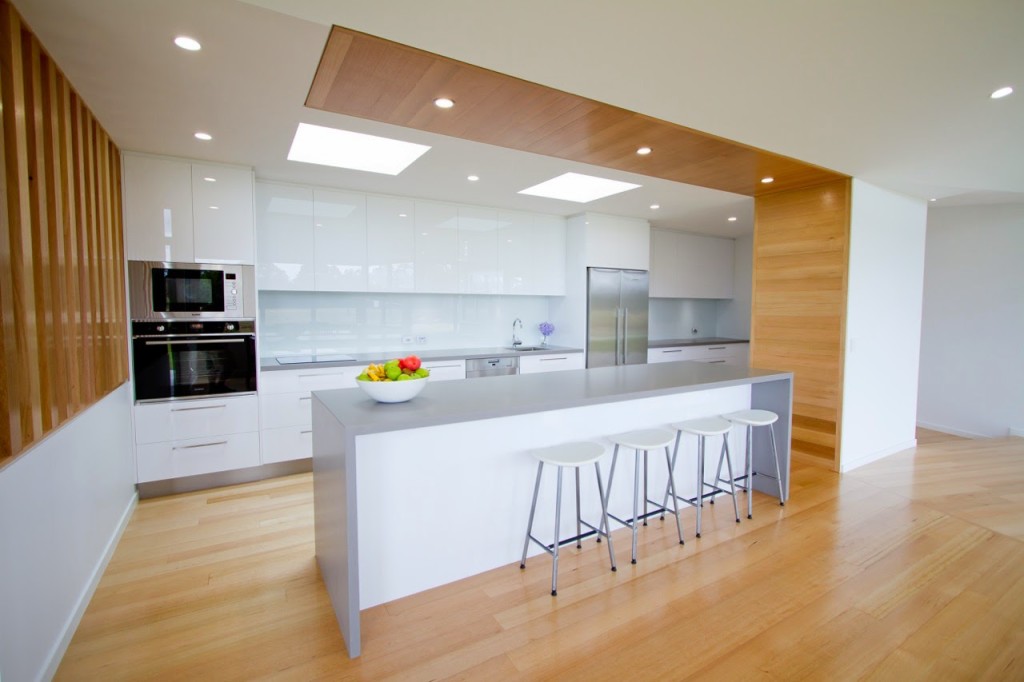
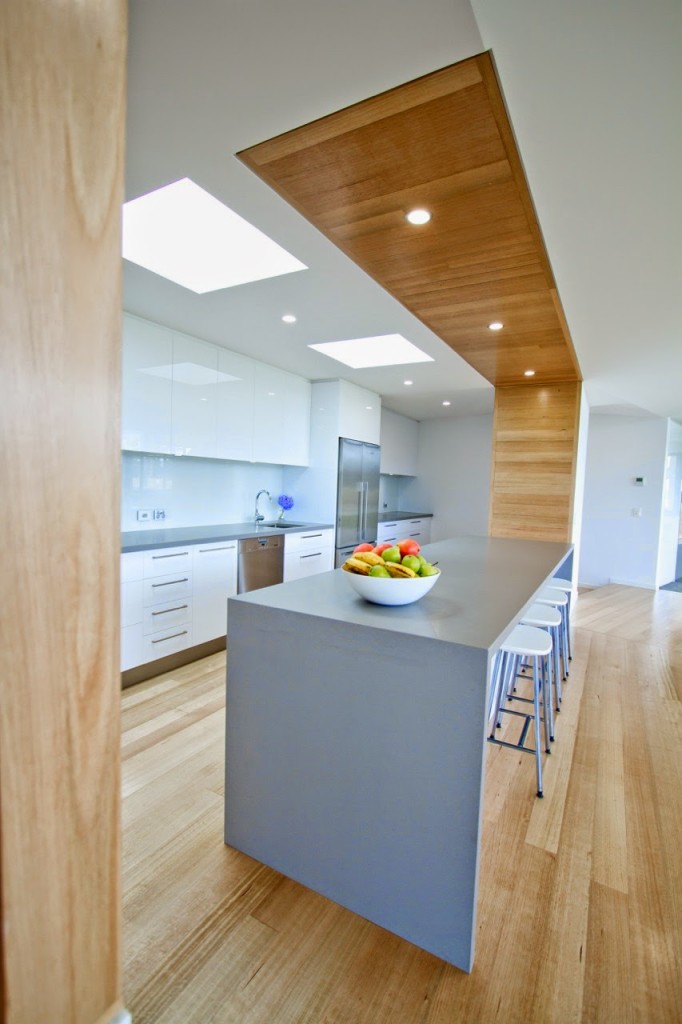
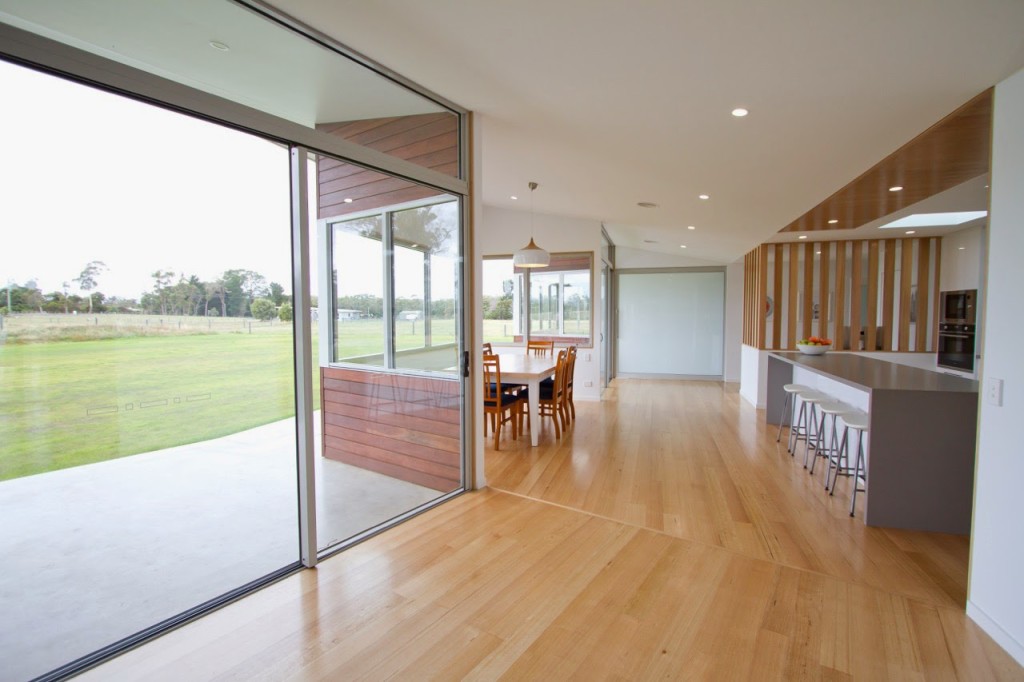
So, here is our kitchen. Definitely the hub of the home and where I seem to spend a great deal of my time. It is right in the middle of the lounge room and rumpus room and looks out to our front yard.
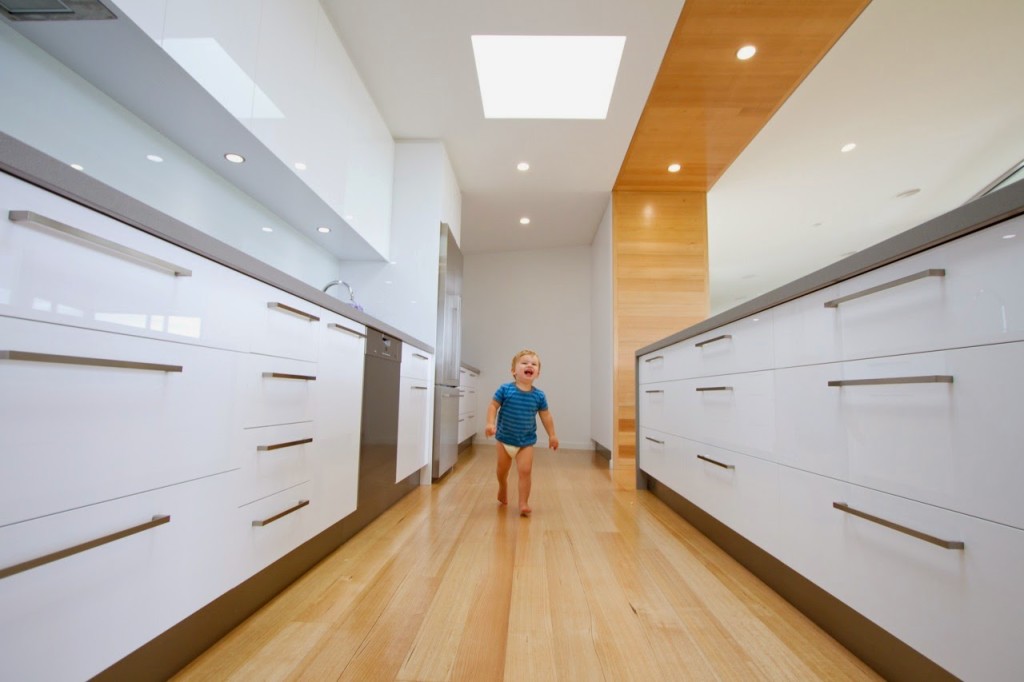
We spent quite a bit of time deciding what colours and finishes we wanted to use on the kitchen cupboards, benchtop and splashback. In the end we went safe and fresh and choose white high gloss cupboards and drawers. Underneath the benchtops we have lots of drawers, which I love and above the splashback and appliances are soft-close cupboards. I’m happy that we decided to omit the handles on the cupboards as it keeps things looking nice and clean. I’m hopeless at visualising a finished space before it is actually finished and I was a little worried that the kitchen would look too boring, but I really love how it all turned out. It feels sleek and simple and stylish.
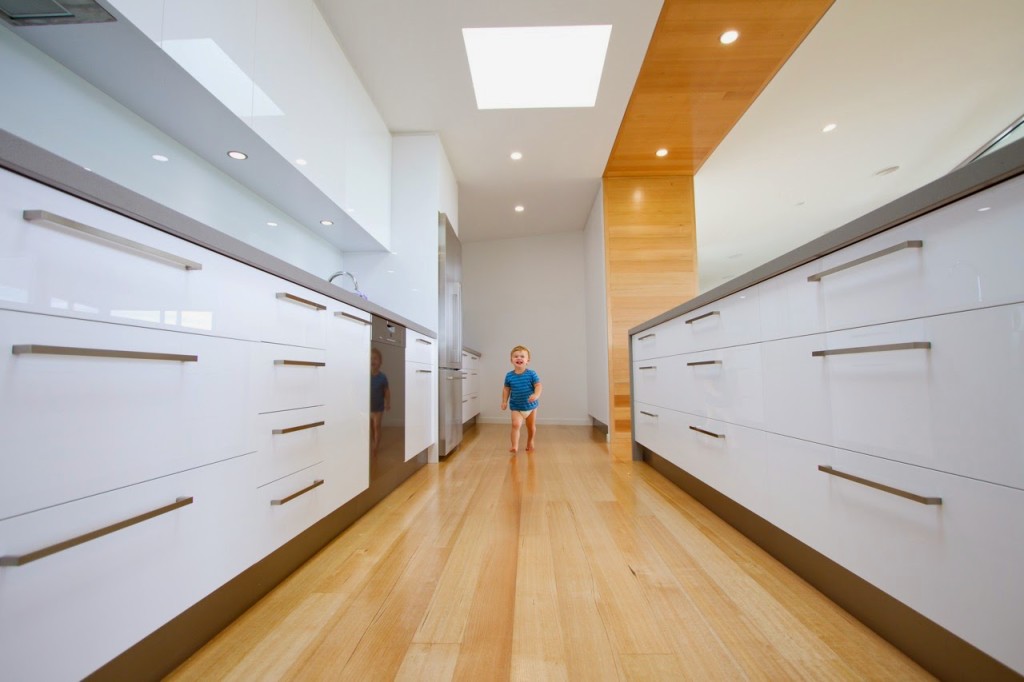
The splashback is white glass, this is the only part of the kitchen that we are not 100% happy with. It has a slight green tinge to it in some light, especially when compared to the bright white cupboards and drawers. We did think of putting timber behind glass at one stage but weren’t sure how it would stand up so didn’t go for it but if we could change one thing about the kitchen now we would have a timber splashback.
To bring a concrete element to the inside of the house, we choose a concrete-look benchtop. It is a new Caesarstone colour called Sleek Concrete. It would have been nice to have a polished concrete slab as the benchtop but also super expensive so this was a nice compromise.
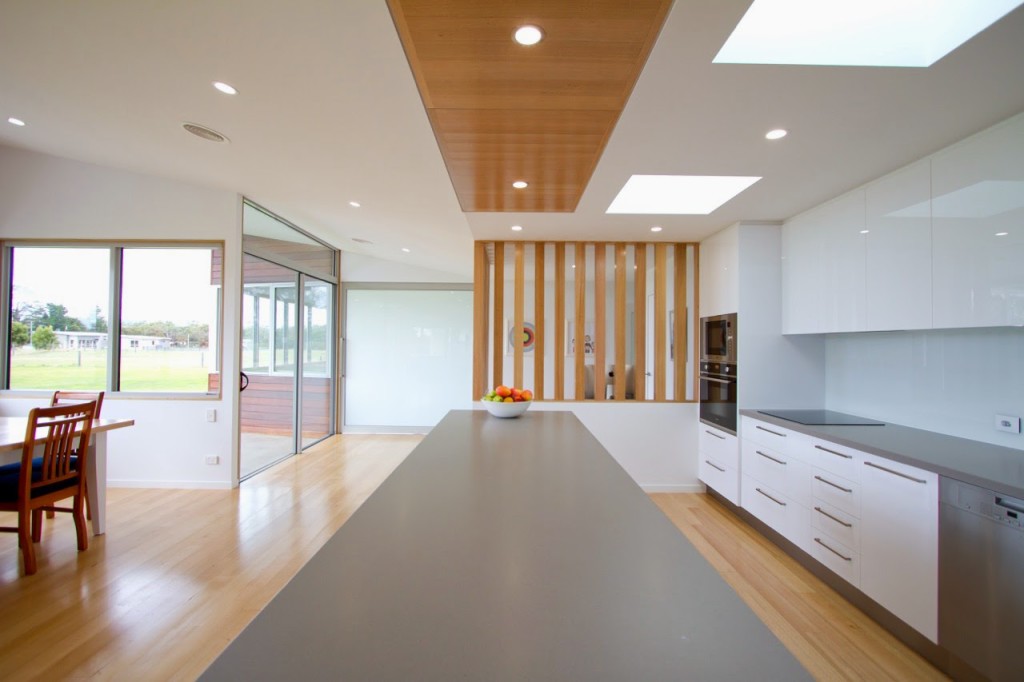
Moving onto the ceiling…we wanted the kitchen nice and light so put two big square recessed skylights in the ceiling. There are a few other skylights in the house and they are one of the best decisions we made when planning the build. They let in so much light and I love the direct sunlight that moves across the kitchen throughout the day. It is awesome standing underneath them and looking up during a heavy rain too!
The timber running up the wall and across the ceiling is the one thing in the house that I can take full credit for…and I’m pretty proud of myself because Jaron usually comes up with all of the cool design stuff before I do! We were trying to look around for pendants to put above the island bench and couldn’t find anything that we were really happy with, then I had a thought that maybe we shouldn’t bother with pendants at all and keep the kitchen clean and streamline without too many distractions. I’m not sure where this inspiration came from but we played around with different ways of including timber in the ceiling of the kitchen and settled on this design and it really helps to increase the interest and ties in well with other timber elements in the house. All of the timber in the house (including the floors) is Tas Oak. I was really set on having a light coloured timber and wanted to stay away from high gloss so we did some research and used a Scandanavian product called Bona Traffic HD as a coating on the timber and it is awesome! It is a satin finish and makes a huge difference in keeping the floor looking clean. When the sunlight hits the floor you don’t notice any of the dust that is really noticeable on a high gloss timber floor. It also has a soft, almost waxy feel under your feet and is lovely and warm to walk on. I especially love the light blonde colour and how it is more of a sandy colour rather than dark brown, yellow or orange. The floor is so easy to clean and hardly ever looks dirty – I’ve managed to go 2-3 weeks in between washing it and you can’t even tell it is overdue for a wash! After the white gloss tiles in our old house that always seemed to look dirty and smeary this floor is a dream!
The pantry is to the right of Harvey in the back of the picture above. It feels a little hidden as it is enclosed by two big, gloss, push-to-open doors with no handles and feels like a blank wall. It has heaps of space, actually the whole kitchen has heaps of storage. Half of the cupboards above the bench don’t even have anything in them yet!
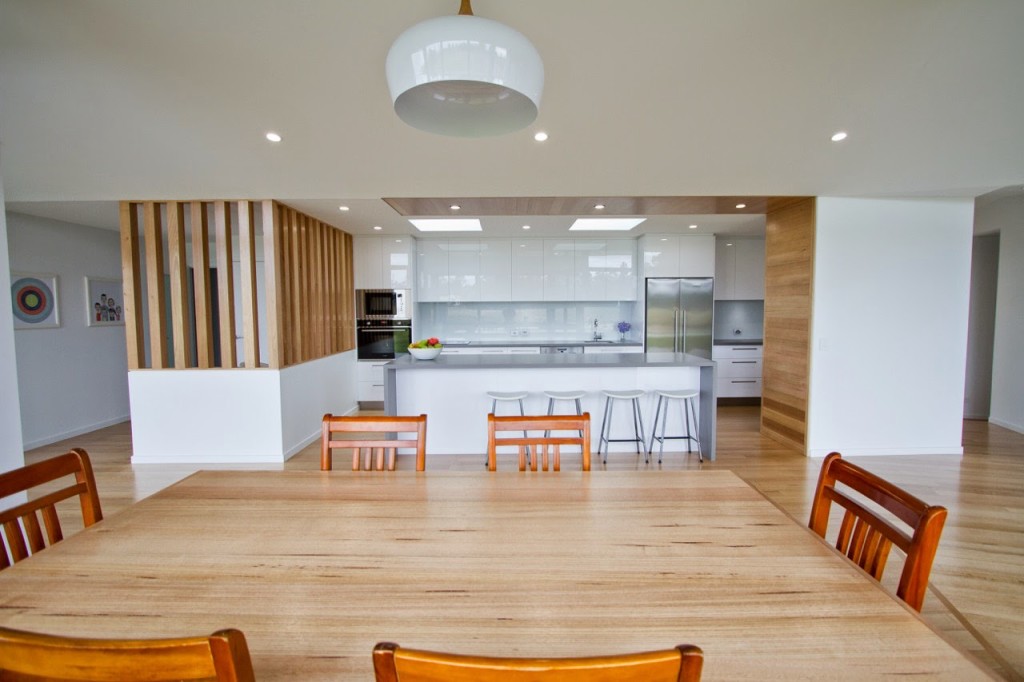
I think we are one of the few, newer houses that doesn’t have a sink on the island bench. It is just something that I have never wanted in my kitchen. I would rather have my bench clutter-free, ready for kids to sit at or people to eat at or a place to serve food and not have to worry about water and taps and dirty dishes getting in the way.
You can see in the photo above the timber posts screening off our computer nook. This area works really well. It means that the computer is still in the busy part of the home, I can always see what is going on or be close to everyone when I am using it, but also has it’s own space.
And here it is looking from the rumpus room. That door to the left of the computer desk is for storage. The computer desk is a grey laminate – it looks almost identical to the Caesarstone benchtops in the kitchen but a fraction of the price.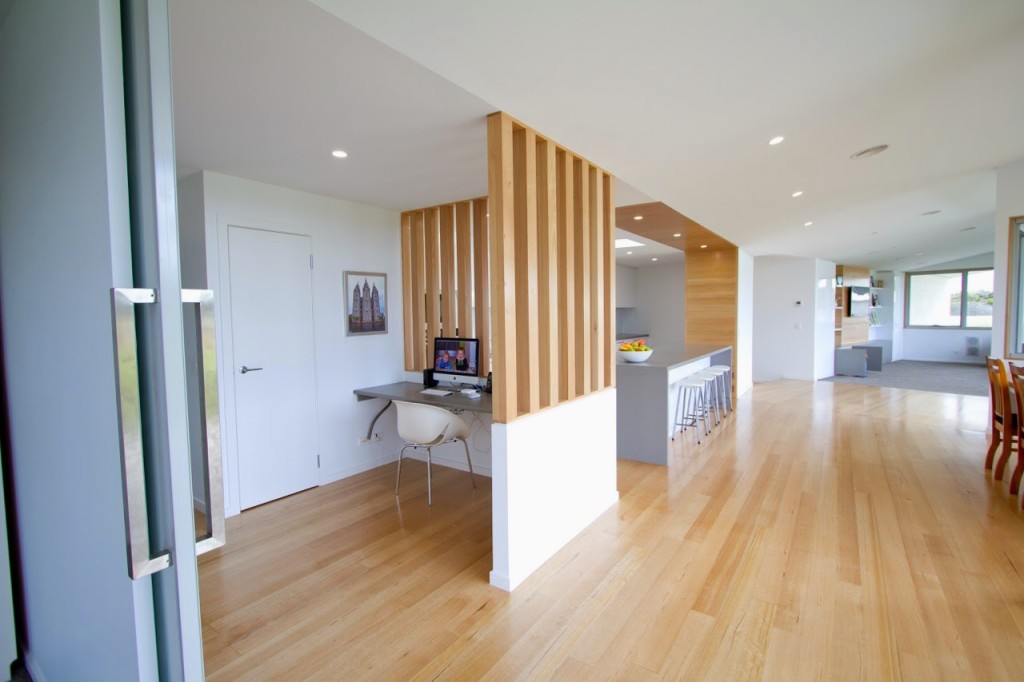
The dining area sits directly in front of the kitchen. I love the pendant light that we choose to put here (there is another identical one in the entrance) the white gloss and timber suits the house perfectly.
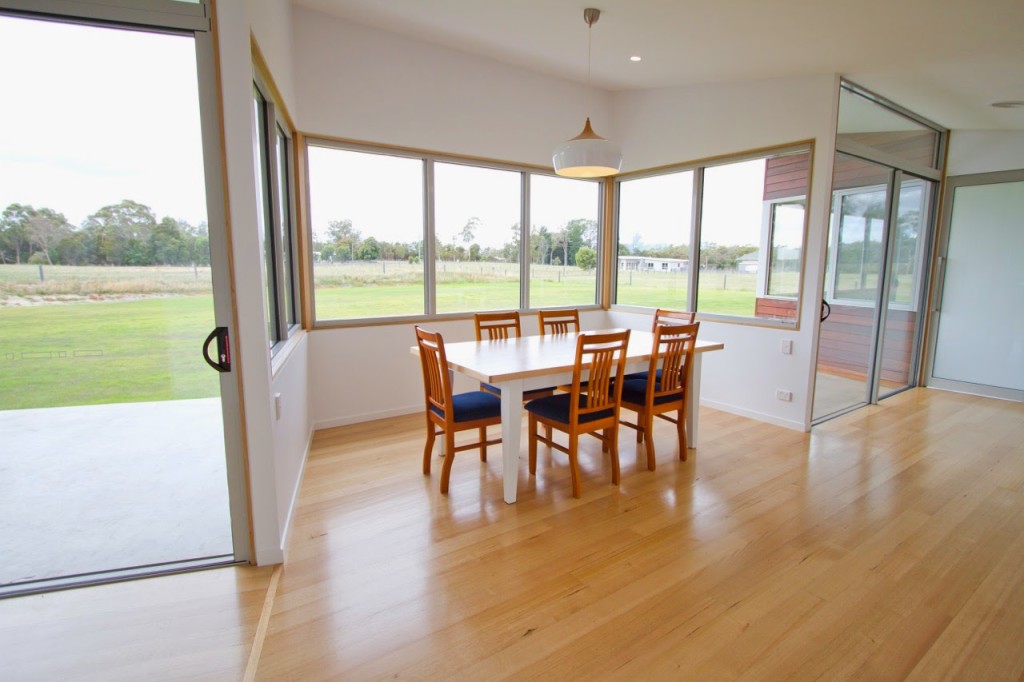
Our dining set is a work in progress…the table was the same colour as the chairs a few months ago. Jaron painted the legs white and used left over timber from the floors to make a new tabletop. So much nicer than what we had before and it only cost $60 and a couple of nights work! Now we need to paint the chairs white and cover the seats with something. Not sure what we will use yet…I have been looking for a grey oilcloth but haven’t been able to find anything that I really like yet (any ideas?) but am also wondering if I could cover them with some leather. Not sure how the leather will go with milk spills and wiping up food though so will have to do a bit more research.
And the last area to talk about for today is the loungeroom…
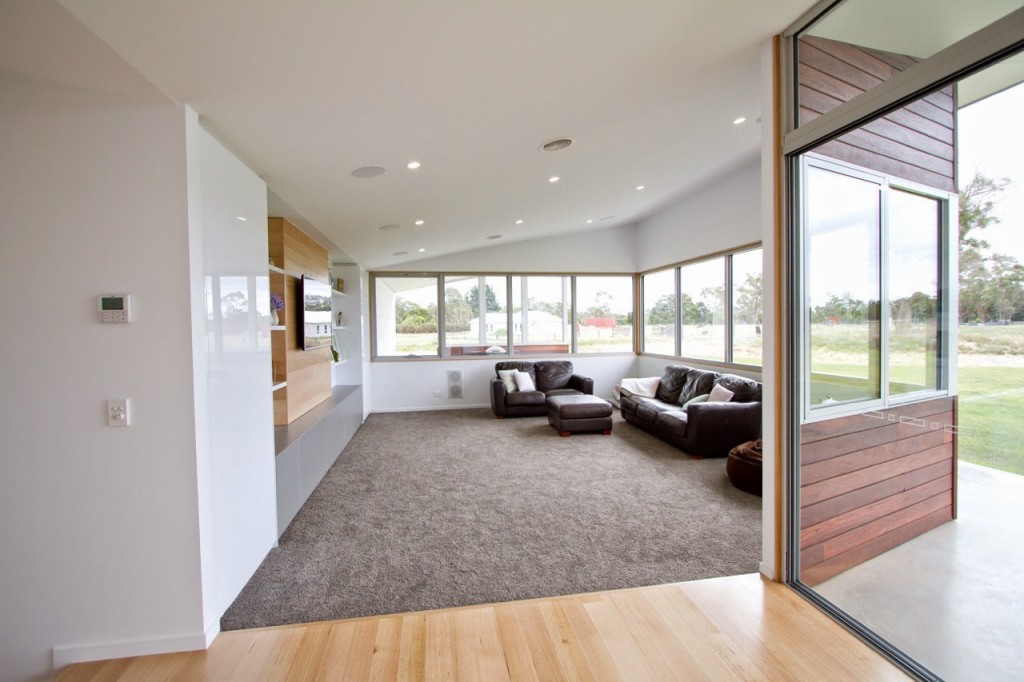
The loungeroom is still a work in progress – we eventually want to get a new couch that suits the space a little better and the display shelves are ever changing and I really need to make some new cushion covers but I’m taking my time with the decorating of this room because we also spend so much time here I want to get a feel for the house first and see where it leads me!
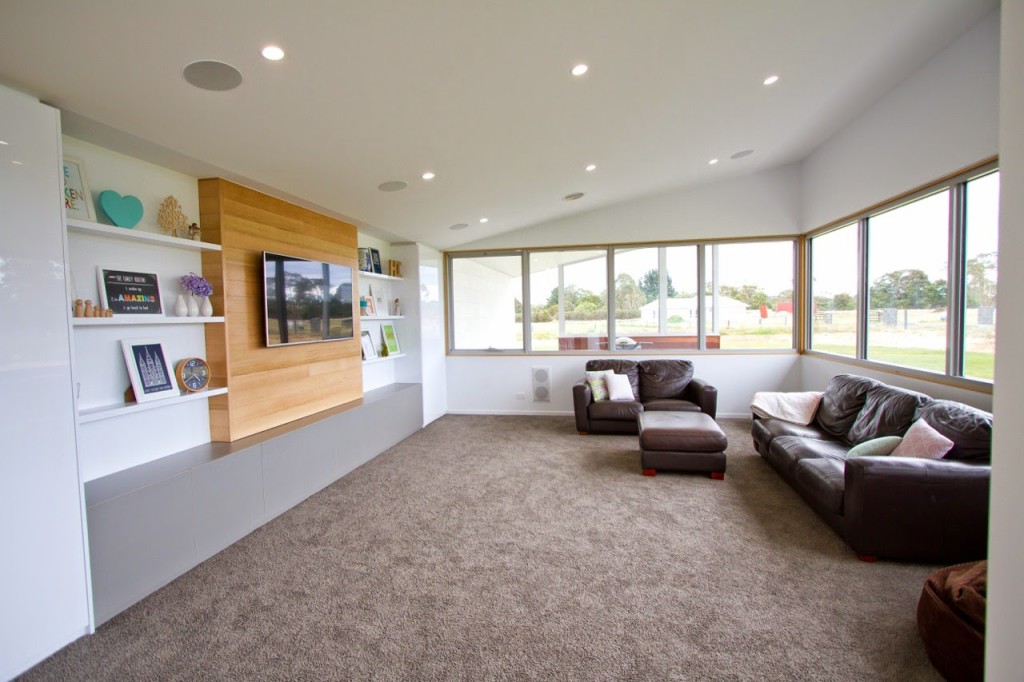
I had some Ikea shelves next to the TV in our old house and I loved how I could display photos/prints/knick knacks and easily change them around without committing to holes in walls. Because we knew it worked well for our style we had the joiner build us in some white gloss shelves either side of the TV for this purpose. It was nice to have somewhere easy to start decorating when we moved into the house too.
The timber paneling in between the shelves is the same Tas Oak as used in the kitchen. We wanted something to give a bit of warmth to the room so that it just didn’t look like a TV on a white wall and it carries on with the light timber theme we have going throughout the house.
Either side of the shelves are two big white gloss cupboards to use for storage – the one on the left is for books and the one on the right has board games, kids drawing stuff and is predominantly used for media – the DVD player, top box, amplifier and receiver are hidden away in this cupboard. Jaron’s big dream was to have surround sound in the loungeroom and he won (I wasn’t keen!) so this is where all of his stuff is kept out of view! The grey bench underneath the TV and shelves is also made up of a heap of cupboards too for extra storage (and at the moment they are all empty except for a few puzzles and kids books in one of them!)
 We used the same paint colour throughout the whole house – on all of the walls, trims and ceiling. It is Vivid White half strength Dulux Wash & Wear 101. This was another risk we took that paid off – we really wanted stark white walls to contrast nicely with the timber and grey elements of the house. So many people tried to talk us out of it and said that it would look too cold but we love it and I’ve discovered a great way to wipe dirty finger marks off without leaving any smears – I’ll share it next time because this post is getting too long!
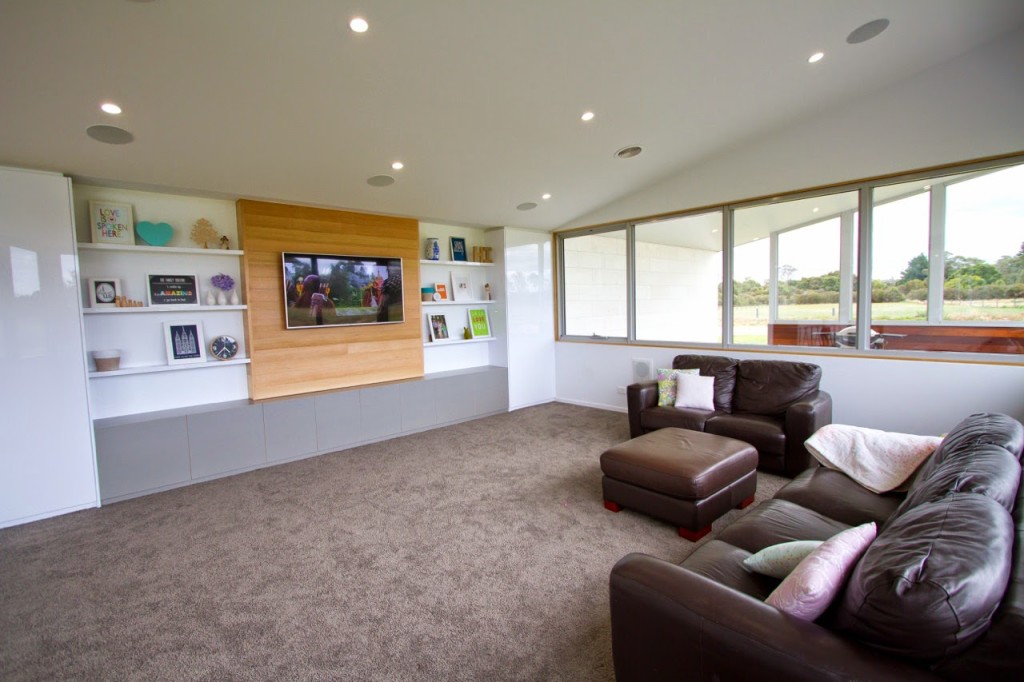
Not sure if you can really tell in these photos but all of the windows in the loungeroom, dining and rumpus room have Tas Oak timber reveals with a shadow line around them. To tell you the truth, I didn’t have a clue what Jaron was talking about when he said he wanted to do it but I love it and once again, it brings in a subtle timber element to all of the rooms.
The carpet we used throughout the house was something that we splurged on. It is Providence Sublime in Fog and is super soft and thick and luxurious. I figure that we sit and lounge and walk barefoot on the floor constantly so it was worth forking out a bit of extra money for. Plus it was one of the only carpet ranges that we could find that made a real stone grey colour, most other greys were too blue or too brown but this one works just right with the rest of our colours.
And this is what you see when you look back at the house from the loungeroom. That big opaque sliding door at the end is the rumpus room and my sewing area but it was a big mess on the day we took photos so I’ll save those for another day!
And if you’re a bit clueless with visualising things like I am, here is another look at the floor plan so that you can make sense of how these rooms fit together with each other and the rest of the house!
High 5 to you if you stuck with me for this loooong post! I better save the rest of the house for another time!


