I’ve got THREE giveaways happening…feel free to enter all of them…everything is made by me!
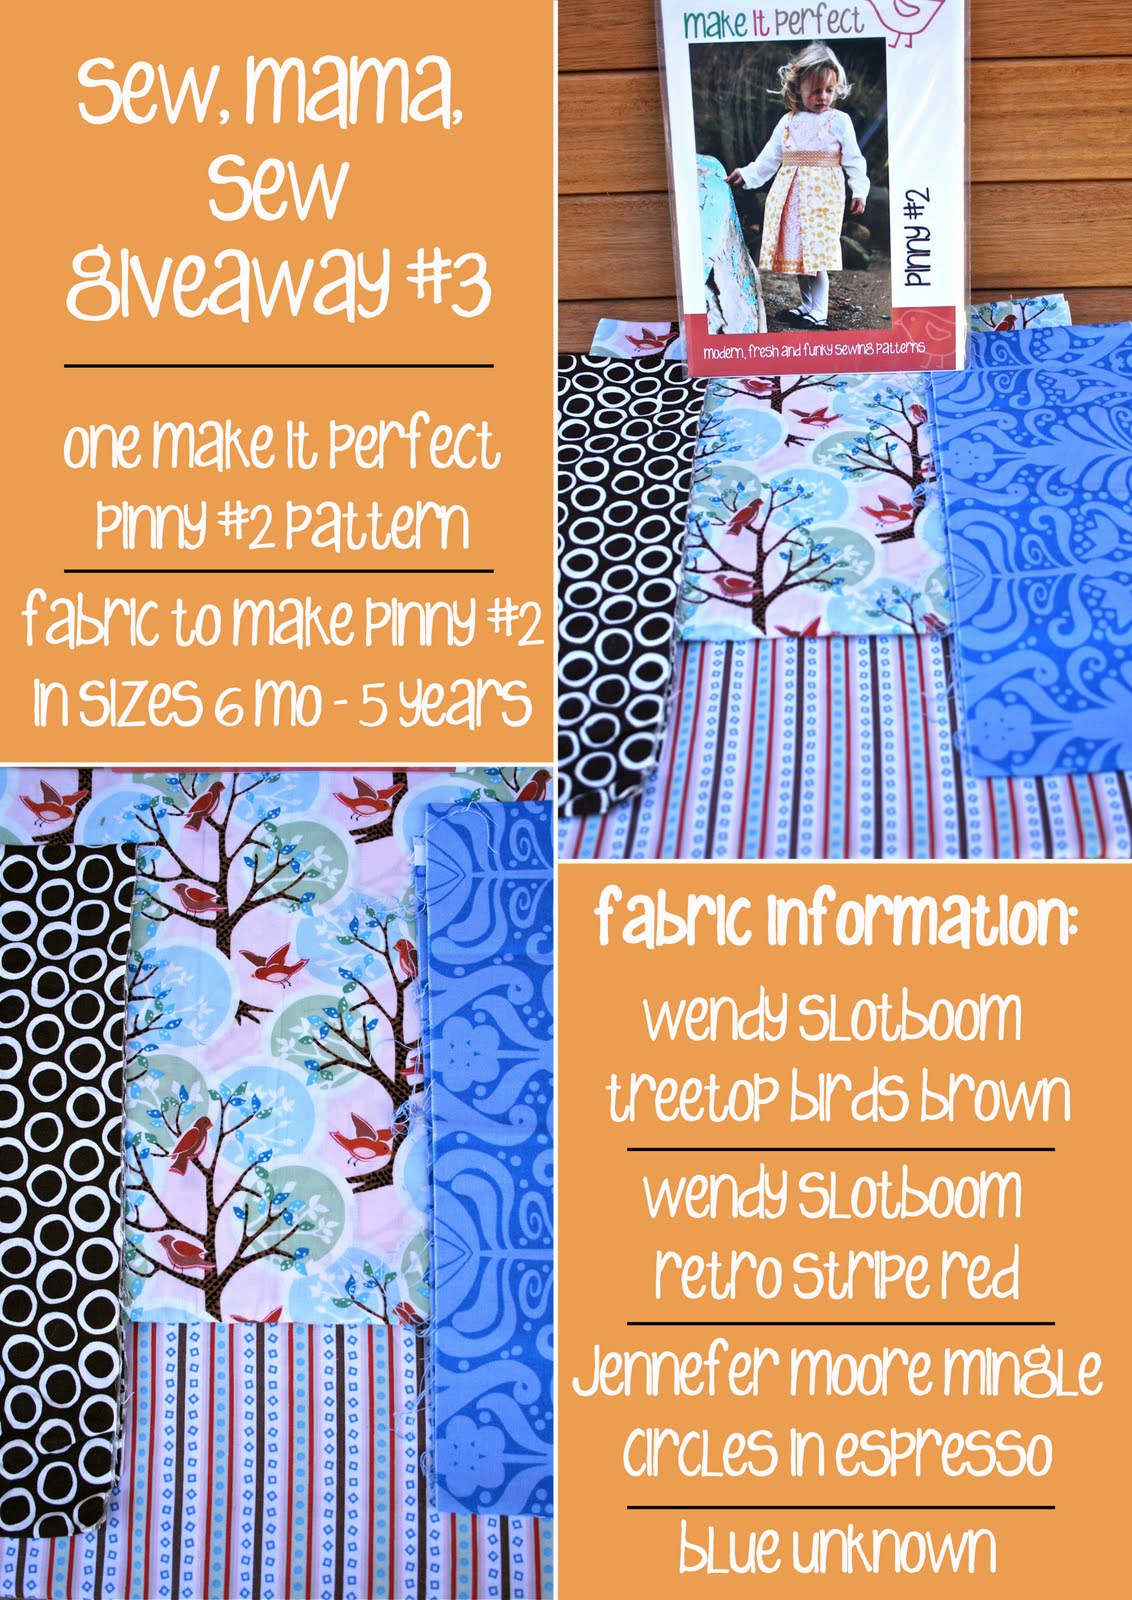
GIVEAWAY #3
Make It Perfect Pinny #2 kit CONSISTING OF One Make It Perfect Pinny #2 pattern Fabric to make Pinny #2 in sizes 6 months – 5 years (winner to specify)
{Fabric information: Wendy Slotboom, Treetop Birds in Brown Wendy Slotboom, Retro Stripe in Red Jennifer Moore, Mingle, Circles in Espresso Blue unknown}
To enter, simply leave a comment!! (If you don’t have an email address linked to your profile, please leave an email address with your comment so I can contact you!) Winner will be chosen via random number generator on Thursday 20th May. I will ship worldwide!
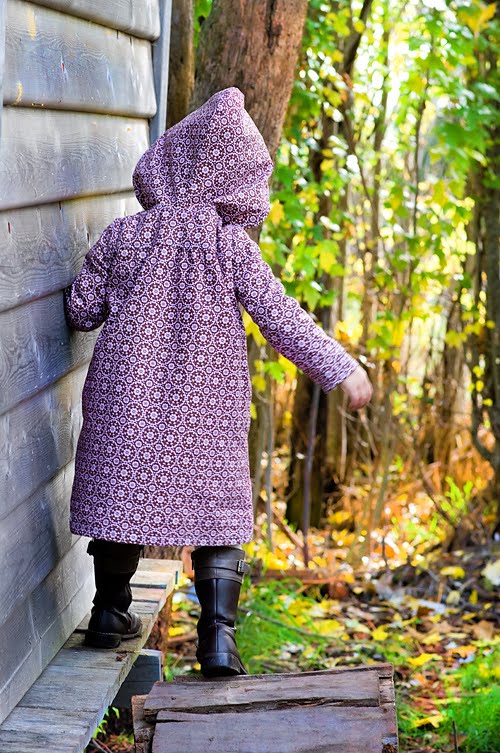
Hello friends! Today I’m excited to announce the release of the latest edition to the Make It Perfect pattern collection, Sprout.
A dress is a girl’s best friend and shouldn’t have to miss out on being worn when it is cold outside. Sprout is designed to be worn when the weather cools down.
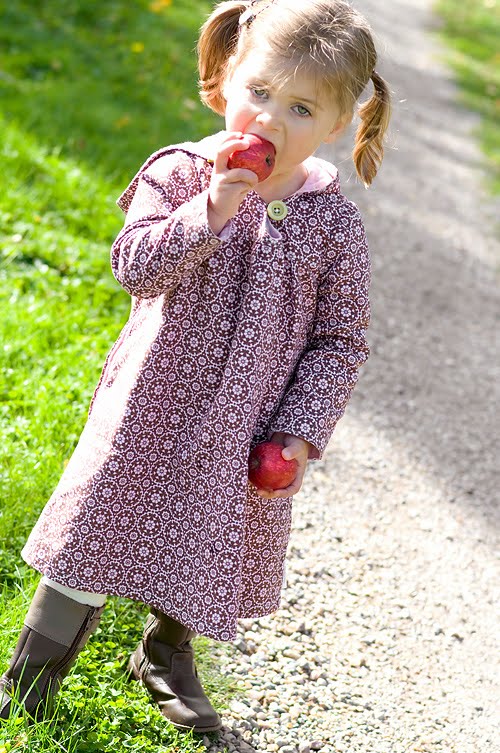
Fully lined with warm flannelette, Sprout is set off by it’s pretty gathered sleeves, long flared skirt, convenient side pockets and warm hood.
No need to hibernate indoors anymore…stay cosy and chic this winter wearing Sprout!”
(P.S. Sprout makes a great summer dress lined with light cotton fabric too!)
I am SO happy with how this dress turned out. I had the idea in my head for months. I knew that Lil’s love for dresses would prove to be a little tiring during winter. It would mean she would have to layer everything, and while layers are very cute, they aren’t always practical when you have an almost 3 year old having a tantrum in the morning when you are trying to get out the door because she JUST WANTS TO WEAR A DRESS!!! Because Sprout is flannelette-lined it is extremely warm and cosy meaning that both Mum and daughter are happy 🙂
Head over to the Make It Perfect website to see more photos and check out the fabric requirements for Sprout.
If you have a store and want to stock this or any other Make It Perfect patterns, contact Creative Abundanceto place an order.
If you would like to purchase a copy of Sprout for yourself, they should be popping up in retail stores very soon. Ask your favourite store to get one in for you!
I know I always say this, but seriously – how adorable is my little model Mary?? She was so fun to have modeling Sprout and is a little girl with a huge personality!!
A big shout-out to Fiona (once again) for the brilliant photography. As always, I was jumping up and down with excitement when I saw what she had captured 🙂
Alright, lets get the show on the road and give away a copy of Sprout. Leave a comment on this post to be in the running! For a bonus entry, post about this giveaway on your blog, then come back and leave another comment telling me you have blogged about it.
(Giveaway will close Thursday 20th May and winner will be drawn via a random number generator.)
(Post-edit…a few people have asked what fabric I have used to make the dress: Exterior – Saffron Craig, Fantastic Fairies, Fairy Circles Flannelette – Riley Blake, Just Dreamy, Tone on Tone Flowers in Pink)
I’ve got some big stuff going down on the blog in the next few days…I FINALLY got around to making another zippered pouch and taking photos along the way to put together a tutorial for you…I’ll be releasing a new pattern on the weekend (yay!) and I’m participating in the Sew Mama Sew May Giveaway Day on Monday with some lovely goodies up my sleeve to give away!! So stay tuned…lots of fun stuff to make and see and WIN 🙂
Lets get this tutorial started then! After making Oishii and then the abundance of zippered pouches that followed I had so many people write to me saying that they are scared of zips! Well, fear zips no more…they are actually quite simple. This is a great beginner zipper project, so gather yourself some materials and lets get sewing 🙂
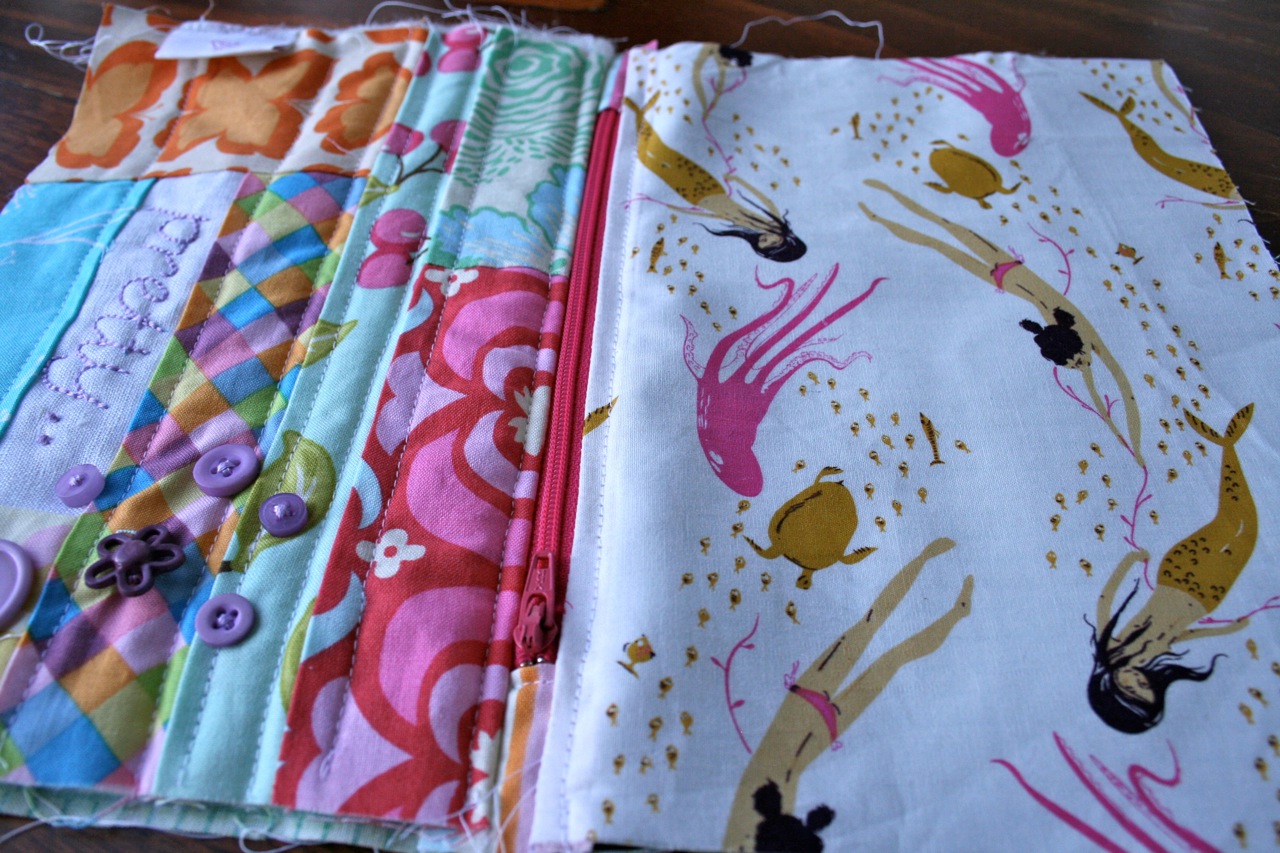
EASY PEASY ZIPPERED POUCH TUTORIAL
I’m not going to give instruction on how to make the patchwork panel that I use for my pouches…the instructions will vary depending on the size of your scraps and the way you lay them out. A quick run-down though in case anyone wants to get nitty-gritty…I cut and join my little scrap pieces until I get a rectangle which measures 9″ x 6 1/2″ making sure I get a piece of plain white fabric in there somewhere. Then I cut a piece of pellon or quilt wadding to the same size and adhere to the wrong side of the fabric by ironing on if using pellon or pinning around the edges if using wadding. Sew a few rows of stitching above and below seams joining fabric strips (I don’t sew on the white fabric). Using an erasable fabric marking pen, write a word on the white piece of fabric then embroider using 4 strands of cross-stitch thread. Sew on a little collection of buttons.
Okay, so that is a speedy how-to make the patchy panel! Of course you can also just use a single piece of fabric (WAY faster if you do that!) It is up to you if you want to use any wadding on the front or back of the pouch. I used wadding on the front but not on the back…depends on the look/feel you are going for. You could also use a piece of stiffener fabric (e.g. Shapewell) if you want a bit of extra strength or stability.
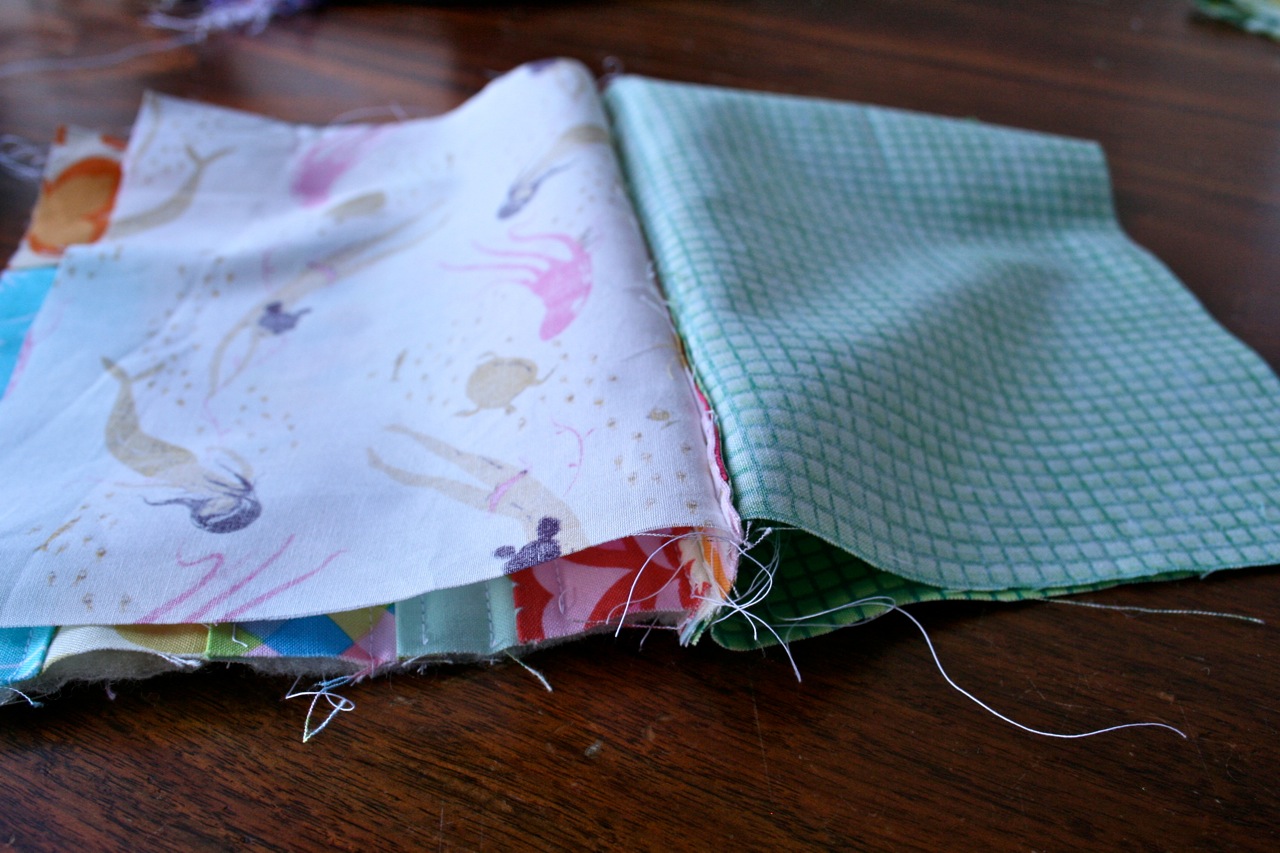
To make a Zippered Pouch, you will need: One 9″ x 6 1/2″ rectangle of fabric for front exterior (patchwork pieced) One 9″ x 6 1/2″ rectangle of fabric for back exterior (mermaids) Two 9″ x 6 1/2″ rectangles of fabric for lining (green check) Two 4″ x 2″ (approx) rectangles of fabric for zipper ends (pink/blue stripe) One 7″ dress zipper
Step 1. Take the two small rectangles of fabric for zipper ends and fold in half so that short ends meet. Press. Place the folded edge of the fabric just over the metal stopper on the end of the zipper and pin into place. Sew about 1/8″ from the folded edge of the fabric (be careful not to sew on top of the metal stopper here…your sewing machine will not like it!!).
Do the same with the second piece of fabric on the opposite end of the zipper (it is easier if you open your zipper a bit before sewing so that the zipper pull doesn’t get in the way).
Step 2. (Don’t think too hard about the next couple of steps because they kinda don’t make sense until you actually follow them!) Take your front exterior piece and lay on the table with right side of fabric facing up. Take your zipper and, with right side of zipper facing right side of fabric, place edge of zipper tape along the TOP edge of your front exterior piece. Pin a few times to hold in place.
Now take one of your lining pieces and lay it on top of the front exterior piece with right sides facing. The zipper should be sandwiched between the two pieces of fabric. Match up top edges of fabric and edge of zipper tape and pin together. (You can remove the pins that were put in earlier to hold the zipper to the front exterior piece now).
Pop a zipper foot on your sewing machine and sew along the pinned edge, about 1/8″ away from the zipper teeth. It can sometimes be tricky to sew close to the edge of the zipper when you reach the zipper pull…make sure your needle is in the down position, lift up your presser foot and slide the zipper towards the back of the sewing machine so that it is away from your needle, then keep sewing.
Step 3. Fold the exterior front and lining pieces back away from the zipper so that right sides of both pieces are facing out. The zipper should be sitting with one side of the zipper tape sewn between both of these pieces and the other side of the zipper tape left free.
Now take your remaining lining piece and place it on the table with right side facing up. Place the free side of the zipper tape along the top edge of the lining piece. Pin into place if you need to (I usually don’t bother). Take your exterior back piece and lay it on top of the edge of the zipper/lining with the wrong side of the exterior back piece facing down. The zipper and exterior front/lining pieces should be sandwiched between the exterior back and lining pieces.
Match up top edges of fabric and edge of zipper tape and pin together like you did in step 2 and sew along the edge.
Trim the overhanging raw edges of the zipper end fabric.
Step 4. Fold exterior and lining fabrics out so that wrong side of one lining piece is touching wrong side of exterior front piece and wrong side of second lining piece is touching wrong side of exterior back piece. The zipper should be sitting nicely in between the front and back fabrics. Press and pin. With the zipper foot still on your sewing machine, topstitch about 1/8″ away from the folded edge of the fabric down both sides of the zipper.
Step 5. Open the zipper and leave opened for the following step. Now open out the fabric pieces and position so that the right sides of the exterior front and back pieces are touching and the right sides of the lining pieces are touching.
Match up raw edges and pin around the entire pieces. When you get to the seam in the middle where the zipper is sewn in, it will be a little bulky. Fold the short end of the zipper and attached fabric so that the fold is facing the lining.
Sew a 1/2″ seam around the pinned edge, leaving a 2″ gap along the bottom edge of the lining pieces for turning. Clip corners and cut a curve into the seam where the zipper is to reduce bulk. Make sure you don’t cut your stitching!
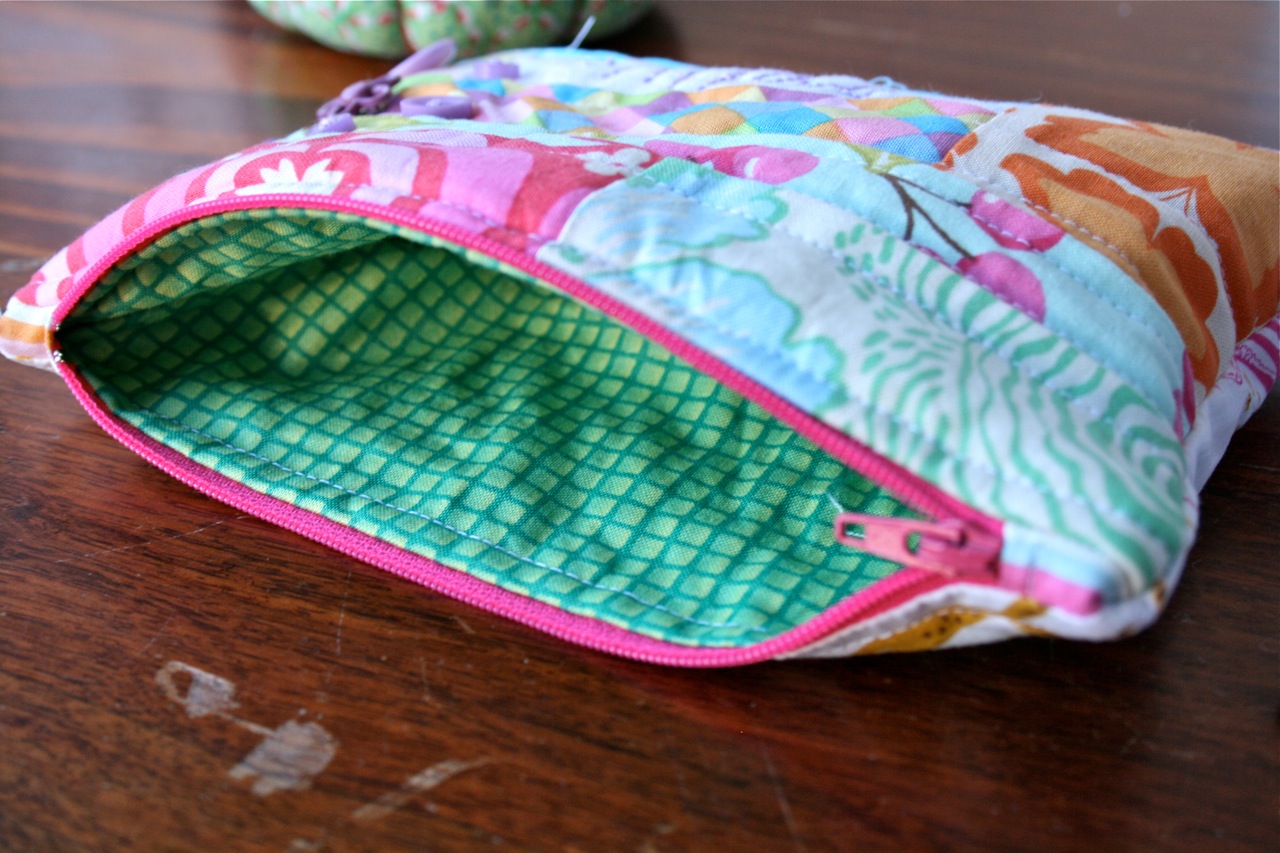
Pull fabric through the opening in the lining until pouch is right sides out. Push the lining into the exterior pouch. Use the pointed end of a closed pair of scissors to push the four corners of the pouch out. Slip stitch the opening in the lining closed, snip all stray thread and you are DONE!
I’d LOVE to see any zippered pouches you create using this tutorial! Make sure you leave a comment with a link or email me some pics so I can check it out 🙂
If you find any mistakes or don’t understand anything, let me know and I’ll fix it up!
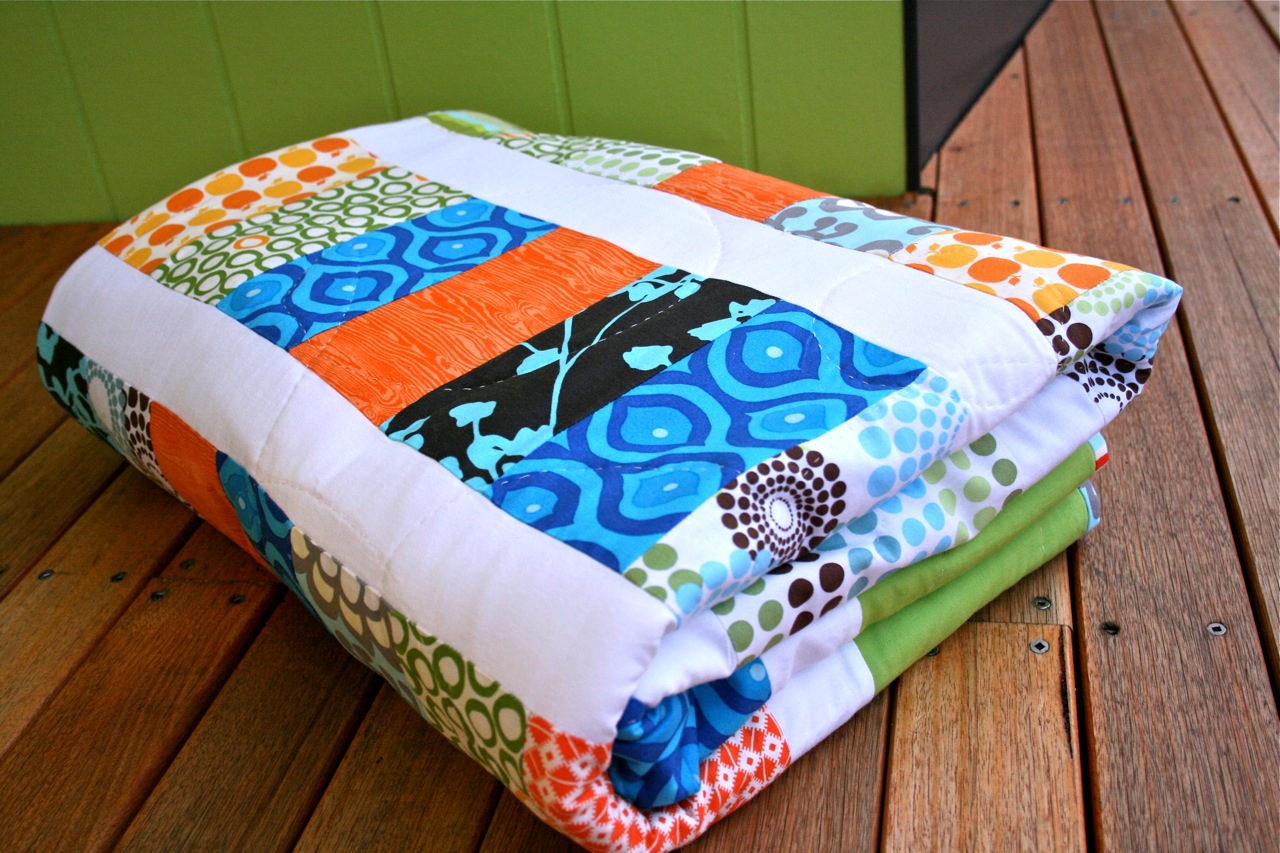
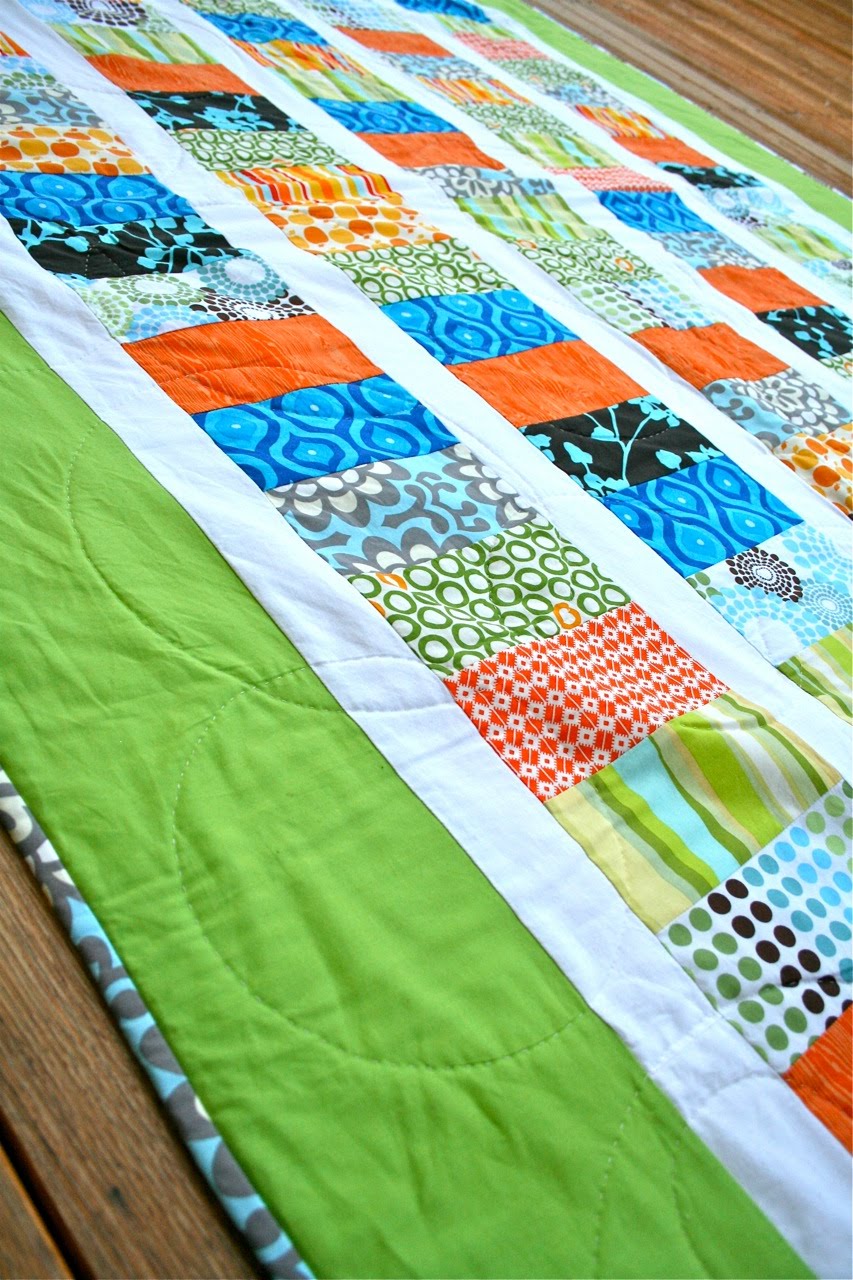
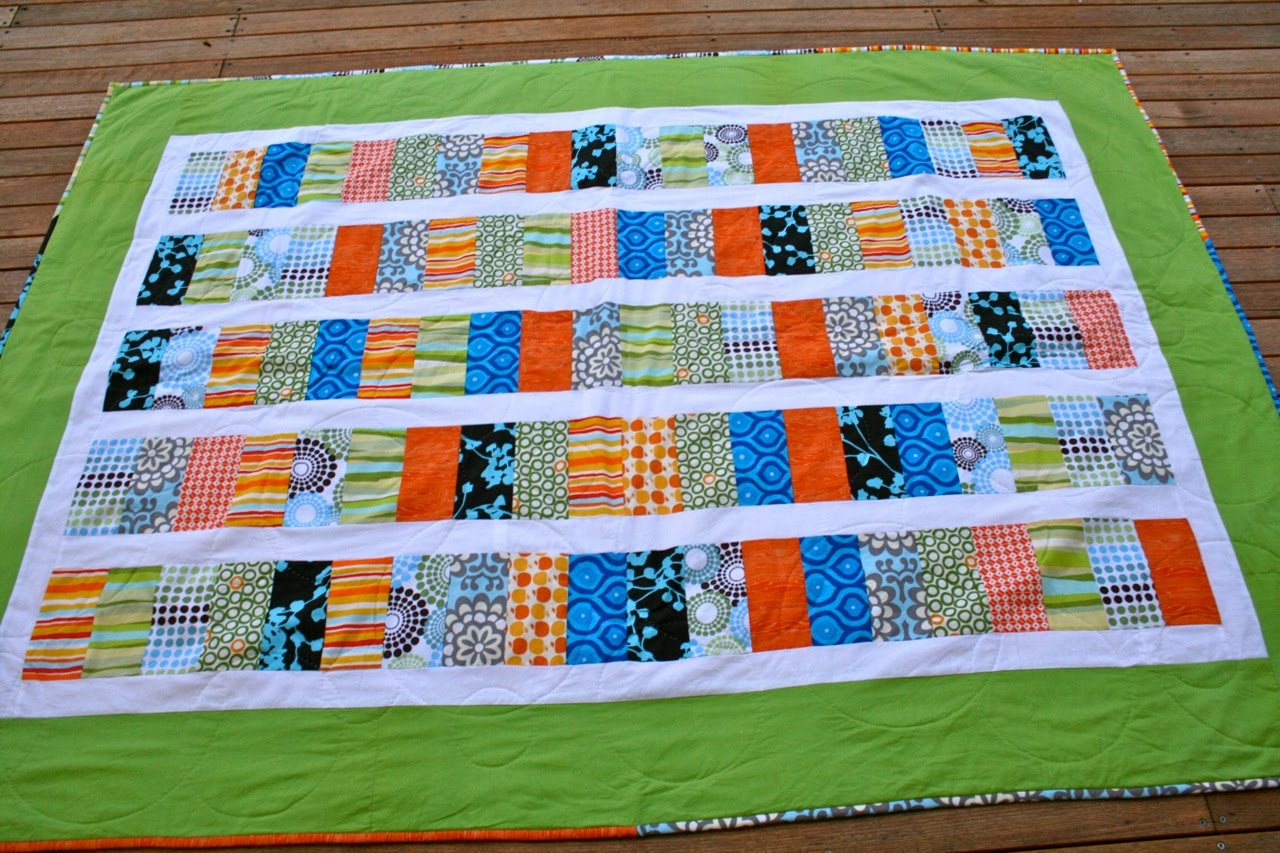
This coin quilt has been a longtime coming. But I like my quilts like that…slow and steady!
When we painted the kids beds I wanted to make matching quilts for them so that their bedroom looks a bit more coordinated than it does now.
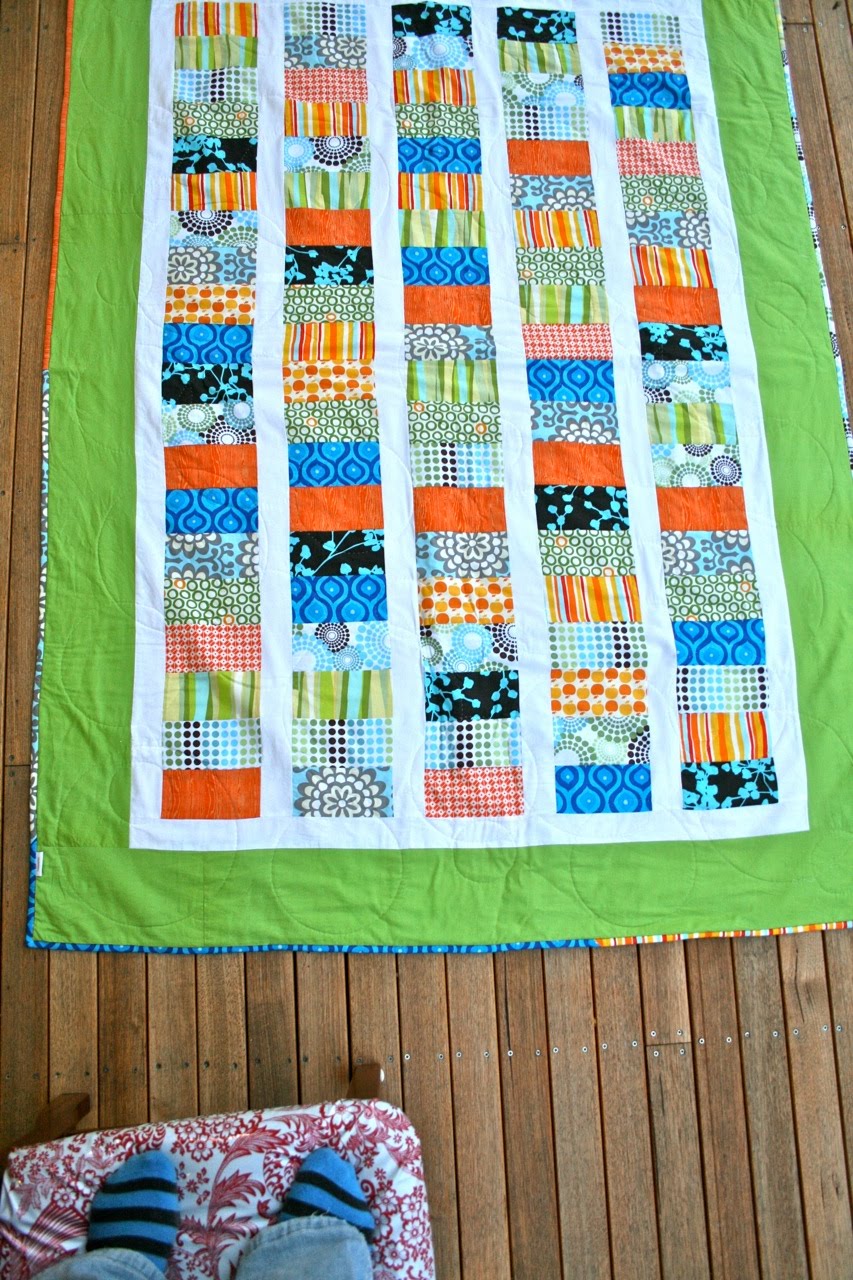
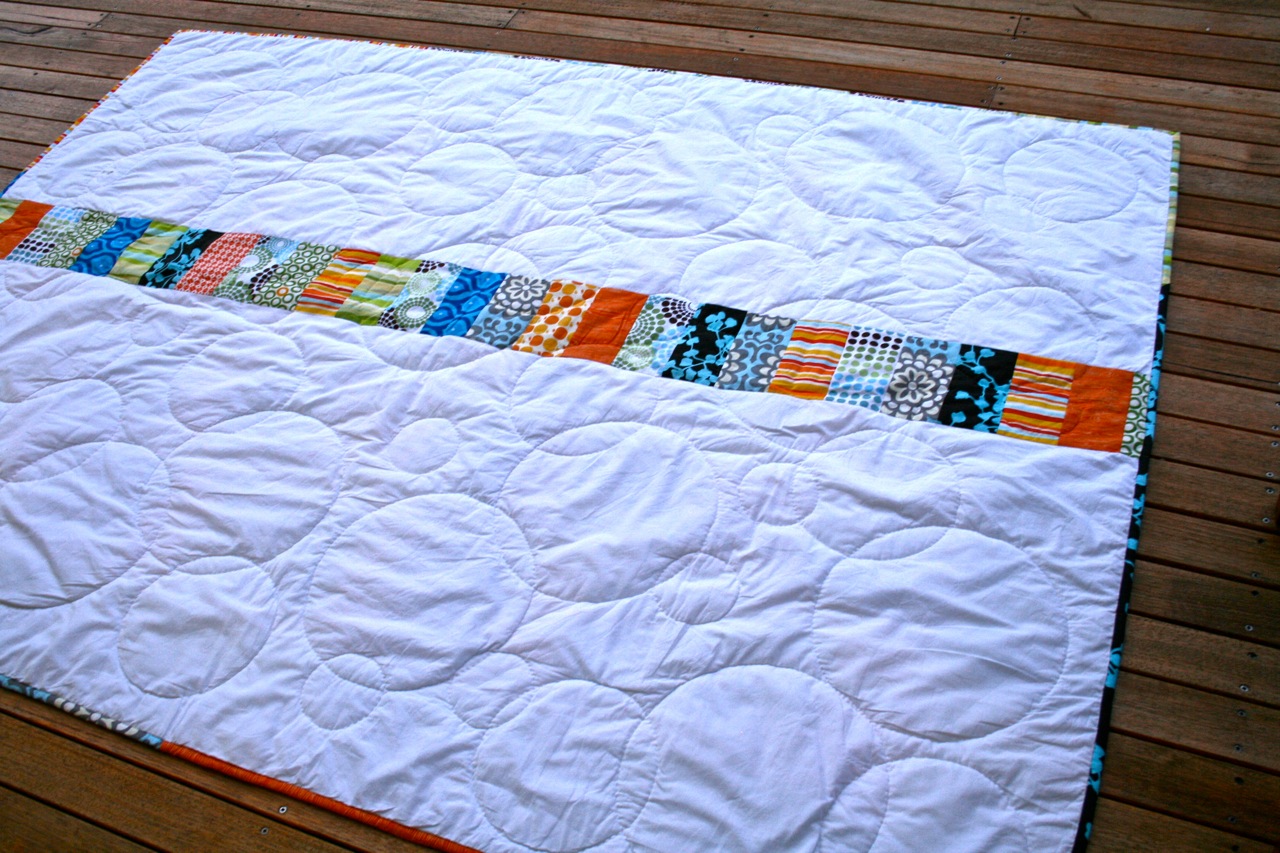
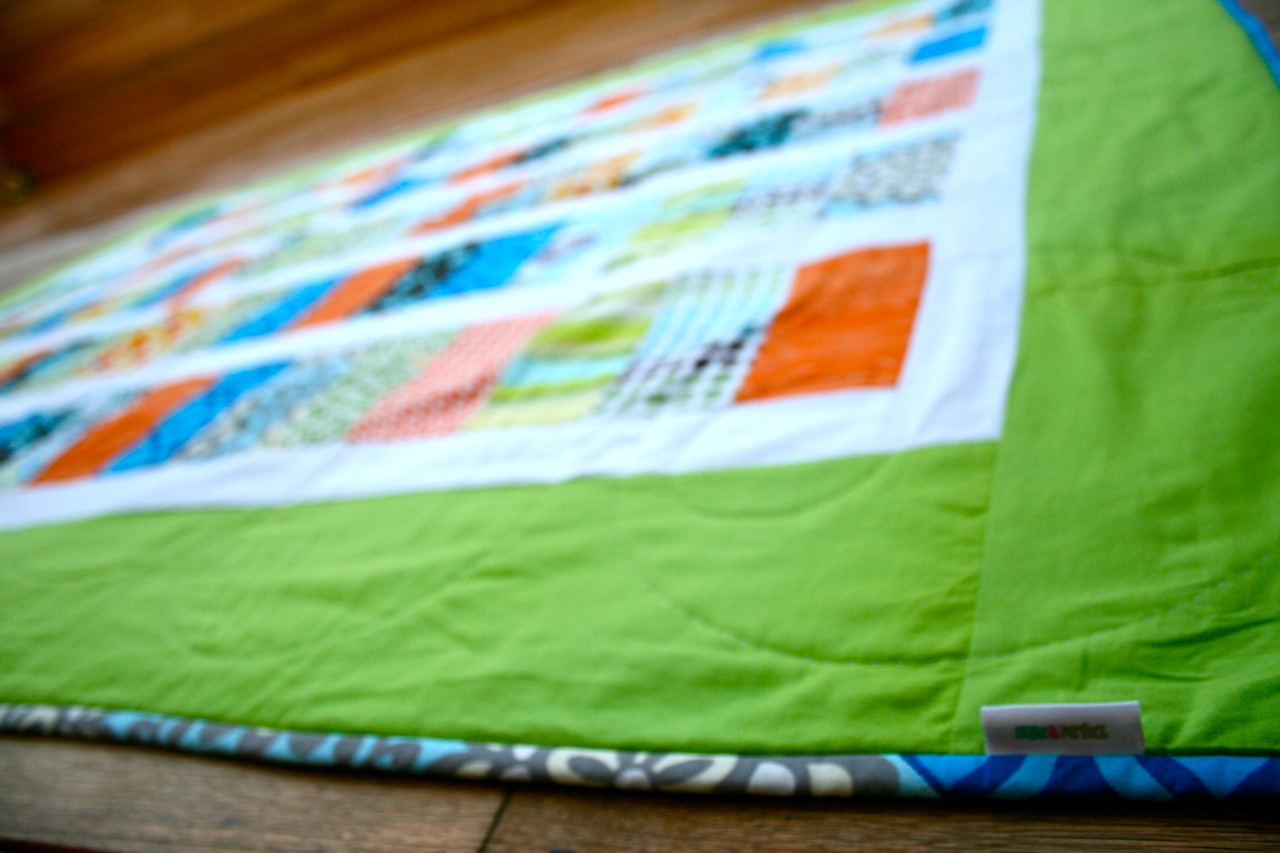
I have finished the fronts and backs of both of them, and here is Oscar’s all quilted and bound and ready to keep him snug all winter long.
I did all of the quilting by hand (I really need to learn to machine quilt but I do love me a bit of hand quilting!). Decided to contrast all of the rectangles and sharp edges and randomly quilt lots of different sized circles. It took forever but I love how it turned out. I don’t use a hoop when I hand quilt…it means that my back ends up all puckery but makes quilting much more comfortable. I kinda like the crinkled look though!!
Now I’ve got to get Lil’s quilt out and basted ready for snuggling on the couch for some winter hand quilting…if she’s lucky it will be ready by next winter 😉
If you love sewing and you are a blog reader then there is no doubt you are a reader of the fabulous blog: Film in the Fridge.
Ashley (Film in the Fridge author) has been inspiring me since my crafty blog reading days began, with her amazing quilts and I always look forward to her blog posts. Her colour combinations and design are brilliant and her string quilts are among my favourites. She even has a shop selling some of her quilts and I believe she takes custom orders also.
Last week I was reading her blog and the first thing I saw was this picture:
I thought the shirts looked familiar and was totally shocked when I continued to read and realised that here was Film in the Fridge giving a rave review about my Shearwater Kaftan pattern!!! And don’t they look great?!
Yesterday I was checking up on her blog again and so excited to see she had made TWO MORE Shearwater Kaftans! Seriously – Ashley…you are a machine!!! Being the green-lover that I am, I am TOTALLY in love with this one:
I still haven’t tried out Anna Maria-Horner’s cotton voile range but have been meaning to make a Shearwater Kaftan out of one of her prints and am very inspired to get sewing now!
Check out what Ashley did with her fourth Shearwater Kaftan…a few modifications (read about them here) and she has created a super cute short sleeved summer top – I think it is brilliant!
So, thankyou Ashley for sharing your Shearwater Kaftan creations with us! I know that it is always a little daunting to muster up the courage to sew something for yourself so hopefully reading about Ashley’s experience with her shirts will give you the courage to take the plunge 🙂

 To enter, simply leave a comment!! (If you don’t have an email address linked to your profile, please leave an email address with your comment so I can contact you!) Winner will be chosen via random number generator on Thursday 20th May. I will ship worldwide!


