Welcome to round two of my Basic Tees show and tell! Hope you’re not sick of them yet because I’ve got ideas for plenty more swimming around in my head!
Lil has reached a stage where she can’t smile naturally for the camera and does all of these weird sort of smiles! It’s cute and cracks me up! This tee is a View B – I’ve used contrast fabric for the sleeves and neck binding again though.
FABRIC = Stella knit in Blood Red, Spot knit unknown
I love these Hilco Campan stripes. They add a lovely punch of colour and interest to a plain tee.
This tee was supposed to be a short-sleeved version of View A, but I forgot to cut short sleeves! It is still cold here and Tommy needs more warm tees so I don’t mind 🙂
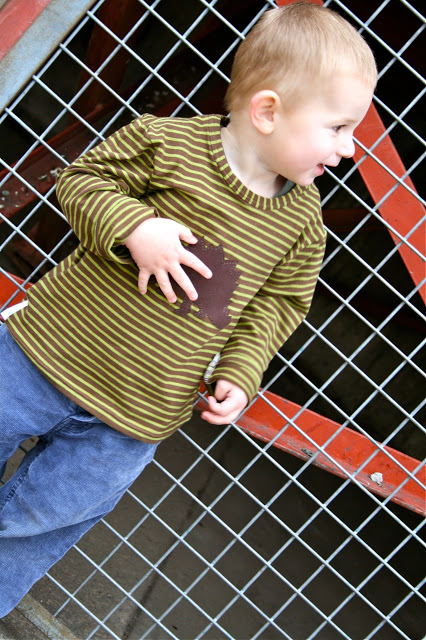
The applique on this one is out of knit fabric using a triple stitch around the edge again. This time I got a silhouette of a stegosaurus to make the applique, but it looks a bit like a hedgehog or a shrub now that it is finished – oops! One of the few words Tommy can say is “dinosaur” so I thought it fitting that he got a dinosaur shirt.
Oscar’s second tee is a View C – boy’s long-sleeve with short-sleeve overlay and contrast neckline and double hem.
This was a bit of a mix-and-match tee – I didn’t have enough of the stripe left to use for the contrast hem so added a bit of grey instead and tied it together with a baseball cap applique. Same deal as usual – found the silhouette online and used triple stitch in green to sew it on and add lines for detail. (Please try to ignore the blue fabric marking pen that hasn’t been washed off yet!!!)
Hopefully these blog posts have given you some inspiration for sewing Basic Tees – there is SO much you can do with this pattern, from keeping them plain to going crazy with colour and embellishments…I warn you that once you start you’ll be hooked!!
For anyone wanting to order a copy of Basic Tees now – you can do so at one of the following stores:
And don’t forget to leave the comment “make it perfect” with any knit purchase from Crafty Mamas for the month of August and you’ll receive a free gift!
So excited to hear all of your lovelyfeedback about my new pattern, Basic Tees. I have to say, I am hooked on this pattern at the moment. It is great to have a pattern that I can quickly sew over and over again and know that my kids will wear it every day. I did mention in my previous post that I have sewn 10 tees in 1 week! It was fun to choose fabric combos and come up with different embellishments for the kids – I tried to pick things that they were interested in and they love them!
Time for a bit of a show and tell – I have listed all of the fabrics used below the photo sets in case you are wanting to find similar fabrics. I’ll share some with you today and then a few more tomorrow…
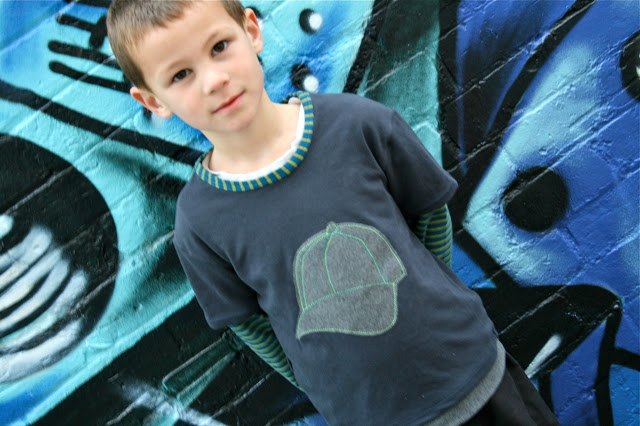
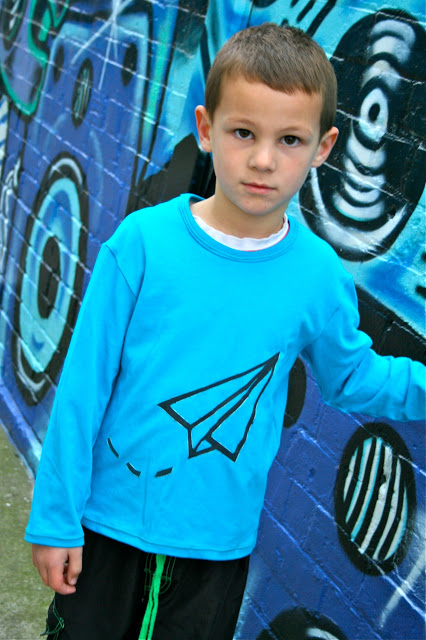
First up, here’s Oscar (looking very serious!) in his plain, long-sleeved tee (View A). I wasn’t sure if I was going to embellish all of the tees I’d made and thought I’d sew them all up and then see if they needed anything more – and this one did.
I haven’t really sewn anything for Oscar in quite awhile (besides his High Flyers pants) and I didn’t realise that all of a sudden it has become a little trickier to come with applique designs that suit older boys. The boy style embellishments that I would usually turn to all seemed a bit “cute” for him, so I spent a bit of time online looking for inspiration and found this great paper aeroplane image to use as a freezer paper stencil – perfect for our boy who is going through reams of paper a week making aeroplanes. His favourite thing to Google and watch YouTube videos about at the moment is “how to make the world’s best paper aeroplane”!!!!
The thin white border around the outside of the stencil was a happy accident…I painted the plane white to start with, but it didn’t come out as bright as I hoped, so painted black over the top and ended up with some of the white on the edges of the black. It looks kinda cool.
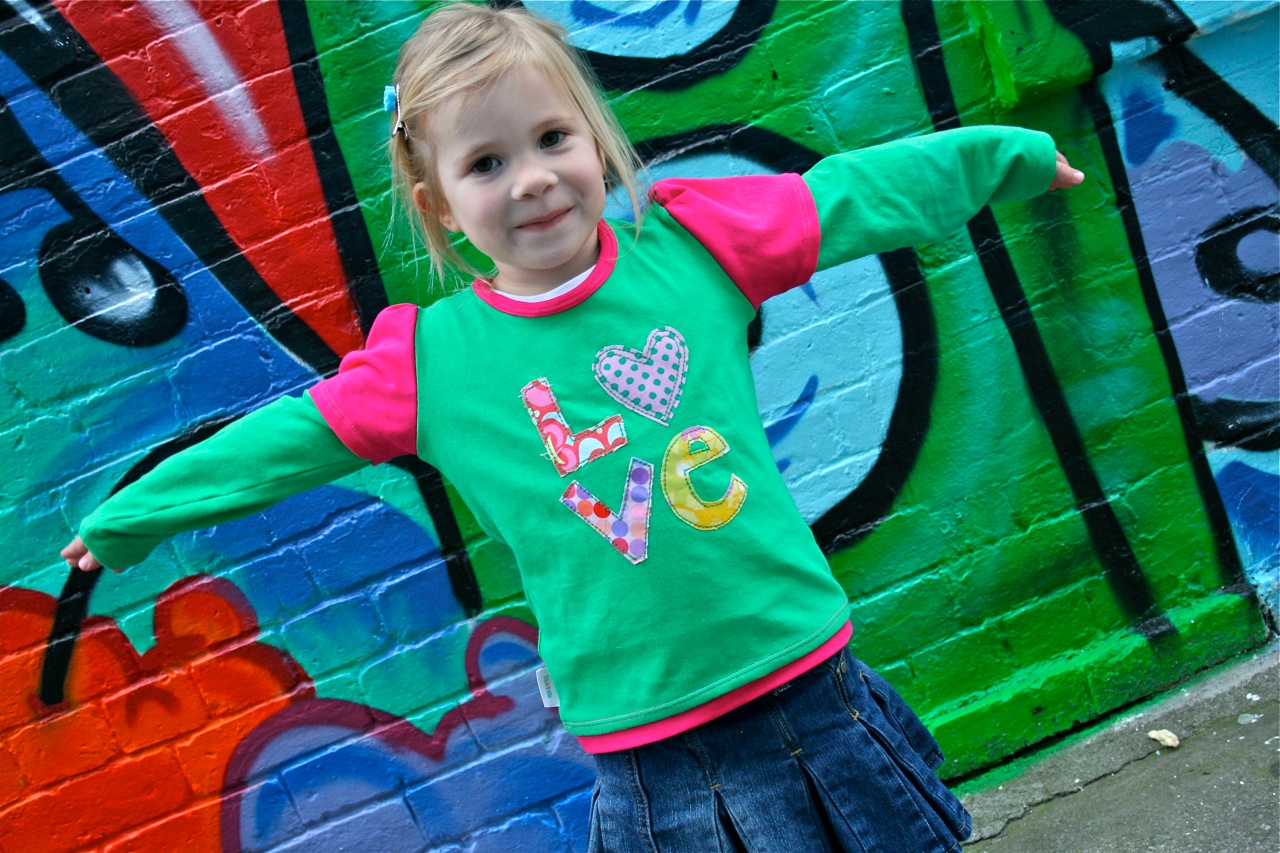
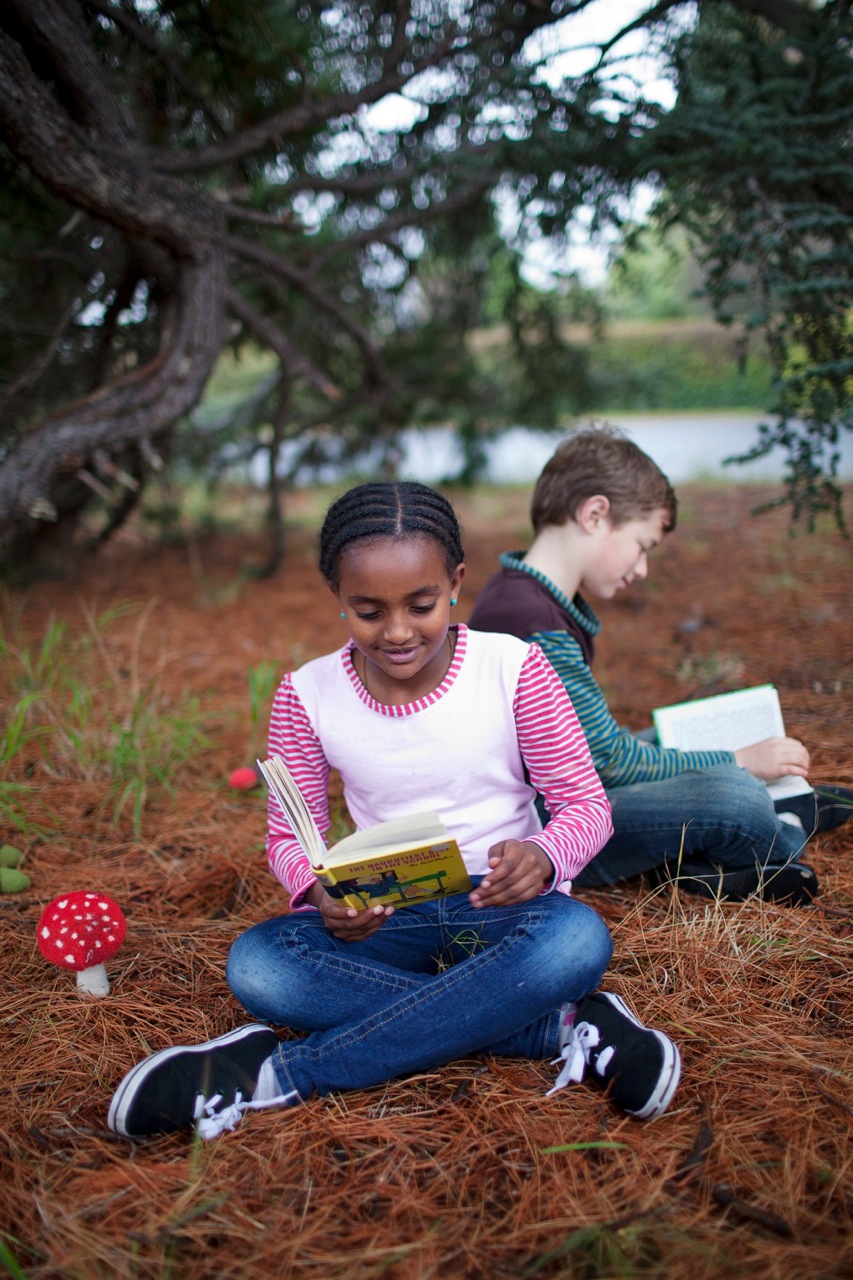
And here’s Lilsy. Her tee is View D – a girl’s long-sleeved tee with contrast short-sleeve overlay and contrast neckline and double hem.
Once I’d sewn this tee, it was a little bright for me and I was worried that the colours I picked were too “out there” together. The applique has really helped to bring it all together though, and she loves it which is the main thing! It is a little big for her at the moment – I sewed a size 4 and she turned 4 last week.
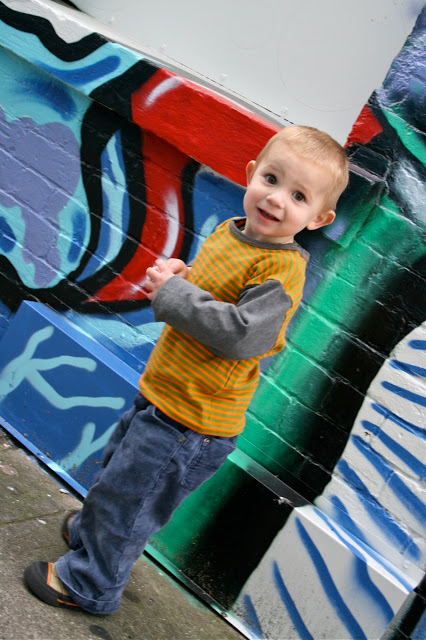
Tommy’s tee is another View A – but this time I used a contrast colour for the neckline and sleeves.
I liked the look of this one without any embellishments and love the fact that it is easy to find boy-friendly knit fabrics. Tommy’s tee is a bit big too – he is 2 and I sewed a size 2 but he is still pretty mini so he will be getting lots of wear out of his!
And lastly for today is Lil – this is View B…girl’s plain tee with short-sleeves. I ended up gathering the hemline of the sleeve a little and sewing some binding in the same way as for the neck to hem the sleeves. Love the way this one has turned out and will be making many more for summer.
The applique is a bird silhouette I found online and I used the same knit fabric that I used for the neck and sleeve binding. Instead of using a zig-zag stitch around the edge of all of my appliques, I have used a triple stitch on my sewing machine. After having a bit of a play with it, I much prefer the way that it looks. If you are using triple stitch with wovens though (like I did in the “LOVE” tee above) then you’ll need to keep in mind that the edges will fray after a few washes. Knits don’t fray though so nothing to worry about with this bird applique!
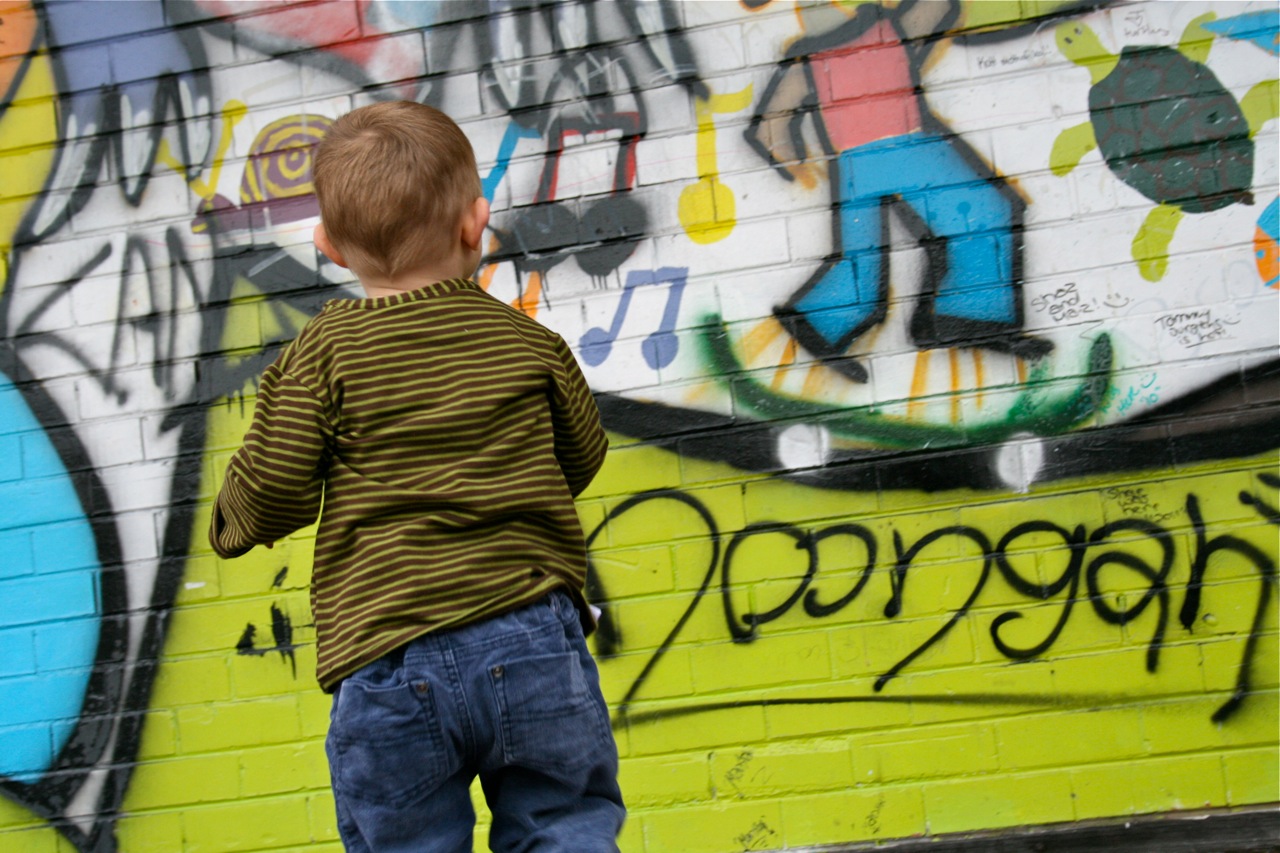
And I thought you might be interested in checking out the dressing studio we used for the shoot…these kids get all the luxuries of paid models – quick changes with Dad in the middle of the alleyway!! They were very good little models yesterday actually – and they may or may not have been bribed with lolly pops 😉
For the month of August, Crafty Mamas is offering a free gift with any knit purchase if you leave the comment “make it perfect” with your order – I wonder what goodies will be turning up in your letter box?!
See you tomorrow with some more Basic Tee creations!
Hi all! Things have been a little quite around here lately…and my house has been messy…that only means one thing – I’ve been busy working on my latest pattern and am all ready to share it with you today!
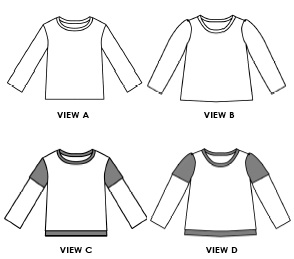
An indispensable starting point for everyday dressing, Basic Tees is a pattern you will find yourself using again and again.
The classic long or short-sleeved tshirt is a wardrobe staple that you can’t do without. The easy style of Basic Tees allows you to express your creativity and create one-of-a-kind tshirts that suit every occasion.
Featuring a straight style for boys and more fitted body with gathered sleeves for girls, as well as options to include short-sleeve overlays and contrast hems, Basic Tees is the ideal foundation for thousands of outfits!
Basic Tees is another Make It Perfect pattern designed for use with knit/stretch fabric. If you are a newbie to sewing with knits, I highly recommend a simple tshirt pattern as your starting point. They are quick and easy to make and something that your kids are bound to get a lot of wear out of.
The pattern comes with lots of tips and tricks for sewing with knits, but my number one tip is to use the best quality fabric that you can afford. All of my failed attempts at sewing with knits have happened when I have been using cheaper quality knits. Good quality is much easier to sew, washes and wears better and gives a much nicer finished result. These tops were sewn using gorgeous knits from Crafty Mamas – the solids are all Stella and the stripes are Hilco Campans. Crafty Mamas now offers free postage within Australia and great International postage rates – gotta love that!
There is heaps you can do with the Basic Tees pattern…instructions are given to create a plain tee or tee with short-sleeve overlay and contrasting hem and neckline as shown above but, of course, these are just starting point suggestions – you can mix and match fabrics and decorate with applique, freezer paper stencil, buttons, ribbons, iron on transfers, etc. and easily come up with a whole cupboard full of tees to suit your style!
Once you sew one, you’ll be itching to make more (trust me, I’m up to my 10th tee this week!) my kids wear long and short sleeved tees every single day so I know I’ll be sewing lots more in the future!
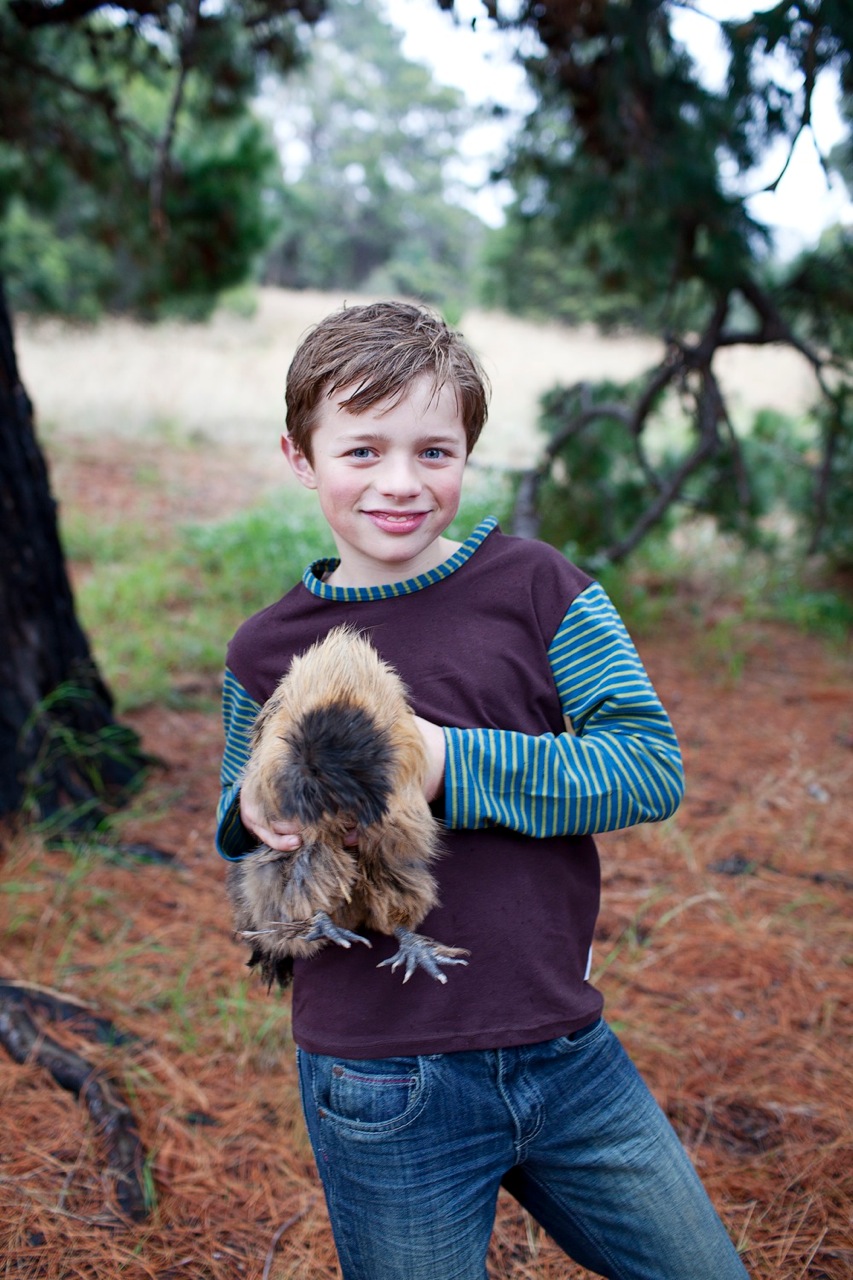
Big thanks to my beautiful photographer, Chelsea (check out her work – she is amazing!) and the GORGEOUS models she rounded up for me. They are the cutest kids ever – chooks, books, rain, cute kids…what more could I ask for?
Take a look at my new website for more information on Basic Tees. As always, copies of the pattern will be avaliable soon in retail stores – or you can always ask your favourite store to order a copy in for you.
GIVEAWAY
I’d love to give one lucky winner a copy of Basic Tees – leave a comment on this post to be in the draw! (Please make sure you leave an email address with your comment. Giveaway will close Wednesday 17th August and winner will be drawn at random).
I’m excited to be featured by Kathy Mack over at Pink Chalk Fabrics today. During July she is taking her readers on a virtual tour of sewing spaces of some of her favourite designers and sewing enthisiasts, and today you can read a bit about me and where I sew!
There have been some gorgeous sewing rooms shared so far, and I have to admit that I was a little nervous that my room wouldn’t compare to some of the amazing sewing studios that I was waiting to be featured, but it is lovely to see a mix of rooms from people who creatively and beautifully “make do” with small spaces in their homes to stunning studios and work rooms. I think we are all a little bit curious as to where others do their work, and I’ve certainly enjoyed picking out fun little details on sewing desks, walls and cupboards.
I asked Kathy if I could be towards the end of the month to give me time to get my room cleaned up – haha! While it was tidy (and I’m telling you now…this is a RARE occurrence!) I took a few snaps as I realise that I’ve never given you a decent peek into my sewing space before.
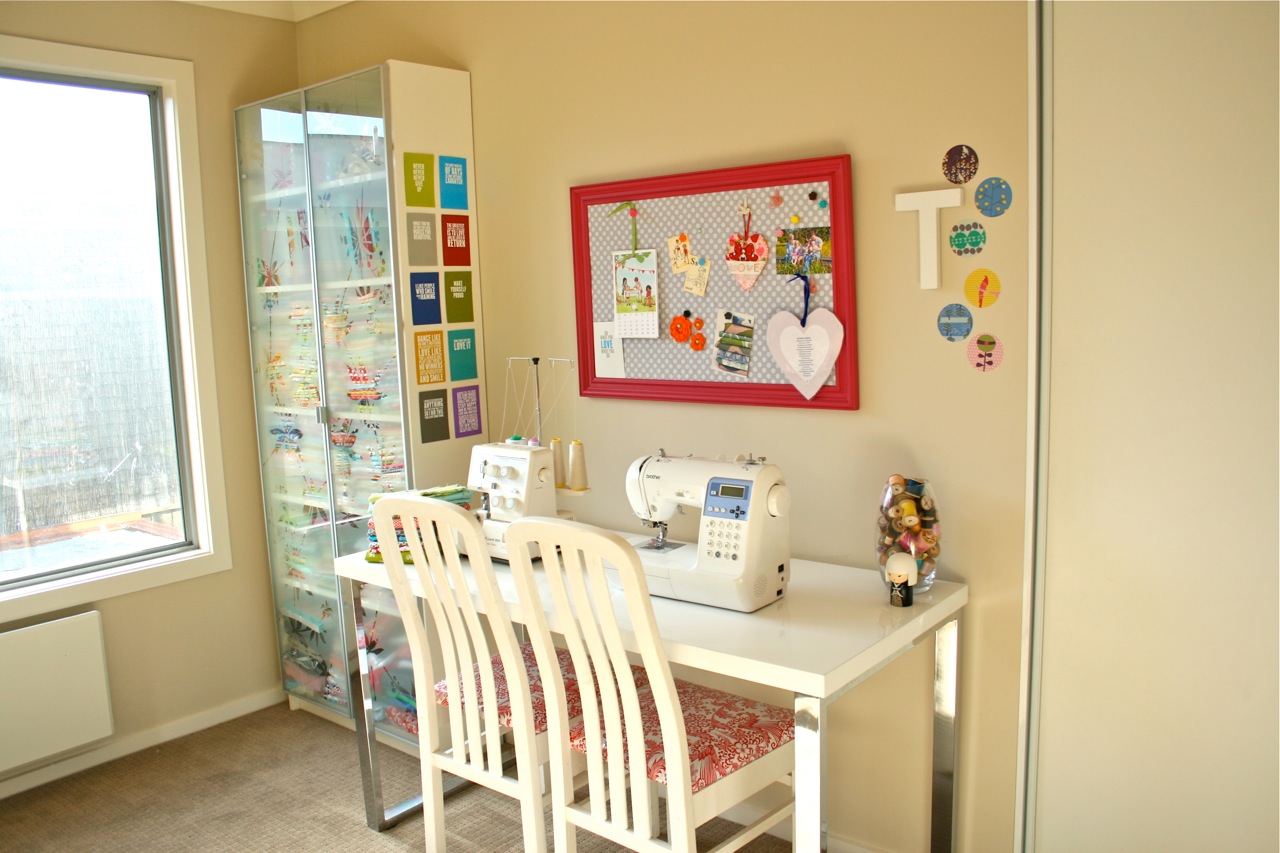
My sewing room is situated directly off our dining area, and from it I can see into the kitchen, dining area, lounge room, deck, and play area outside. When we designed our house we were deciding between including an ensuite off our bedroom or a sewing/rumpus room. Because I sew a lot, this option far outweighed a second bathroom and I love that we can keep all of the toys out of the bedrooms and loungeroom as well. The sewing room is combined with our playroom, kids toys on one wall and sewing stuff on another. It works beautifully. I leave my sewing stuff out all the time and my kids are so used to it being around that they very rarely touch anything. Other people come around and ask me how I keep them away from it, but I really don’t have to. The only time they are interested in the sewing machine is when I am actually using it! I LOVE LOVE LOVE that I can keep my sewing space set up all the time – gone are the days of packing everything away before going to bed each night. It makes it much easier to quickly sew for 10 or 15 minutes here and there and get things finished a lot faster. I don’t sew a lot when the children are awake, but when I do, it is nice that they can play at my feet and we can all make big messes together in the one room! The only downfall about sharing the space with the toys is I feel like I have to clean them up before I can sit down and sew properly so sometimes that turns me off sewing for the night!
Toy storage = Ikea Trofast…best storage investment we have ever made.
This is my sewing wall…table from Officeworks where all the action takes place. There is a built-in cupboard to the right where I keep all of my bulky sewing bits and pieces – baskets and boxes full of haberdashery, loads of Make It Perfect samples, quilt wadding, etc.
The chairs are ones that we rescued from the side of the road when we first got married! They have had many a coat of paint over the years and I recovered the seats with oilcloth to match the chairs at our dining table. Cupboard – Billy with Nyckelby doors, Ikea.
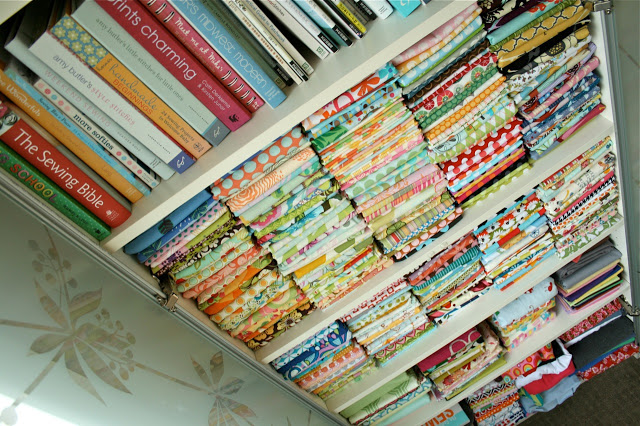
My fabric cupboard is full to the brim now…but how can I resist the lovely new ranges that keep being released?! Buy another cupboard
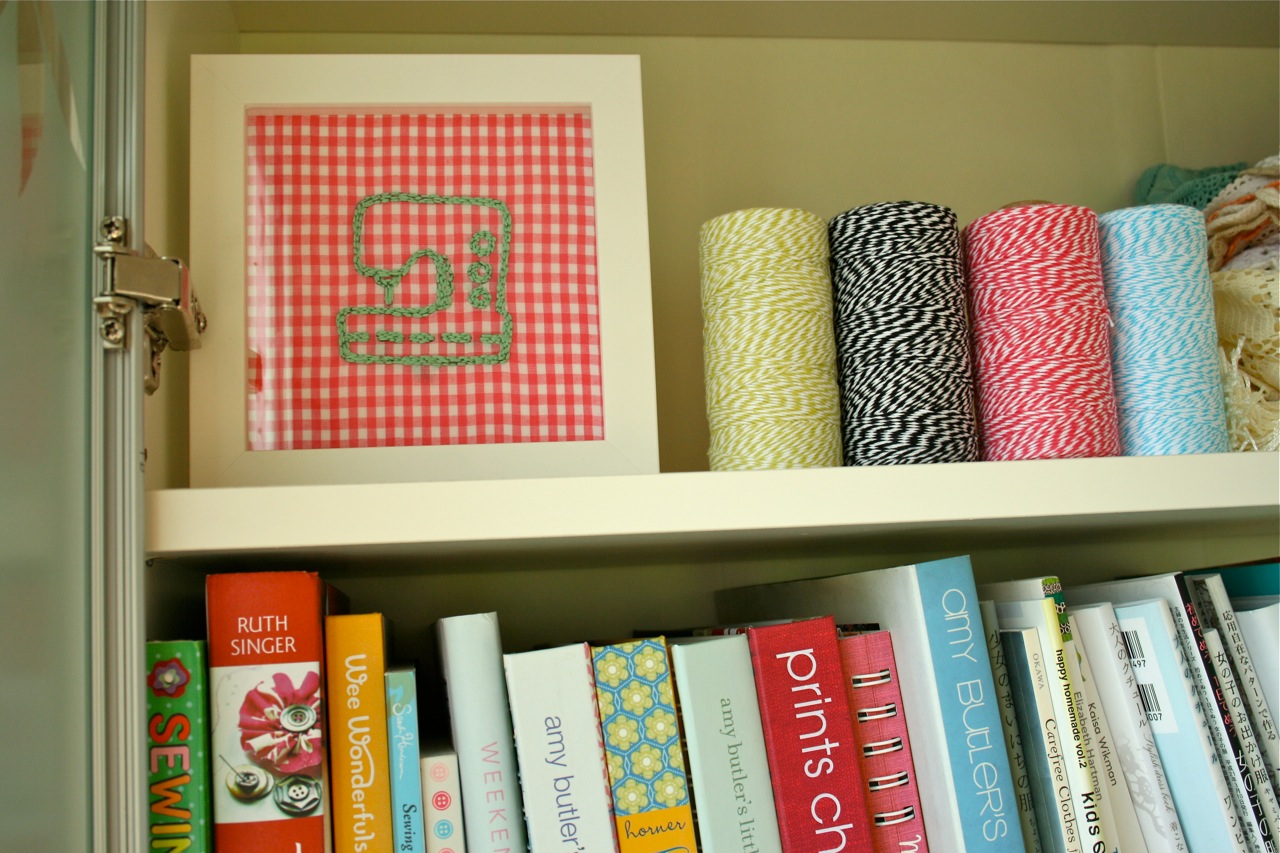
My non-sewing sister embroidered the funky sewing machine for me. Love it! And I think every crafty person needs a spool or two of bakers twine, right?!
The back of the sewing room houses another slim Billy cupboard. I keep some Citrus Pop stuff in here as well as pieces of fabric under 1/2m and ribbons, spools of thread, buttons, etc. You can also see my view onto the deck.
So there you have it, a sneak peek into my sewing room!
Lucky I’m orgainsed this time and don’t have as much to get ready as I did for the Sydney Fair. And just like I did with the Fair in Sydney – I’ve got another FOUR ENTRY TICKETS to give away to four lucky winners!
If you’d like a chance at winning a ticket, leave a comment on this blog post, or a comment on the Make It Perfect Facebook wall. I need to be able to get in contact with you if you win so make sure you leave an email address.
The giveaway will end at 8pm on Sunday night and I’ll be in contact with the winners to arrange getting tickets to them.
Please only enter if you are able to use the tickets (i.e. if you can go to the fair yourself or have someone that you can give the ticket to!)
And after my slackness with no photos from the Sydney Fair, I did manage to scrounge a few off some friends…
…with sweet Yana…who was the lucky winner of one of the entry tickets in Sydney!
…me and my banner (thanks for the following pics Bec!)
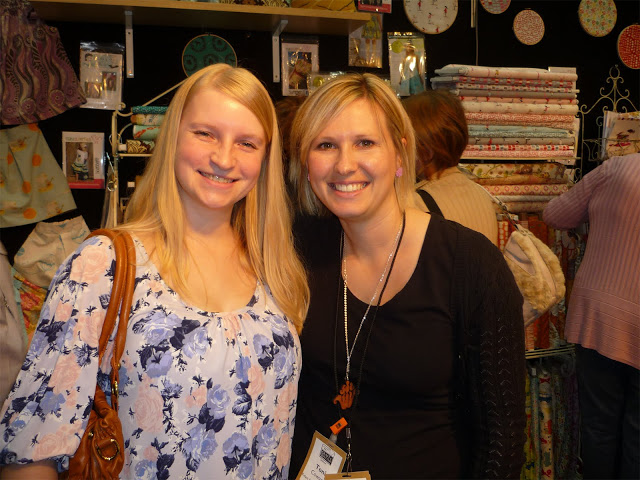
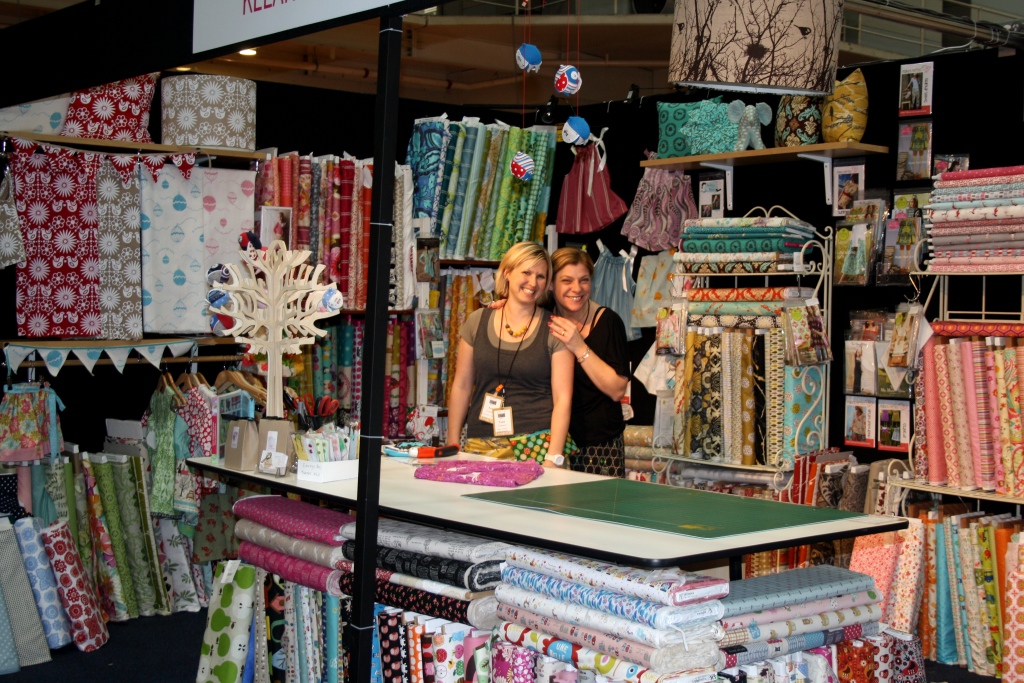
…Elissa from Kelani Fabric and I in her amazing stand!
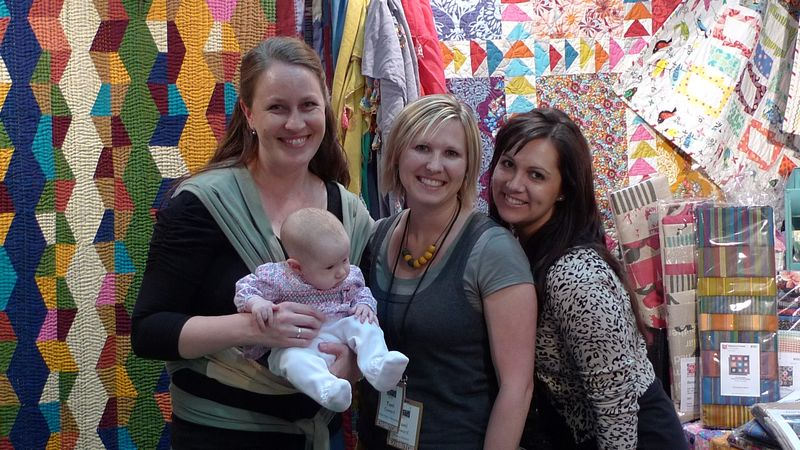
…catching up with special friends – Kate (with baby Grace) and Bec!