Browsing Category

Thermomix

Cooking, Thermomix

.Thermomix Cooking – Cherry Ripe Slice.

I don’t know about you, but Christmas gives me an instant free pass to cook lots of deliciously bad treats.  This year I’ve been trying out a few new ones with pleasing results.
I found this recipe for Cherry Ripe Slice and knew that it would be perfect for converting for the Thermomix.  It was really yummy – I only managed to have one small piece before it was all gone so I think I’ll have to try it again before Christmas.  
The icing was supposed to be just chocolate spread over the top, but I tried adding a tablespoon of cream to turn it into more of a set ganache so that it would be easier to slice.  I also added a couple of drops of red food colouring to the cherry mixture to make it more red.
 
Cherry Ripe Slice 

For the base:
100g butter
150g self-raising flour
15g cocoa
75g caster sugar
100g plain sweet biscuits

For the filling:
300g glace cherries
150g dessicated coconut
1 tin condensed milk
5 drops red food colouring

For the icing:
200g dark chocolate, broken into pieces
30g copha
1Tbs cream (optional, for softer chocolate)

To make the base:
Place butter into TMX bowl and melt on 60 degrees, speed 1 for 3 minutes.  Remove from bowl and set aside.
Without washing bowl, place flour, cocoa, sugar and biscuits into bowl.  Process on speed 4 for 20 seconds.
Add melted butter and combine on speed 4 for 20 seconds. (The mixture will be quite dry.)
Press into the base of a paper-lined slice tray and cook in a moderate oven for 15 minutes.

To make the filling:
Place 200g cherries into cleaned bowl and pulse on turbo 3-4 times.
Add coconut and pulse on turbo 3-4 times to combine.
Chop remaining 100g cherries into halves and add to bowl with condensed milk and food colouring.  Combine on speed 3 for 10 seconds.
Spread filling over base and cook in a moderate oven for 30 minutes.
Allow to cool completely before icing.

To make the icing:
Place all ingredients into clean and dry bowl and melt on 60 degrees, speed 3 for 3 minutes.  Spread over filling and place in fridge until set and cold.  Slice and serve.

Cooking, Thermomix

.Thermomix Cooking – Lemon Bar Cookie Cups.

I’m not sure how to best describe these tasty little morsels, except for DELICIOUS!  In honour of my love for all things lemon, I couldn’t pass this recipe by without having a try, and have converted it to the Thermomix while I was at it.  

Have you ever tried a lemon bar/slice with a soft, cakey base and tangy lemon curd filling?  These cookie cups are a take on the very popular slice – but with the ease of not having to cut the slice and making them very easy to serve and pop into your mouth!

I found the original recipe here (if you want to make them without using a Thermomix)…and the curd recipe was from here.

Lemon Bar Cookie Cups

For the lemon curd:
100g butter
zest of 1 lemon
juice of 2 lemons 
2 eggs
1 egg yolk
150g caster sugar

For the cookies: 
120g butter
110g sugar
180g icing sugar
100g canola oil
1 egg
1/2 tsp vanilla essence
260g plain flour
85g wholemeal plain flour
1/2 tsp salt
1/2 tsp bicarb soda
1/2 tsp cream of tartar

To make lemon curd:
Place all ingredients into the TMX, chop on speed 7 for 5 seconds.
Insert butterfly, cook for 8 minutes on 80 degrees at speed 3.
Pour into jars, store in fridge.
Allow to cool before adding to cookies – mine was in the fridge overnight so not sure how warm curd would go?

To make cookies:
Place butter, sugar and icing sugar into the TMX, cream on speed 3 for 1 minute.
Add oil, egg and vanilla, beat on speed 4 for 20 seconds.
Add flours, salt, bicarb and cream of tartar, mix until just combined on speed 3 for 15-20 seconds.

Place 1 tablespoon of cookie mixture into greased mini muffin tin.
Bake in moderate oven for 8 minutes.
Remove from oven and make a deep indent into each cookie using the end of a wooden spoon or your finger.
Fill with about 1 teaspoon of lemon curd.
Put back into oven and cook for a further 4 minutes or until edges are starting to go a light golden brown.
Cool in tin for 10 minutes, then gently remove and place on a cooling rack.  Dust lightly with icing sugar before serving.

Makes 30.

Cooking, Thermomix

.Thermomix Cooking – Oat & Apricot Slice.

I’m on a bit of a health kick at the moment – trying to curb a few bad snacking habits and get myself ready for Summer!  I still love baking though and have been making a few things for Jaron and the kids to eat but recently came across this healthy recipe for Oat & Apricot slice that I can enjoy too!  It is really filling, full of lots of good for you ingredients and great for breakfast or lunch on the run with a piece of fruit or tub of yoghurt.  Of course, making them is a breeze in the Thermo – if you don’t have a Thermo, just combine everything in a bowl with a wooden spoon!
 
(P.S. If you have any favourite healthy baking or snacking recipes or ideas – send them my way!)
 
Oat & Apricot Slice

170g wholemeal plain flour
1tsp baking powder
120g brown sugar
50g quick oats
15 chopped apricots
20g sunflower seeds
20g butter
2 small eggs, beaten

Combine butter and eggs in TMX, speed 8 for 4 seconds.
Add remaining ingrediends.  Knead on interval speed for 30 seconds to combine.
Press into a greased 20cm square tin and smooth top with back of spoon.
Bake in 170 degree oven for 25 minutes.
When completely cool, cut into 8 slices.

Cooking, Thermomix

.Thermomix Cooking – CADA for breakfast.

I know I’ve mentioned on my blog before that I have a hard time with choosing foods to eat for breakfast.  Usually I’ll quickly down one weetbix to get it over and done with, but by 10am, I’m hungry again.  
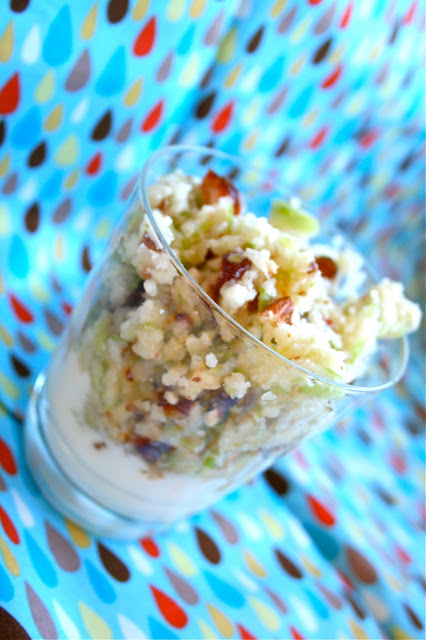
Recently Cyndi O’Meara (nutritionist and author of Changing Habits, Changing Lives) visited our state holding workshops and information evenings.  Unfortunately I wasn’t able to attend any of them, but a friend shared with me this delicious breakfast recipe.  I’ve been eating it each morning for about a week and absolutely love it – fresh and easy to eat.  It doesn’t leave me feeling bloated or flat and the best part is that I feel full until well after lunch time!  Each letter of the name, CADA, corresponds with an ingredient so you won’t even need to pull out your cookbook for this one!
 
CADA

small handful coconut (I use 1 Tbs)
1 apple, quartered, core removed
small handful dates (I use 2 fresh or 3 dried)
small handful almonds (I use 7)

Place all ingredients in Thermomix.  Close lid and press TURBO button a few times until mixture is to desired texture.
Serve over natural yoghurt and top with berries or other fruit if desired.

Cooking, Thermomix

.Thermomix Cooking – Edna’s Lemon Curd Teacake.

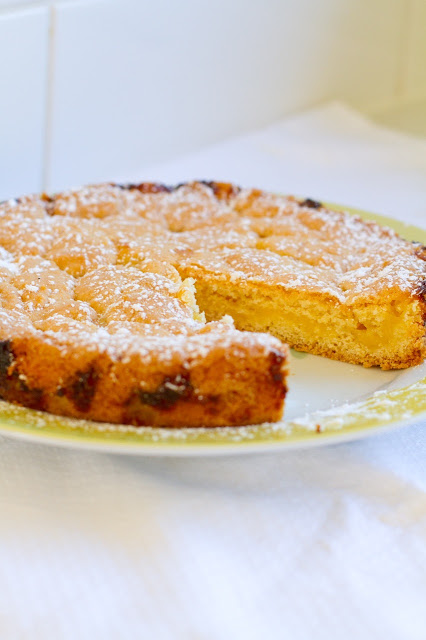
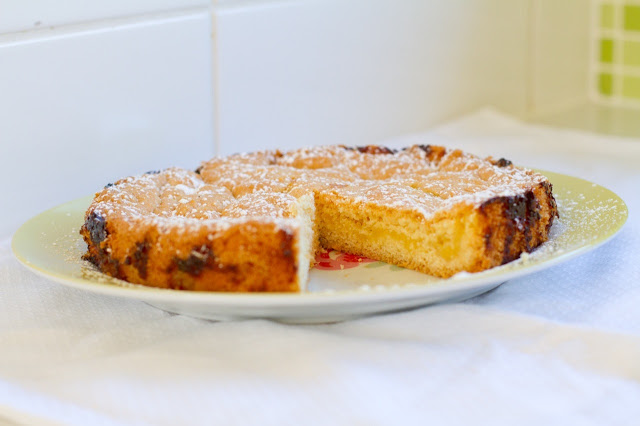
mmmmm…glad I got this recipe converted.  It is a breeze in the Thermo and still one of my favourite cakes ever.  If you want to make it without a Thermomix, the original recipe post is here.  Super easy one to double if you want to make two cakes – trust me, they will go fast!

Edna’s Lemon Curd Teacake
 

For cake mixture:
150g self-raising flour
60g butter
110g sugar
1 egg 

For lemon curd:
60g lemon juice
60g butter
110g sugar
1 egg

To make cake mixture, place all ingredients into TM bowl and beat for 30 seconds on speed 5.  Remove from bowl and set aside. 
To make lemon curd, place all ingredients into TM bowl and cook at 100 degrees for 5 minutes on speed 4.
Grease and line a round cake tin.
Spread half the cake mixture into the base of the tin (the cake mixture will be quite thick, I usually spread it with wet fingertips.)
Pour lemon curd over cake mixture (the lemon curd mixture will be quite runny.)
Dollop 1/2 teaspoonfuls of remaining cake mixture over the top of the lemon curd.
Bake in 180 degree celsius oven for half an hour.
Eat warm or cold.