I’m sure that ripple cakes (log cakes) aren’t news to you. They’re such a popular and easy to make dessert, we had them a lot when we were kids. It’s been forever since I last had some though so I made them for dessert at family dinner last Sunday night. Favourites in our house are the chocolate version and caramel/apple version – I’m not sure if there are any other variations around? I’d love to hear about them if there are! There may be someone out there who hasn’t eaten them or doesn’t know how to make them though, so I thought I’d share the simple recipes anyway!
Chocolate Ripple Cake
2 packets Arnott’s Choc Ripple Biscuits
600ml cream
Beat cream using electric beater until whipped.
Spread a small amount of cream down the center of your serving plate (where you want the log to sit.)
Sandwich biscuits together using thin amounts of cream between each biscuit. Sit biscuit log on top of cream strip on the plate – this cream will help the biscuits stand upright.
When finished making log(s), cover entire log with whipped cream**.
Refrigerate overnight or for at least 4 or 5 hours before serving.
**P.S. I like to make the first covering of cream fairly thin (so you can just see the biscuits underneath) because the cream tends to discolour and look a little tired after soaking into the biscuits overnight. Before serving, I spread a bit more freshly whipped cream over the entire log to freshen it up.
Caramel Apple Ripple Cake
2 packets Arnott’s Butternut Snap Cookies Sliced stewed apple
600ml cream
Beat cream using electric beater until whipped.
Sread a small amount of cream down the center of your serving plate (where you want the log to sit.)
Sandwich biscuits together using a stewed apple between each biscuit. If your apple pieces are too thick, cut them down of squash them flat between each layer. Sit biscuit log on top of cream strip on the plate – this cream will help the biscuits stand upright.
When finished making log(s), cover entire log with whipped cream**.
Refrigerate overnight or for at least 4 or 5 hours before serving.
**P.S. I like to make the first covering of cream fairly thin (so you can just see the biscuits underneath) because the cream tends to discolour and look a little tired after soaking into the biscuits overnight. Before serving, I spread a bit more freshly whipped cream over the entire log to freshen it up.
Back to school means back to baking, I’m bored with the usual chocolate chip cookies, so pulled out some old favourite recipes for my big bake up this week.
These white chocolate and macadamia nut cookies are chunky and melt-in-your-mouth delicious. The mixture might seem a little dry when you are making it, but don’t despair, it’s supposed to be like that. Lovely for morning or afternoon tea or a treat to pop in your mouth any time of the day!
White Chocolate & Macadamia Nut Cookies
125g butter 3/4 cup brown sugar 1 egg 1 tsp vanilla essence 1 cup plain flour 1 cup self-raising flour 200g white chocolate, roughly chopped 150g macadamia nuts, roughly chopped
Beat butter and brown sugar until thick and creamy. Add egg and vanilla and continue to beat until well combined. Mix in flours until just combined, then add white chocolate and nuts and stir to form a chunky mixture. Place spoonfuls of mixture onto tray lined with baking paper and press down slightly with your fingers. Bake in 175 degree celsius oven for 15-20 minutes or until golden brown.
It’s not very often that I make a meal for dinner that the WHOLE family enjoys, we’ve got some picky eaters in our house (hopefully that will change as they get older) and it makes things difficult at meal times to try and please everyone. Stack Ups, however are an absolute family favourite. It gets the thumbs up from everyone and we all like to eat it in different ways. I owe it to my Mother-In-Law (with 7 kids and a few picky eaters, this was always a winner in her house too!) for introducing me to it way back when Jaron and I were just dating. I don’t think I started cooking it myself until a couple of years ago and it has been a winner ever since.
You could describe it as deconstructed healthy-style nachos…I like that everything is put in the middle of the table “help yourself” style – but we do make the kids choose at least two vegetables to include on their plates! It is also fantastic for feeding a crowd, especially if you aren’t sure what your guests like to eat. Not only do the kids love eating it, they also love helping to prepare all of the food. At the moment I don’t give them any chopping jobs but they love grating (and I don’t) so getting them to help out with the grating gives me one less thing to worry about and keeps them busy for awhile!
STACK-UPS RECIPE
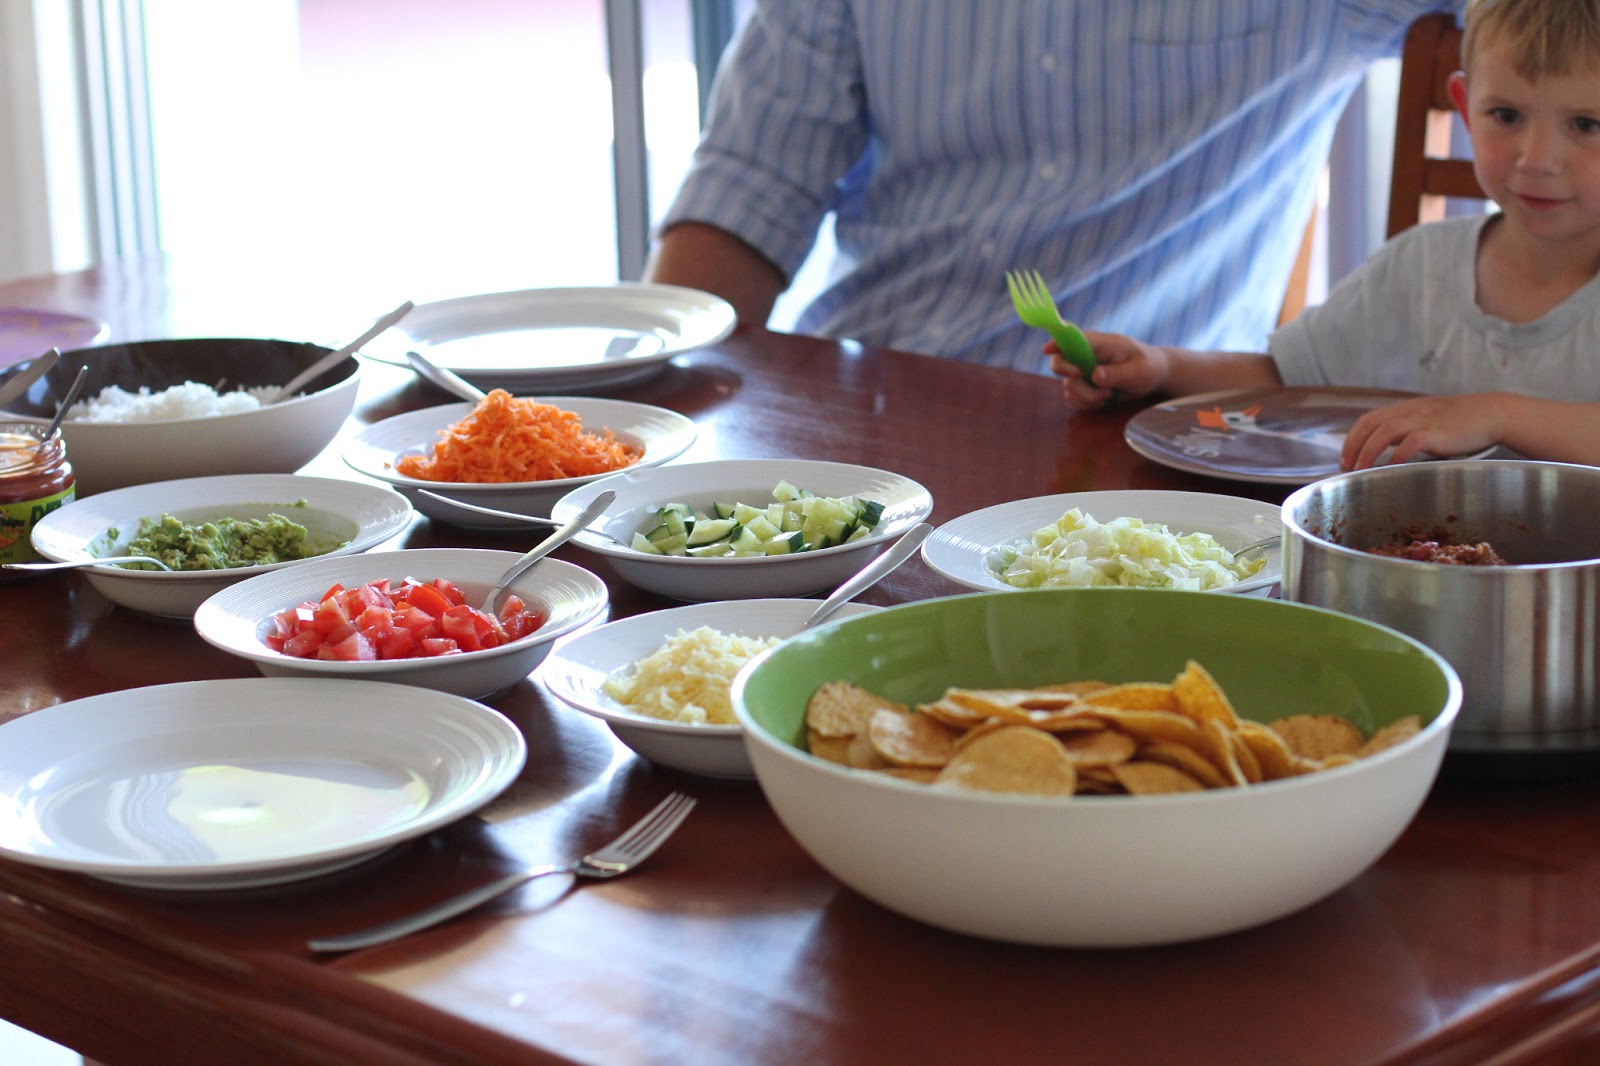
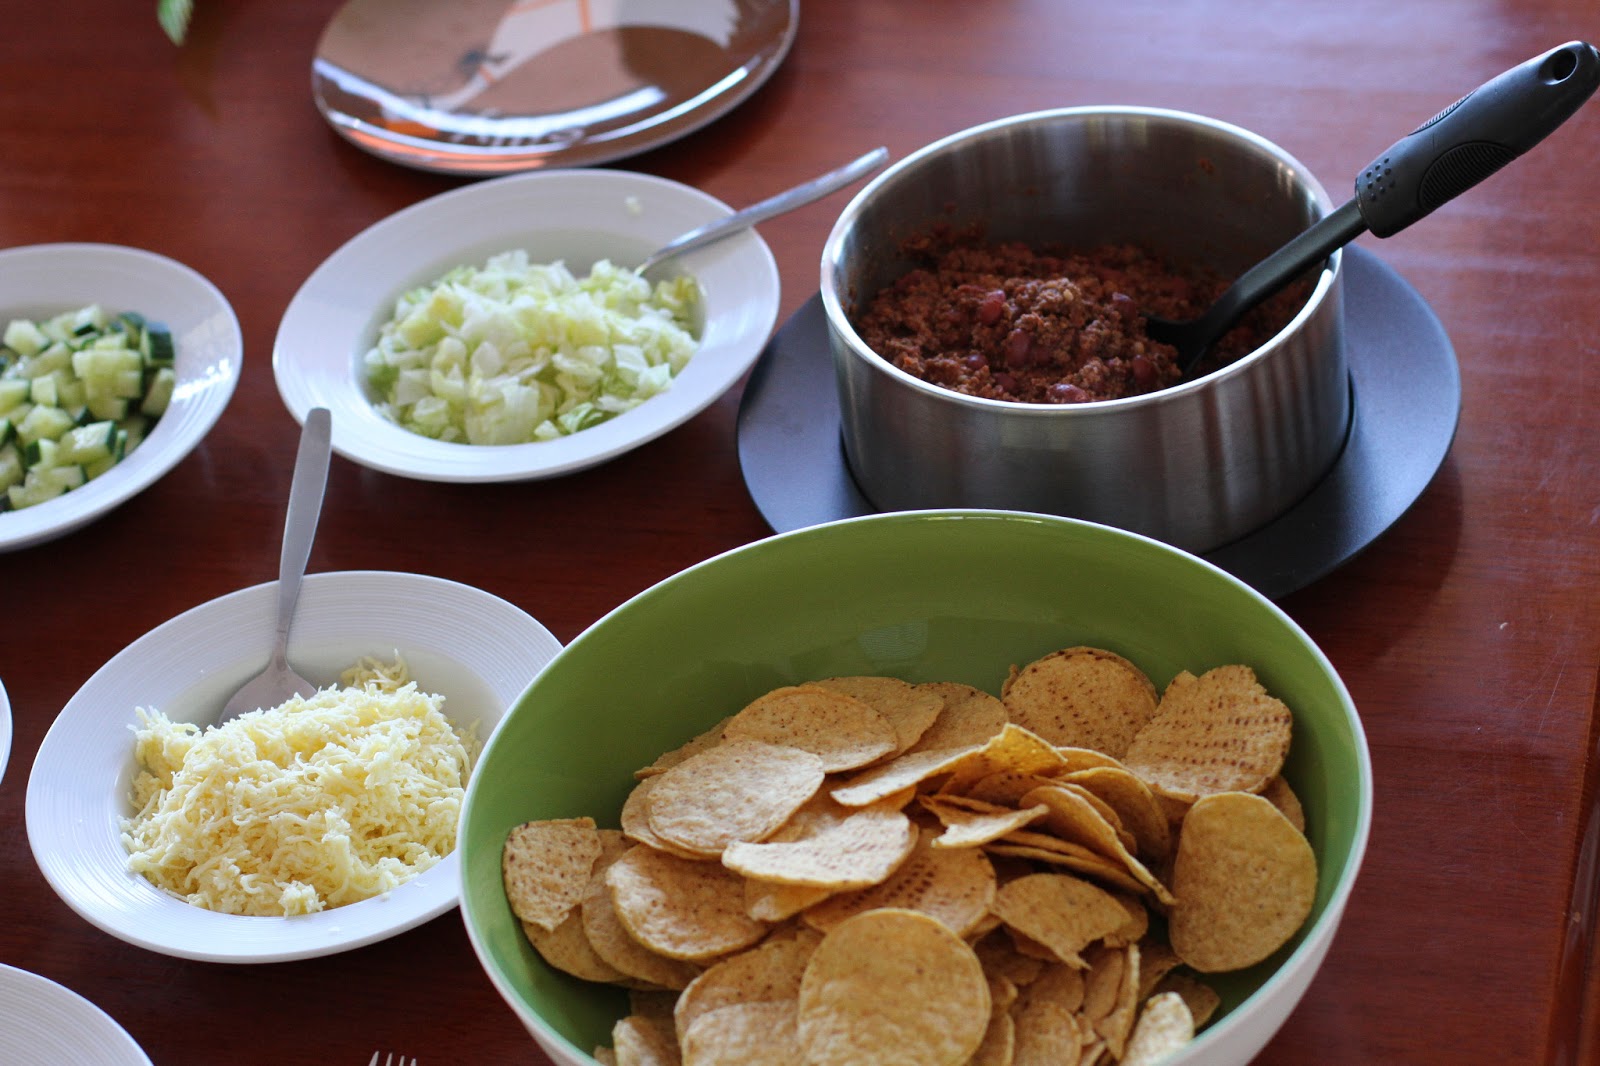
To prepare, all you have to do is make/cut up bowls of the following foods (of course, you can add more or less depending on what your family likes to eat):
** Tomato-based mince mixture (mine is always different, usually minced meat, onion, garlic, herbs, spices, beef stock, can of tomatoes, can of red kidney beans, etc. or you could add a sachet of taco seasoning mix if you want it more mexican.) ** Corn chips (I try and steer away from the highly flavoured kinds – we like the Mission brand at the moment) ** Rice ** Lettuce (shredded) ** Tomatoes (diced) ** Cucumber (diced) ** Carrot (grated) ** Cheese (grated) ** Avocado ** Salsa ** Sour cream
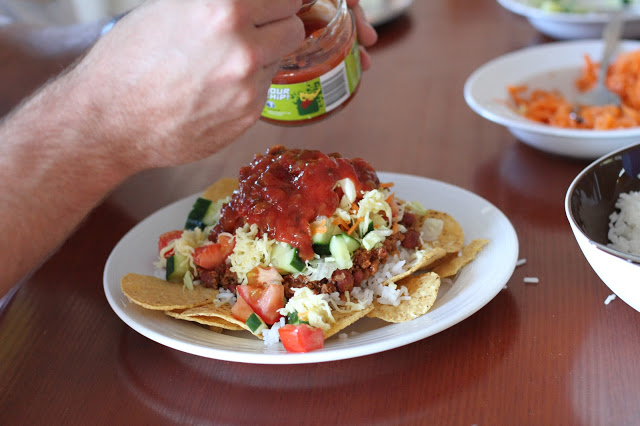
The “real” way to eat it is stacked up high on your plate (hence, the name Stack Ups)… The kids like to separate everything on their plates and are a little choosier with what they include…
However you choose to eat it, I can guarantee that it is a meal that will please everyone and you can still ensure that you’re getting lots of fresh veggies to keep you healthy!
So, I am totally repulsed by chocolate at the moment (as is usual for me in early pregnancy). It’s a strange feeling as I will see chocolate and have the urge to eat it, but as soon as I smell or taste it, remember how gross it is to me right now! I’m making the most of it, as I know my chocoholic urges will hit me strong in a few months!
I am, however, loving anything creamy or buttery. Usually I couldn’t care less for cream, but now it is divine! Yesterday I made a vanilla slice in the Thermomix. Oh, it was SO good! Topped my usual vanilla slice over the stove recipe and was absolutely delicious. And 100 times easier to make in the Thermomix, as all you have to do it press a few buttons and walk away then you are left with a perfectly smooth, creamy custard filling. So, here it is. And if you don’t have a Thermomix, follow the usual method for making custard on the stove-top using the same ingredients.
Preheat oven to 220 degrees celsius. Place puff pastry on baking trays and bake in oven for 10-12 minutes until just brown. Remove from oven and press down a spatula while still hot to flatten. Allow to cool. Place sugar in TMX bowl, and grind on speed 9 for 5 seconds. Add remaining ingredients and cook on 80 degrees for 15 minutes at speed 4. Have a taste of the custard and if it tastes too floury, cook for another 5 minutes at 80 degrees. Increase temperature to 100 degrees and cook for 7 minutes at speed 4. Line a 25cm square tin with baking paper, so that it extends up all four sides of the tin. Trim pastry sheet to fit the bottom of the tin, and place in the tin with browned side facing up. Pour custard over pastry, spreading it out nice and smooth. Trim remaining pastry sheet to fit top of the tin and place on top of custard with browned side facing down. Refrigerate for 4-5 hours until completely cold (you can pop it in the freezer for the first 30-40 minutes to speed up the chilling process but don’t forget to take it out and place in the fridge.) Spread top of slice with icing made from a little melted butter, icing sugar and hot water. Allow to set before removing slice from tin, cutting into slices and serving. Makes 16 large squares.
Mmmm…dumplings. We are a little obsessed at the moment. Our friend from Japan taught us how to make them a little awhile ago and we’ve been loving them ever since. They are really easy to make – here’s a step-by-step “how to” incase you want to give them a try too!
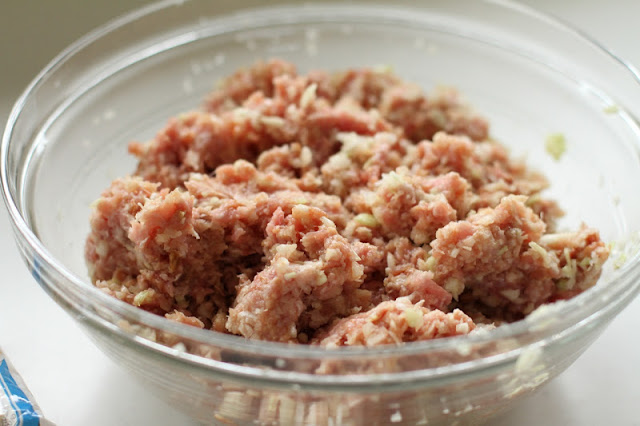
First of all, you’ll need 500g pork mince. (You can use prawn mince too – or a mixture of both, but we’ve only used pork so far.) Place it in a bowl and mix in 250g-300g finely diced cabbage, 1 tsp minced garlic, 1 tsp minced ginger, 2 Tbs soy sauce and 2 Tbs sesame oil.
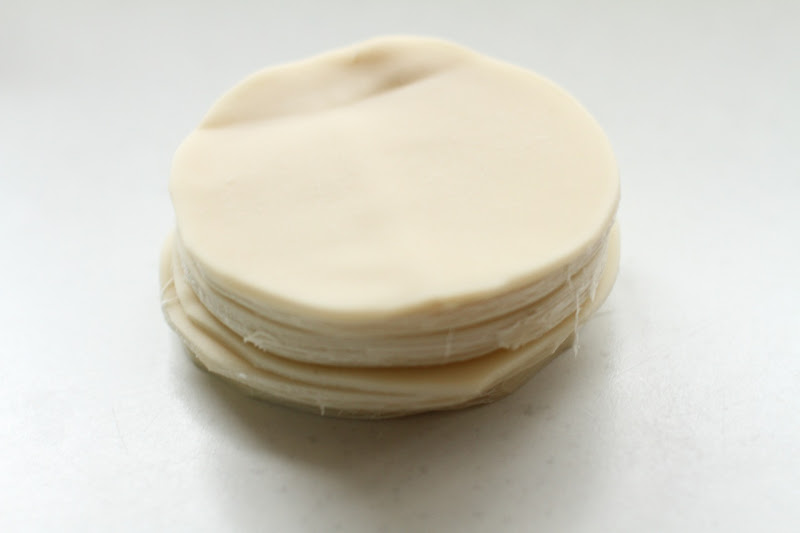
Next, you’ll need some dumpling wrappers. I accidentally bought square wonton skins this time but I just cut them into a circle shape using my kitchen scissors. If you can find circle ones, buy them – heaps easier. I used 2 packets for the quantity of mince mixture above.
Take a wrapper and place a heaped teaspoonful of mince mixture into the centre. Don’t use too much mince or the dumplings will be too hard to fold.
Have a little bowl of water close by and, using your fingertips, rub some water around the outside edge of half of the wrapper.
Fold wrapper in half, try not to let outside edges touch yet though.
Starting at the left-hand side of the dumpling, make little folds on the top layer of the wrapper and press down onto the bottom layer until you’ve folded all the way across the top.
All done! You should be able to get 5 little folds across the top. I was pretty unco when I first started and only managed 3 or 4. You get better at it the more you practise and the smaller you make your folds.
Wrapped and ready to cook!
Heat up some oil over medium-high heat in a frypan. I like to use my electric frypan so that I can cook lots at once and it keeps a nice, even temperature.
Make sure the heat isn’t too hot or the dumplings will burn. You aren’t trying to cook them all the way through here, just get a nice, light-brown, crispy bottom.
Once they are brown and crispy, turn up the heat and throw in about 1/4 – 1/2 cup cold water and put the lid on your frypan straight away to steam the dumplings. Keep the lid on until all the water has evaporated off the base of the frypan. Check dumplings to see if they are cooked through (when you press them with your fingers, they should be nice and firm – or you could break one in half and have a look). If they aren’t cooked through, you can add a little more water to continue steaming. It could take up to 10 minutes of steaming time. Remove lid from frypan and give the dumplings a minute or two to continue cooking and get the crispiness back up again.
Enjoy! We serve ours with a dipping sauce made of soy sauce and a little dash of sesame oil.
And if you’ve got a bit of time up your sleeve, make a double batch of dumplings while you’re at it and throw some in the freezer ready to take out and cook up quickly when you’re craving…

 2 packets Arnott’s Choc Ripple Biscuits
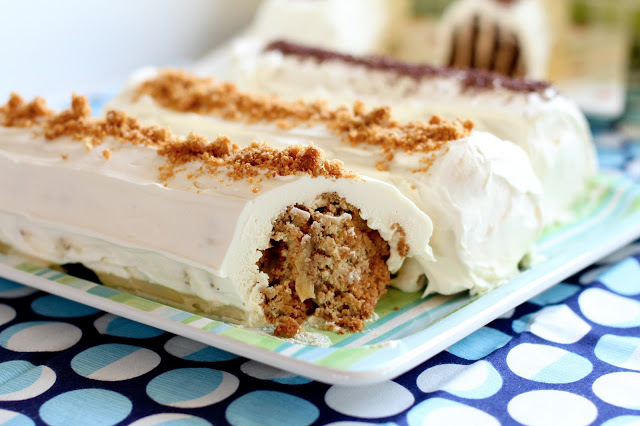


 The kids like to separate everything on their plates and are a little choosier with what they include…