Congratulations Caitlin! Email me your address and I’ll send your Toy Sack and fabric off to you.
I hope you guys have fun with the tutorial…here are some of the cool ideas that were suggested to use the Toy Sack for:
Library bag Dance class Hair stuff Car entertainment Socks Underwear Sorting colorus Unfinished sewing/knitting/crochet/craft projects Nintendo DS Fabric scraps Lego Art and craft bits and pieces Hats and scarves Suitcase organisation Church bag Wool Collections Picnic bag Pool bag Pantry storage Camping stuff PJs & story book Gift wrapping Beach supplies Classroom oragnisation Sand pit toys Overnight travel bag Toiletry bag (plastic lined) Suitcase organisation Aeroplane “fun” bag Guess what’s in the bag game Baby stuff Day trip Park bag Footy gear Ribbon storage Fabric Books Daycare Playdough tools Stationary Hide from the kids 😉 Odd socks Groceries Pet toys First aid
Winter has really set in here. We have been lucky so far to have mostly sunny days even if it is crisp outside, but the mornings are becoming noticeably colder (this morning our pipes were frozen and we had to run the shower for about 5 minutes before they thawed out and the pressure picked up!)
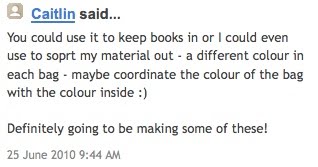
I was determined to make Lil another Sprout dress sooner rather than later so that she could get some good wear out of it and knew that she would be happy wearing it on cold mornings to church.
Last night I made this for her:
It took me awhile to decide on the fabric for this one but I am really happy with how it turned out. Pretty red with a splash of aqua is a stunning combo and she looks very Little Red Riding-Hoodish. (I haven’t finished with the Ta Dot fabric yet and couldn’t resist it in flannel!!!)
The side pockets are a hit – especially as they are lined with flannel and keep her hands toasty and warm.
Seeing her wear this today made me think seriously about an adult version that many of you hinted at when the pattern was first released. It would be so super comfortable and warm – especially teamed with a pair of winter boots.
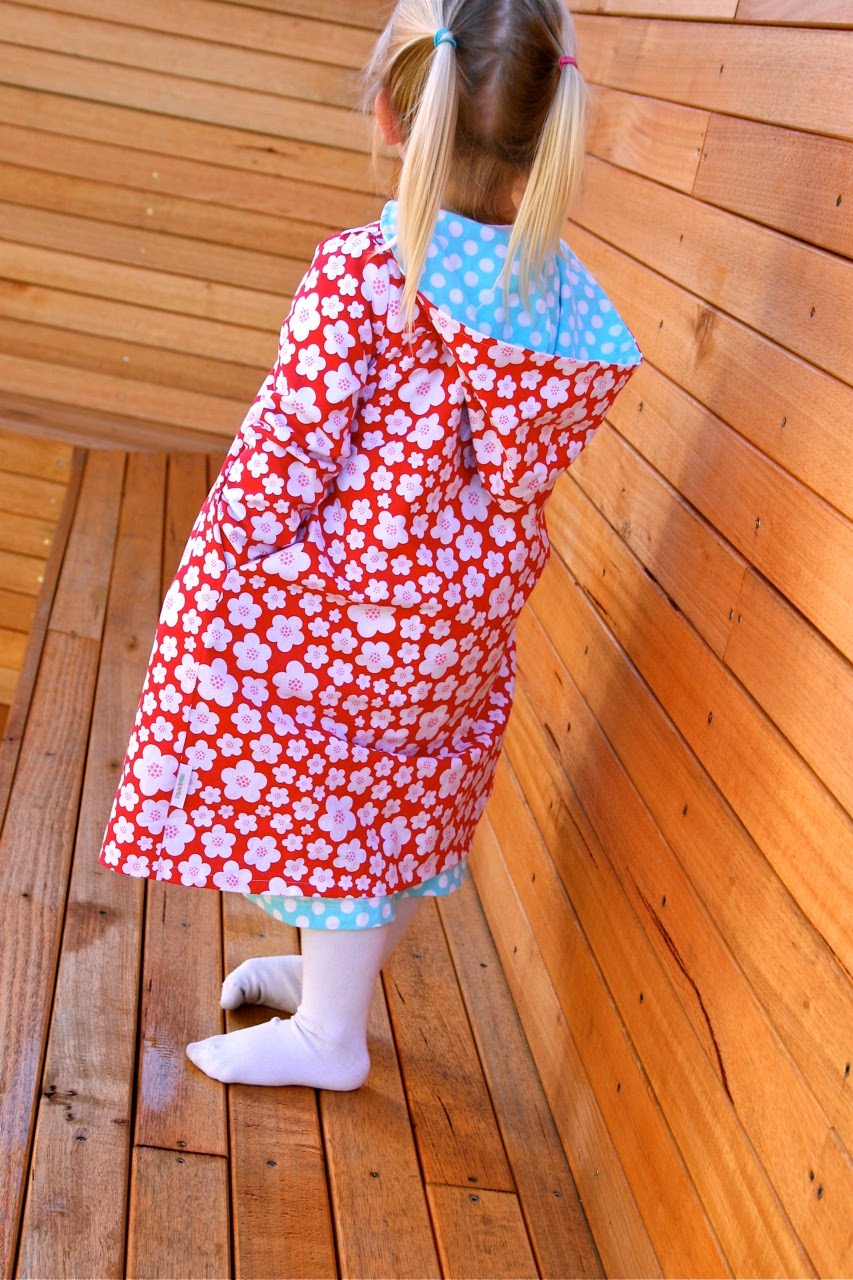
Cheeky smile! It is so hard to get an un-posed photo of Lil at the moment…she insists on screwing up her nose poking her tongue between her cheeks. Full of mischief – love it!!!
SUPPLIES: Make It Perfect pattern – Sprout Patty Young, Flora and Fauna, Blossoms in Red Michael Miller, Ta Dot in Ocean
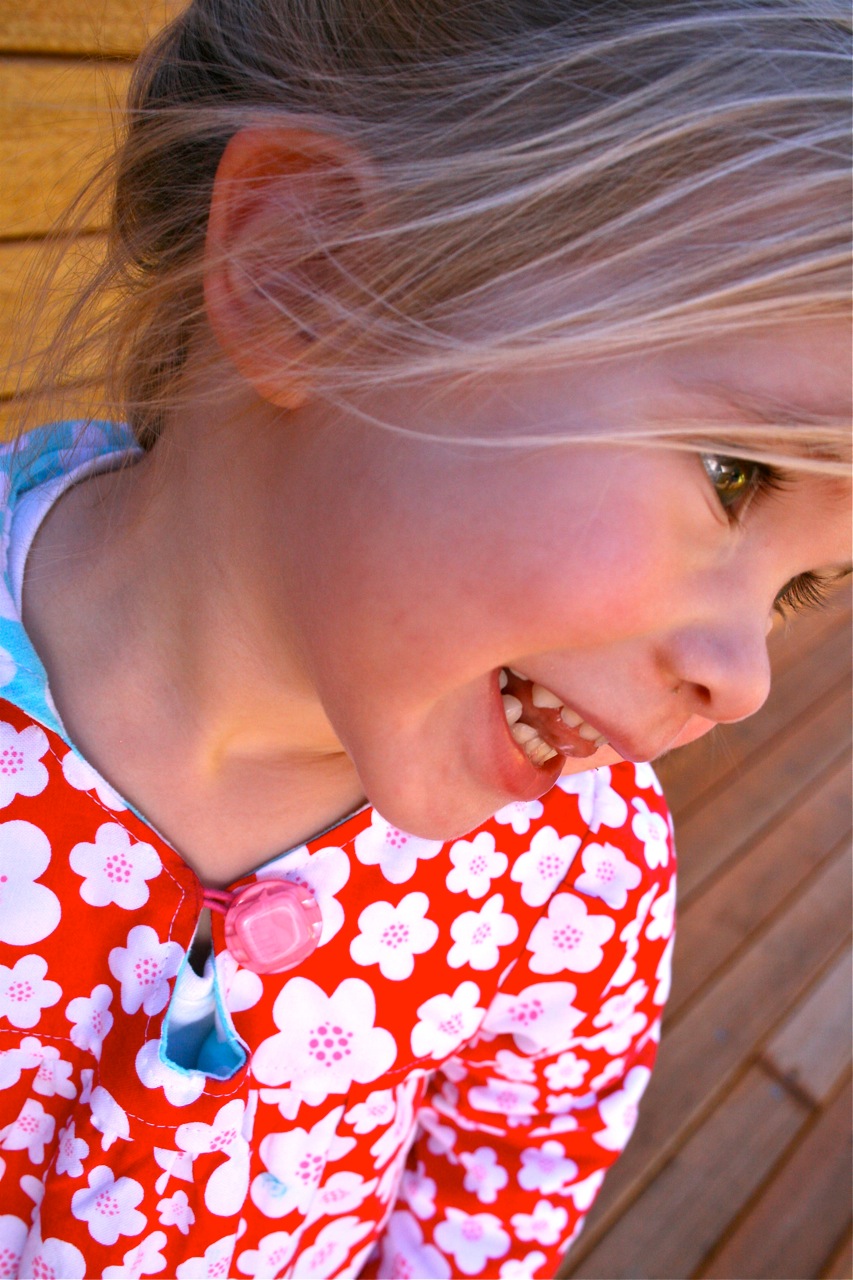
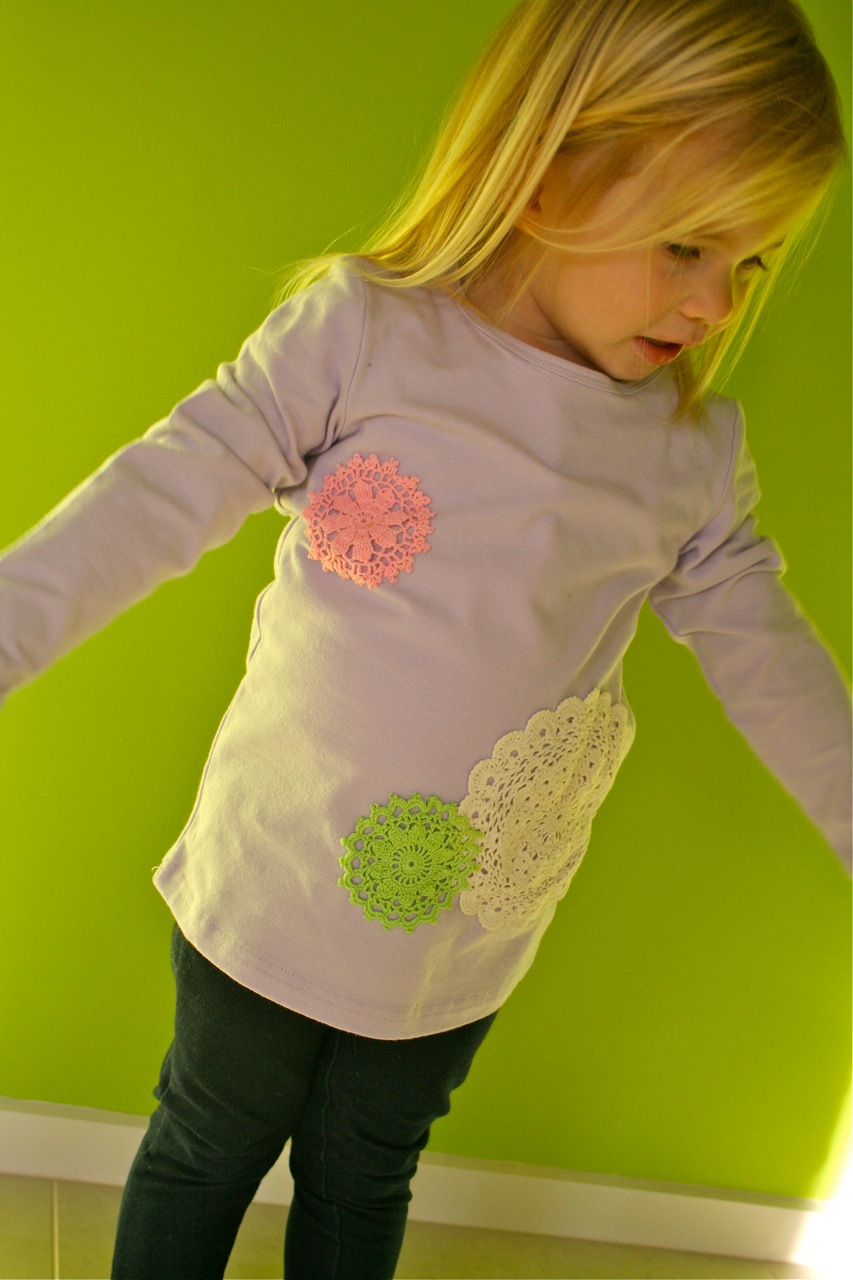
It was only a matter of time before I sewed some of my doilies onto a top for Lil. I love how it turned out. The white doily was sewn on with the sewing machine but the pink and green ones were a little too “lacy” to hide the stitches so I hand sewed those down. Do you think I could get away with a top like this for myself?!!
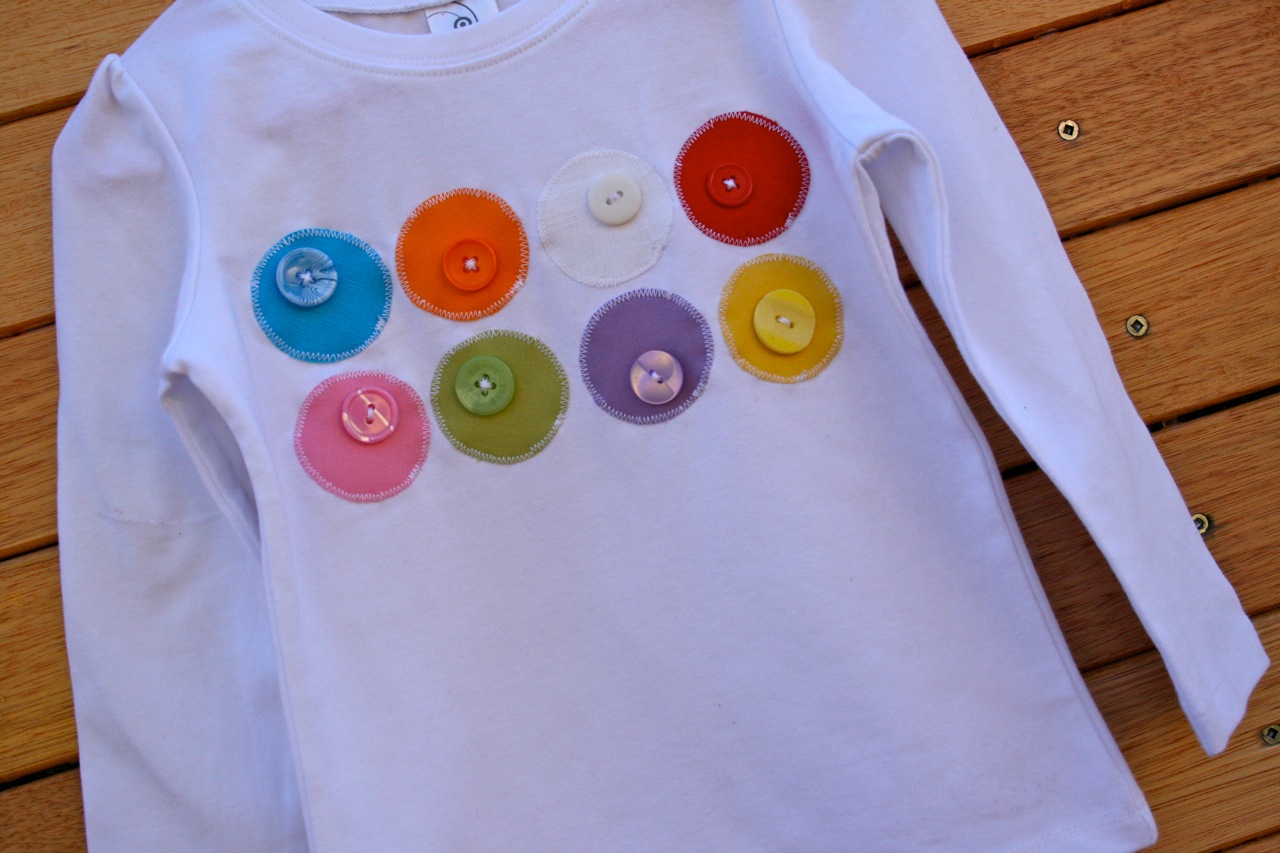
I was browsing Flickr one night and was inspired by this cute top. I thought I could do something similar with some circles and hand stitching. When I started digging through my scraps though, I ended up choosing a heap of solid colours and loved the way they looked together. I played around with having the buttons sitting on different colours and it looked really funky but decided to go for a more subtle approach with the buttons hiding on similar coloured circles.
I often get people emailing me asking where I get my plain long-sleeved and short-sleeved tops from. All of mine come from Target or Kmart. Depending on where you live and how well stocked your store is will depend on how easily they are to come across. They seem to be around more often than they were a year or so ago though. Because we live in a country area, our stores are quite small and not well stocked. Every time I go shopping (which isn’t very often!) I look out for plain tops and always buy two or three in various sizes or colours. Now I have a plain top drawer that is VERY well stocked ready to make tops for my kids or presents for friends.
Check out how big my baby girl is now!! She will be 3 in one month and every day seems to be that little bit older – much easier to get along with and reason with now and slowly emerging from her ratty 2-year old stage 🙂
P.S. I’m more than happy for you to use any of my applique ideas for your own personal use!
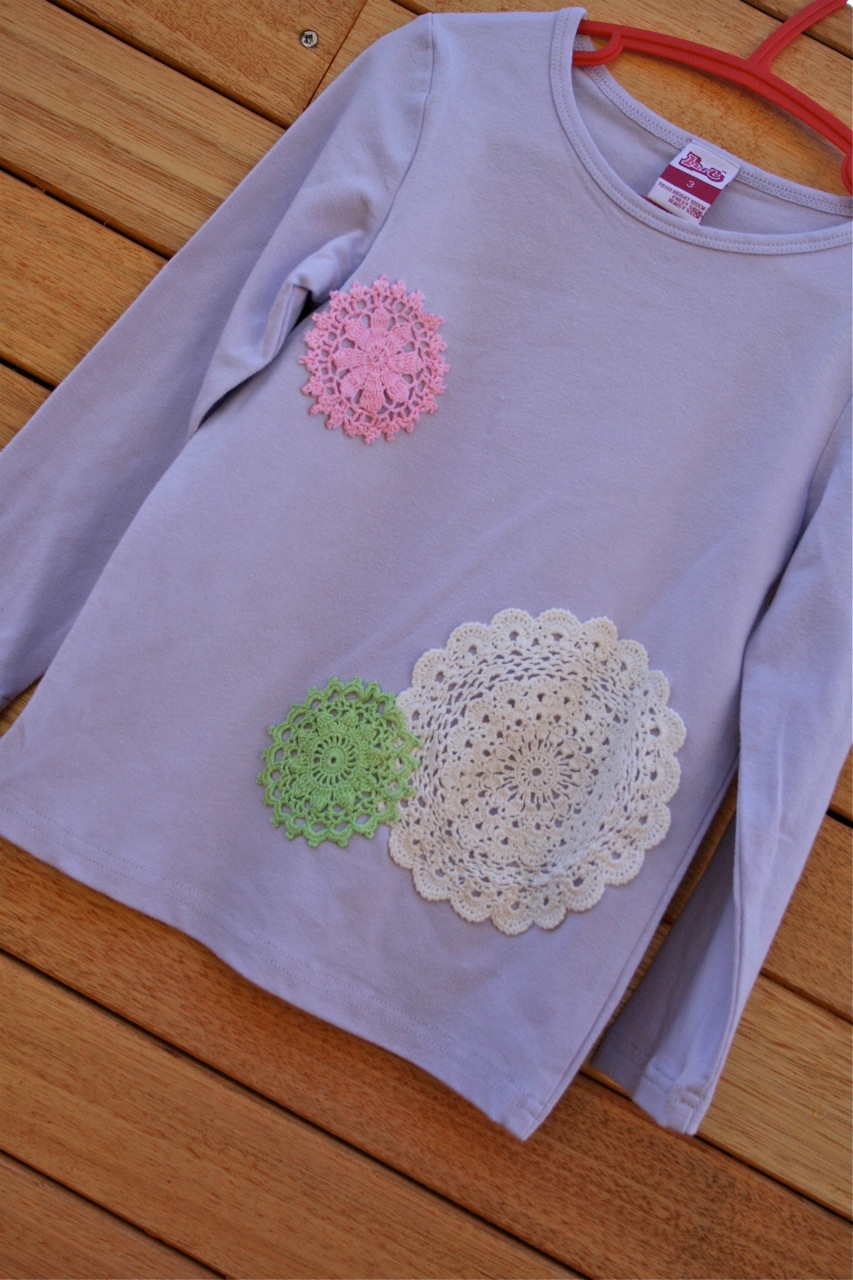
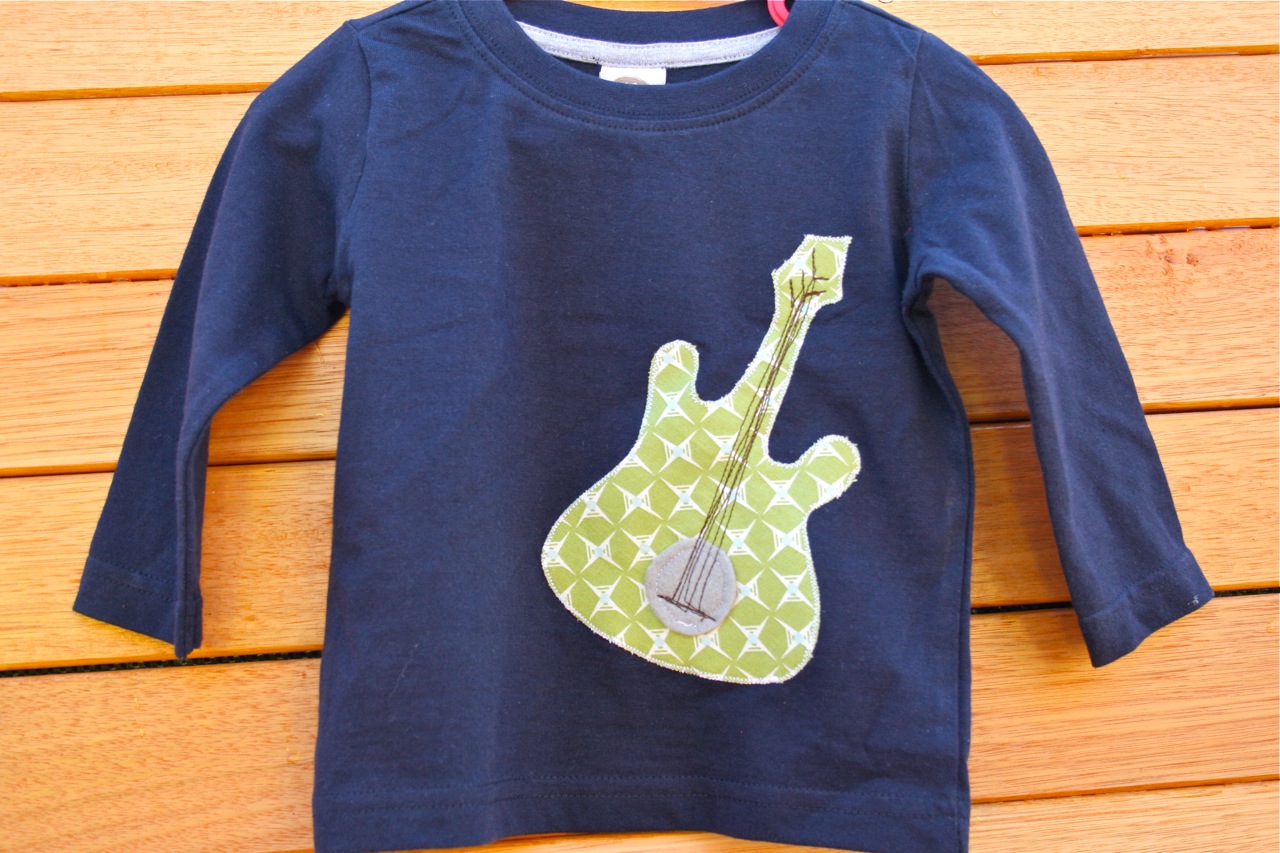
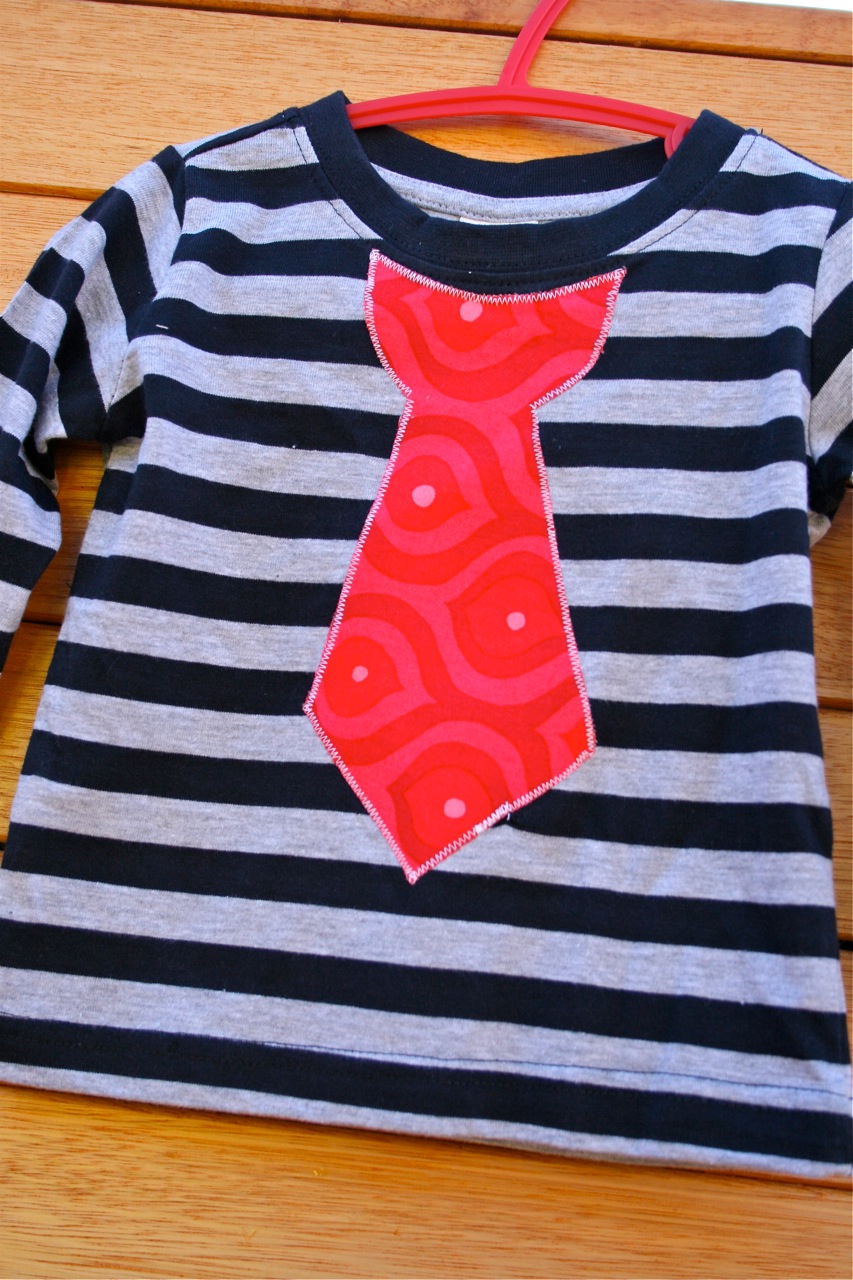
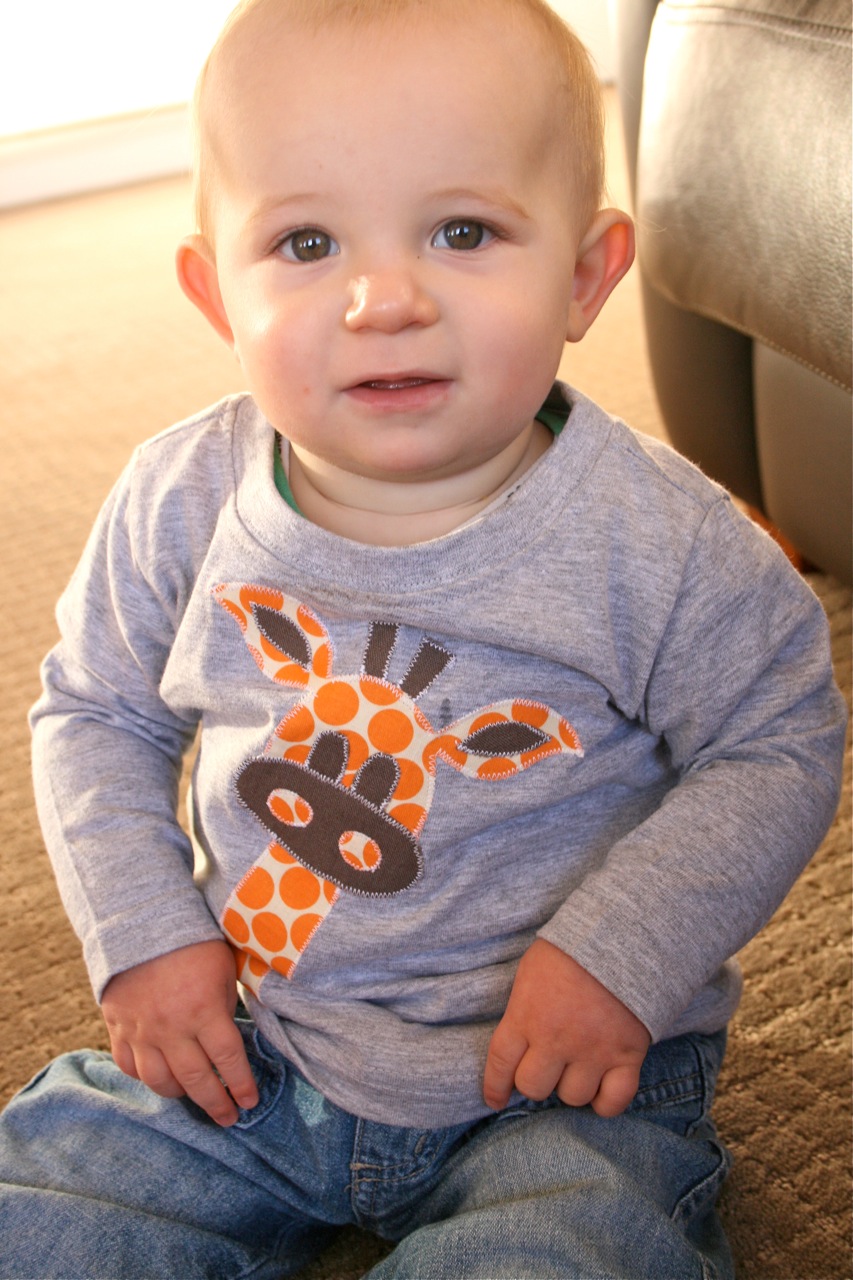
This seems to be a usual, seasonal occurrence. The weather changes and kids need new clothes and I struggle to find tops that aren’t smothered in licensed character images or trashy slogans and pictures that are much to old for my small-fries.
So I go the el-cheapo option of buying plain tops for less than $5 each and dressing them up with a bit of applique. I particularly like this because the tops are so cheap that I don’t mind them being worn as play clothes but they don’t look daggy!
Once I’ve settled on a design (the part that takes the longest for me!) the actual applique only takes a very short time and I managed to make 3 for Tommy and 2 for Lil one evening this week.
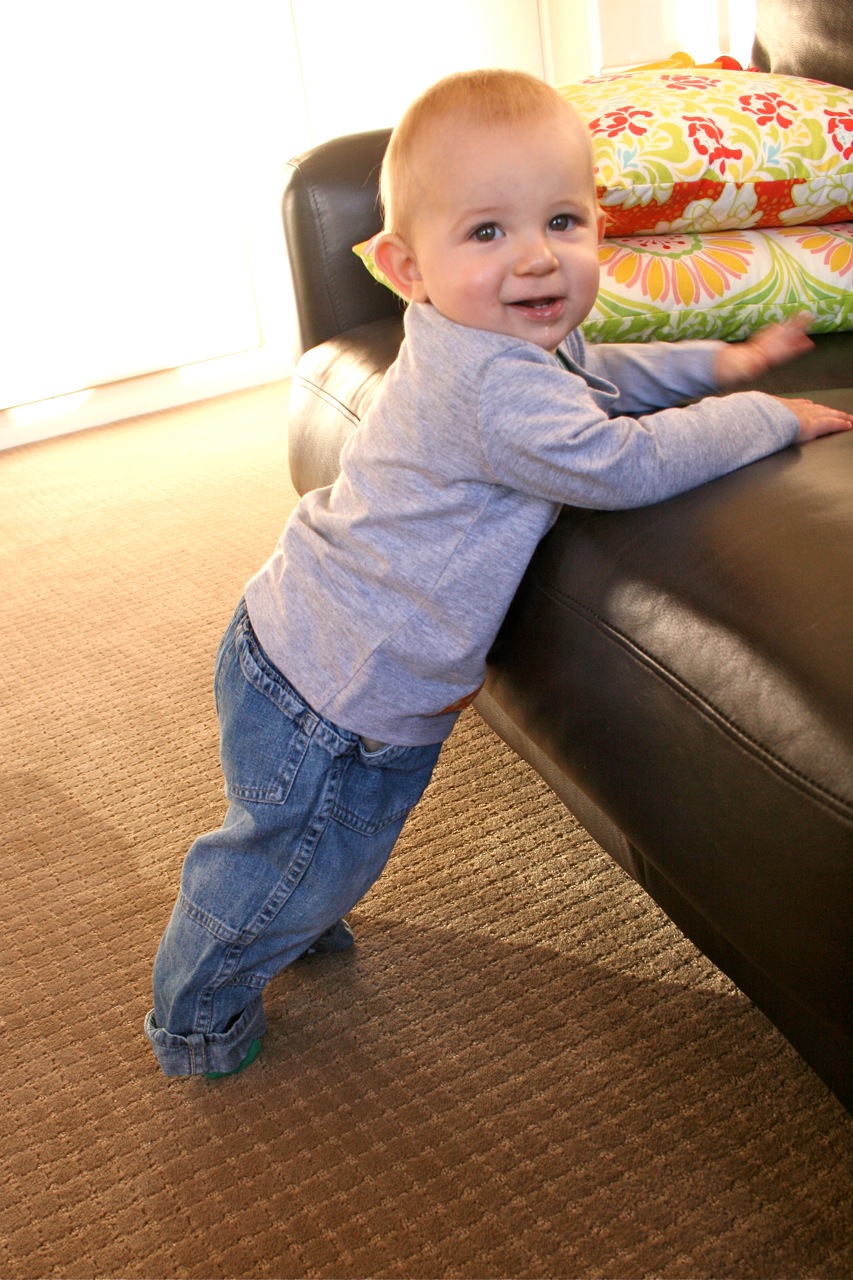
Tommy is s..l..o..w..l..y starting to get more mobile. He has recently worked out how to pull himself to standing whilst holding onto furniture and thinks he is SO clever 🙂
P.S. I’m more than happy for you to use any of my applique ideas for your own personal use!
Giveaway now closed – feel free to still leave a comment though!
{Thanks for the Toy Sack-love 🙂 If you need an introduction to these toy sacks then read my previous post here.}
This is a long tutorial…stick with me…if you keep scrolling all the way down to the end, I’ve got a toy sack to GIVE AWAY! So if you aren’t a sewer or want a toy sack without any work, now is your chance to enter 🙂
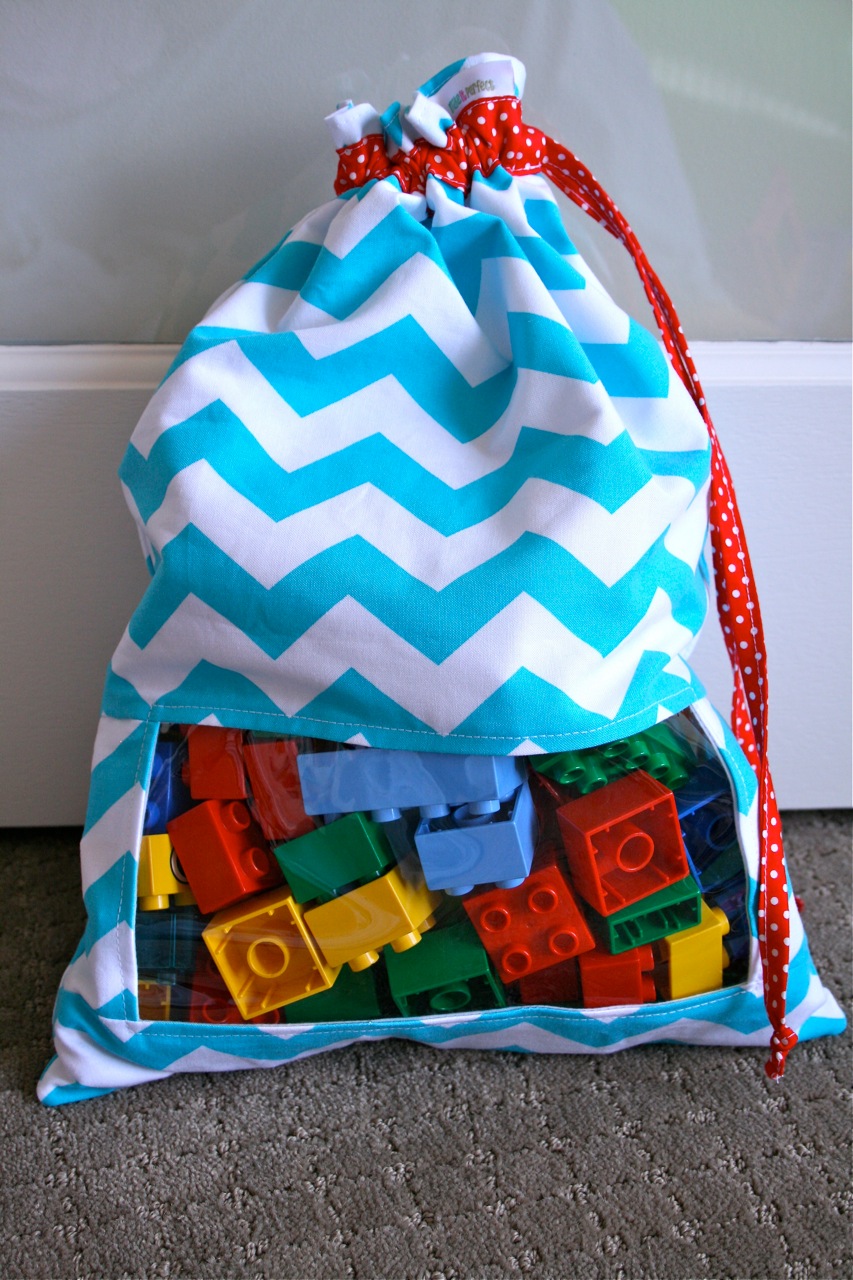
“Peek-A-Boo” Toy Sacks Tutorial!!!
To make a “Peek-A-Boo” Toy Sack, you will need:
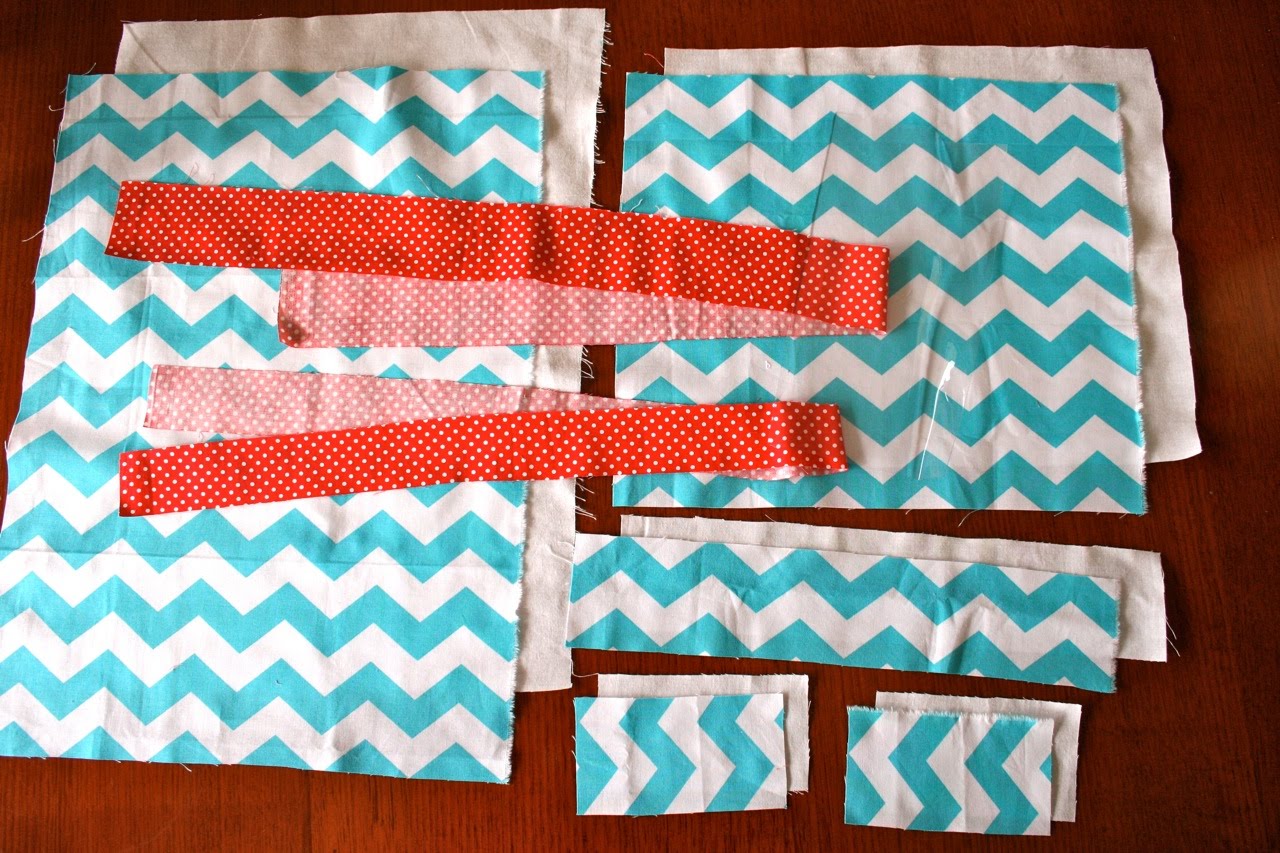
One 10 3/4″ x 12 1/2″ rectangle of fabric cut from exterior and lining for front of bag One 2 1/2″ x 12 1/2″ rectangle of fabric cut from exterior and lining for front of bag Two 4 1/2″ x 2 1/2″ rectangles of fabric cut from exterior and lining for front of bag One 16 3/4″ x 12 1/2″ rectangle of fabric cut from exterior and lining for back of bag One 4 1/2″ x 8 1/2″ rectangle cut from tablecloth plastic for window One 1 1/2″ x width of the fabric (40″-44″) strip cut from contrast fabric for drawstring One 2″ x width of the fabric (40″-44″) strip cut from contrast fabric for casing
FYI: * Exterior fabric is blue/white zigzag * Lining fabric is white * Casing and drawstring fabric is red * Plastic window is clear PVC “tablecloth” plastic – this comes in 3 thicknesses (from Spotlight), I use the middle thickness because it is strong but thin enough to use your regular sewing machine needle on.
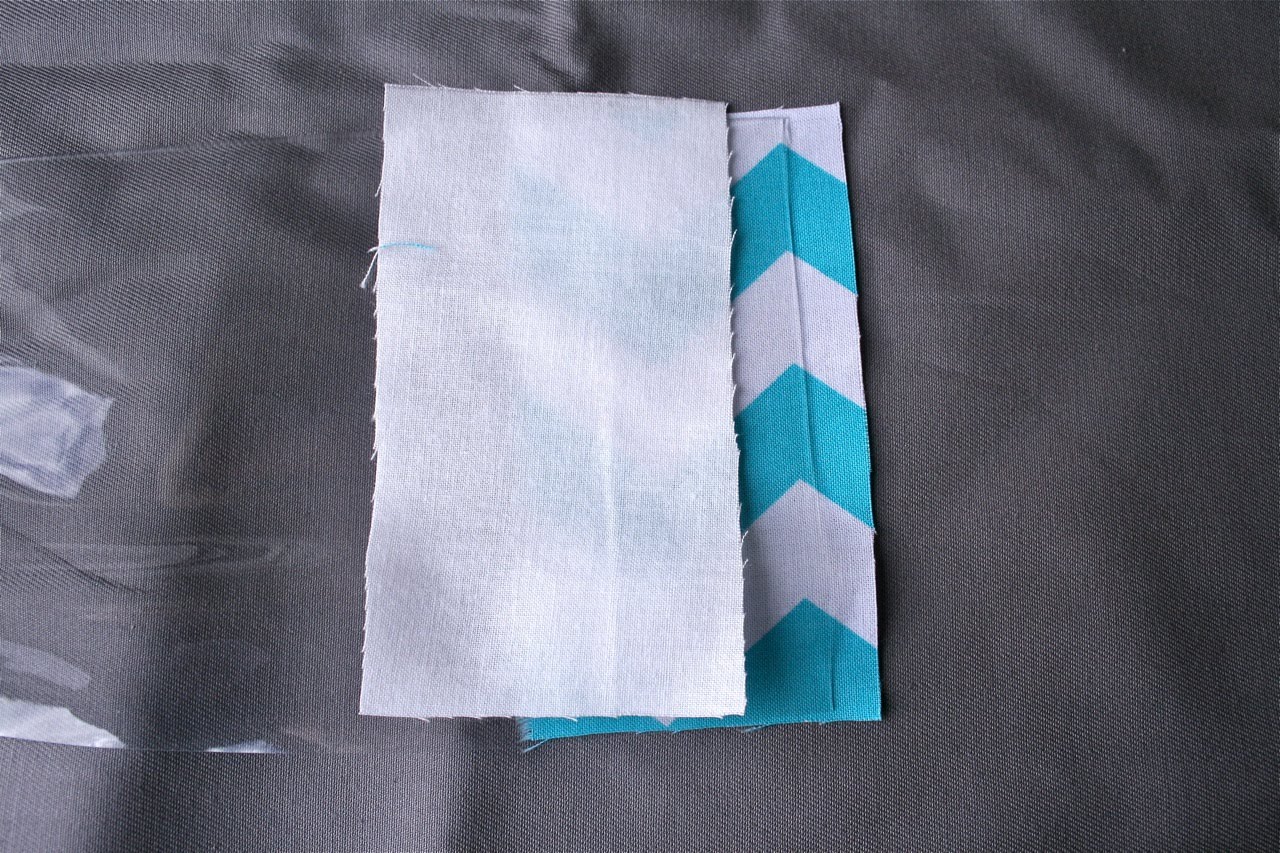
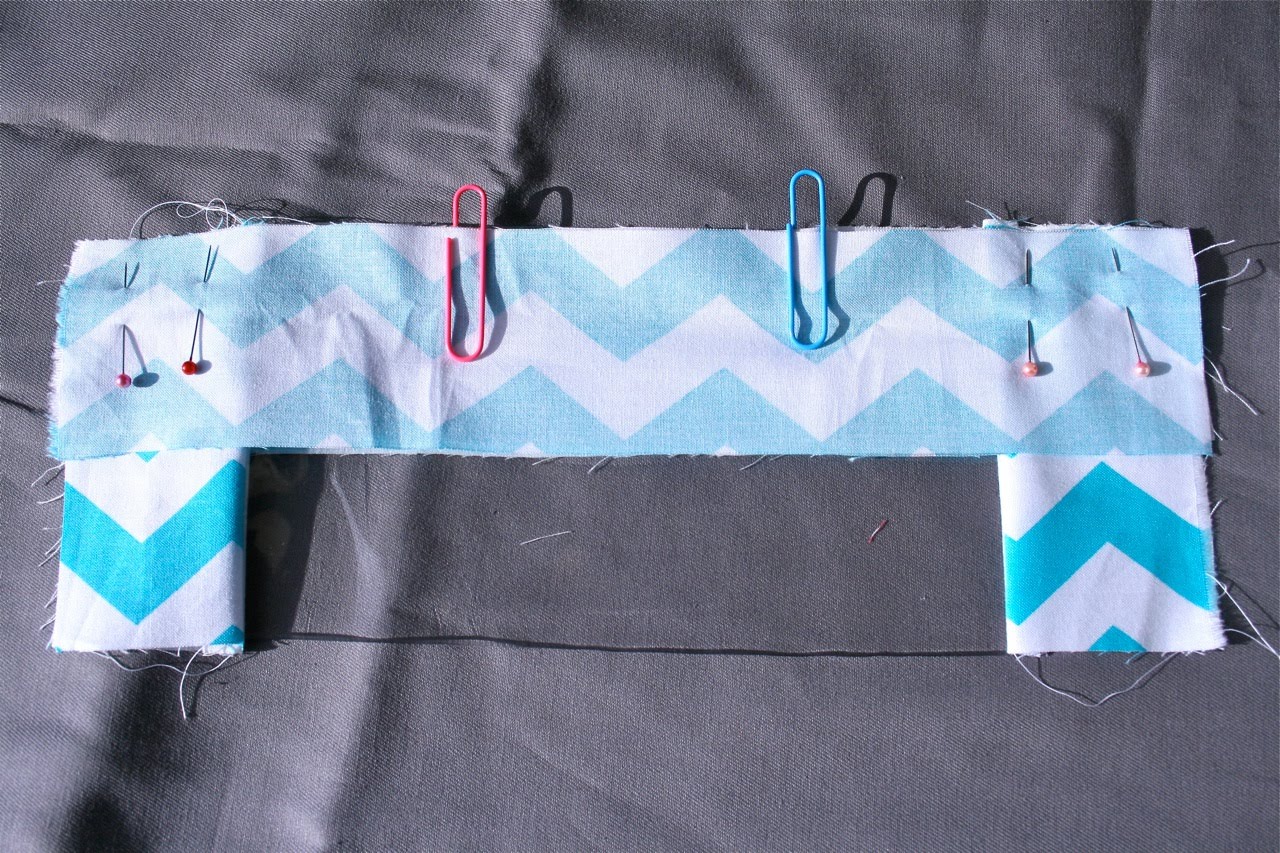
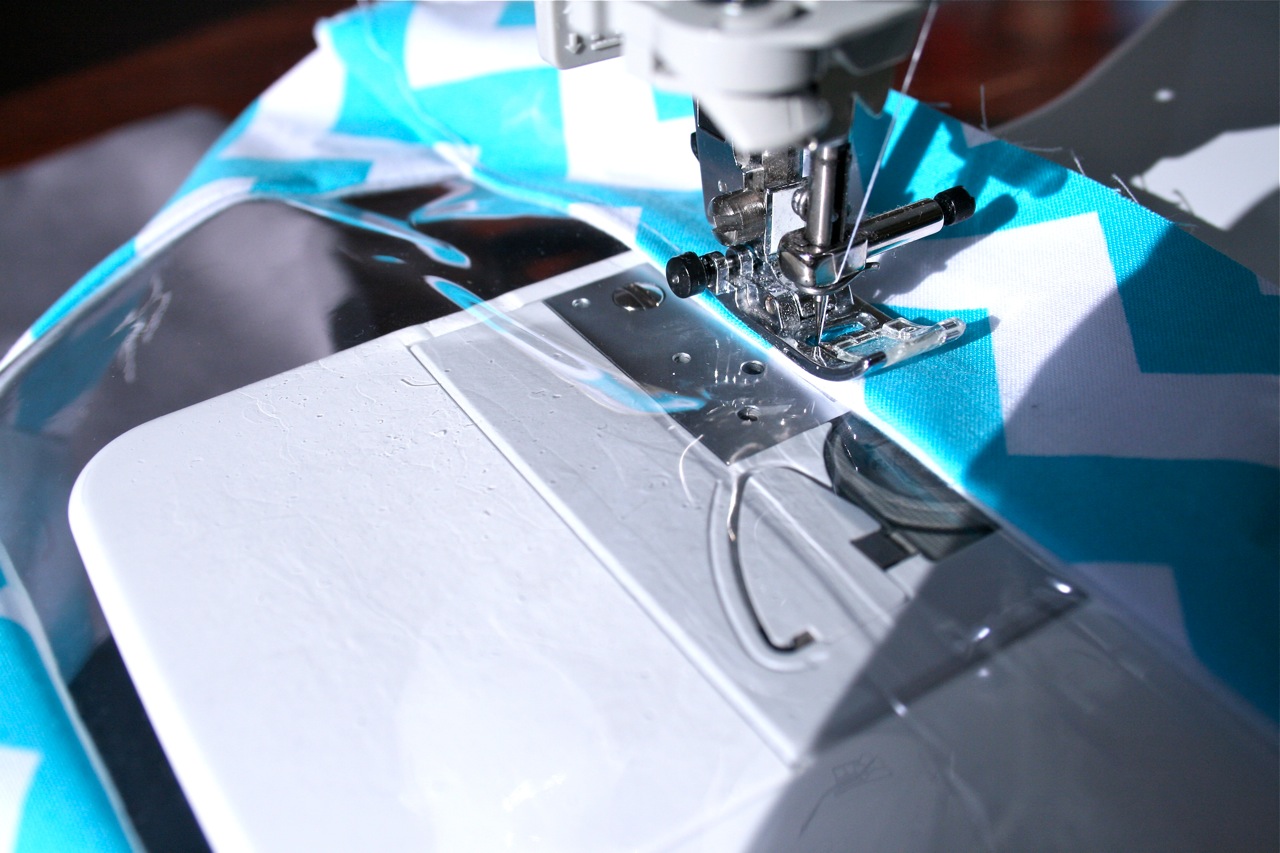
Step 1. Take one of the 4 1/2″ x 2 1/2″ rectangles of fabric cut from exterior and lay on the table with right side facing up. Take your rectangle cut from plastic sheet and lay on top of exterior fabric, matching up short edge of plastic strip with long edge of exterior fabric. Take one of the 4 1/2″ x 2 1/2″ rectangles of fabric cut from lining and lay on top of the plastic sheet with right side facing down. Match up raw edges (the plastic sheet should be sandwiched between the exterior and lining fabrics). Using pins on the plastic sheet will make holes, to hold in place, use a few paper clips along the raw edge. Sew together along paper clipped edge, using 1/4″ seam. Repeat to attach other 4 1/2″ x 2 1/2″ rectangles of fabric cut from exterior and lining on the opposite short edge of plastic sheet. Fold fabric out so that wrong sides are touching. You can’t iron near the plastic sheet, so firmly press seams flat with your fingertips. Step 2. Take the 2 1/2″ x 12 1/2″ rectangles of fabric cut from exterior and lining and attach to the bottom long edge of the plastic sheet and side pieces of fabric in the same way you attached the side pieces. Match up raw edges and pin or paper clip into place. You can use pins where you are joining fabric to fabric.
Sew along pinned/paperclipped edge using a 1/4″ seam. Open out fabric so that wrong sides are touching and firmly press seams flat using fingertips.
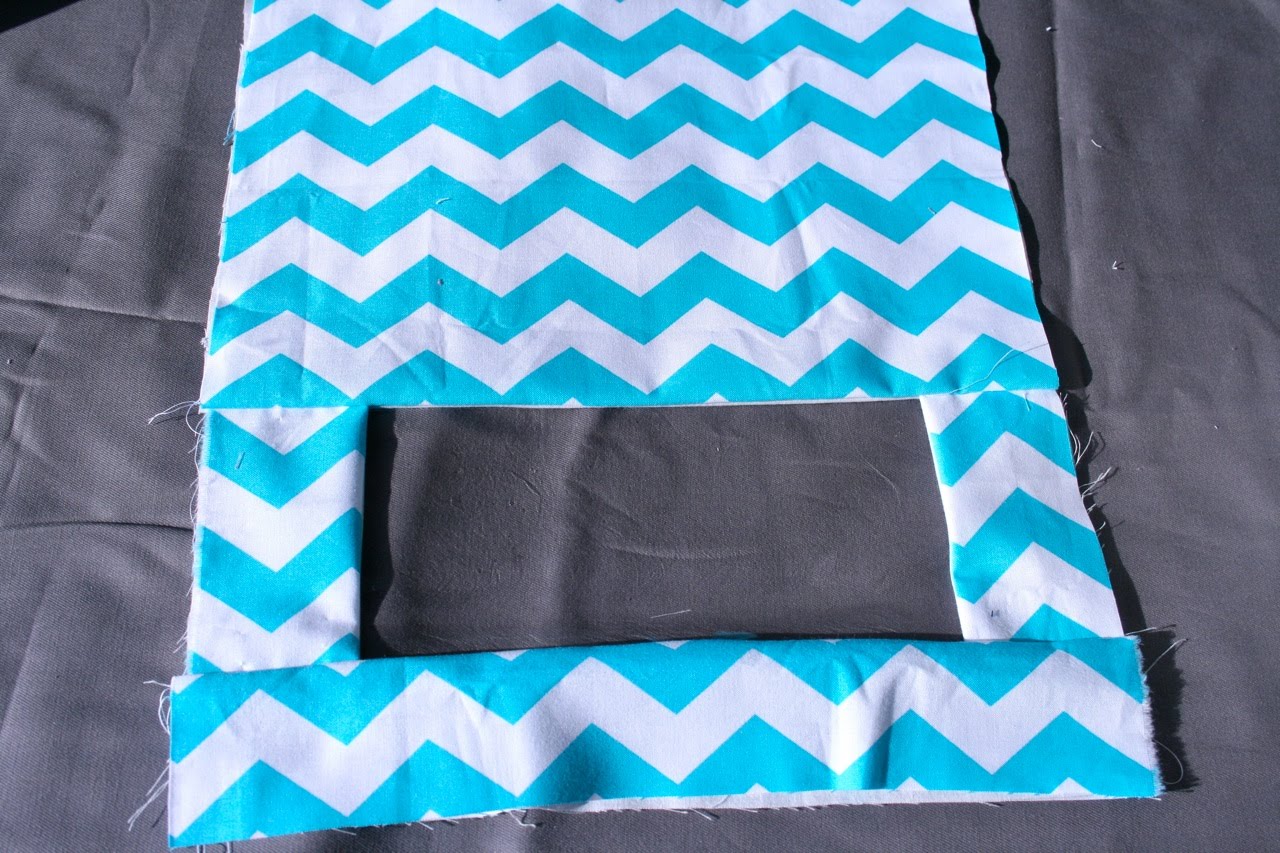
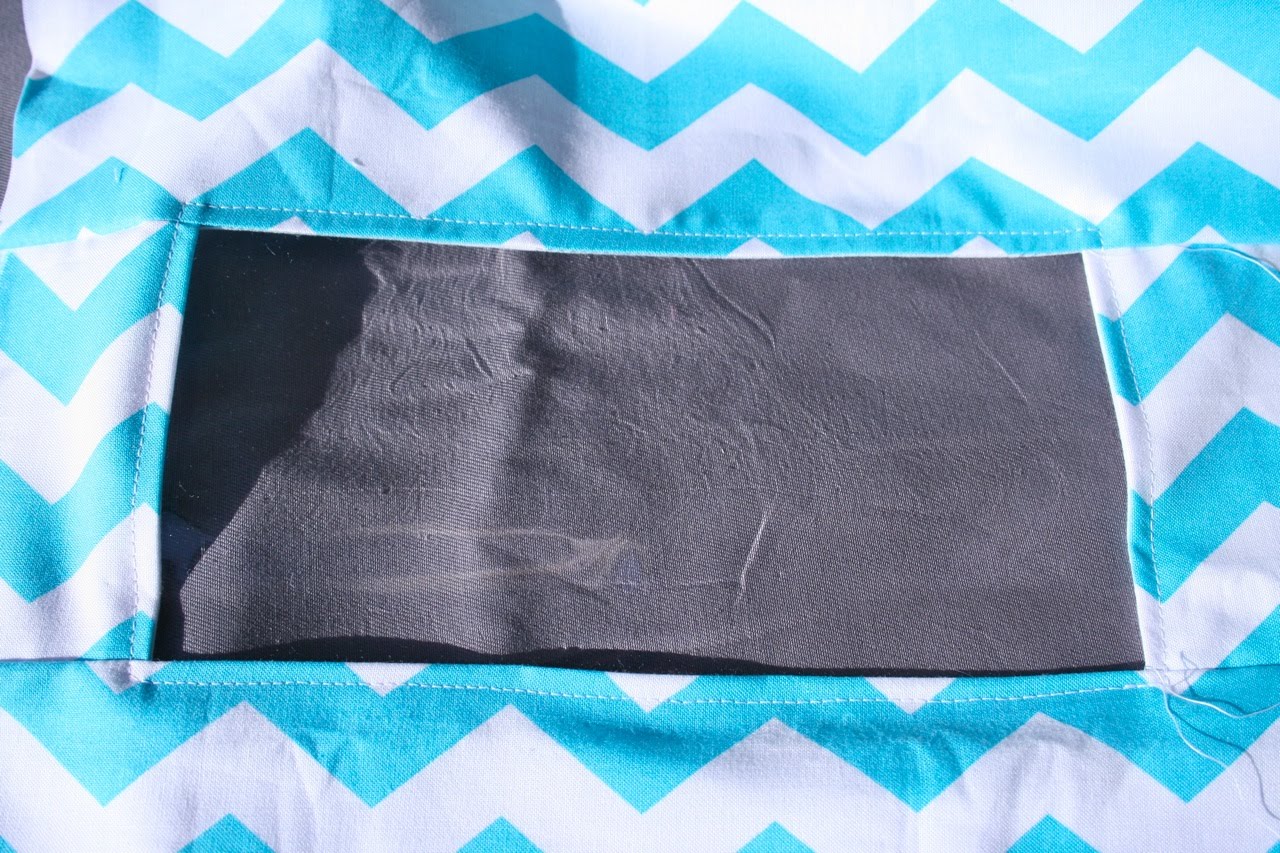
Step 3. Take the 10 3/4″ x 12 1/2″ rectangles of fabric cut from exterior and lining and attach the top long edge of the plastic sheet and side pieces of fabric in the same way you attached the bottom piece. Open out fabric so that wrong sides are facing and firmly press seams flat using fingertips.
{Exterior of front of sack}
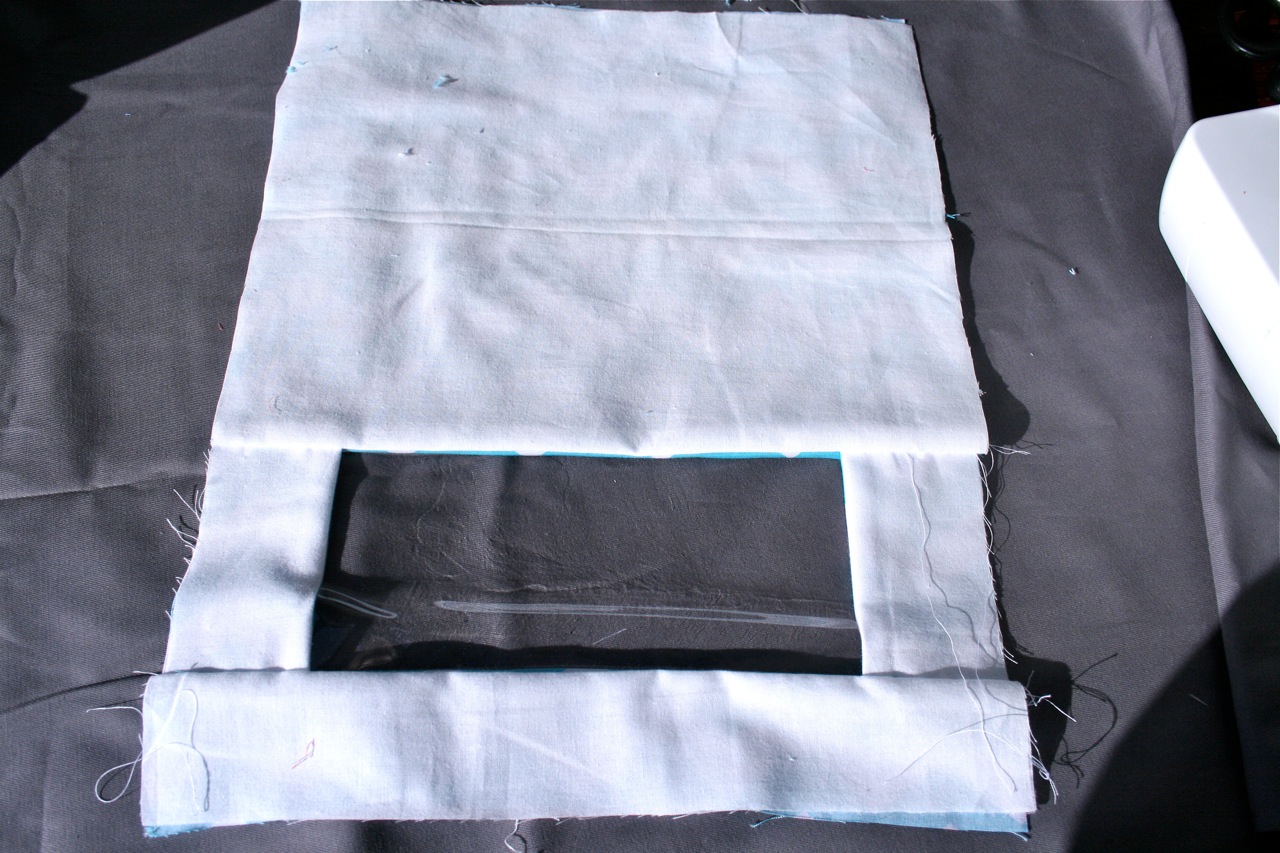
{Lining of front of sack}
Topstitch about 1/8″ away from the edge around the entire window.
Step 4. Make a hem at the top of the sack by taking front of sack and folding the right side of the top raw edge of exterior and lining fabrics under 1/2″. Take the 16 3/4″ x 12 1/2″ rectangles of fabric cut from exterior and lining and fold the right side of the top raw edge of both pieces of fabric under 1/2″.
Take lining back piece and lay on the table with right side facing up. Place front of sack so that exterior is facing up and front lining is facing back lining piece . Take exterior back piece and lay on top of the stack with wrong side up so that right sides of exterior fabric are facing.
Match up top folded edges of all four layers of fabric so that they are perfectly aligned (this will ensure a neat finish to the top hem of your sack.) Match up raw side and bottom edges of sack and pin into place. You should have four layers of fabric pinned together.
Sew together around pinned edge using a 1/4″ seam. Trim bottom corners off sack, making sure not to clip your stitching.
Turn bag right sides out, pushing lining fabric inside exterior. Match up top folded edge of sack and pin front exterior and lining pieces together and back exterior and lining pieces together. Sew around pinned edge, close to the folded edge of the fabric.
Step 4. Take strips cut from contrasting fabric for casing and drawstring and make a center fold by folding in half, length ways, so that wrong sides of fabric are touching. Open out and fold both long raw edges of fabric in towards the center fold.
A much, much easier way to do this is to invest in a couple of bias binding makers…they are GREAT! Very affordable (I think about $10 each?) and make light work of making binding. The two I used for this project are made by Clover. The pink one – 18mm is used for the 1 1/2″ wide strip of fabric and is the size I use most often when making clothing. The blue one – 25mm is used for the 2″ wide strip of fabric. (Nicole Mallalieu has a great tutorial showing how to use these cool gadgets on her blog).
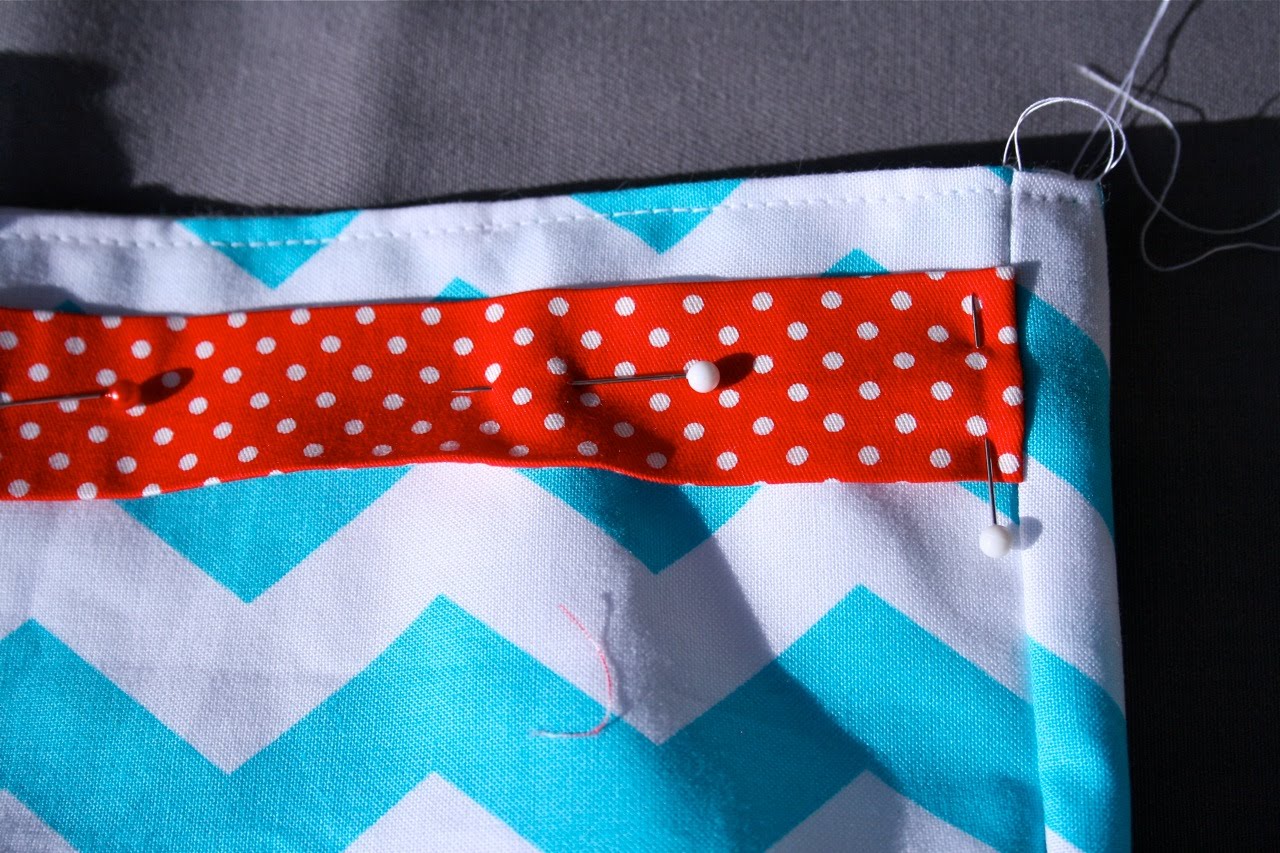
Set thin drawstring strip aside for now. Step 5. Take thicker strip for casing and fold one short raw edge under about 1/2″. Press. Align folded edge of strip with side seam of sack. Position strip so that it is sitting about 1/2″ from top edge of sack and pin into place. Continue pinning until strip has made it’s way around the entire sack.
When you get back to the side seam you started at, trim the strip so that it overlaps the beginning of the strip about 1/2″, then fold short raw edge of the end of the strip under 1/2″ and align folded edge with the side seam of the sack. There should be an opening between the two folded ends of the strip, this is where you will insert your drawstring. Pin into place.
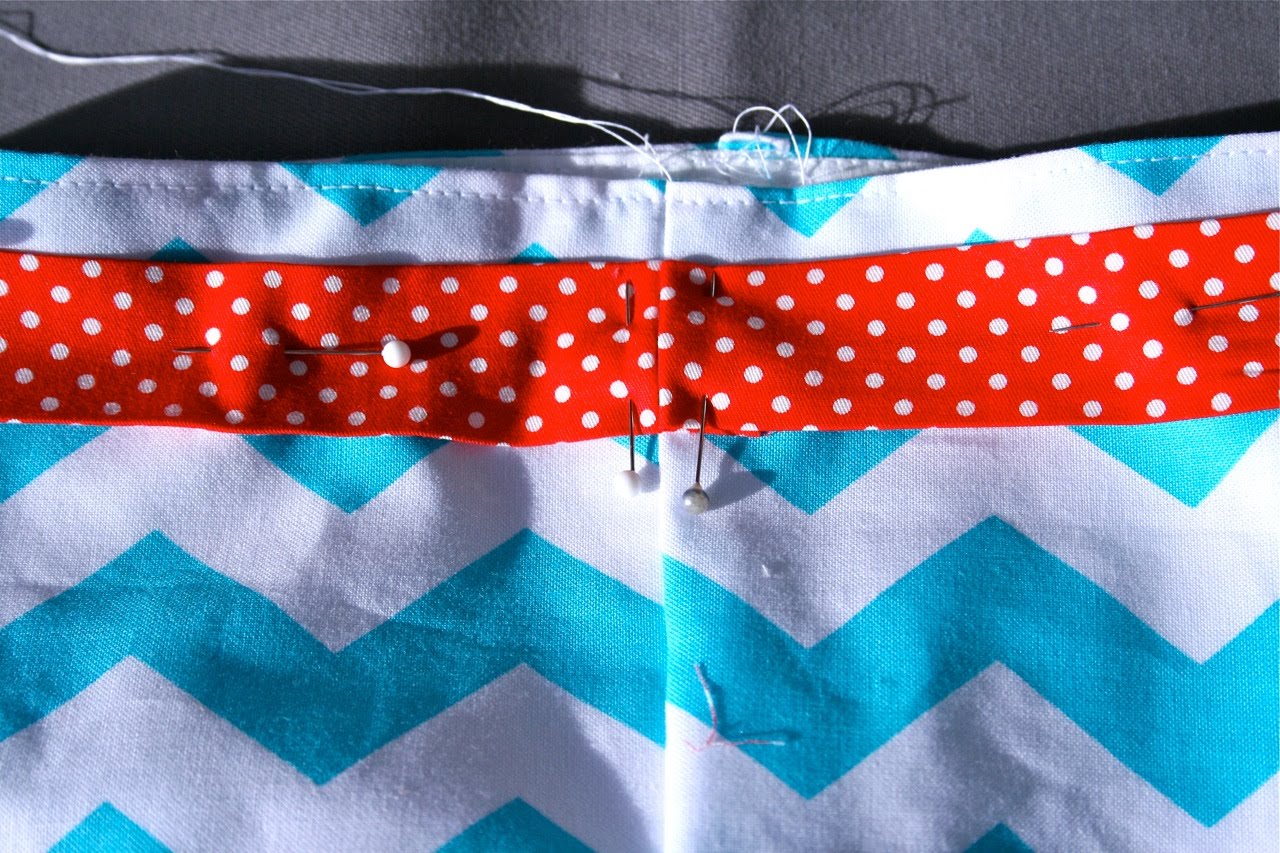
Sew around the top and bottom edges of the strip, close to the edge to secure strip into place and form casing for drawstring.
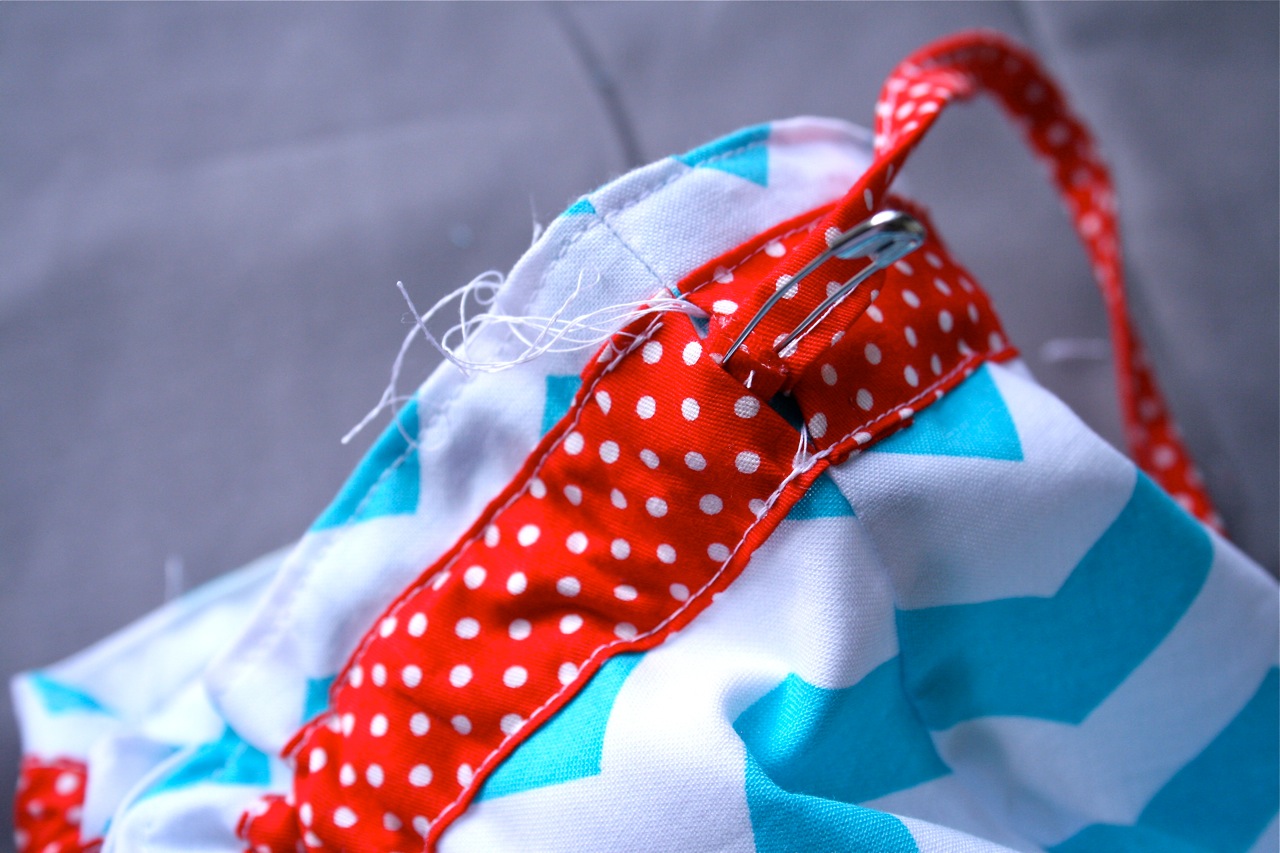
Take thin drawstring strip and fold in half, length wise once again so that raw edges of the strip are enclosed. Sew down opened edge of the strip, close to the edge to secure.
Attach a safety pin to one end of the drawstring and thread through the casing. Tie a knot at each end of the drawstring.
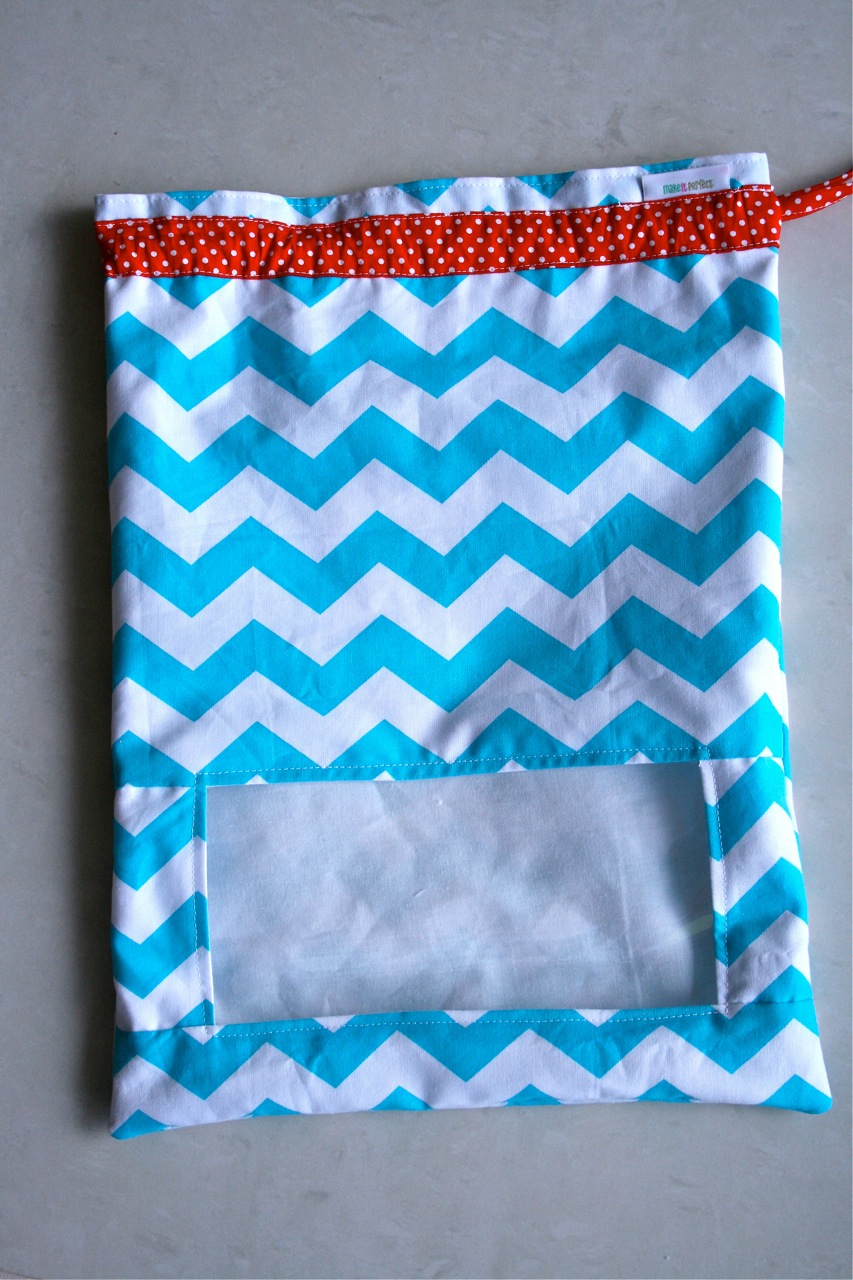
Snip stray threads and you are done!!
If you make a “Peek-A-Boo” Toy Sack, I would love to see it! Send me an email or add your photo to the Make It Perfect Flickr Group.
Okay – for the giveaway…
To win THIS “Peek-A-Boo” Toy Sack (made from Paula Prass, Summer Soiree, Chevron in Aqua) as well as eight 10″ x 12″ squares of Ta Dot fabric (used in my toy sacks) leave a comment on this blog post and share what else you could use a toy sack for besides organising toys…
For an extra entry, become a follower of my blog and leave a separate comment to tell me that you follow. If you are already a follower, leave a separate comment telling me so and you will receive an extra entry too. The giveaway winner will be draw randomly next Monday evening, 28th June and is open to everyone 🙂


